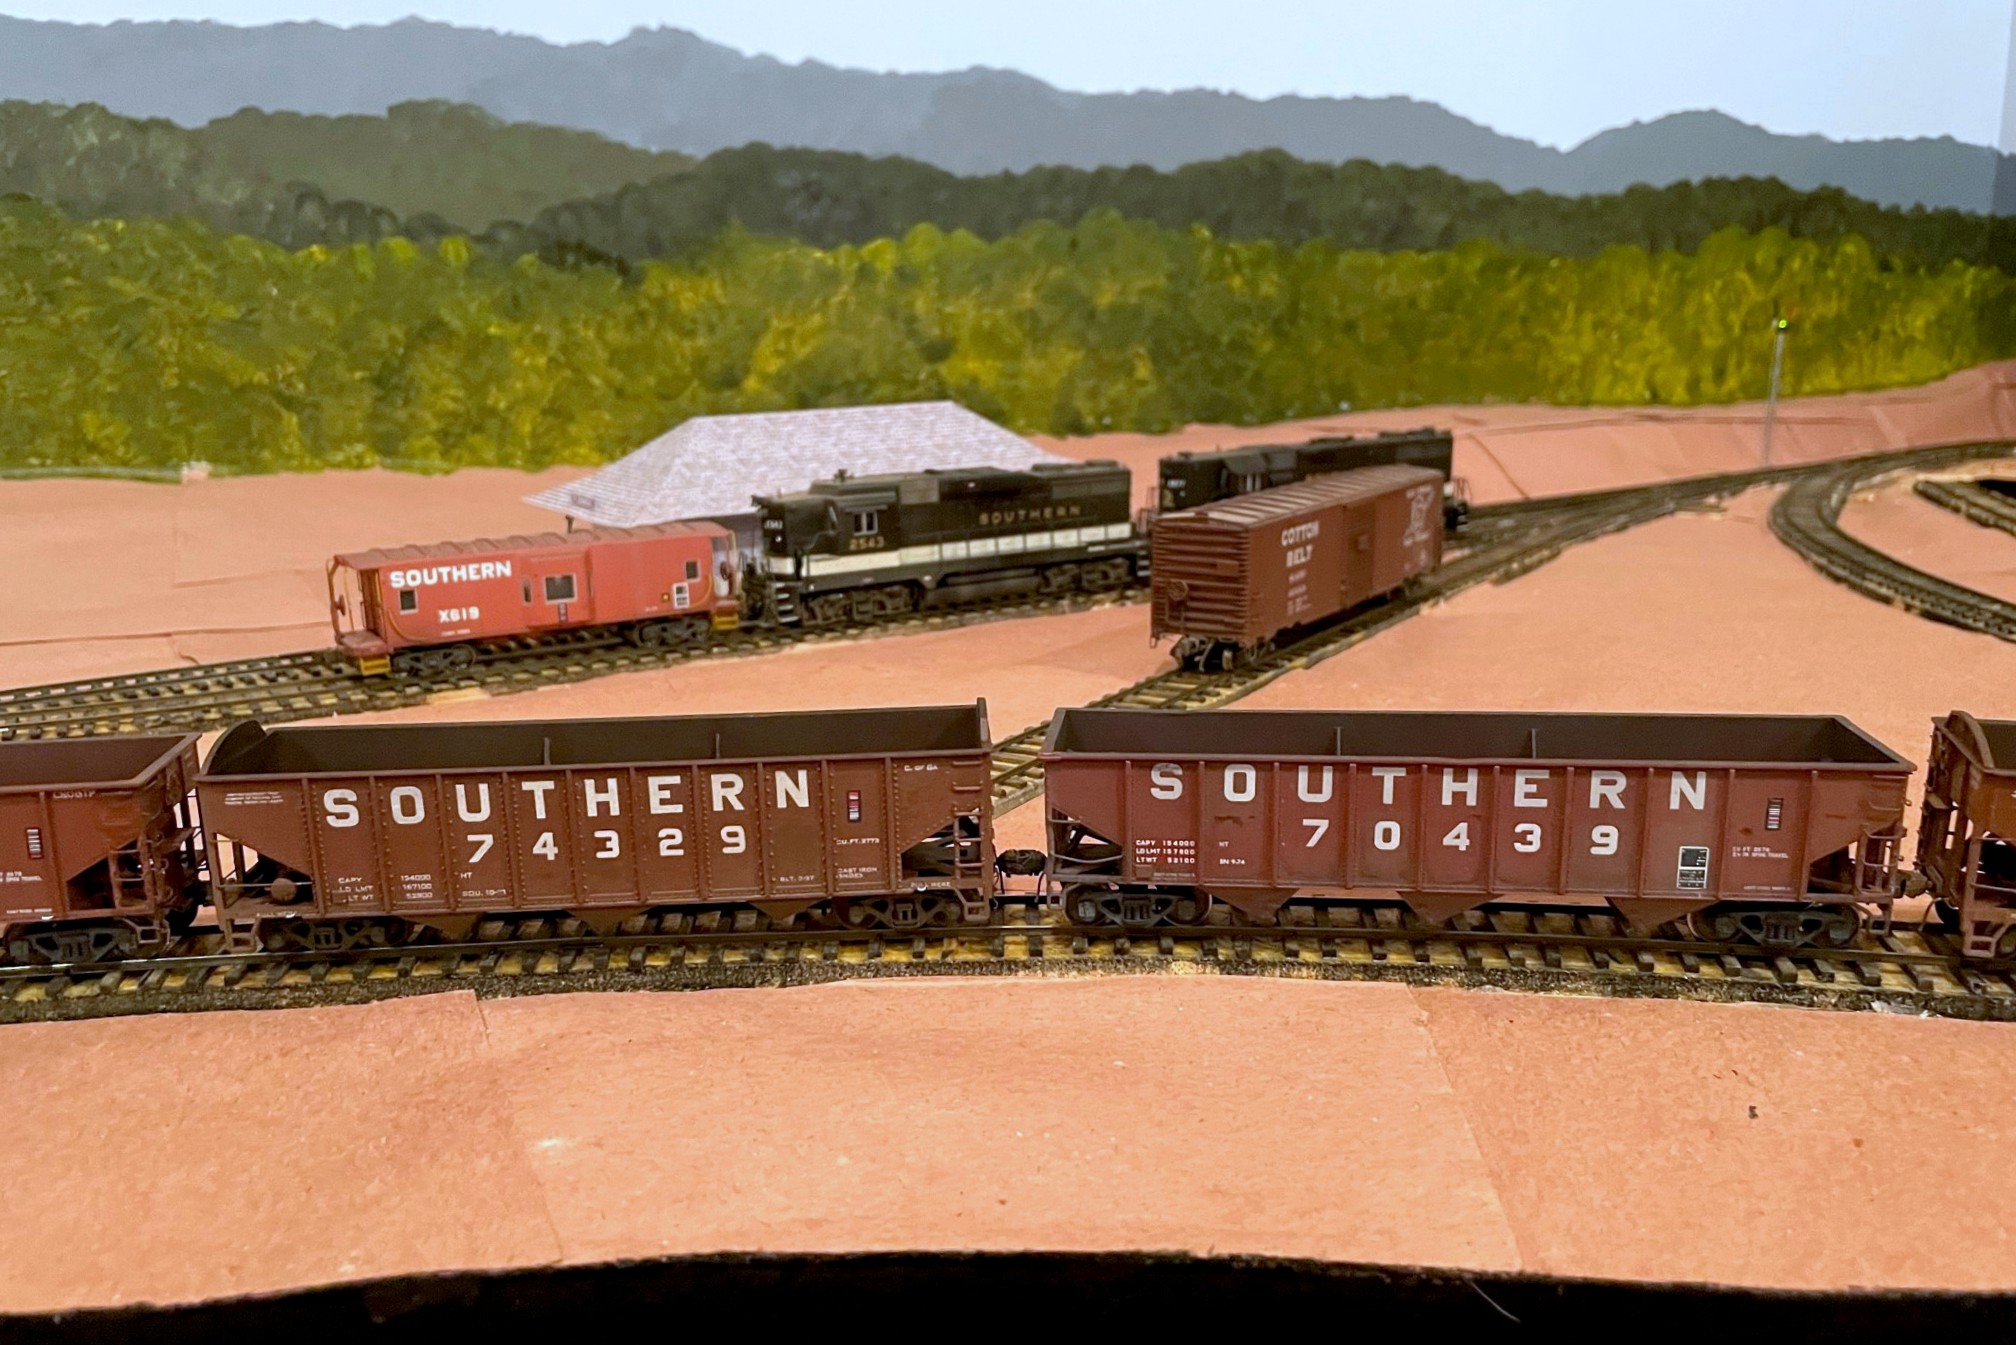
In the last post, I mentioned some of the work that went into creating an ex-Central of Georgia 70T rib-side hopper from an old MDC Roundhouse kit. Atlas makes a much more crisp and better operating out-of-the-box car in its Trainman 9-panel, 70T hopper that is a good stand-in for this car, but it’s about 2 scale feet too long. The Atlas kit, however, is a great model for the Southern’s mainstay fleet of 70T hoppers in the 70300-73749 and 281000-281299 series which far outnumbered the ex-CofGa cars in the 74100-74584 series–all you have to do is remove the heap shields and renumber them. The MDC Roundhouse kit can be picked up in Southern paint pretty cheaply. It’s a far WORSE model both dimensionally and detail-wise to match the Southern’s main fleet of 70T cars, but its overall dimensions are closer to the ex-CofGa cars. However, it requires a ton of work to make the car presentable in a string of more recently produced and more detailed cars. So, is it worth the work? Spoiler alert: it’s not worth it unless you’re just a crazy hopper person like me who notices the subtle length difference between these different series of cars in a long string of hoppers.
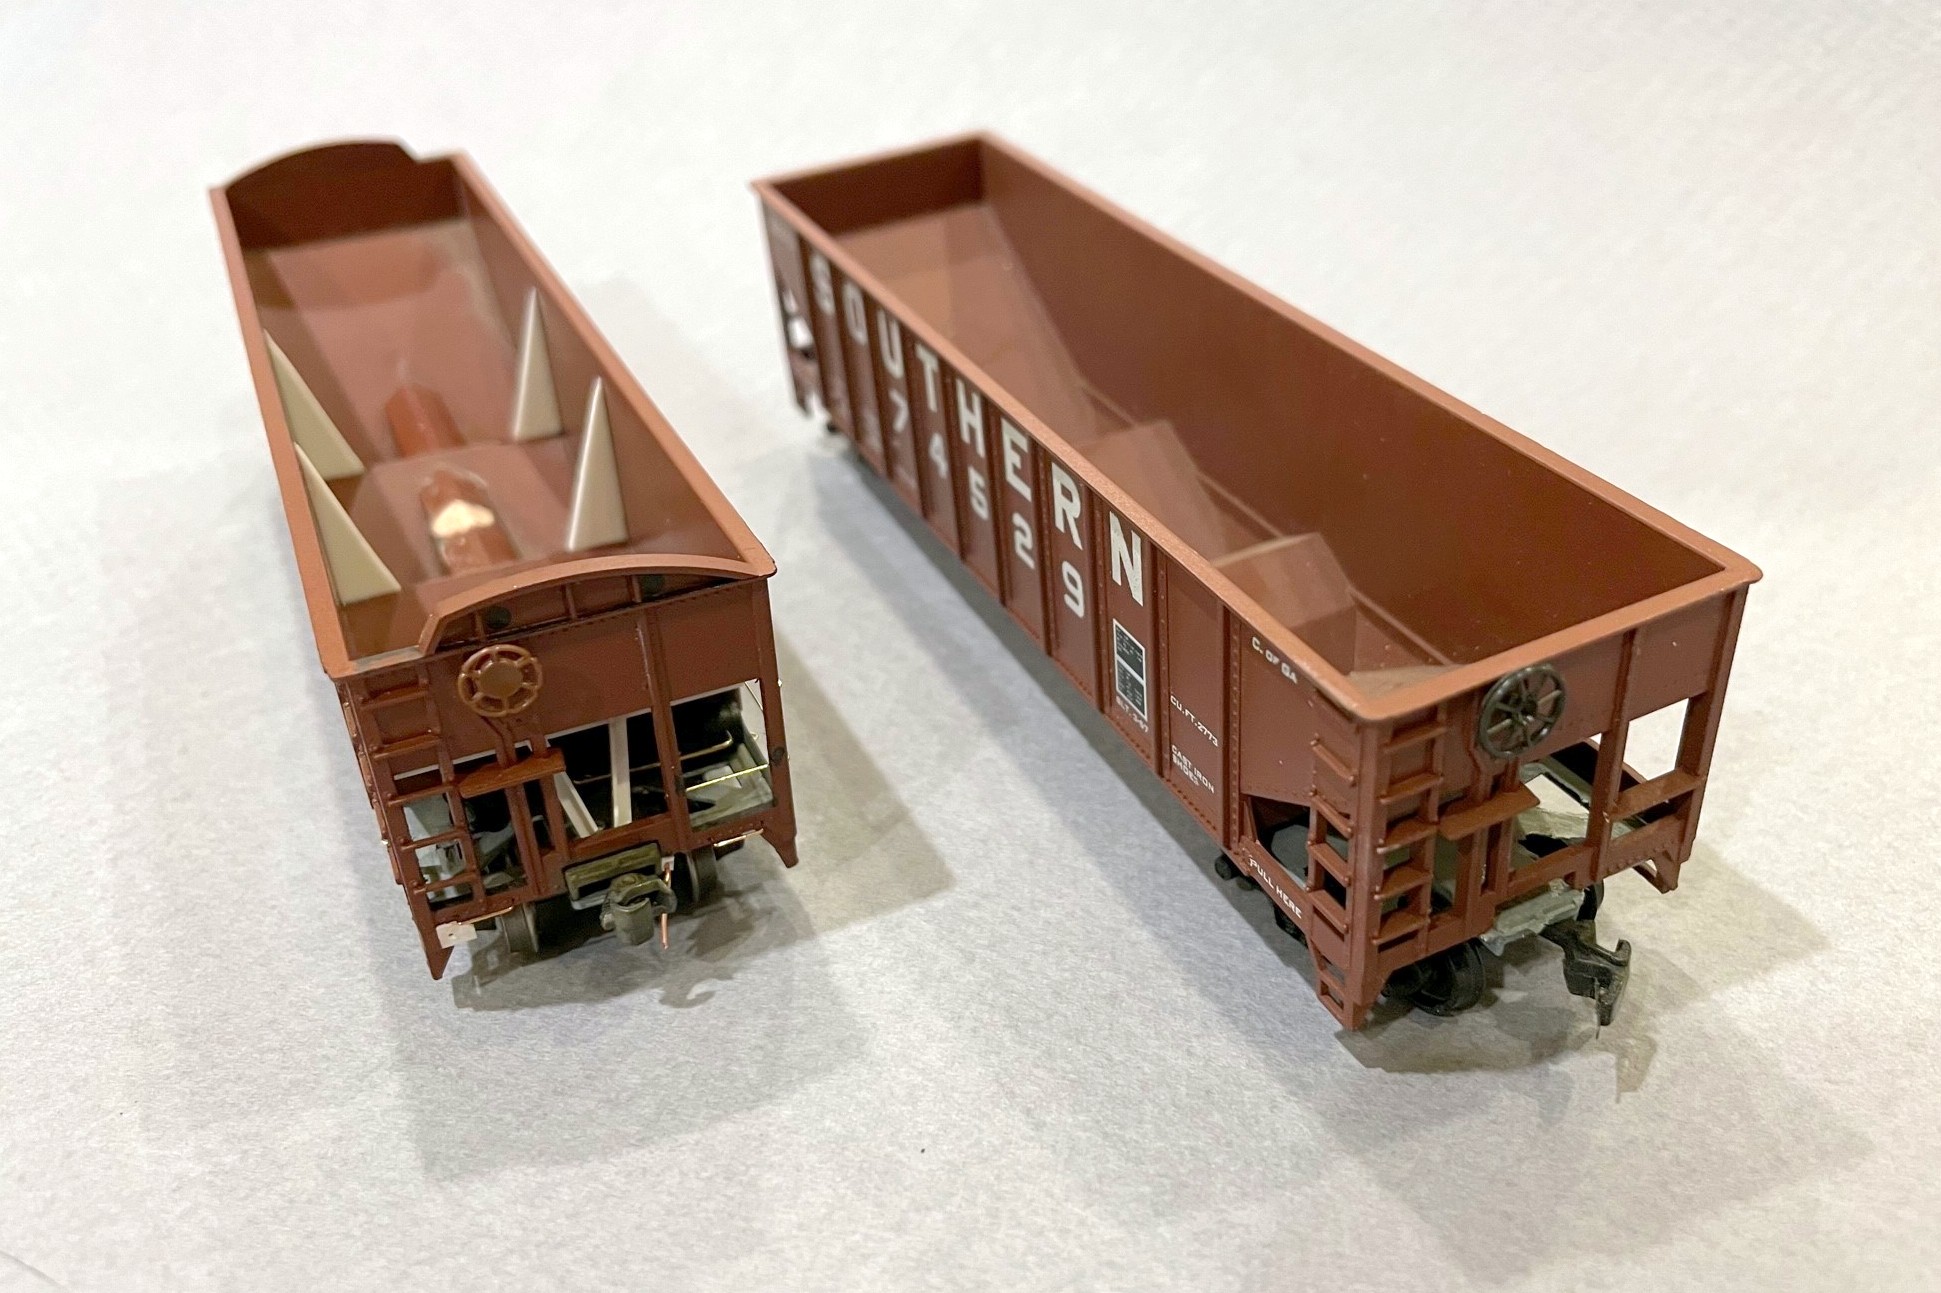
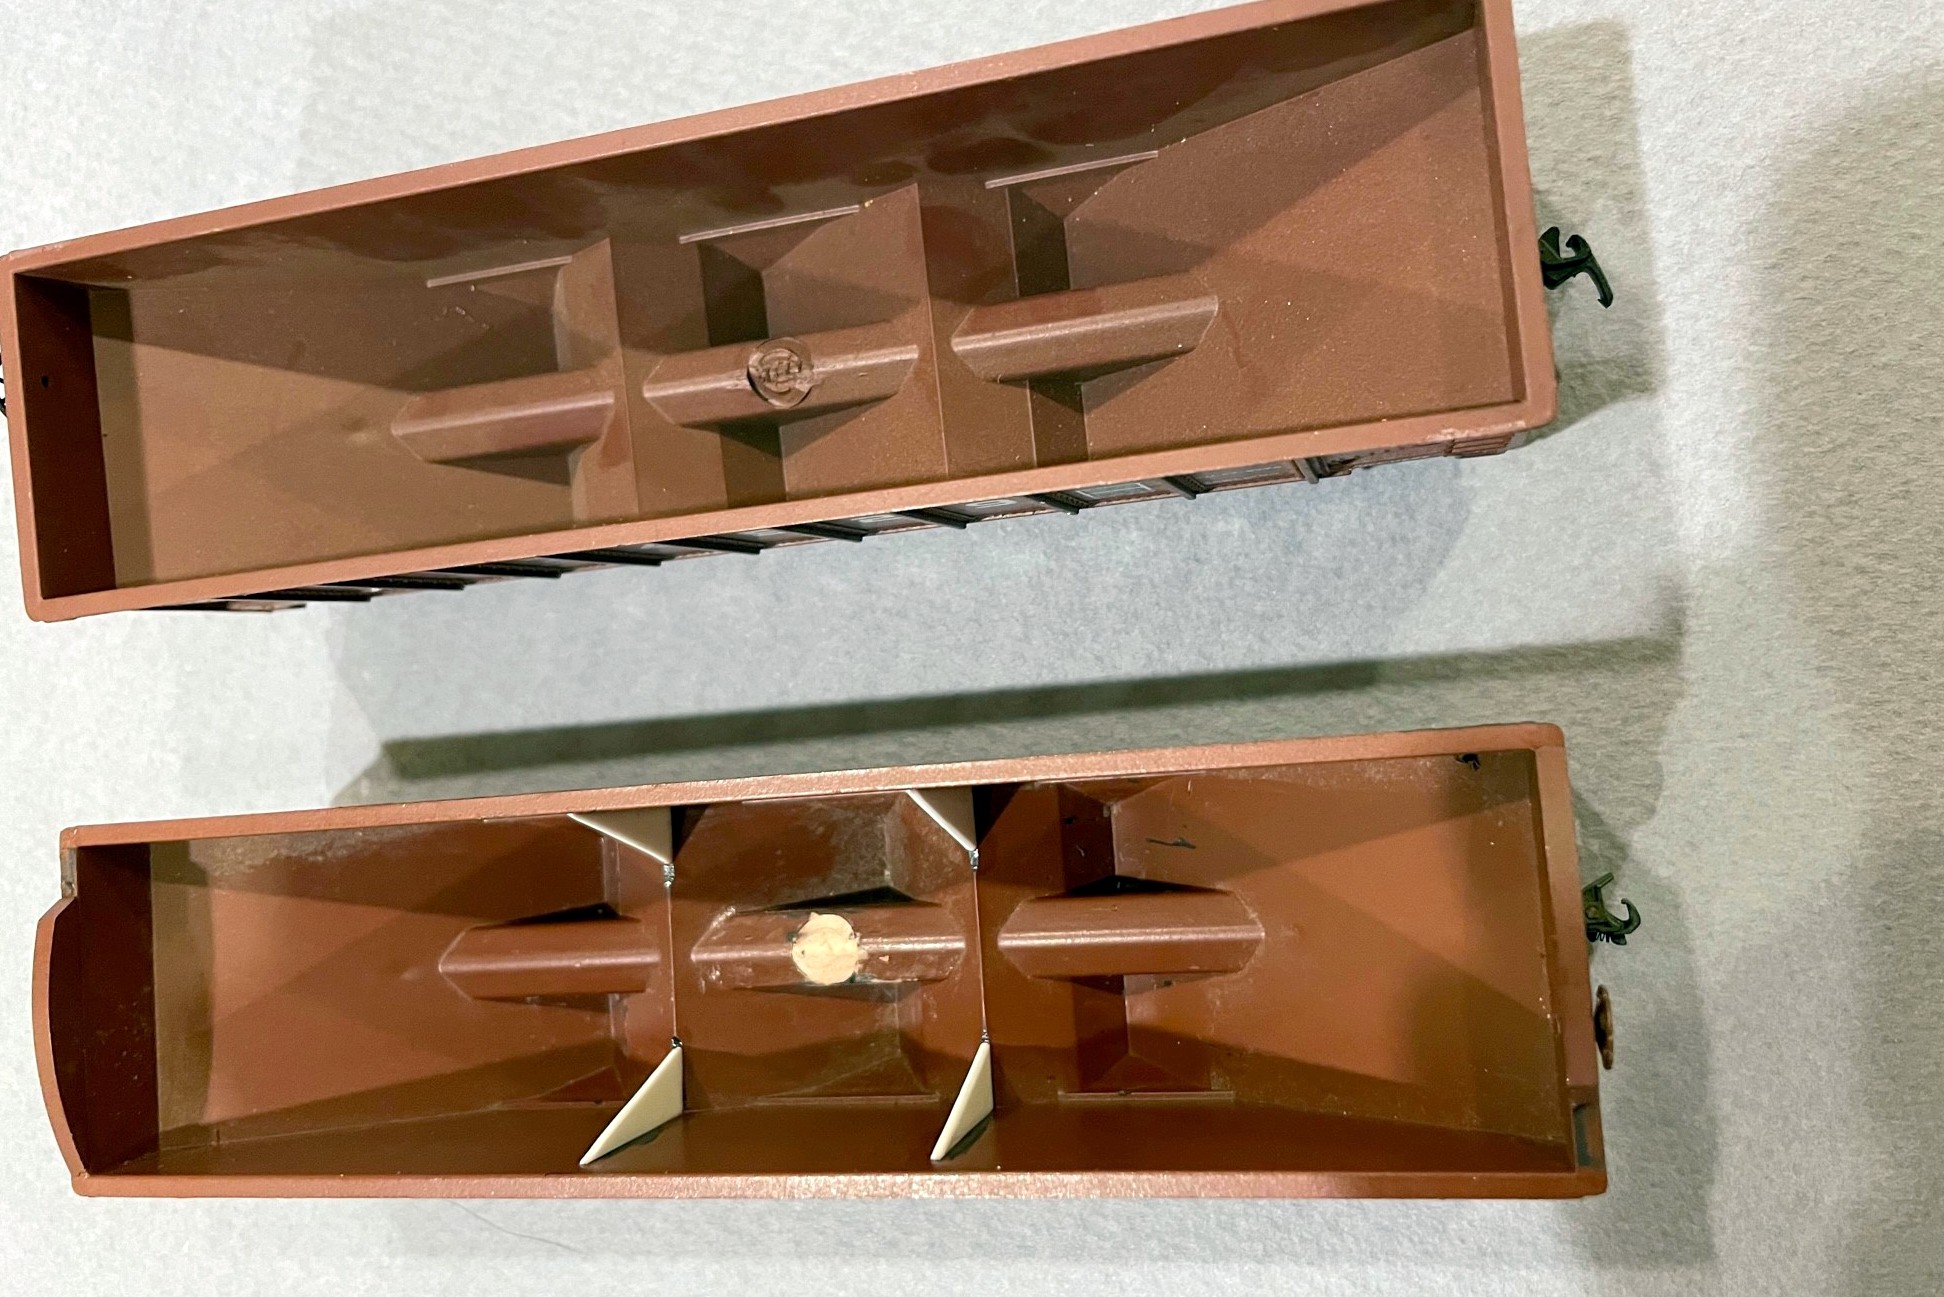
Ok, if you’re still reading, here’s a little more on what it takes to model one of the ex-CofGa cars using an MDC Roundhouse kit or one of the slightly improved Athearn versions. First, what’s wrong with the model out of the box? These molds are at least 40 years old, so the detail is sub-par–the rivets are clunky, the grabs are thickly molded, the brake platform and brake wheel housing is grossly under-modeled, the brake wheel is horrendous, and it’s just missing some details like the long grabs on the left ends of the car and bracing inside the car. Also, the bottom sills and corner posts are super thick at the ends. The interiors have an ugly scar right in the middle where the injection molding was done. The most egregious issue is also the most likely to escape notice (so I didn’t bother fixing it): the middle hopper bay is reversed with respect to the brake end. The lettering is not up to today’s standards but acceptable for a car that will be weathered, but there is no lettering on the ends of the MDC cars. The car also comes with arched heap shields that can be added, but they’re a little too short to look right, something that I initially ignored but eventually remedied by replacing them with parts off an Atlas car. It’s also missing details that were on the CofGa cars like slope sheet bracing on the ends.

I remedied most of these issues with an X-Acto blade. I started by removing the angles between the bottom sills and the side panels. Next I worked on the side/bottom sills and carved away excess material from the top and bottom with a No 11 X-Acto blade (leaving essentially just enough for the “PULL HERE” lettering). This was done to both the ends of the sides and the ends. I also removed the excess material from the left-side corner posts with a blade (I left the ladder side alone) and cleaned up the excess plastic in the steps. I narrowed down the ladder grabs with the X-Acto blade using repeated small cuts on the back side and alternating between top and bottom until the grabs were essentially round-ish instead of rectangular. I also used a chisel blade to remove the awkward rib down the center of the underside of the slope sheets. Finally, I removed the molded-on grabs from the lower ends adjacent to the couplers.
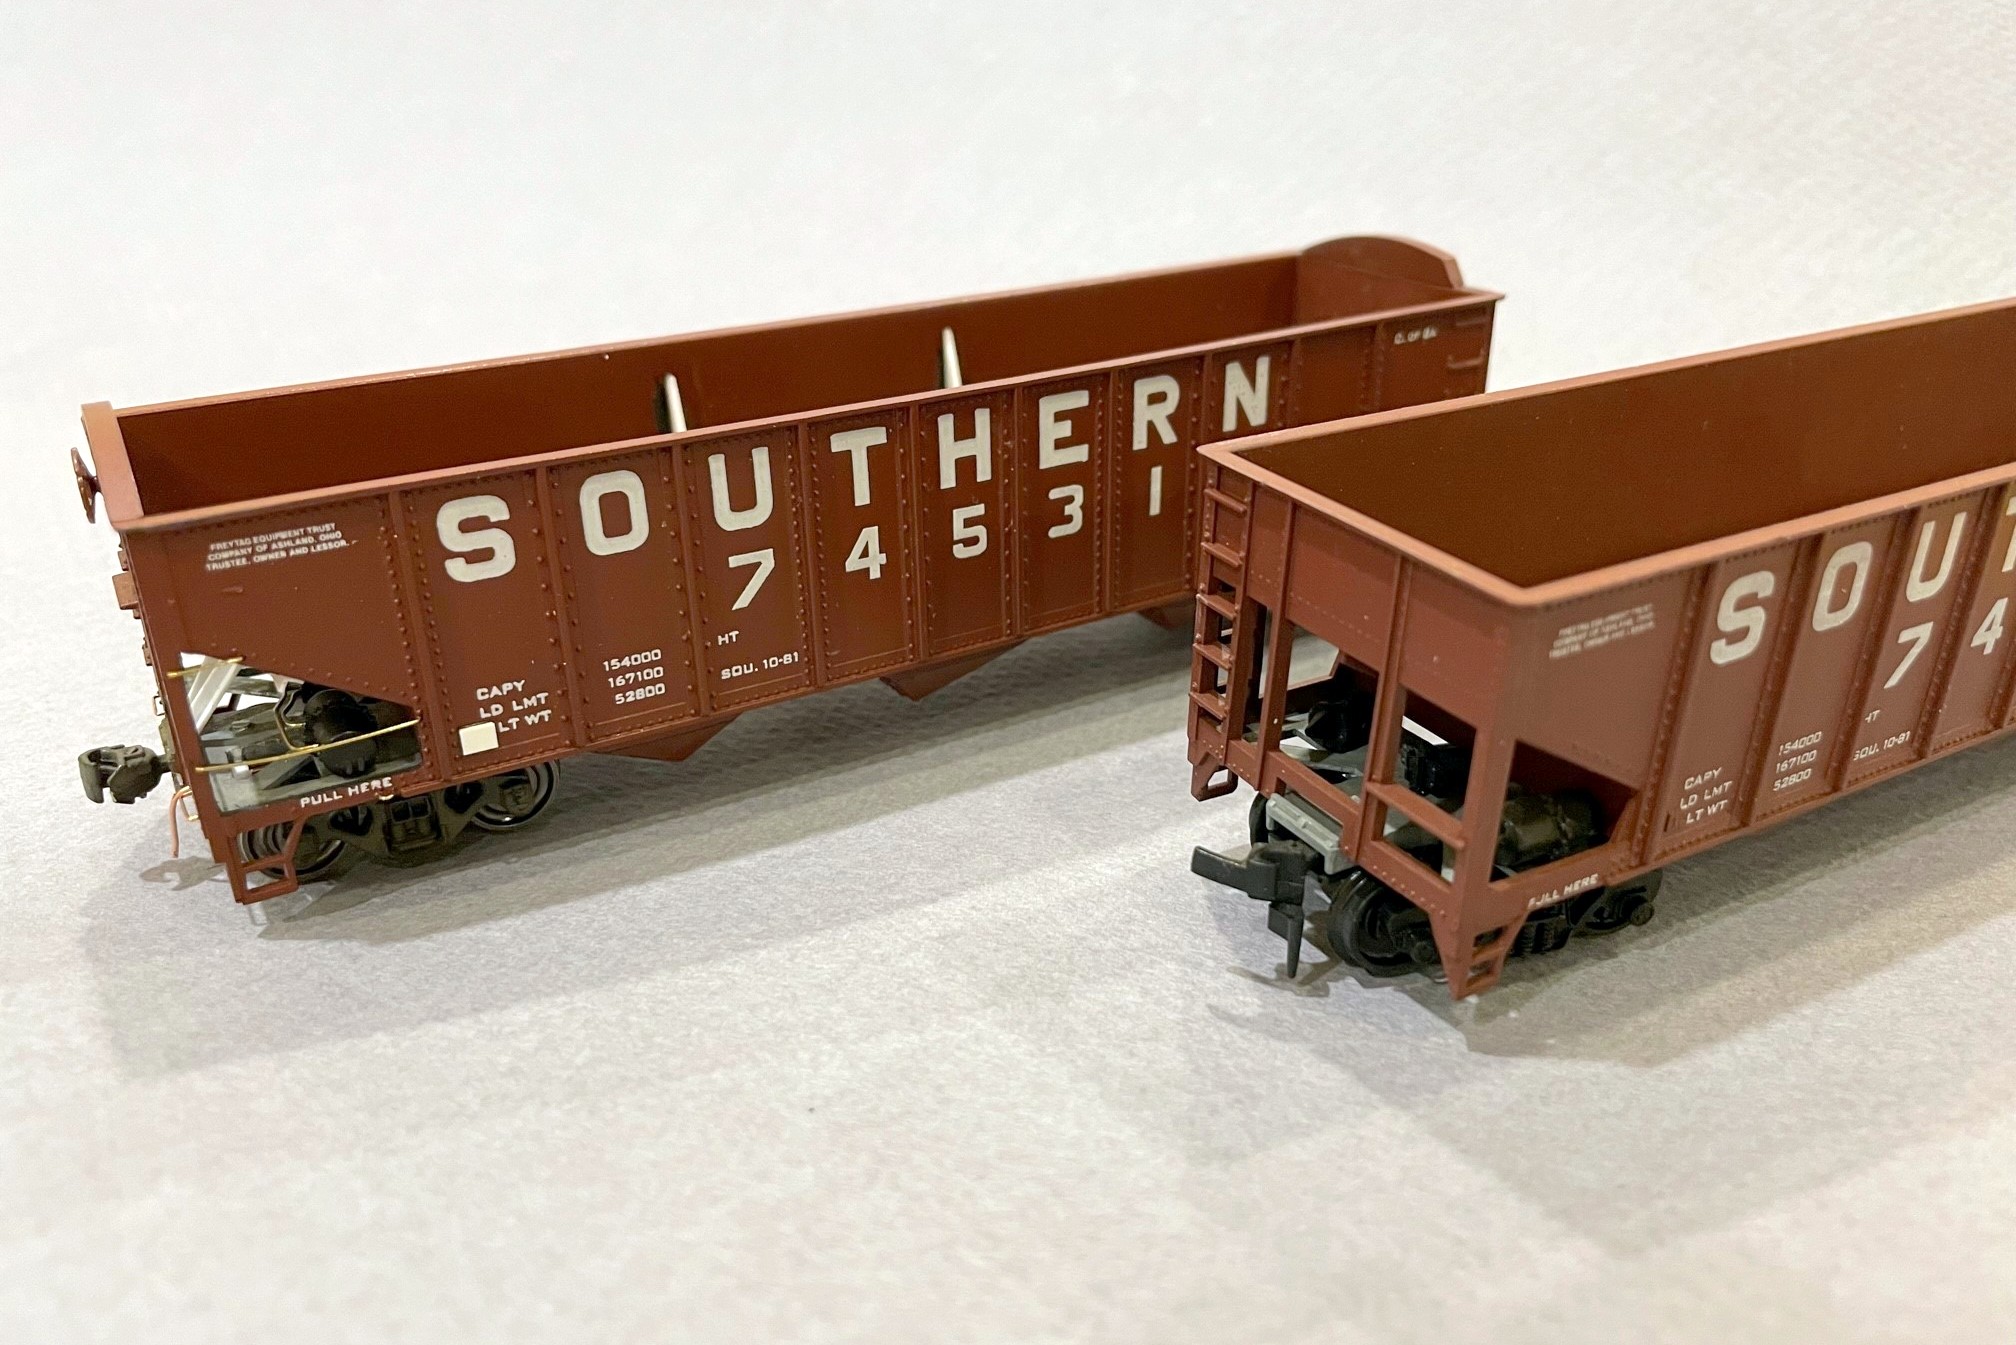
Next came the added styrene bits. I added some flat bits for the tack boards and the panels where the coupler cut bar would attach. Some large triangles (using the Atlas cars as a model) became the interior bracing. The most complex part was the slope-sheet bracing under the ends. I made these from three pieces of L-girder styrene and just dimensioned and cut them to resemble photos. I also replaced the brake wheels with more detailed Miner wheels from the parts bin (one Kadee and another whose origin is lost). I added wire grabs adjacent to the couplers, and added custom-bent long grabs on the left ends made from .012″ brass wire and tow loops made by bending .012″ brass wire around a thumbtack (I bend them into a “J” shape and just drill one hole). I bent coupler cut bars and eye bolts from .012″ brass wire using a little jig I made. I also added a couple pieces of brake-gear piping between the reservoir and triple valve bent from .020″ brass wire. The train line is a piece of copper wire from an old ethernet cable sandwiched between two pieces of L-shaped styrene. The final details included Kadee No 5 couplers, Intermountain metal 33″ semi-scale wheels (faces, backs and axles painted black), and arched heap shields salvaged from Atlas models (the in-progress photos here show the MDC arches which I replaced before weathering). Some careful carving and putty fixed the ugly scar on the center sill inside the car.
I wanted to renumber the cars and detail them for the early ’70s, so I removed a couple of the numbers and the black-and-white lube stencils the best I could by scraping them off with the back of an X-Acto chisel blade. I custom-mixed some paint to match the body and covered all the new details and scraped sides. I added the new numbers, ACI labels, and end reporting marks using a combination of Microscale, Herald King, and K4 decals. Now they were ready for weathering!
For weathering, I started with some drybrushing of dark rust spots in a few places on the sides. Next I airbrushed them moderately using a combination of flat black and dark tan airbrushing and washes. Since these are old cars that have been repainted, I went a little heavier than usual with the black on the interiors. I hit them with a wash of flat black paint and water, letting it sit for a minute and then wiping it off vertically to produce some rain streaking and shadows on the details. I used a wash of light orange rust and water on the interior and then added some drybrushed rust spots inside.
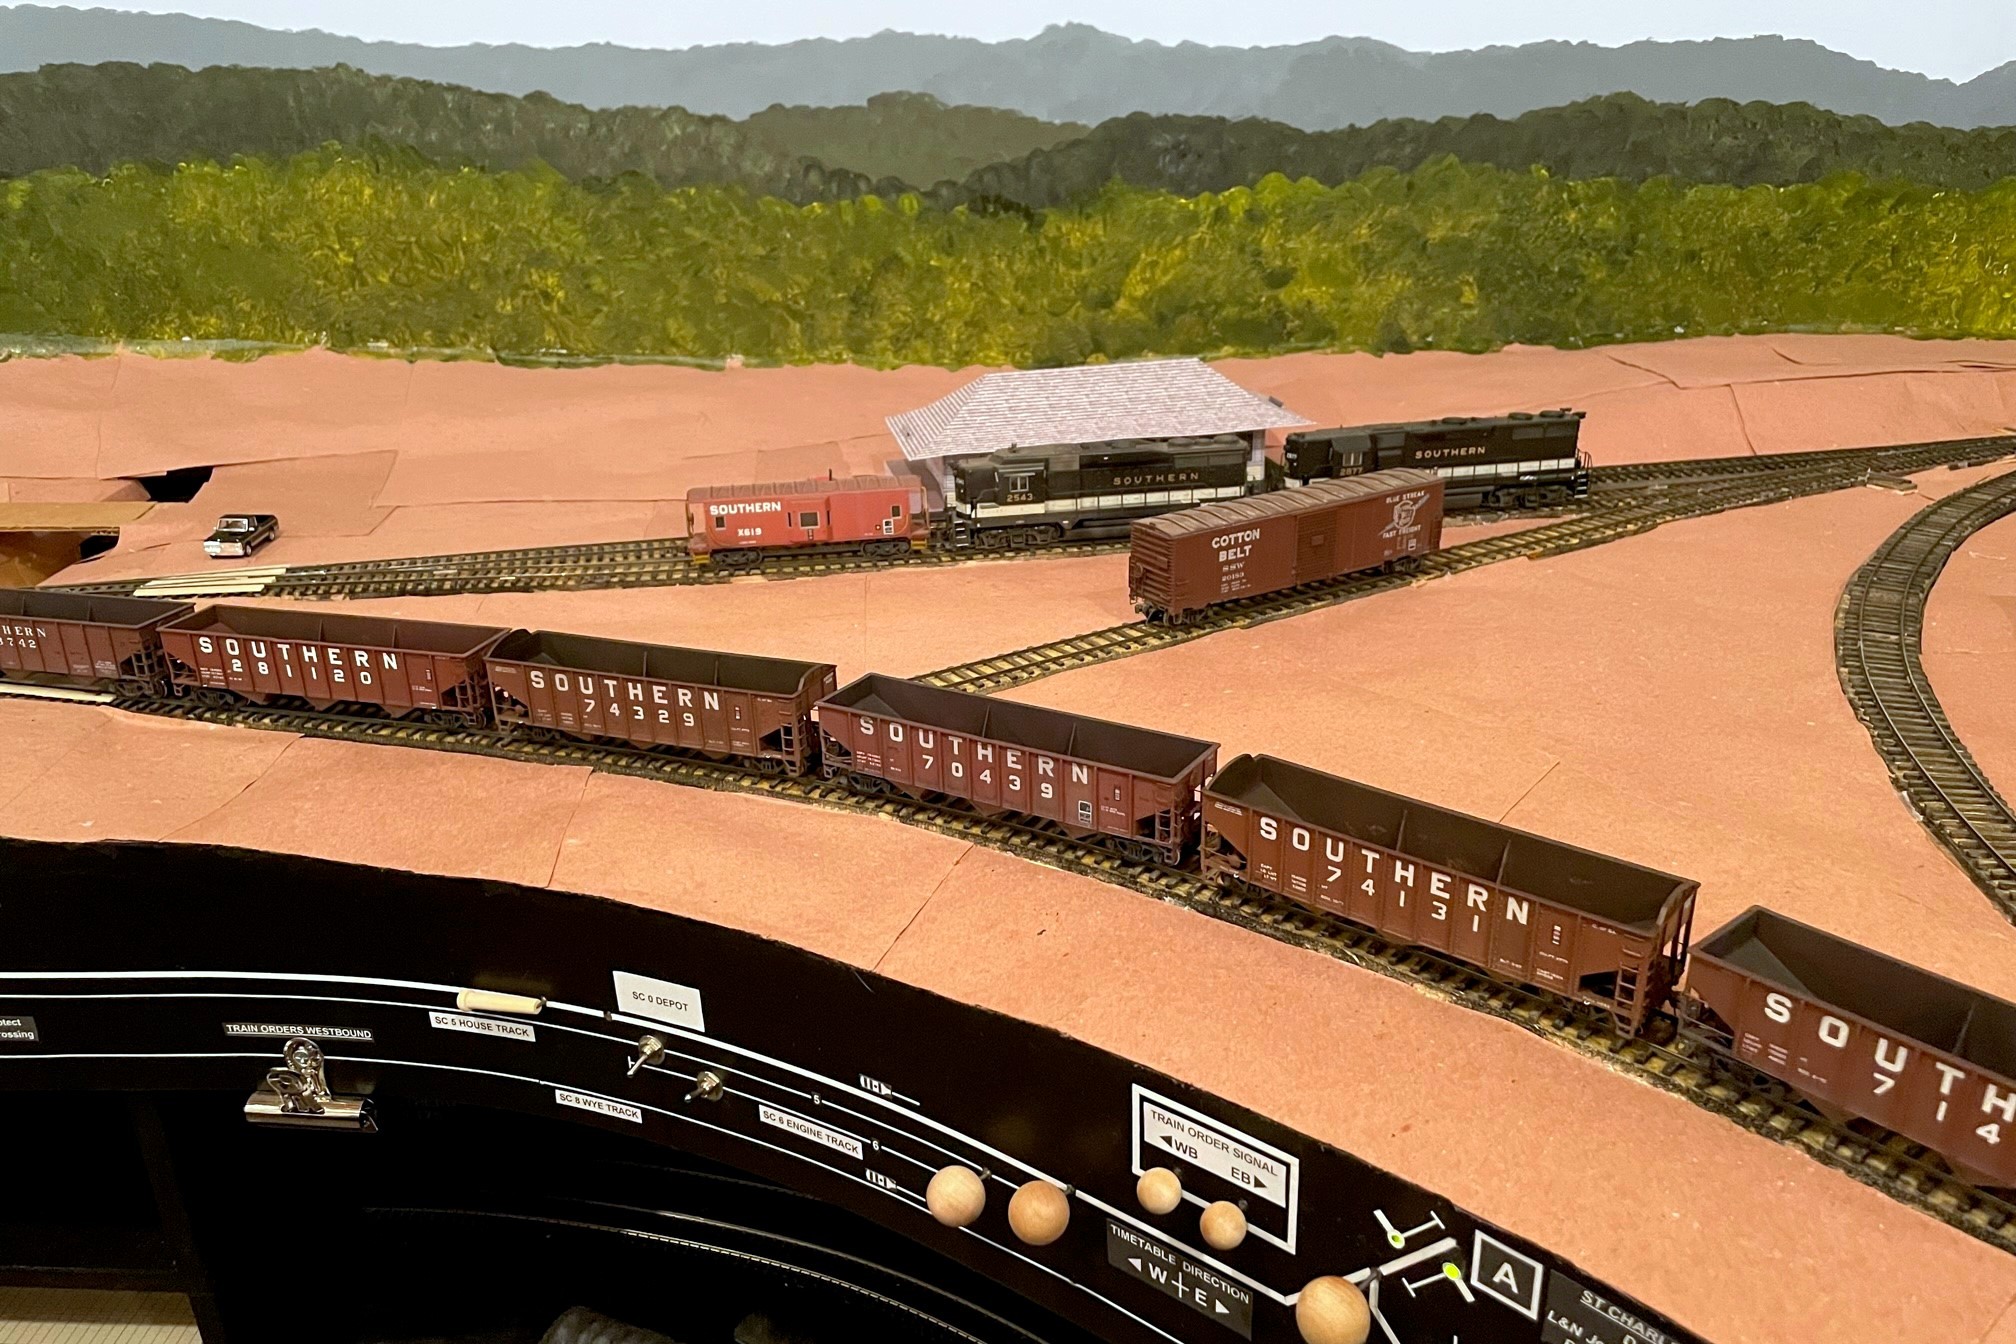
In all, these cars took probably 4x as long to detail and make layout-worthy as the Atlas Trainman cars. Now that they’re complete, I do like seeing the more stocky look of these CofGa cars mixed into a long string of Southern-heritage 70T cars. So much so that I’ll probably eventually go back and take all the heap shields off my Atlas cars and renumber them into non-CofGa series. Thankfully I’ve only completed 3 of these Atlas models, so it’s not a huge sacrifice. So, if you’re a hopper nut like me and nerd out on seeing the subtle differences between car series, then knock yourself out on a project like this! If you’re not a hopper nut, I recommend sticking to the Atlas models and saving yourself a lot of trouble.
Dan, the cars look great and make a good looking consist.
Thanks for sharing
Fenton