Monthly Archives: March 2020

Track!!!

First track on the St. Charles Branch layout
This is the first section of track on the St. Charles Branch layout. It’s a part of the Southern Railway staging yard representing Appalachia, Virginia.

Yesterday was an eventful day in two ways. First, it was our first day under “stay at home” orders for COVID-19 in Colorado. Second, the extra time gave me a chance to hit a major milestone on the St. Charles Branch–the first sections of track!!!

The first piece was a section of flex track for the Southern Railway staging yard representing Appalachia, VA. I’m hand laying all the track on the visible section of the layout, but I’ll be using Atlas Code 83 flex track for the staging yards, helices and hidden track. The flex track is recycled from my former layout representing the Interstate Railroad’s Dixiana Branch, and I’ve got plenty!
Start of first switch
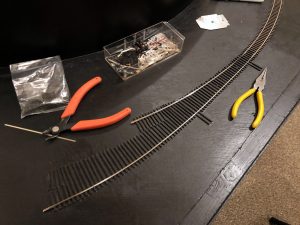
Here’s the start of the first switch in staging. This one leads to two engine tracks alongside the staging. I’m using Tony Koester’s method which is outside-in.

I am hand laying the switches in the staging area, and I started the first two switches yesterday. I’m using the method Tony Koester outlined in Model Railroader a couple decades ago. As you can see, it’s an outside-in method and requires no fancy tools, just rail nippers, needle-nosed pliers, a flat file, a triangle file, a bench vise, soldering iron, and an NMRA track gauge. I’m using Micro Engineering Code 83 rail and small spikes here. The tool set is rounded out with a freight car truck to check things as you go.
Mostly completed first switch
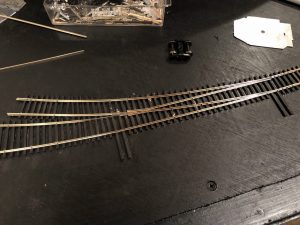
First switch mostly completed. This shows one of the things I like about hand-laying: I can stack the points of the second switch right on top of the frog from the first switch.

It’s been more than 5 years since I hand laid a switch, but I’ve found it’s like riding a bike (I looked but couldn’t find where I’d put Tony’s article, so it was all from memory). One lesson I carried over from my previous layout is to pay special attention to two things on the frog: 1) make sure the track is at the tightest acceptable gauge at the frog, and 2) take extra time to make the rails line up perfectly with the point of the frog.

Staging Level Painted

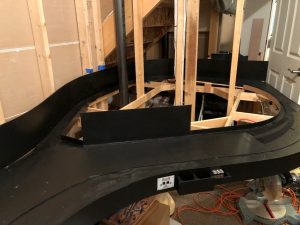
Staging level painted and ready for track
The staging level got a coat of black paint to prepare it for track. This panoramic view of the layout room shows the start of L&N staging on the right and the peninsula for Southern staging on the left.

While I’d never call COVID-19 a good thing, it has made for a lot more time at home and accelerated progress on the layout. Yesterday, I accomplished a major step by painting the entire staging level black. I chose black for the fascia and staging area for two reasons. First, black helps things hide that might otherwise be distracting from the main layout, and second, I’m modeling the coal fields, so black just fits. Not to mention, it’ll look really nice with locomotives in Southern’s tuxedo scheme! I’m very happy with the way the curved Masonite fascia looks in satin black. . . Darth Vader would be proud. I’ve heard people complain that you can’t fill gaps in Masonite, but I found lightweight spackling compound (the kind used to fill nail holes in drywall) works great. I was able to repair a few accidental gouges from a circular saw quite well. The most exiting thing about this step is what it means next–track! I should be hand laying my first few switches this week and laying

These pictures give you an idea of the large amount of staging I’ll have on the layout–probably 2-4x what I need, but better too much than too little. In the first picture, you can see the ties for the switches that mark the entry into the four stub tracks of L&N staging representing the town of Pennington. The Southern will hug the aisle on the right, and the staging yard representing Appalachia will begin just above the green container on the floor and form a reversing loop around the peninsula.

Staging level under the stairs
This is looking back under the stairs where the helix to St. Charles will sit on the unpainted lumber. The staging level will have a single track that loops around the back here to create a continuous running loop on the staging level since I won’t have one on the upper levels.

The second photo shows the layout’s other loop which will allow for continuous running on the staging level. I didn’t have this in the original design, but I was inspired by my young nephew’s visit to try to have something running in a circle for him to enjoy (he LOVES trains). Unfortunately, I didn’t have anything running by the time he visited, but I still thank him for inspiring this modification–I think it will pay dividends in the future for breaking in new equipment and entertaining kids. And hey, sometimes you just want to run trains in circles.

Subroadbed for Staging Complete

Staging Subroadbed Complete
View of the overall layout area with the subroadbed for the staging level complete

Nothing too exciting for this update, but I am making steady progress. Last week I was able to finish all the subroadbed (7/16″ ply with 1/4″ “doorskin” under the tracks) for the staging level. Next step is adding some Masonite walls behind the roadbed to hide the studs and keep cars from falling.

First Ties Laid

First ties on the layout
Three of the first five turnouts to receive their ties on the layout

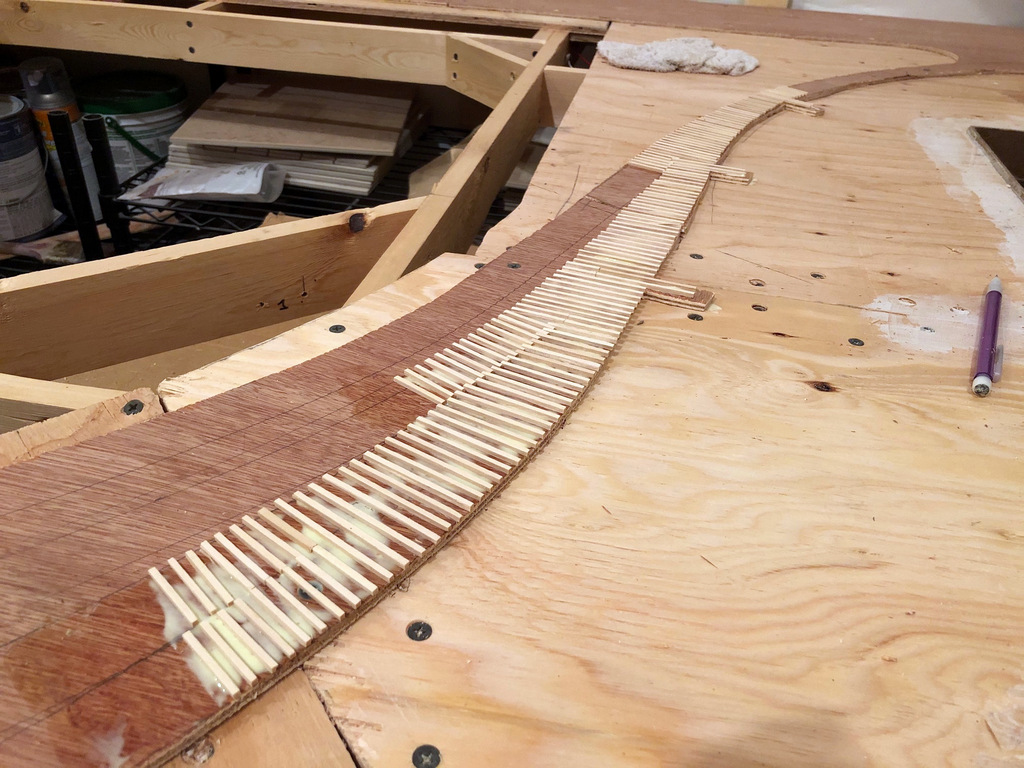
Today was exciting because I got to lay the first ties on the layout! While staging tracks will be prefab flex track, the switches will be hand-laid like the rest of the layout. You can see from the photo some of the benefits of handlaying–how else could I make this cool curved staging yard lead on an S-curve!

I wish this meant I was just days away from laying the first rail, but the ties are really just in preparation for the black paint that will be used for the staging level–better to paint the ties black with the rest than to glue them down onto paint.