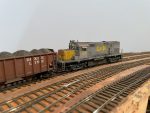
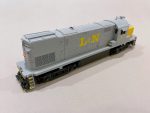
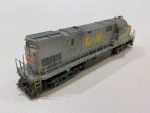
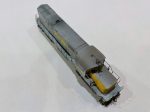
The Louisville and Nashville served the end of the Southern’s St Charles Branch via trackage rights, and the train that did the honors in diesel years was known as the Cumberland Valley Local or “CV Local” for short. This train, which also served the mines near Middlesboro, Kentucky, was usually meager in terms of tonnage, and a single locomotive was sufficient for the task. For my eras, the CV Local was usually handled by a single Alco RS3, and after 1974, a single Alco C420. Due to weight restrictions on the “Old CV” where this train roamed, the favorite C420s were 1316 and 1317, two ex-Tennessee Central units that happened to be the lightest C420s on the railroad. Needless to say, modeling one of these units has been on my list since I started building the St Charles Branch. So, meet ex-TC C420 1317 in HO scale!
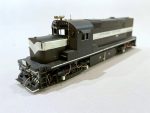
This model started as an Atlas Phase 2b C420 in factory-applied TC paint (why not?). While the Atlas details are pretty good out-of-the-box, there were a few things the model needed to be an accurate representation on this particular unit. Most noticeably, the TC units had very narrow, rectangular fuel tanks (part of what made them so light). I simulated this by removing the rounded sections of the Atlas fuel tank, separating the air reservoirs (I’d need them later), and patching the holes. The tank is still about 18″ too wide, but it gives the impression created by the narrow tank and makes this C420 stand out in a line of round-tank Alcos. The drain pipe on the left side is just a piece of Cat 5 ethernet cable with the insulation intact and a few bits of styrene for the bracket.
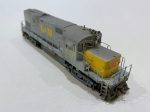
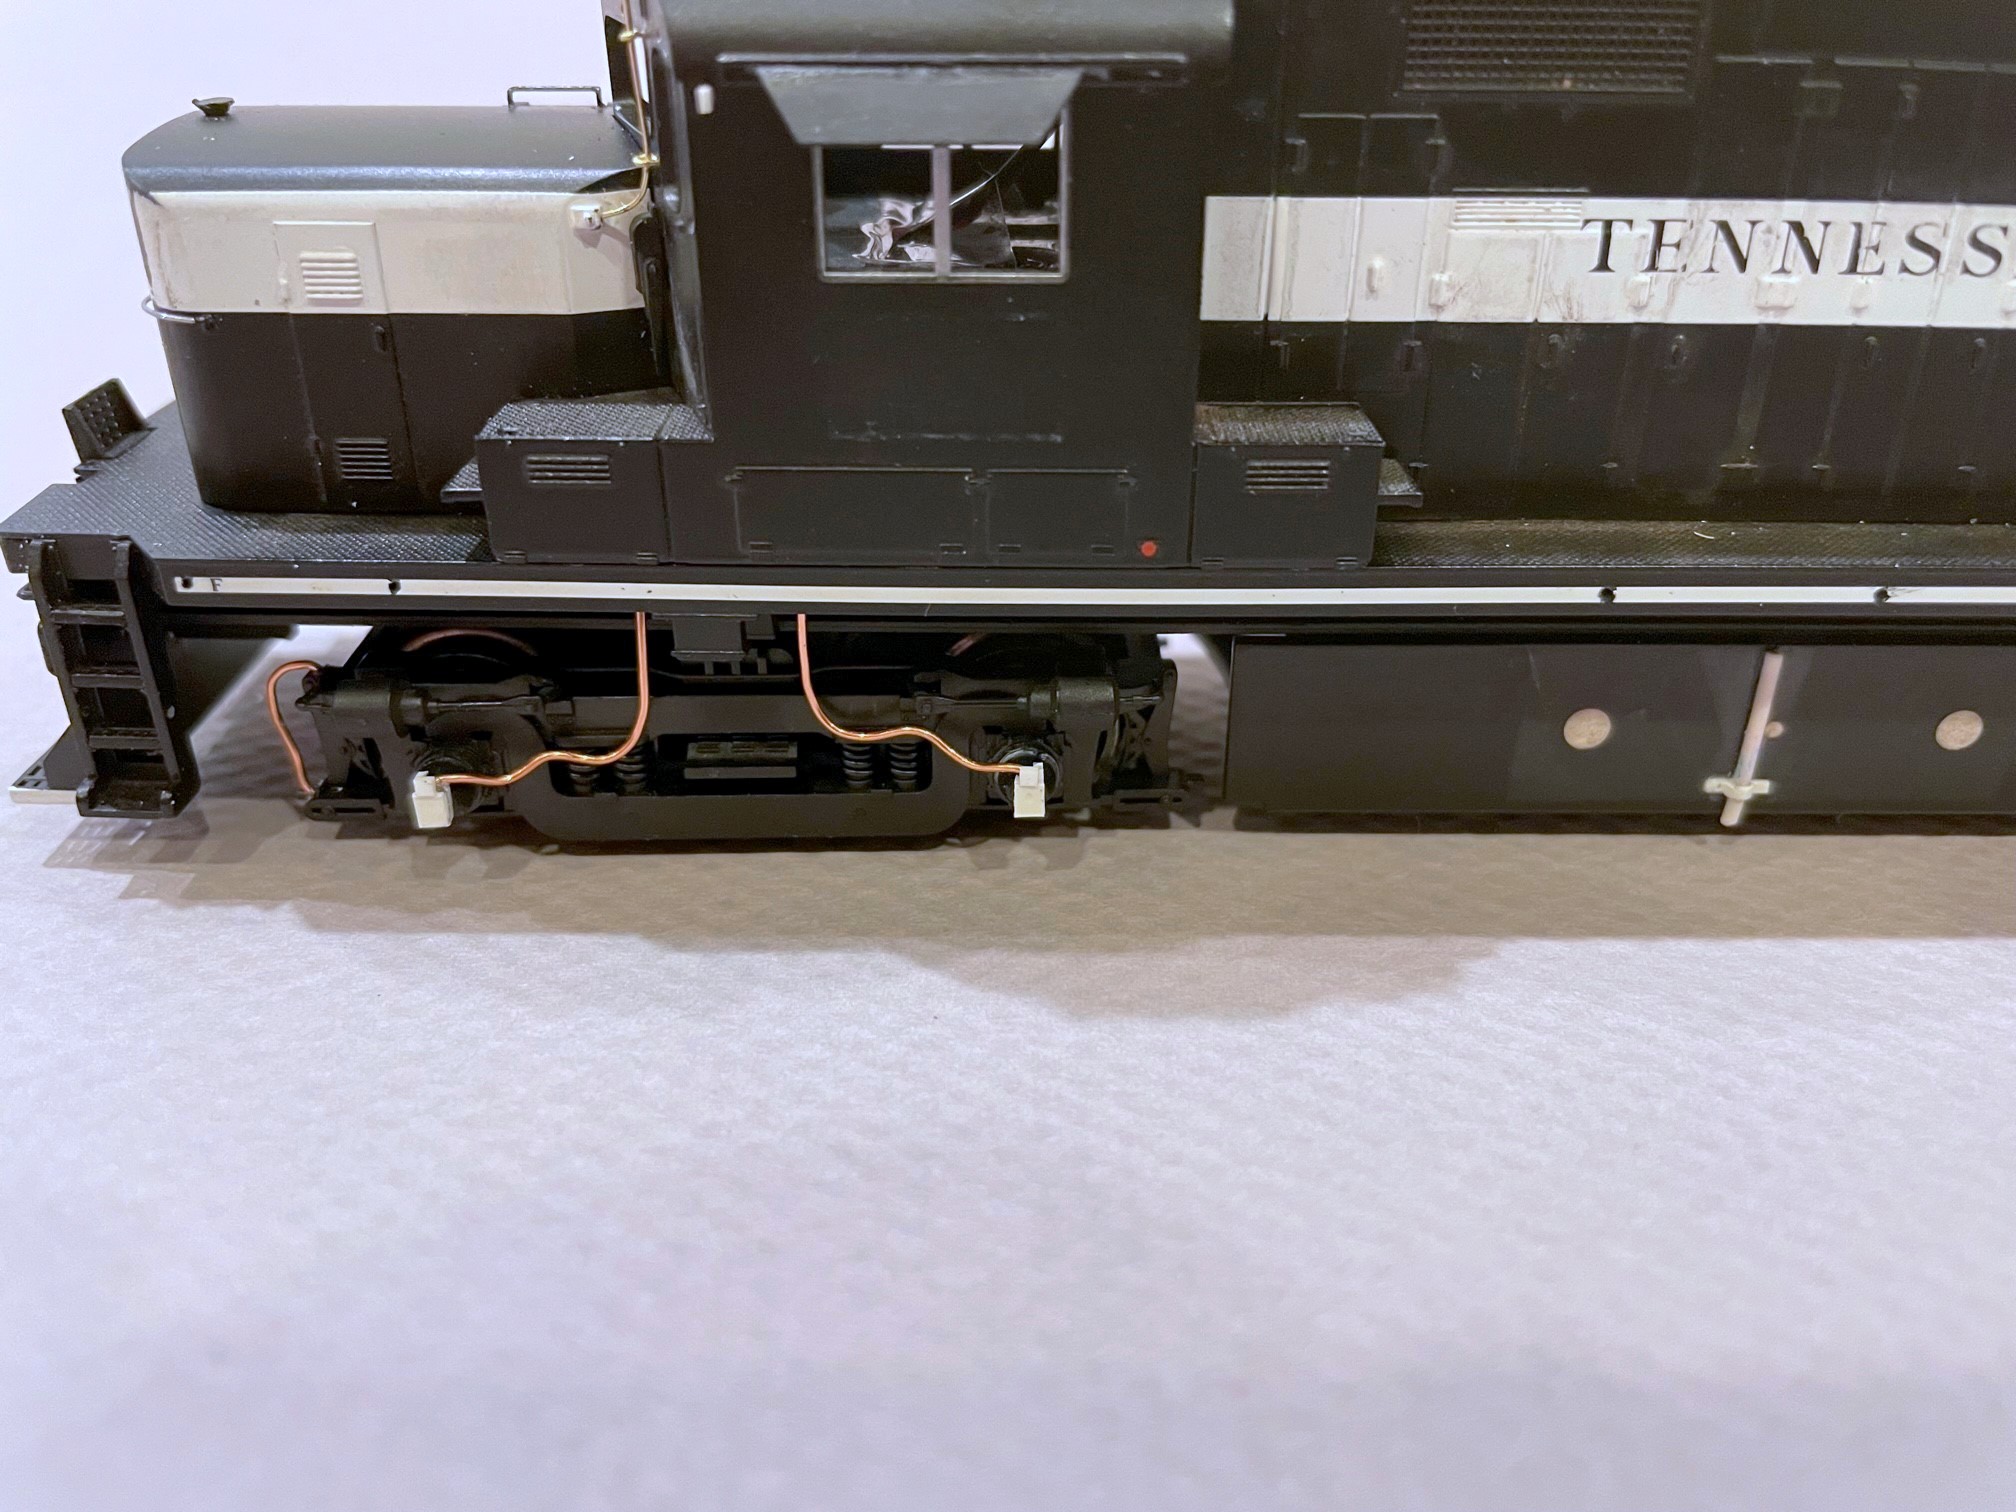
A few of the details are commercially available detail parts including a DW brass horn and DW air filter (added just before weathering where the bell was previously). Most, however, are homemade from bits of styrene, brass wire, and one of my favorite modeling materials, copper wire from old Cat 5 ethernet cables. The most challenging details were the wheel slip sensors that go over the four truck journal boxes on the left side of the locomotive. For mine, I used bits of sprue filed into a conical shape for the base. Next, I drilled a hole through the center big enough for the copper wire (stripped of insulation). I bent the copper wire so it extends through the truck sideframe to help prevent the assembly from being broken off. From there, the wire bends up and then toward the middle of the sideframe where I bent it into a sagging shape per photos. Next I used bits of styrene to frame the wire on top of the conical housing and then to cap the frame to simulate the portion where the wire comes into the housing. Similarly, I bent bits of copper wire into the shape of sand lines for the pilot end of each sideframe (there’s not enough room on the fuel-tank end).
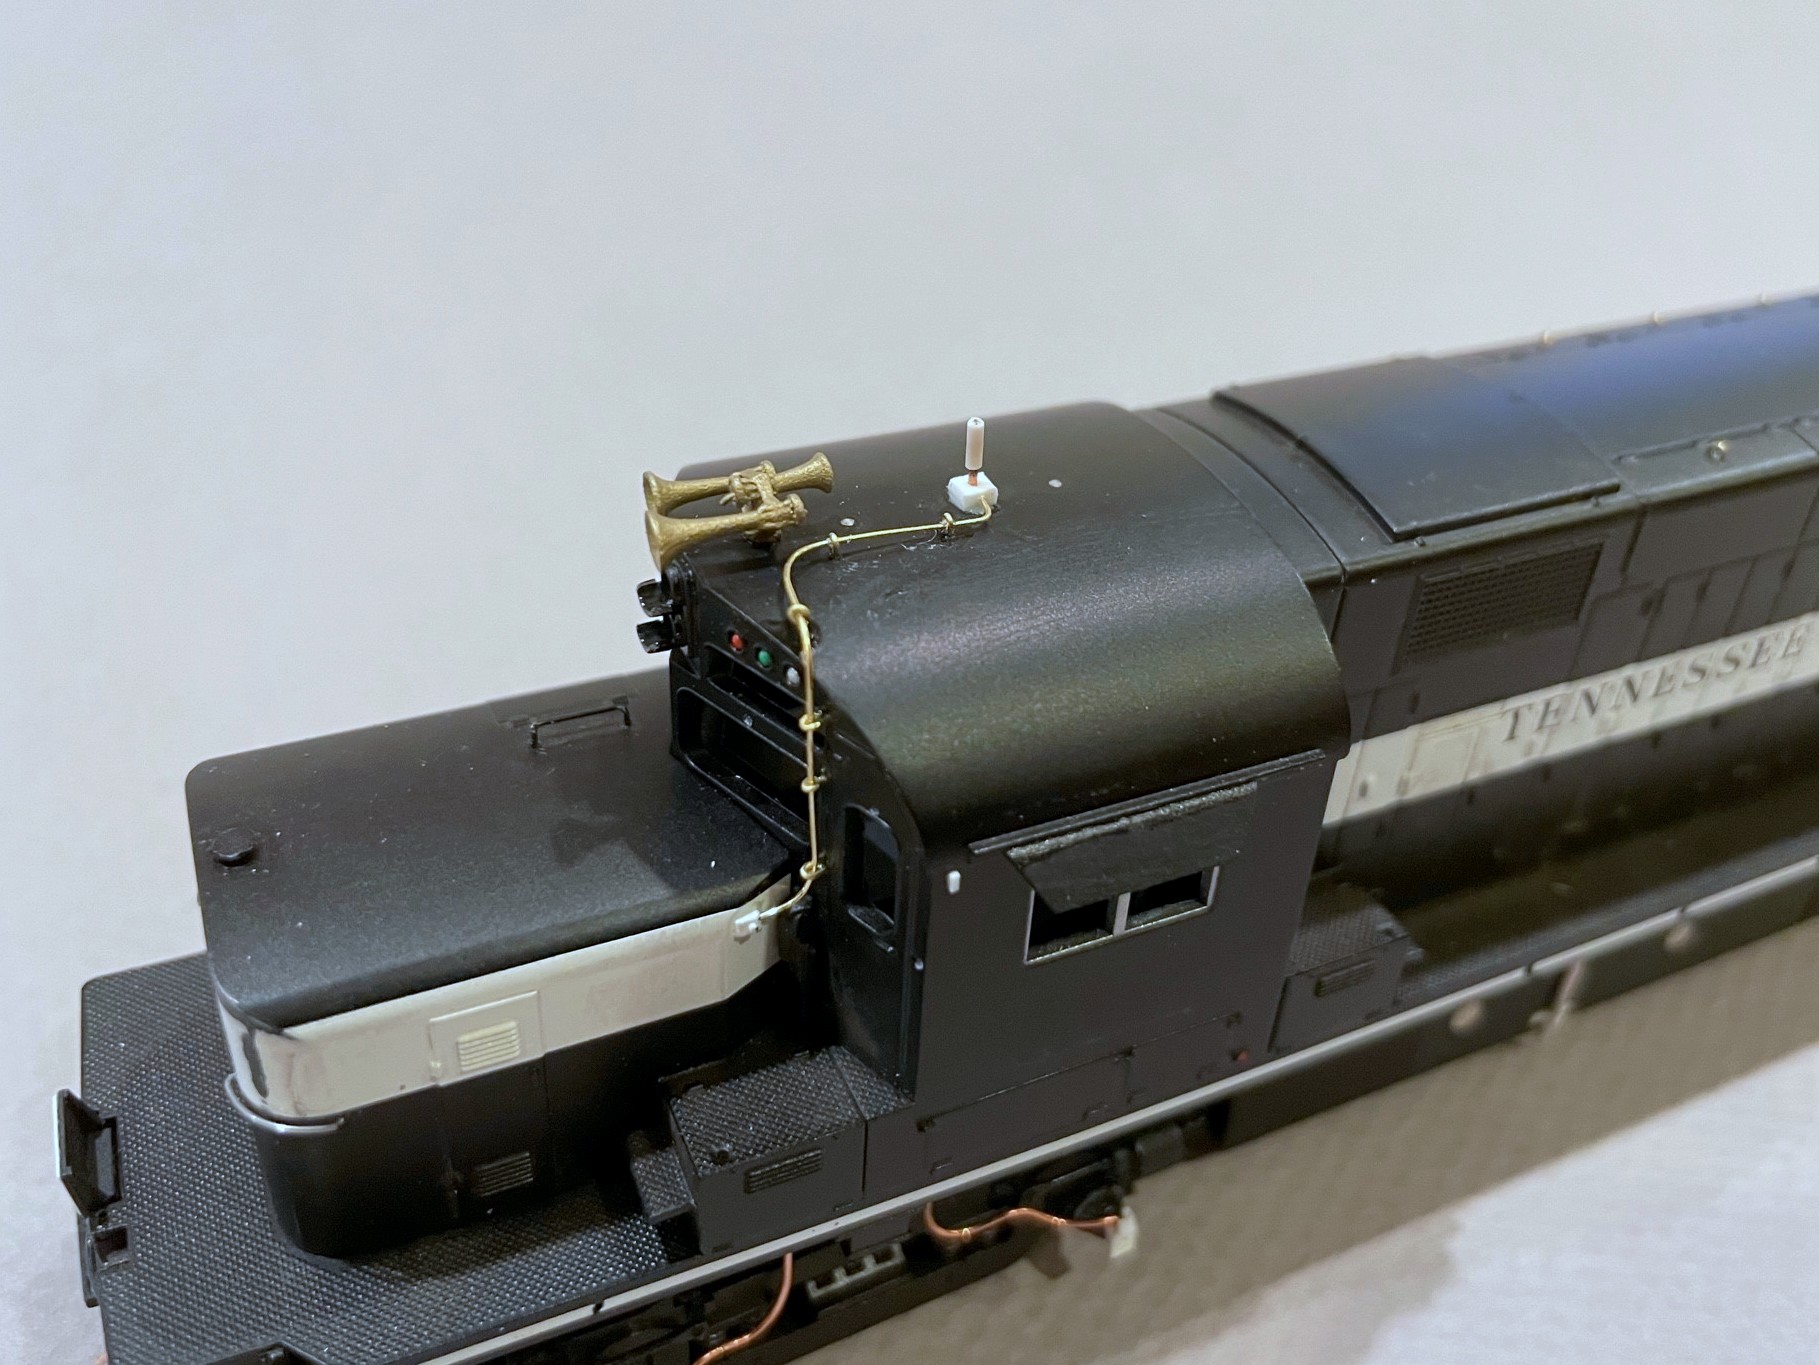
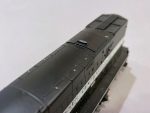
The next most challenging detail was the antenna conduit. Photos are clear that the L&N added a long antenna conduit from the nose to the roof along the cab face. I couldn’t find any roof shots of 1317, so I inferred the rest from other units: 1) conduits are usually paired with a box under the antenna on the L&N, and 2) firecracker antennas in the center of the cab roof are the most common. The conduit was carefully bent from .012″ brass wire and held in place by eye bolts (these happen to be homemade as well from .010″ wire). The base is a cube of styrene, and the firecracker antenna is just a piece of copper ethernet wire with the insulation partially removed (thanks to my friend Stuart Thayer for teaching me this trick). Rounding out the initial cab details are some sunshades out of the spare parts box and a couple of headlight deflectors made from bits cut from the “ears” of a Kadee coupler box.
The roof of the model has molded-on lift rings, and I decided to shave these off and replace them with wire. I used .010″ wire bent around a thumbtack to create candy-cane shaped lift rings–only the long end is actually inserted into a hole, the other side is just pressed into the body a bit. For the pilots, I reused most of the Atlas factory parts including the MU cables, coupler cut bar and long grab. I also used the factory drop steps but added a piece of thin styrene to make it solid instead of a grate per prototype photos. The train line hose, like my freight car hoses, is – you guessed it – a piece of copper ethernet wire bent into shape and crimped at the end to form the glad hand. Finally, just before painting, I noticed that the L&N had removed the hand brake from the front of the cab, so I did the same, replacing it with a square-shaped length of styrene and a hole.
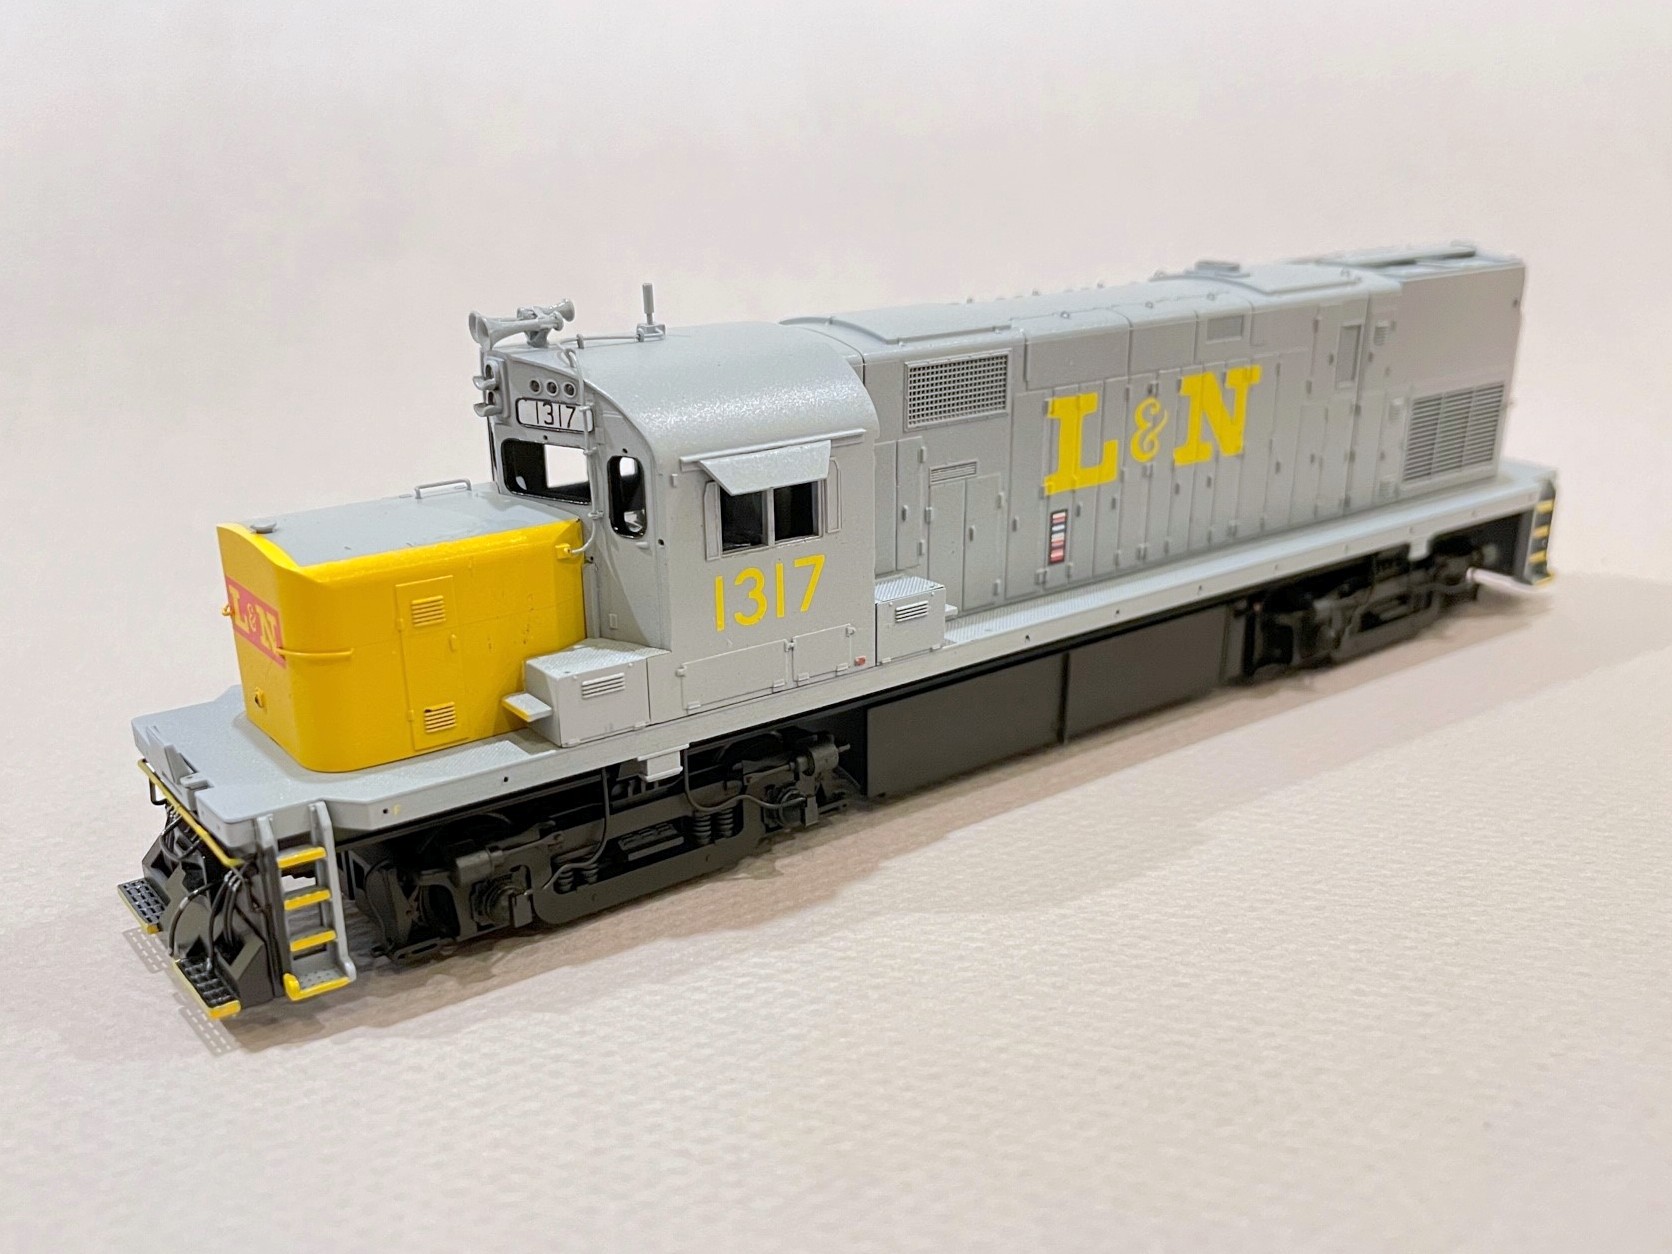
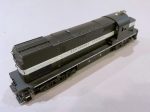
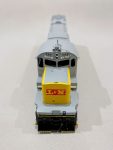
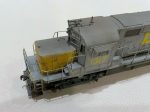
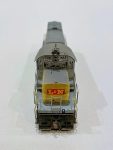
Before painting, I sanded the TC paint lightly to remove some of the sheen and “3D” nature of the striping, but I left a little of the raised paint so at certain angles you’d be able to still see the faint lines of the TC paint (again, why not?). I still have a lot of Testors Model Master acrylics, so after examining photos, I decided on “light ghost gray” for my base color and “insignia yellow” for the nose. I primed the whole locomotive with black and then masked the pilots before airbrushing the gray. The nose was easy because it’s a separate piece, so all I had to do was spray it gray, mask the rectangle for the top, and spray the yellow. I used a combination of a black sharpie and brushed black paint for the window and number-board gaskets, and a little blue and red paint for MU covers, fuel fillers, and a couple other things on the gray that look red in photos. Marker and walkway lights are just semi-gloss black paint. The final step was spraying the painted shell with Rustoleum clear “high luster” lacquer to protect the paint and make a better surface for decals.
I used the Microscale set 87-823 “L&N Locomotives Gray & Yellow 1970-80” for most of the decals, using dozens of liberal coats of Micro-Sol and Micro-Set and a damp paper towel to help the decals settle in. The numbers on the number boards are from a Microscale SCL diesel set–they’re a little smaller and look better on Alco boards. One detail I added during this step was the cab wind deflectors flanking the side windows. These are just bits of clear styrene from an Intermountain wheel box. I cut a strip the width of the deflectors, masked a strip down the middle, painted the back the gray color of the body, and used a silver Sharpie marker on the sides and around the masking. After removing the masking tape, I cut the deflectors to length, added a little dog-ear, and used the silver Sharpie to hit the cut ends. A dab of CA on the cab secures them in place. This method models an otherwise delicate detail in a manner that’s resilient to routine handling on the layout.
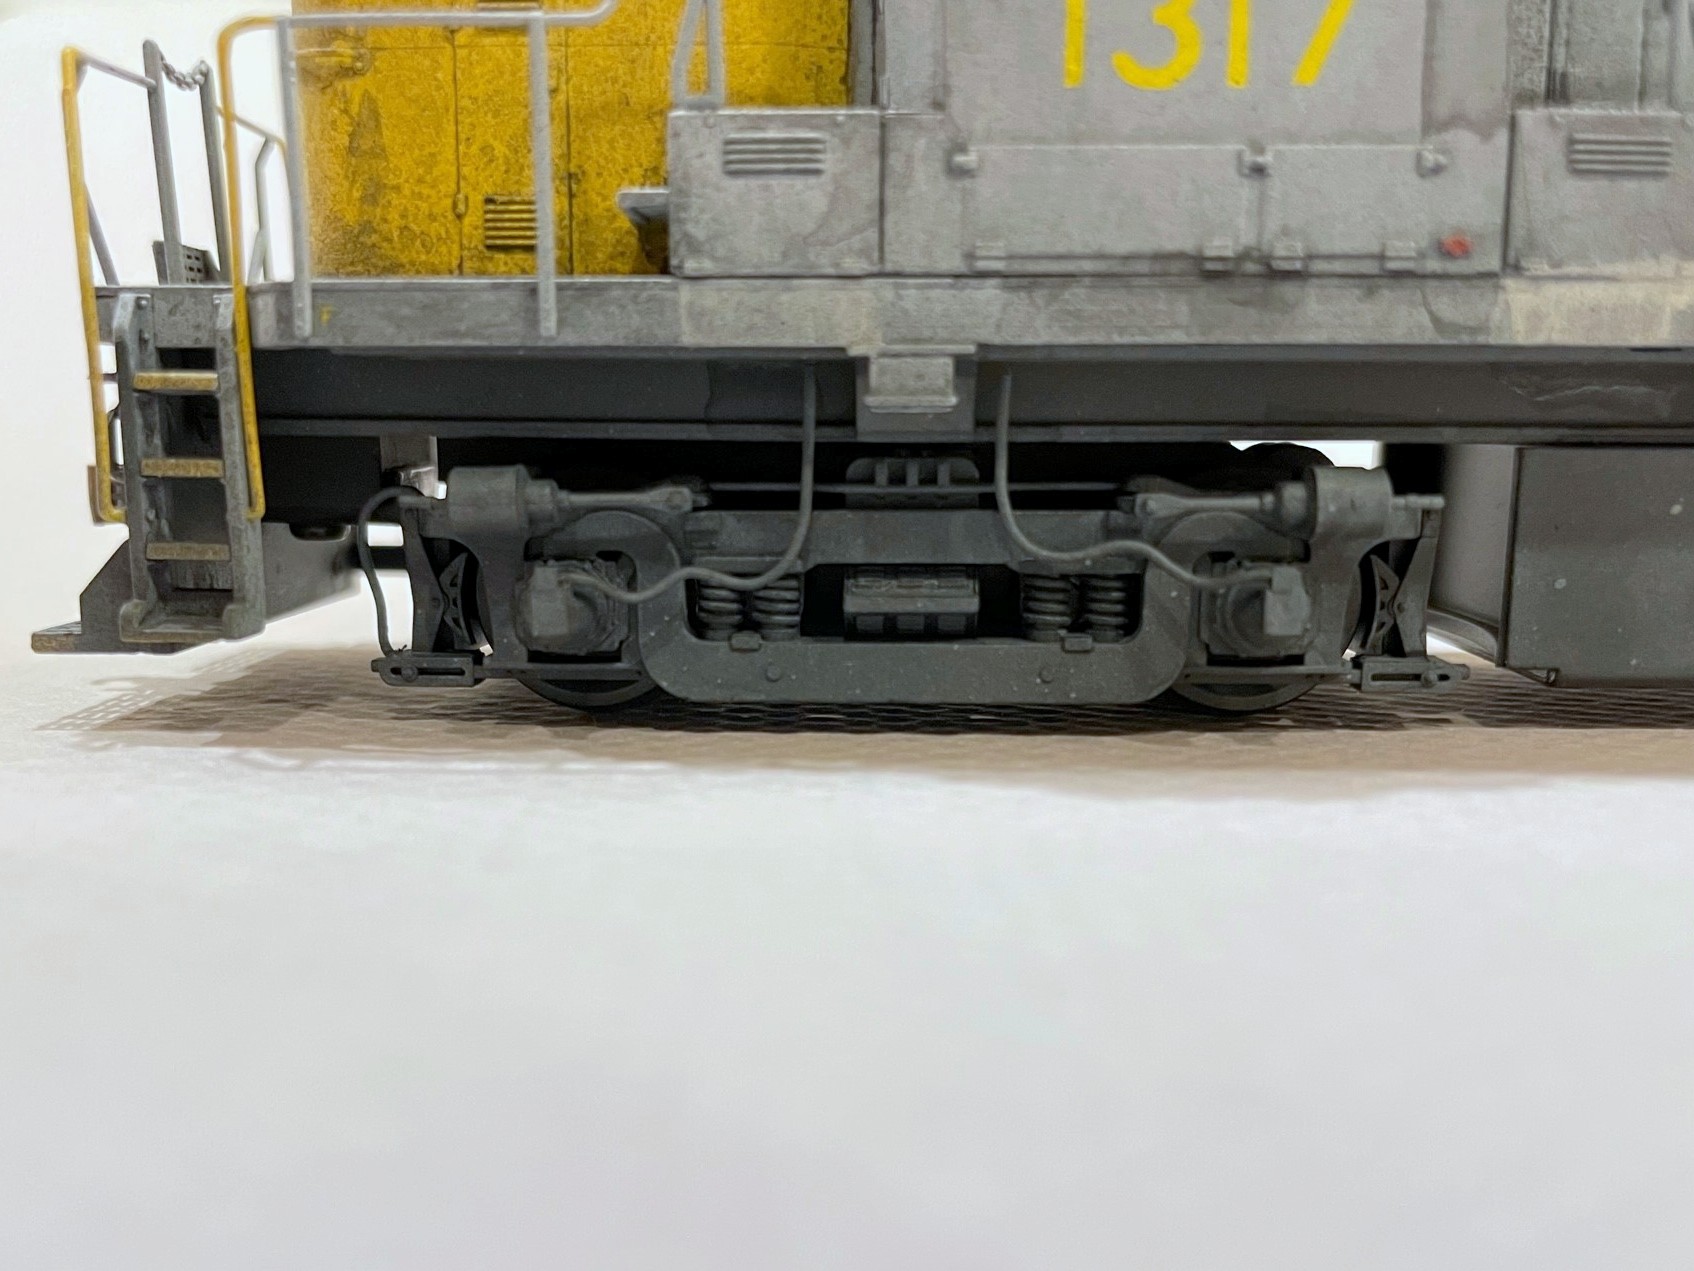
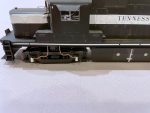
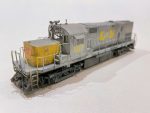
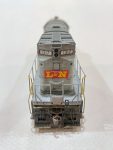
Weathering on this unit, as you can see, is substantial–these units worked the coal fields, and baths are few and far between. Besides, part of an Alco’s charm is it’s ability to spew oil and black smoke everywhere. Working from photos, I started with the oil seeps on the engine doors–these are mostly around the bottom, but in two photos from 1974, an entire door on 1317’s left side was covered in oil, so I modeled this. I used watered down flat black paint, alternately dabbing paint and water to get the consistency right and wiping in a vertical direction between coats. Next came several black washes of water with some black paint mixed in. I brush it on in a section, wait 30-60 seconds, then wipe in a vertical direction to simulate grime streaked by rain. The trick is to do multiple light coats until you’re happy. A little drybrushed sand color under the battery boxes finished the preliminary weathering.

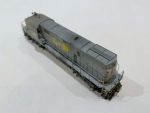
I left the handrails off until I was ready to airbrush. Airbrushing consisted first of some tan sprayed heavily on the pilots, trucks and fuel tanks (with the air reservoirs now mounted). Next came flat black primarily on the roof–moderate in most areas and thick around the exhaust stack. Finally, I used a little rust on the pilots and roof to give it just a bit of a rusty brown look. All that remained at this point was to reassemble everything, including the cab glass that had been removed earlier, and add a set of A-Line windshield wipers painted silver.
Overall, I’m very happy with how 1317 turned out, though I think I overshot the weathering a little. The unit was repainted in 1974, and I was shooting for weathering circa 1976. I think I nailed the weathering circa 1978, but it’s still a pretty realistic representation of how filthy these Alcos got in the L&N’s coal fields during the coal boom. This is also the first Alco I’ve ever finished, so I also enjoyed the challenge of making so many details from scratch. The unit came with factory sound by Loksound which does a great job of replicating the lumbering burble of the Alco 251 prime mover, so she’s a blast to operate! I’m just happy the CV Local finally has a finished L&N unit to head it up which should make the next ops session more fun.