Today I upped the operations realism a couple notches on the St Charles Branch by adding fast clocks!… Ok, with only half the tracks built and with only one partial operating session under my belt, it doesn’t take much to up operations several notches at this point, but the fast clocks are still really cool! While fast clocks are an important part of operating layouts, I was surprised at just how few good options are out there, especially for analog fast clocks. There are digital options available that work with your DCC system (nice feature), but modeling the ’60s and ’70s, I felt a digital clock display would be too gross an anachronism, and I’m working hard to transport operators back in time when they’re on the layout. I even played around with creating my own “analog” fast clock using MS PowerPoint which actually turned out pretty good for what it is–it works, but it was never intended to be a permanent solution. Feel free to download the “Poor Man’s Model Railroad Analog Fast Clock” (below) and play around with it–it will function somewhat online, but it works much better if you download it. You can read more about it and download a digital version as well here.
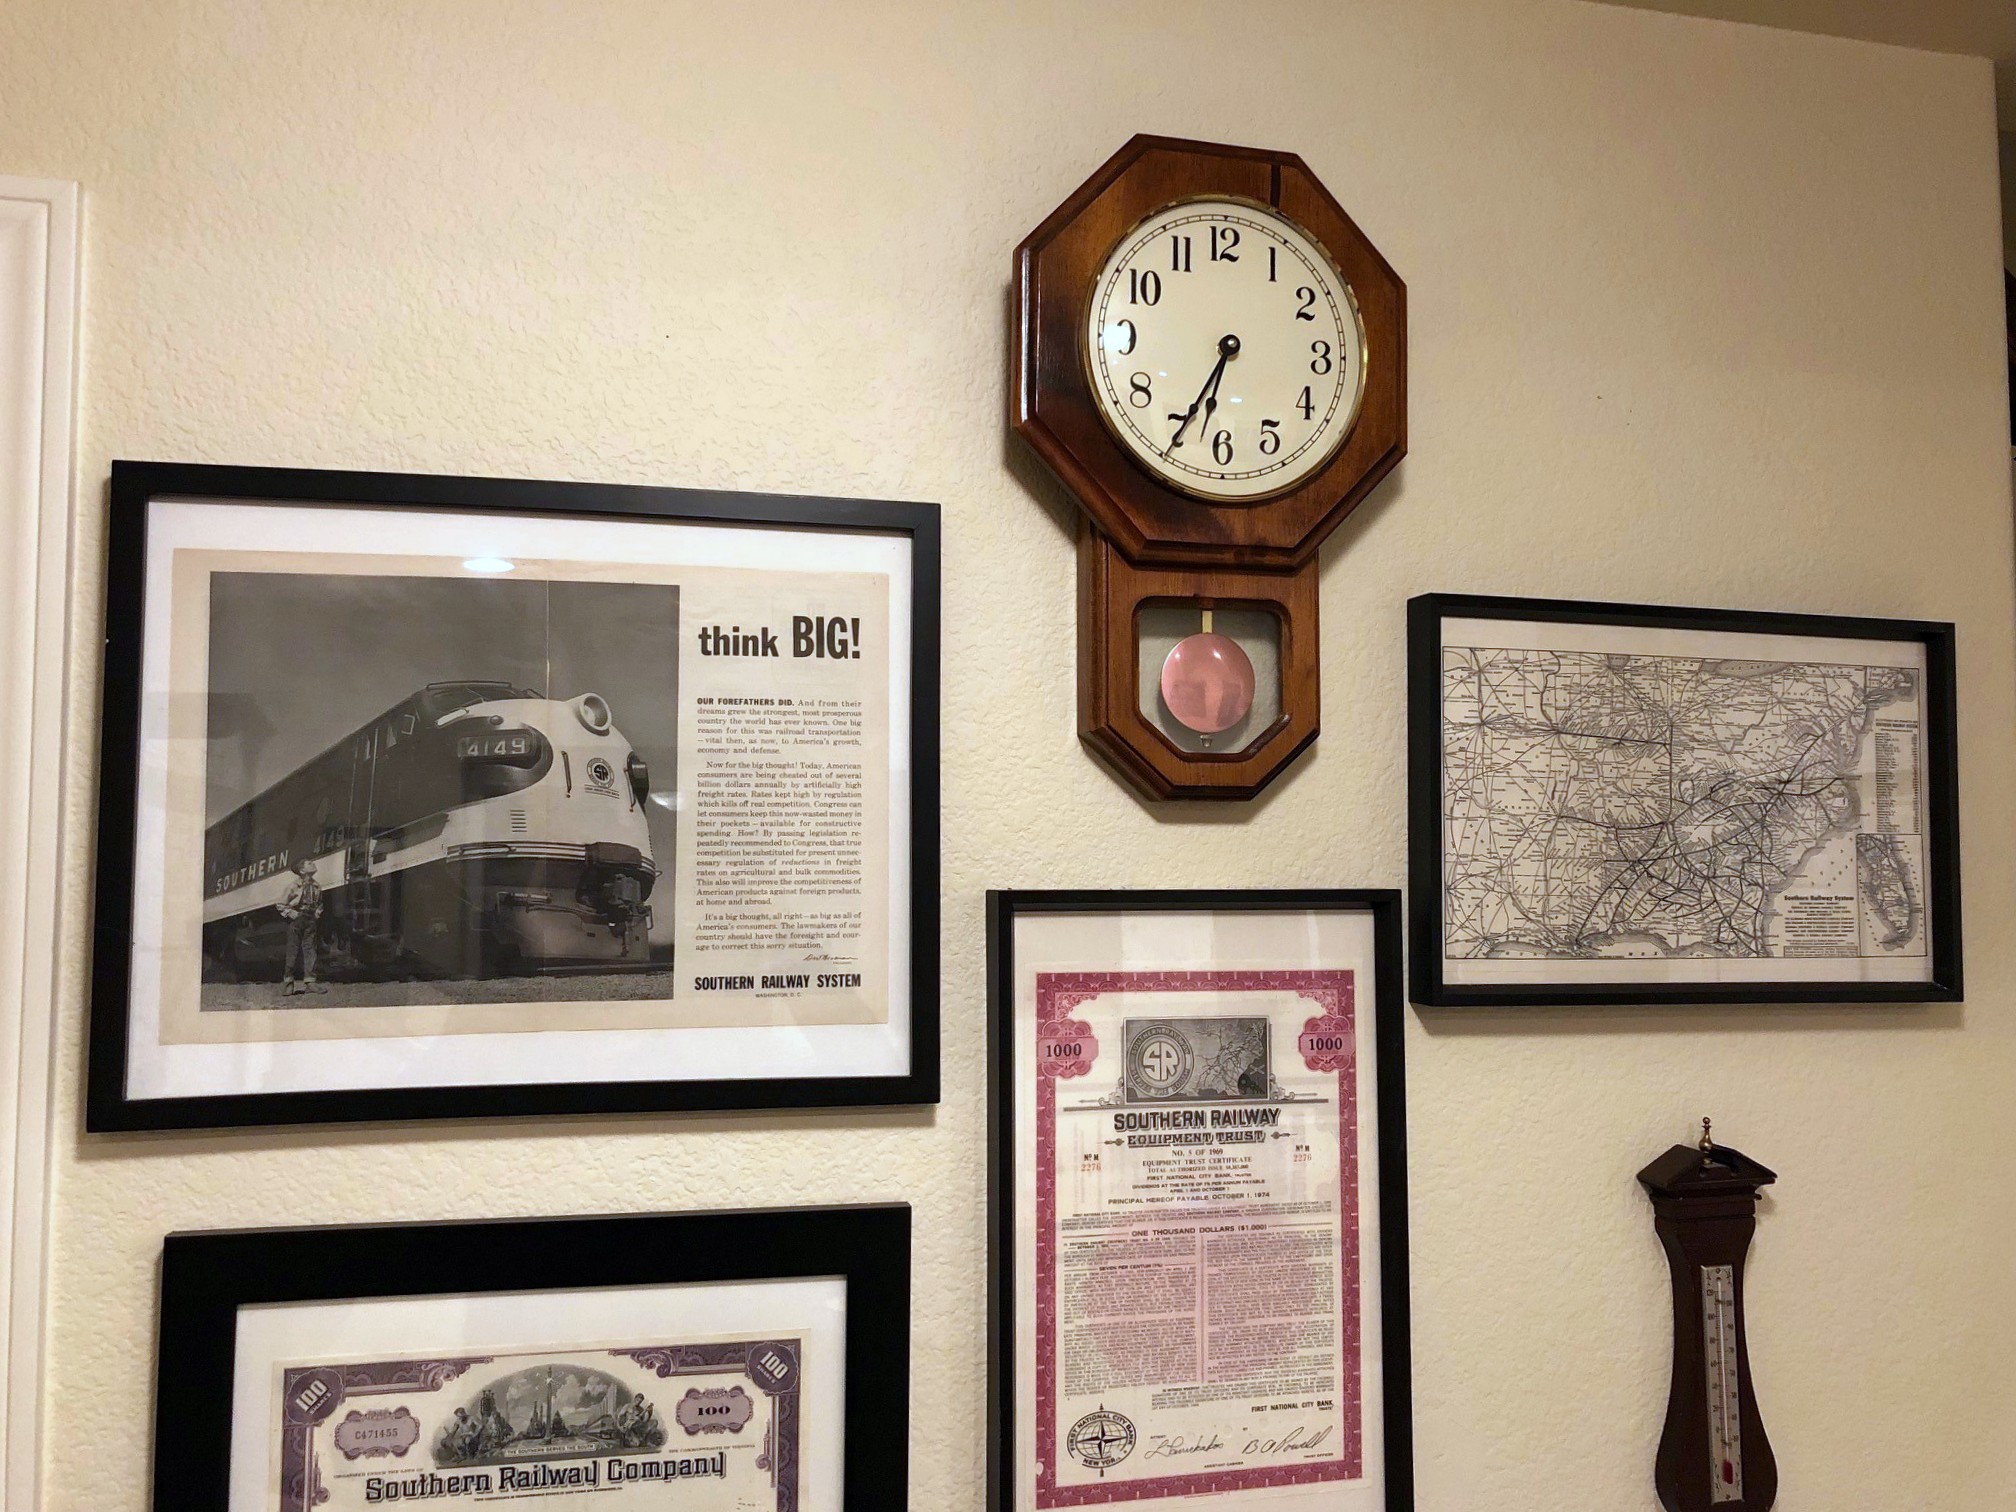
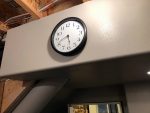
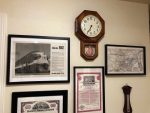
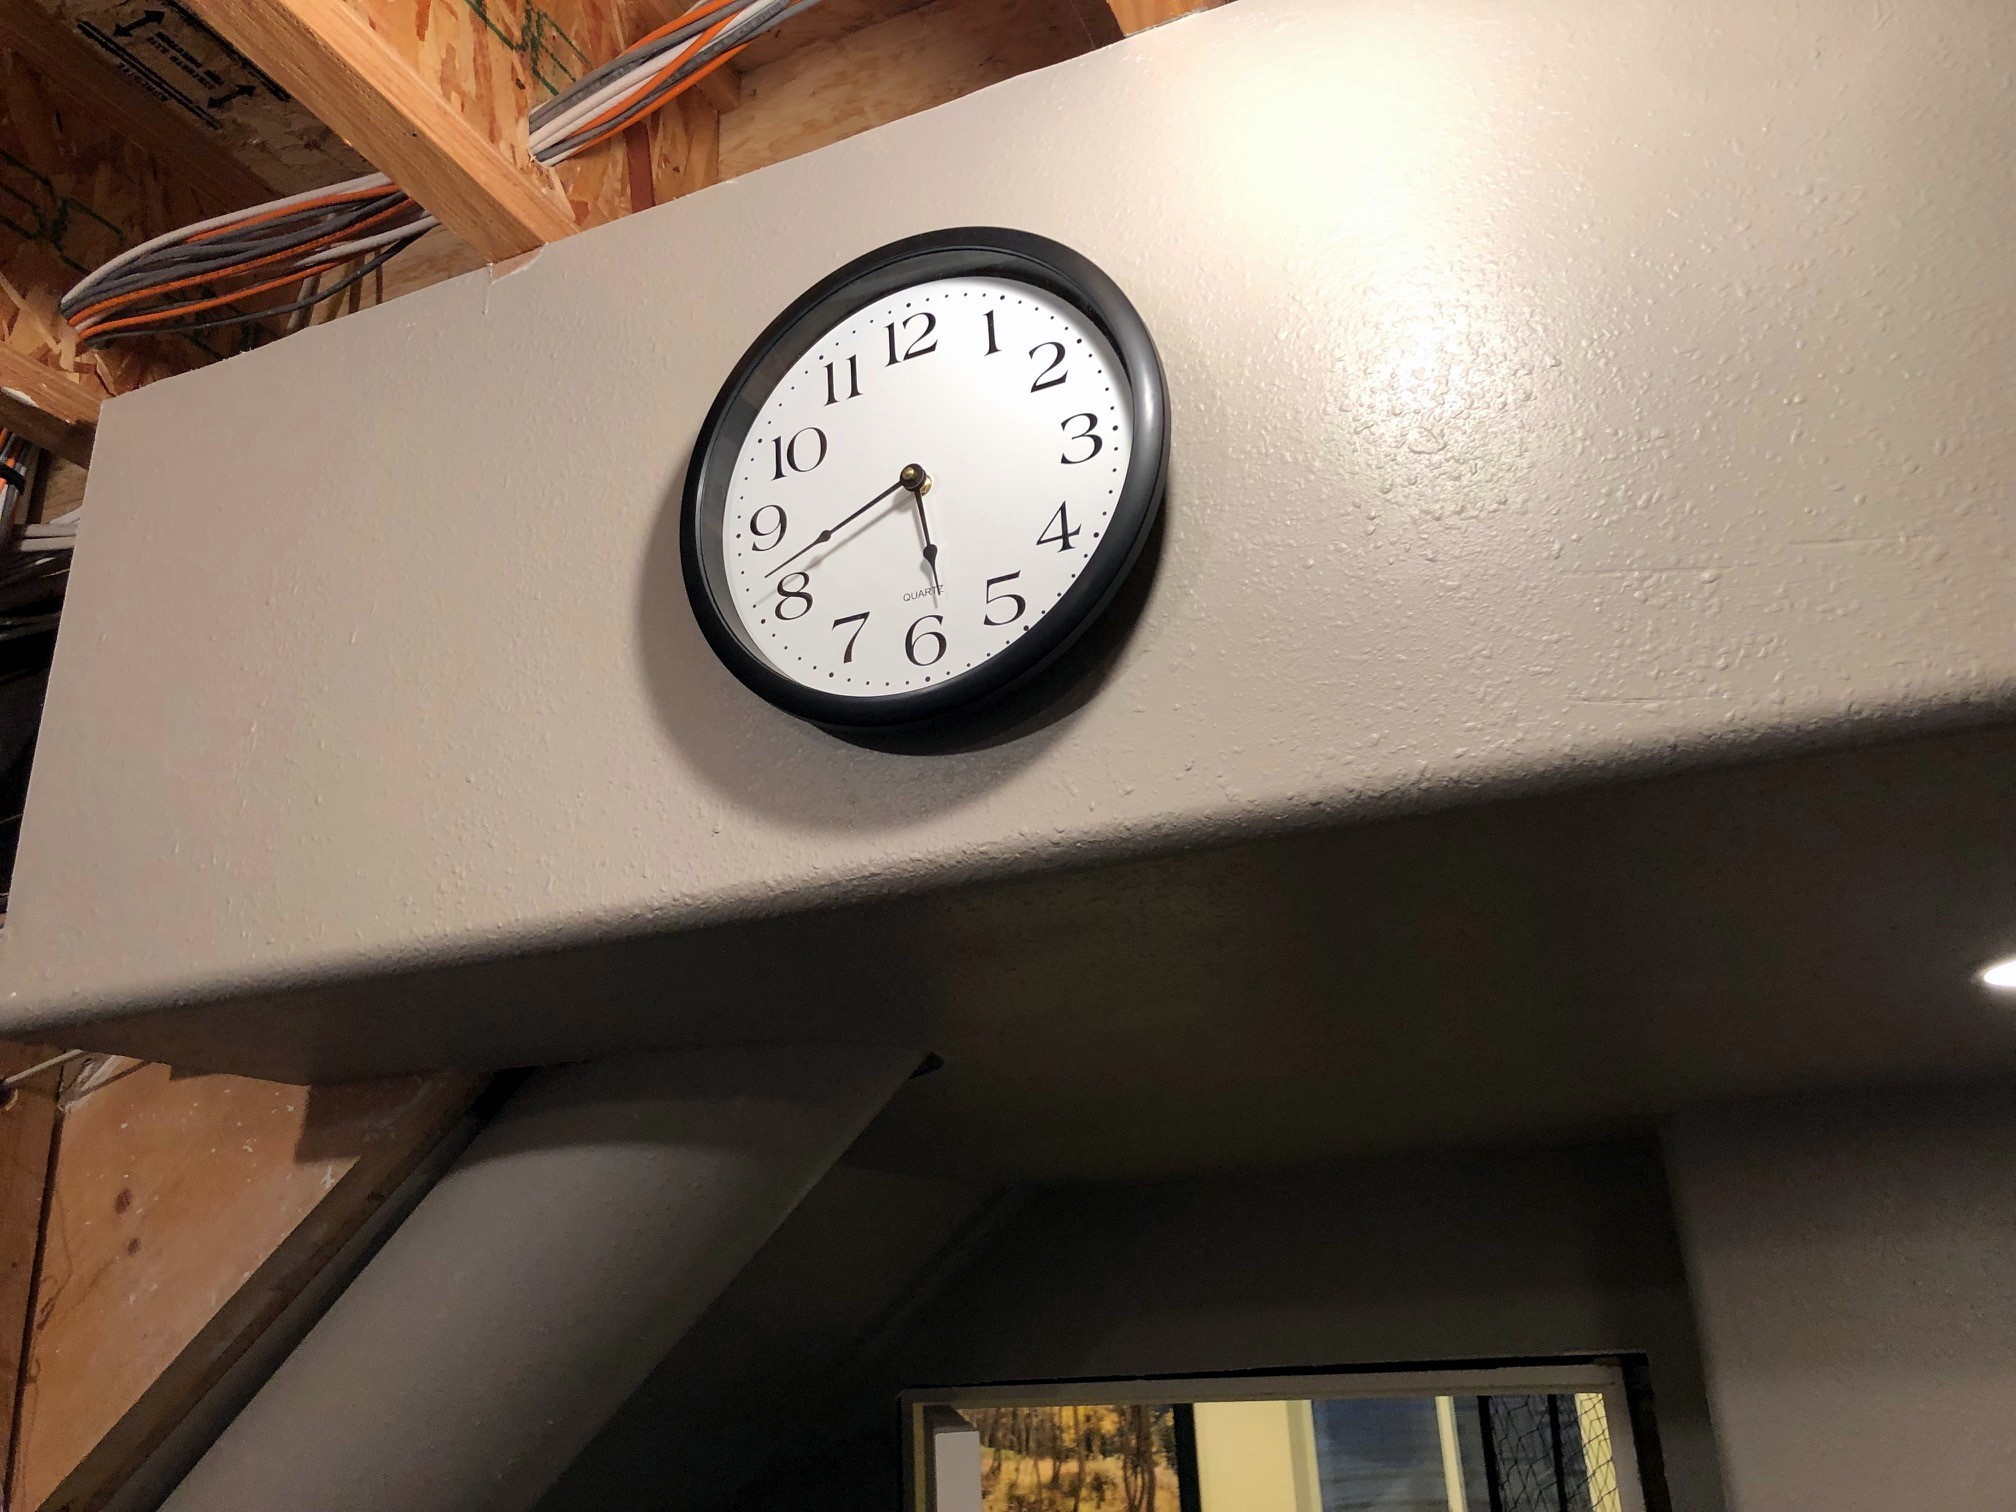
For the real solution, I needed a way to have multiple physical analog clocks all synchronized with an adjustable fast-clock ratio. I narrowed it down to two systems. The first was a WiFi system that offered both digital and analog clocks, but it was limited to a single style of analog clock, and I don’t really need MORE radio frequency waves in my house. In the end, I opted for Mike Dodd’s FCC4 fast-clock system. The FCC4 consists of a control board, three simple switches (run/stop, advance, and reset), and as many clocks as you need running off a two-wire bus. What intrigued me most was how Mike implemented the analog clocks–YOU buy the clocks, and he supplies the replacement mechanisms that will fit in just about any wall clock you can buy today. That feature enabled me to buy a clock for the layout room that had the style I wanted, AND it allowed me to convert a “Regulator” style clock made by my wife’s grandfather into a fast clock for the crew room (i.e., the rec room adjacent to the layout).

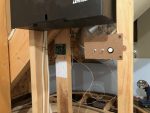
You can save some money by buying the kit version and assembling it yourself, but I decided to buy the assembled and tested versions of the controller and clock mechanisms, and everything worked like a charm (so refreshing in this day and age). I just needed to swap out the two clock mechanisms (a fun 30-minute project), add a few switches, and run several wires. Installation of the wires through the walls was the most difficult part of the project, but even that was pretty straightforward. In the end, I now have two fast clocks set to a 4:1 ratio that I can turn on and off, advance at a 17:1 ratio if needed, and reset to my session’s start time (5:30 AM for now) easily, and if I ever expand the layout into the spare bedroom next door, I just need to run a couple more wires and buy another mechanism to have another clock. I mounted the control board on a stud inside my helix space where it will be hidden from sight but easily accessible via a short crawl for troubleshooting or adjusting the ratio. The controls are on a temporary board for now–I’ll eventually install them in a recessed portion of the upper-level fascia to keep the switches away from little hands and wayward elbows.
If you need an analog fast-clock system, I would definitely check out the FCC4! Not only is Mike Dodd very responsive to questions, but he’s also a model railroader himself, so he’s designed this system from the perspective of an operations-oriented layout owner. I’m looking forward to my first operating session using the clocks where the times on train orders are more than just numbers on a piece of paper!