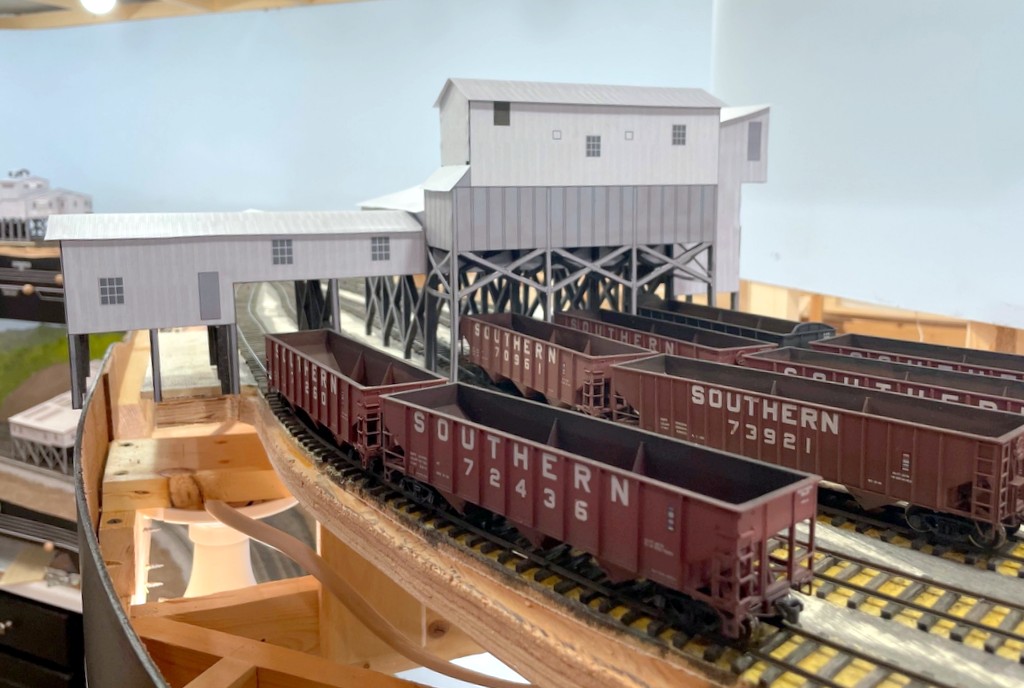
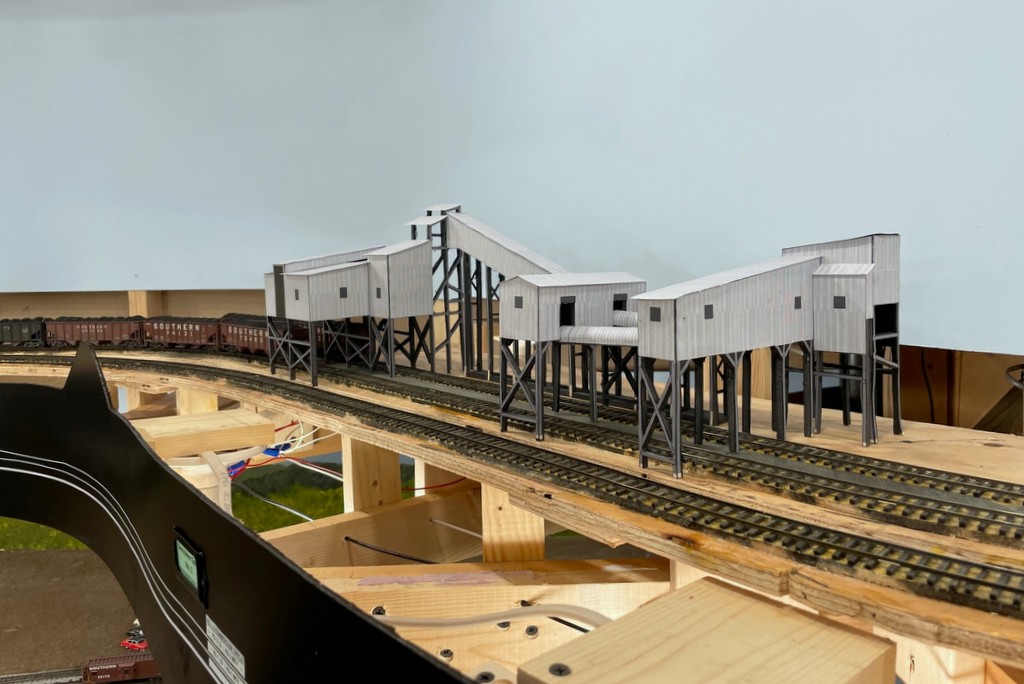
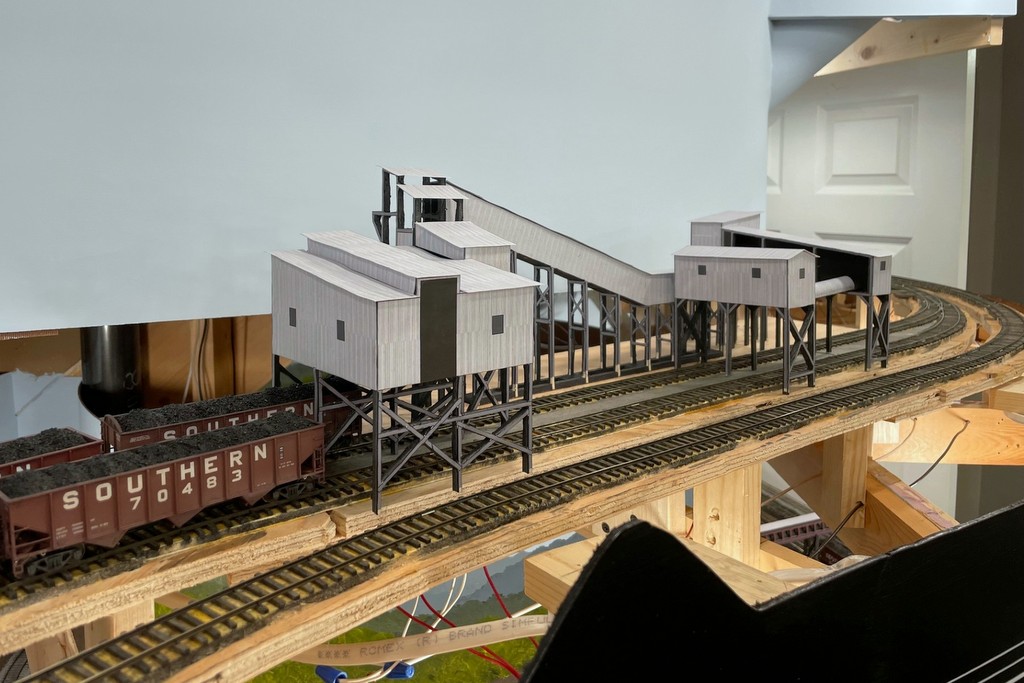
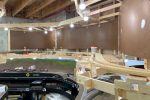
Empty hoppers spotted above the back of the Benedict tipple mock-up. Monarch can be seen in the background
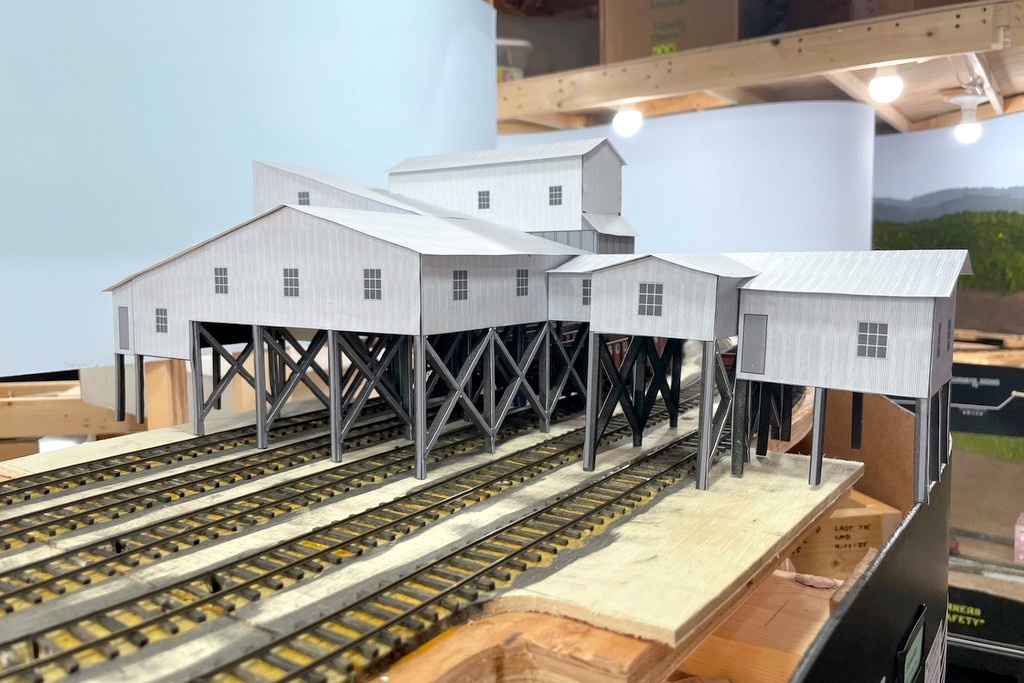
I added my last two mock-ups for the major tipples on the St Charles Branch that I’m modeling – Monarch and Benedict. These were fun because they’ve got so many angles and parts to their structures. They were also challenging to design because photos are hard to come by, especially for Benedict. I ended up taking a lot of guesses based on blurry aerial photos for the sides not covered by photos. Still, I think they’re credible representations and will help me get the scenery base right for the scenes. They’re also a lot more fun to switch than bare plywood!
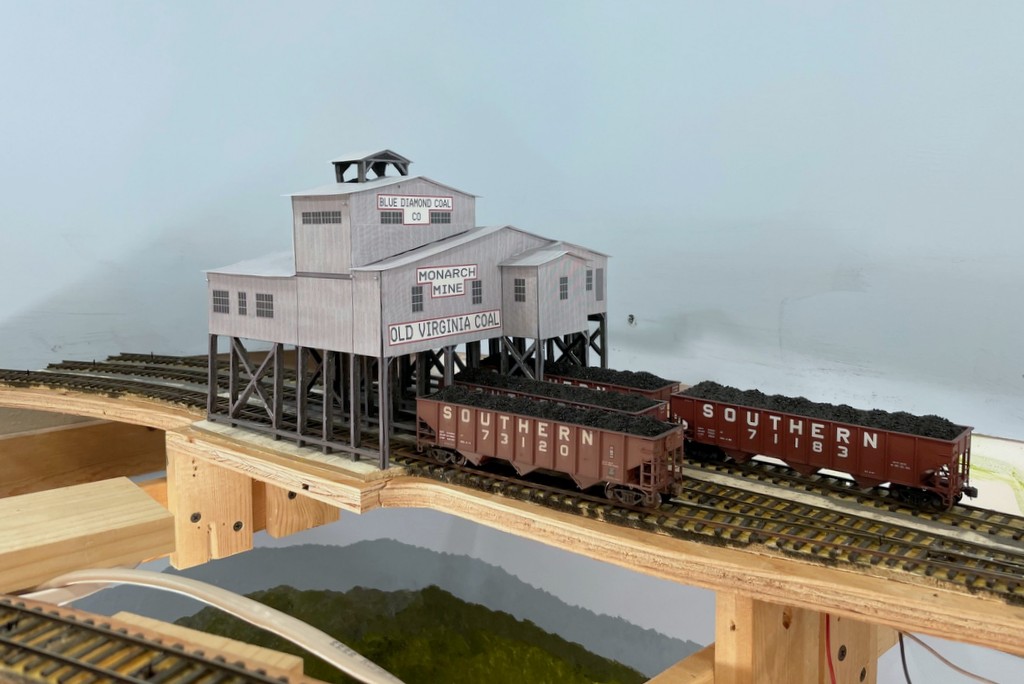
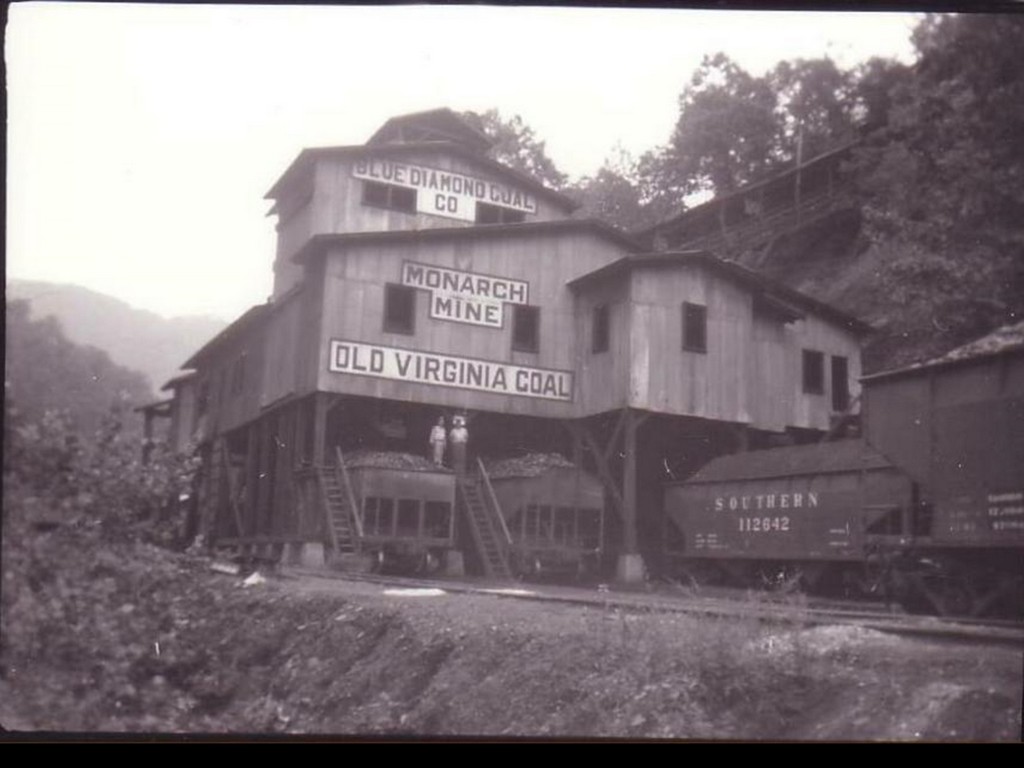
In-progress Monarch tipple mock-up showing the stiltsHere’s the Monarch tipple mock-up in place at the end of the branchOld photo of the Monarch Tipple when it was still in operation
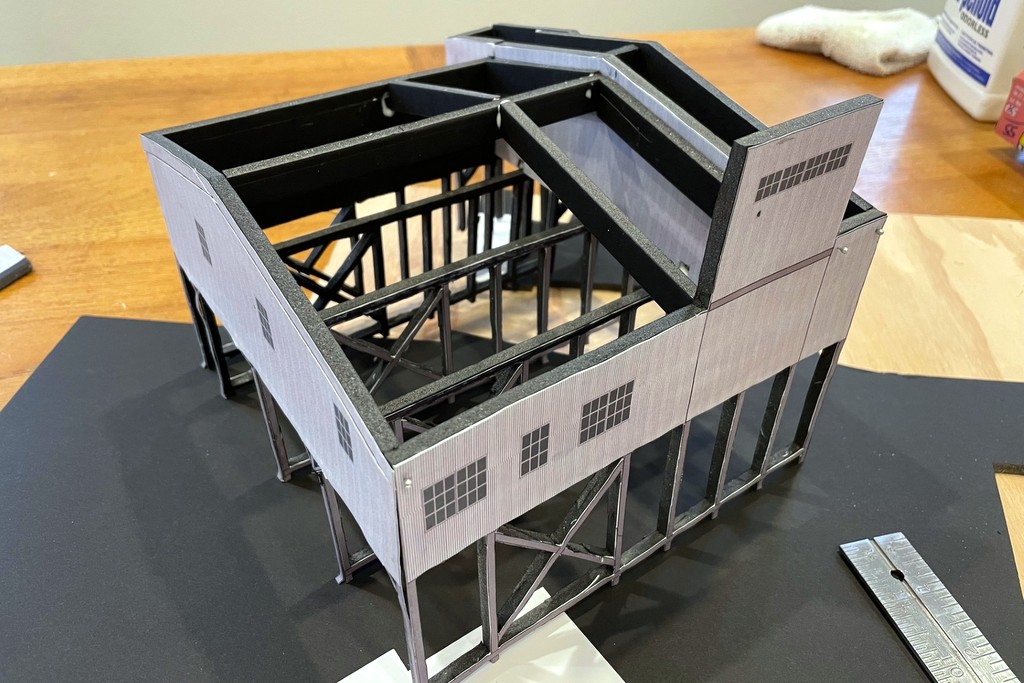
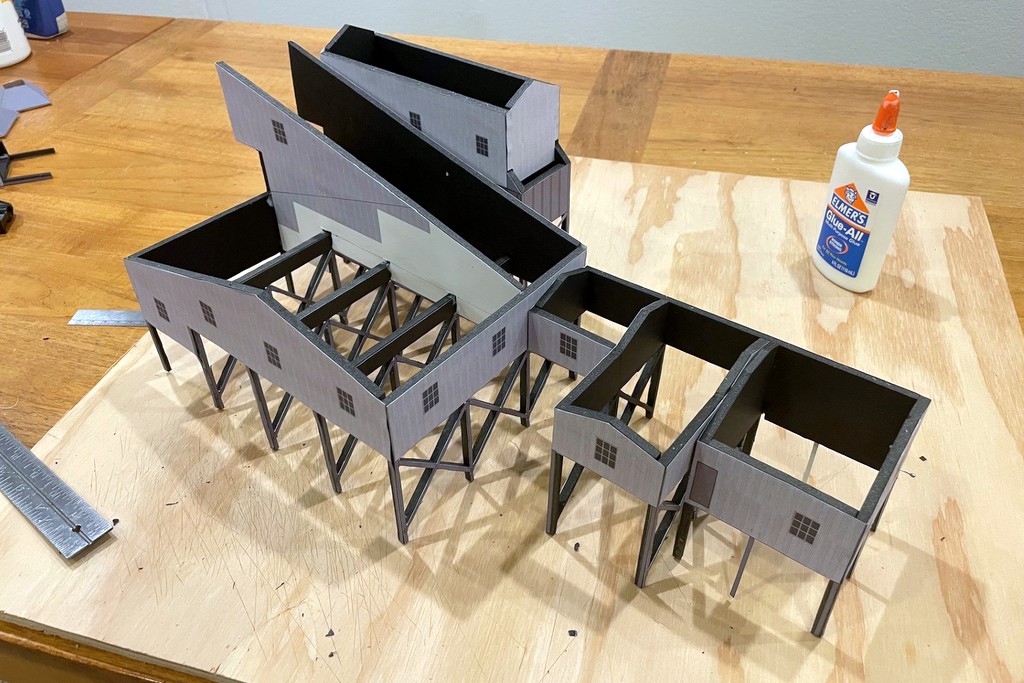
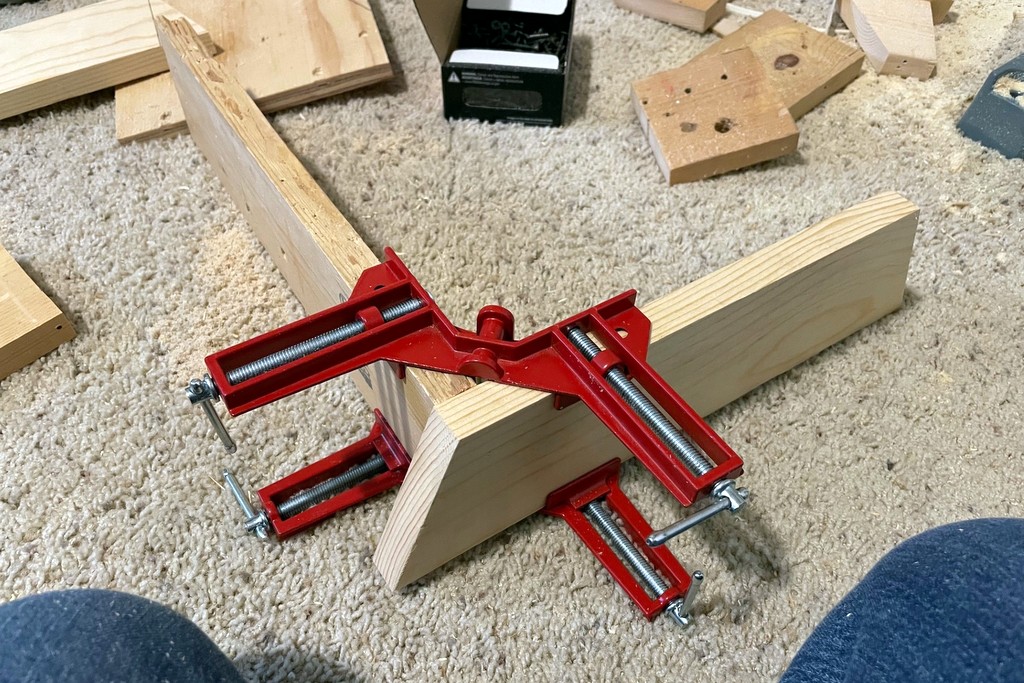
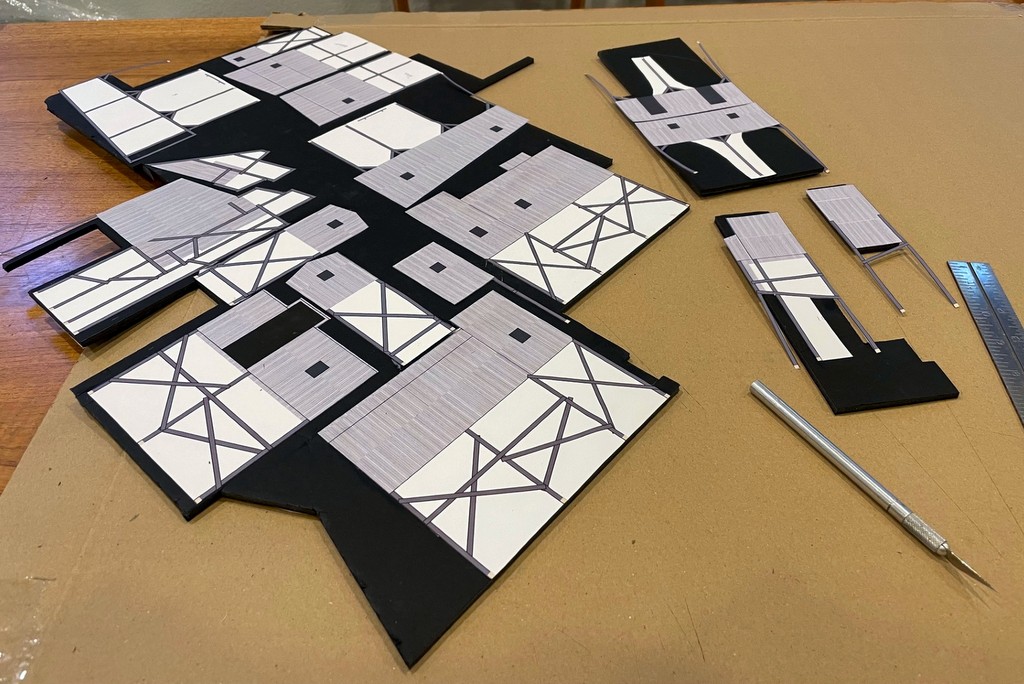
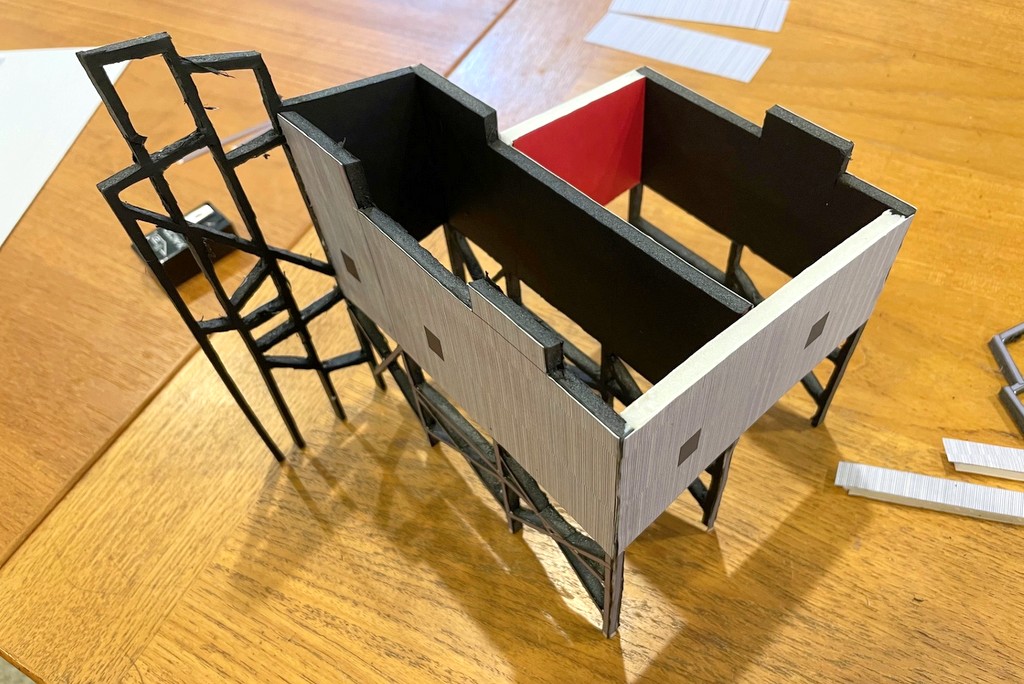
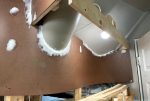
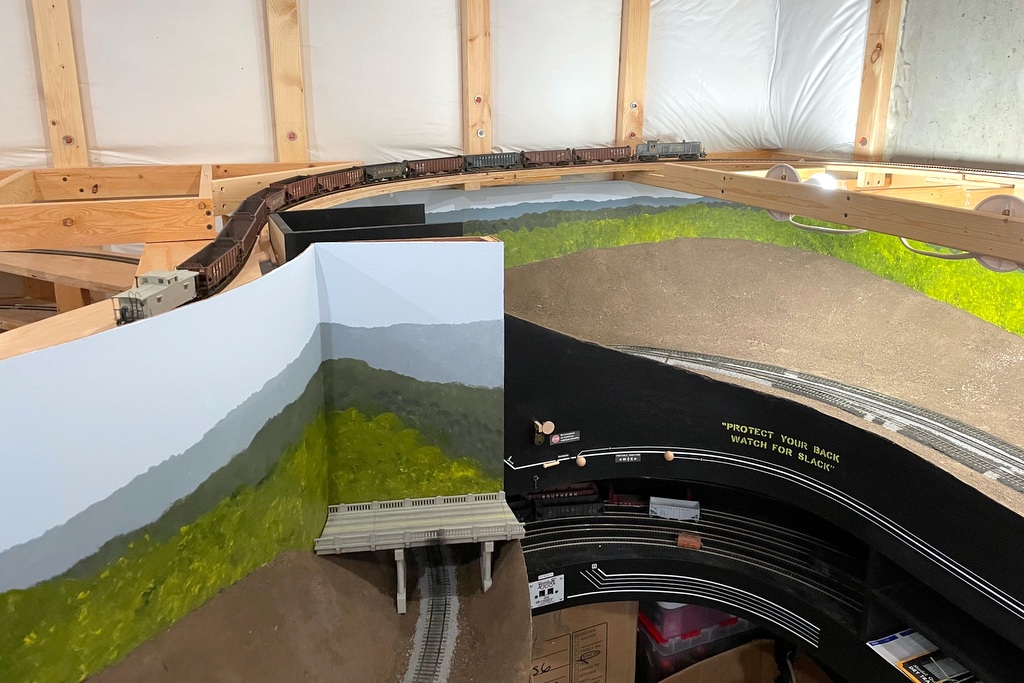
One of the pictures illustrates one of the reasons for doing mock-ups. I thought I measured well, but it turns out I designed the Benedict tipple too wide, so the end goes into the aisle about 3/8″. Seeing that here with the mock-up allows me to adjust my “blueprints” (drawings in PowerPoint) to compress the structure back on the table which is a lot easier than putting in new fascia or moving the subroadbed. I’ve covered how I make these in past posts, but the basic process is to create an HO scale line drawing in PowerPoint based on photos, add some texture to the drawing (corrugated siding, windows, signs), print them on card stock, glue them to black 1/4″ foamcore, cut out the holes in the supports with an X-Acto blade and metal straightedge, and assemble them with white glue.
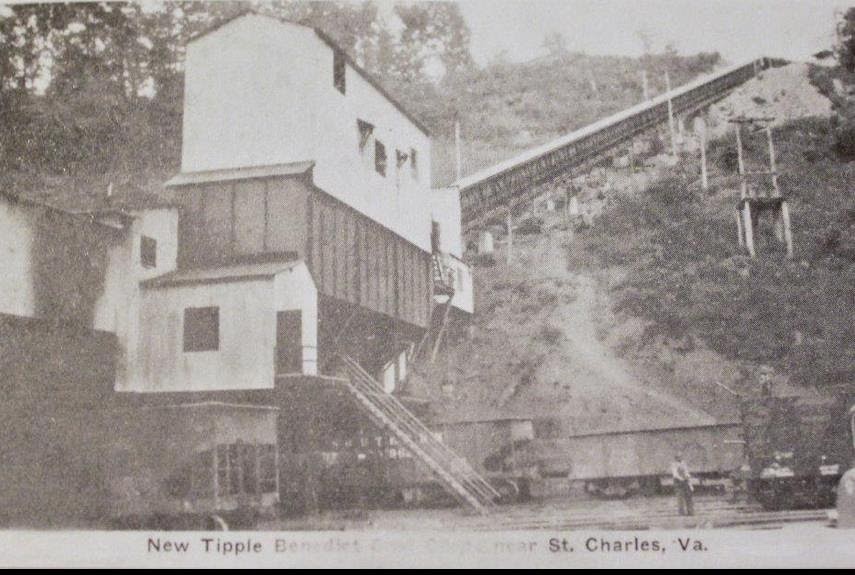
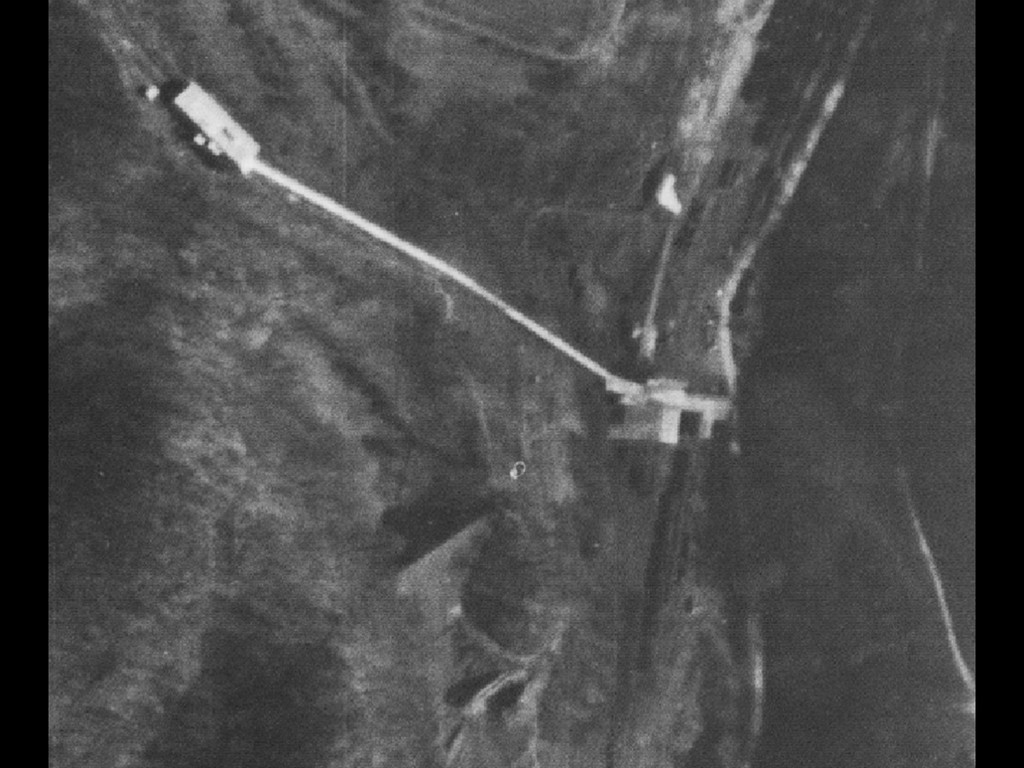
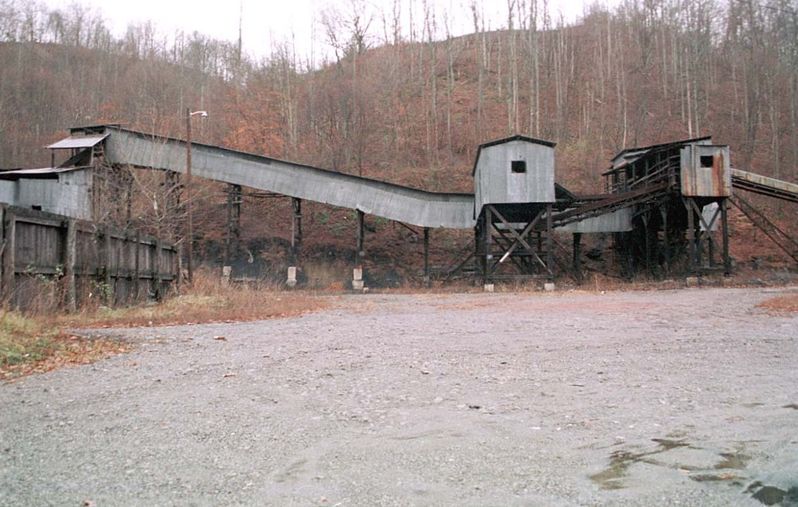
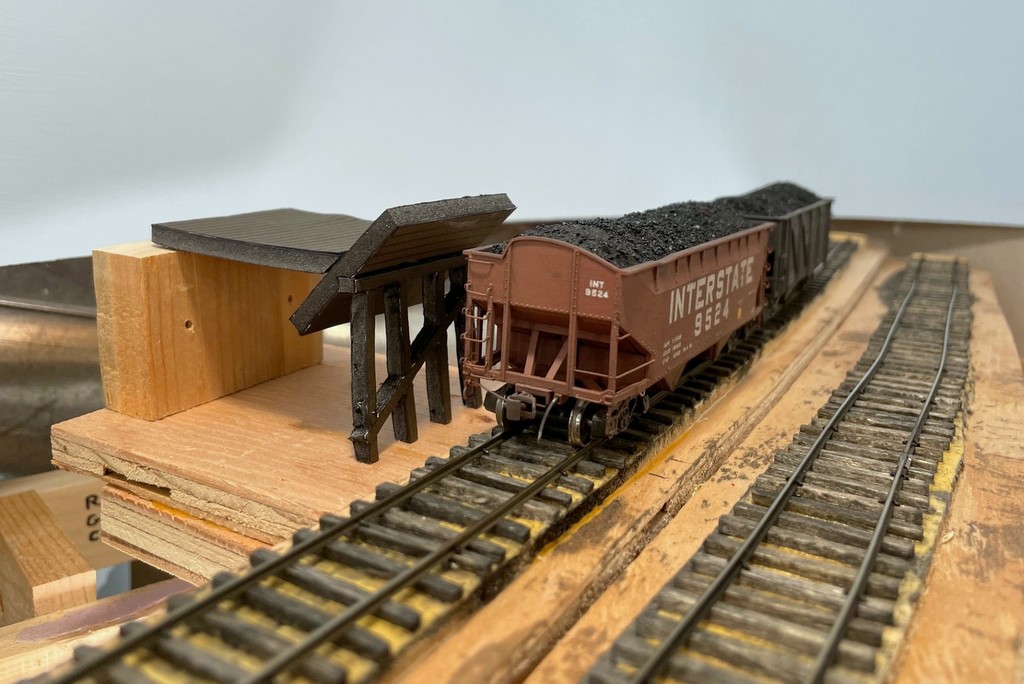
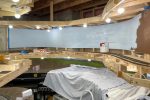
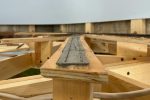
The Benedict tipple mock-up is the most complex I’ve made to date with all the angled bracing and building componentsFront view of the Benedict tipple mock-up looking toward the end of the branchThis is the only photo of the Benedict tipple I’ve been able to findThis aerial shot of Benedict tipple from the 1950s shows its basic layout
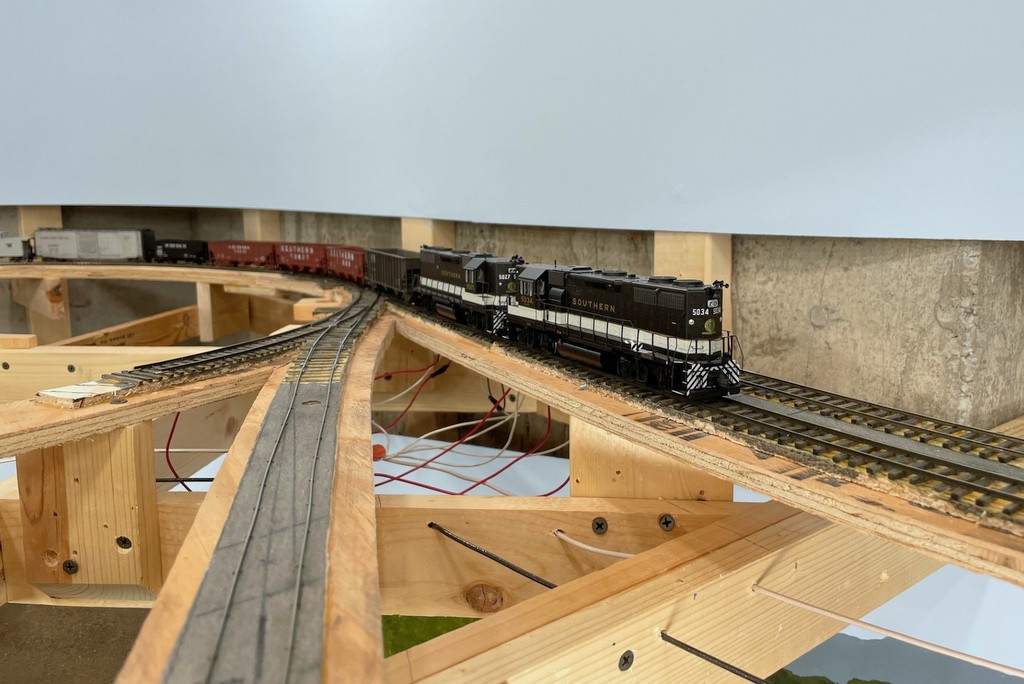
The golden spike halfway inserted and ready to be driven home
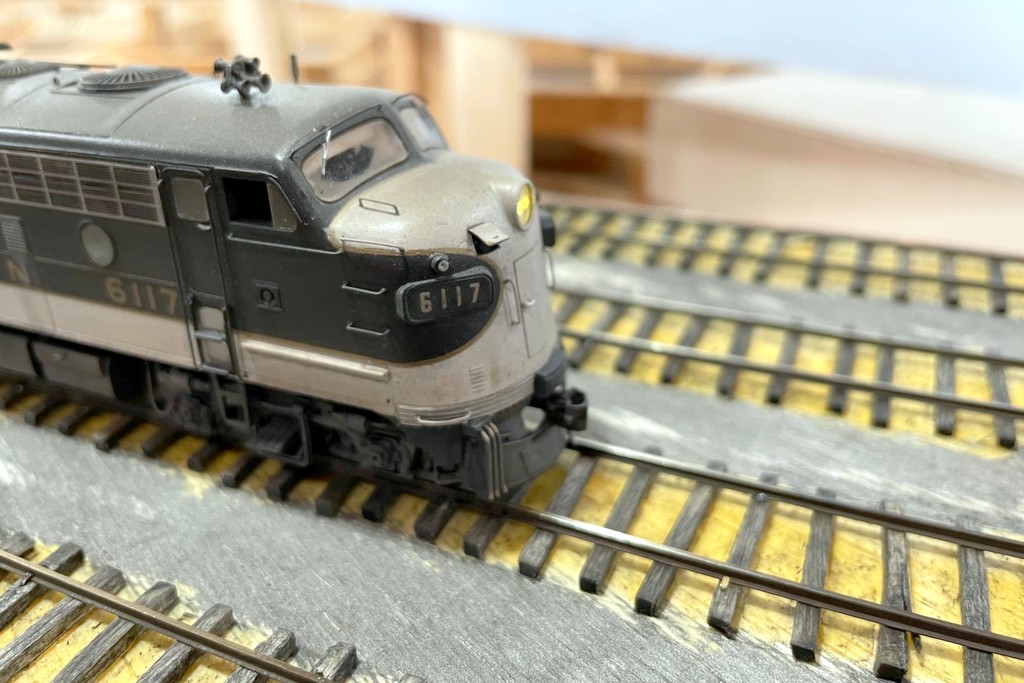
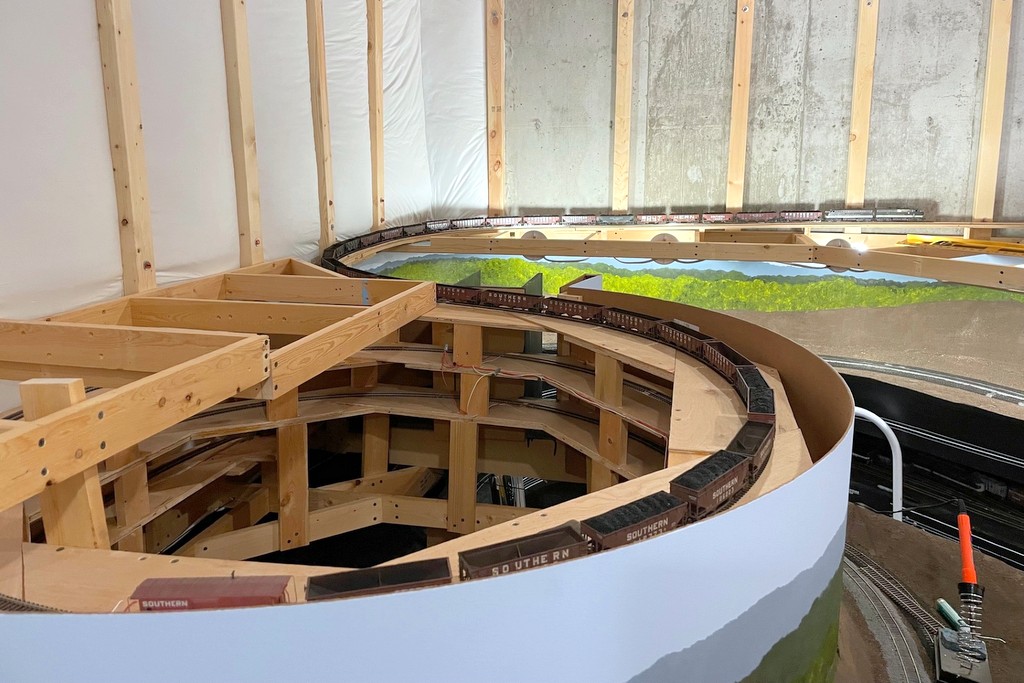
I just passed a major milestone on the St Charles Branch–the trackwork is complete, and the golden spike is in! The final section was the stub tracks for the Benedict loader, so once the last track was installed and working, I put in a literal golden spike at the end of the line to mark the occasion. Of note, this particular spike, now painted gold, is one that I recycled from my previous layout (the Dorchester and Dixiana Branch), so it’s now pulled duty on both of my layouts. I brought Southern F& 6117 in to witness the final spike as it was doing its test run on the new track. I also commemorated the date on my benchwork like I’ve done for other milestones.
The installed golden spike (just in front of the F-unit) is noticeable but isn’t obtrusiveLike other milestones, I captured this one in Sharpie on the benchwork – in this case in fitting gold ink
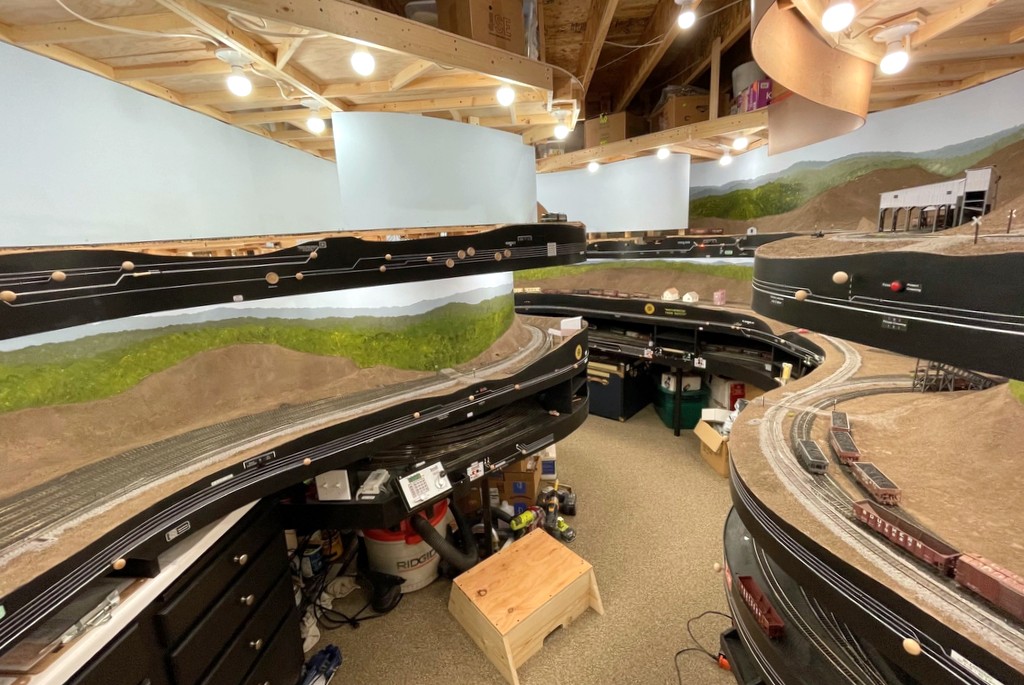
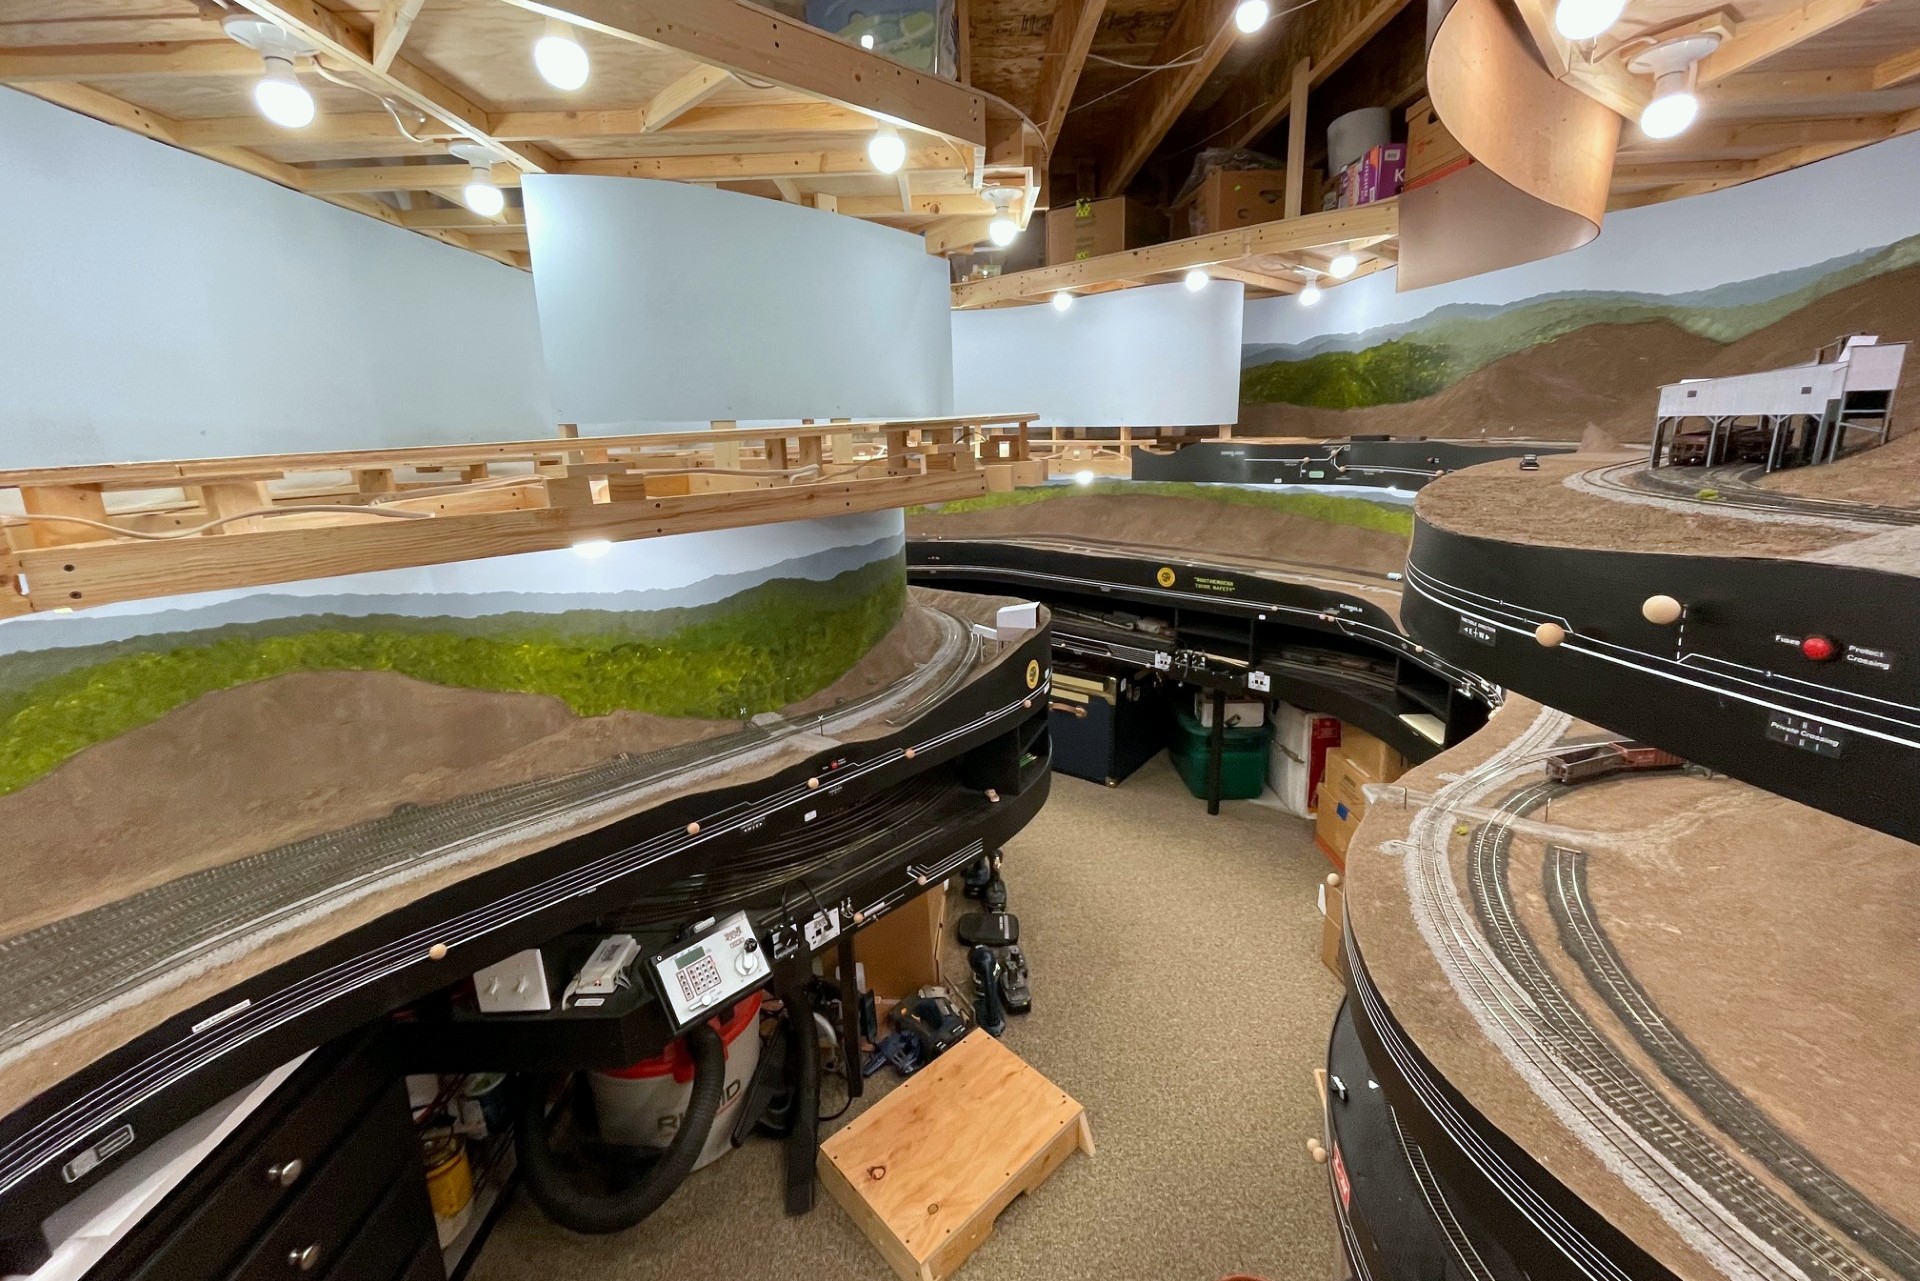
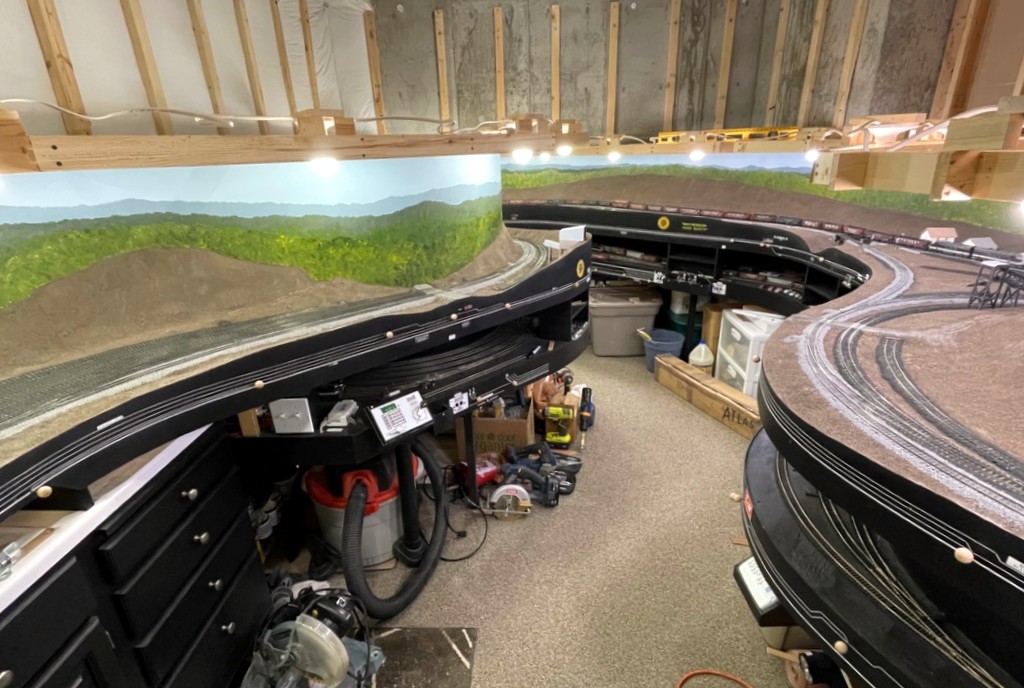
I must say this is a bit bittersweet. It’s exciting because I can now move on to scenery and starting to flesh some scenes out, but it’s sad because I rather enjoy hand-laying track. Maybe there’s a phase 2 in the future, but I hope it’s not so far off that I forget how to do this. In the meantime, here’s a couple overview shots of what the layout currently looks like.
Here’s a look at the layout’s current state from the doorwayAnother view from the aisle looking back at the door
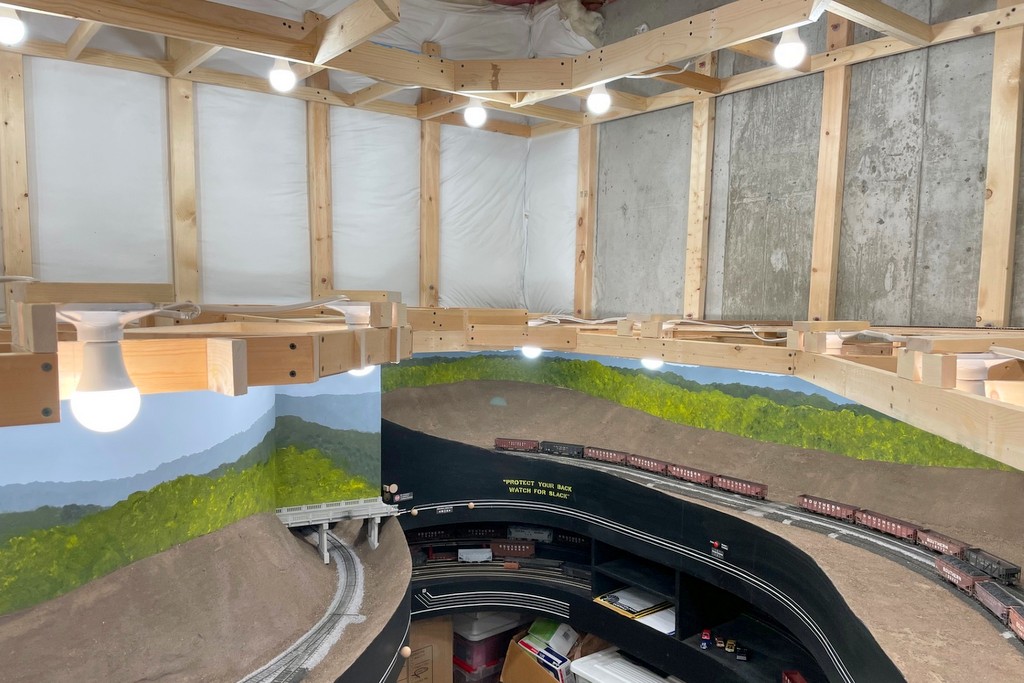
The installed and painted backdrops make the layout room look bigger because you can no longer see all of it from a single location
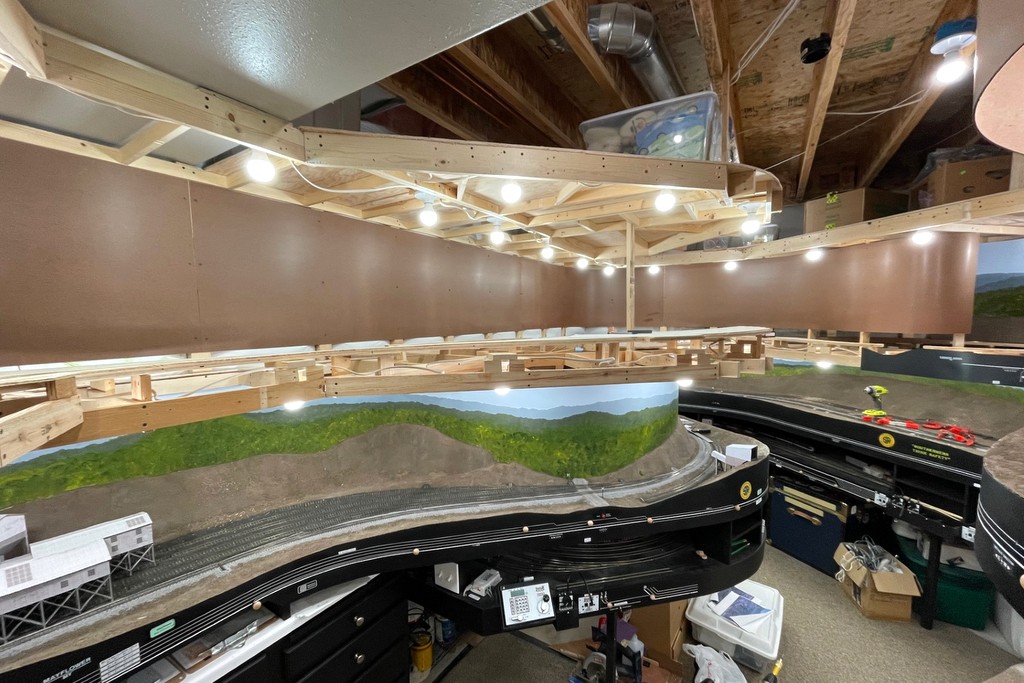
The layout room now looks very different because I’ve finally installed all the backdrops on the upper level. All unfinished areas are now covered (except the ceiling), and the sky blue paint makes the room look very bright. In addition to the backdrop around the walls, there’s a short backdrop atop the helix that forms the backdrop for the Benedict loader reached via switchback. I underestimated how much this would change the feel of the layout. Because it blocks the view across the layout, it makes the layout feel a little deeper because you can’t see it all from any one spot anymore.
With such a tall backdrop (24″), I secured the risers for the backdrop to the lighting valance and storage shelf above the upper level
I learned a trick for hiding seams in the hardboard by accident. Like all my other seams, I covered them the best I could with lightweight spackling compound sanded smooth, but it’s nearly impossible to get everything perfectly flat and even across both boards. It just so happened that all three joints in this section were right behind lights–with a light shining directly only the seam, there’s no shadow on any of the uneven joints making the seam a lot more difficult to spot.
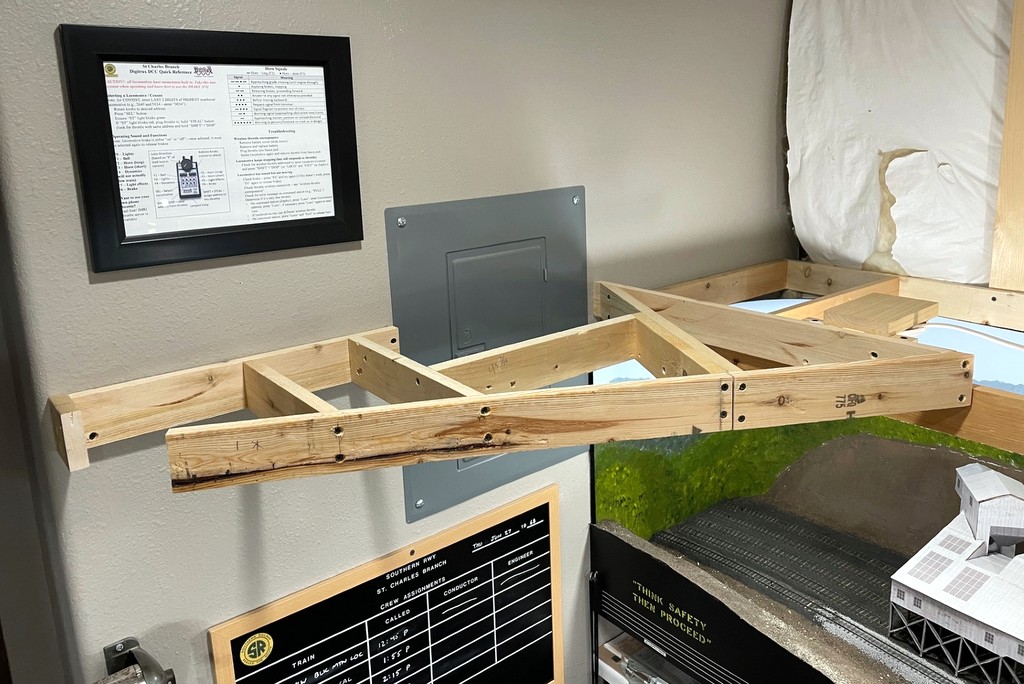
The next step is to build the last four bridge sections and put some DCC bus wires in place so I can start laying track in the final section. Exciting!
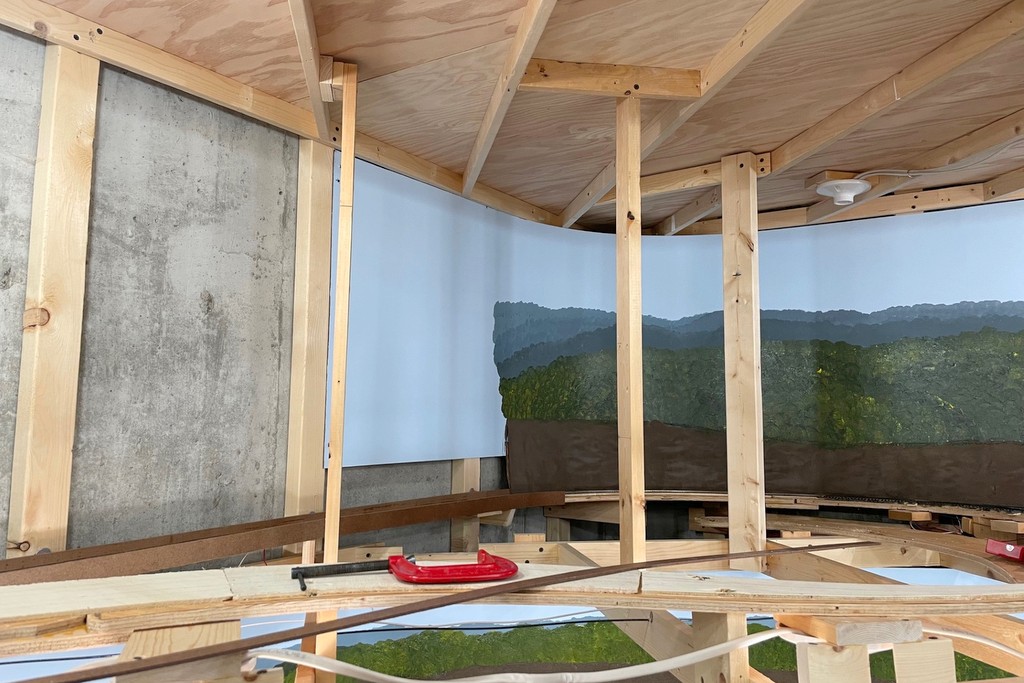
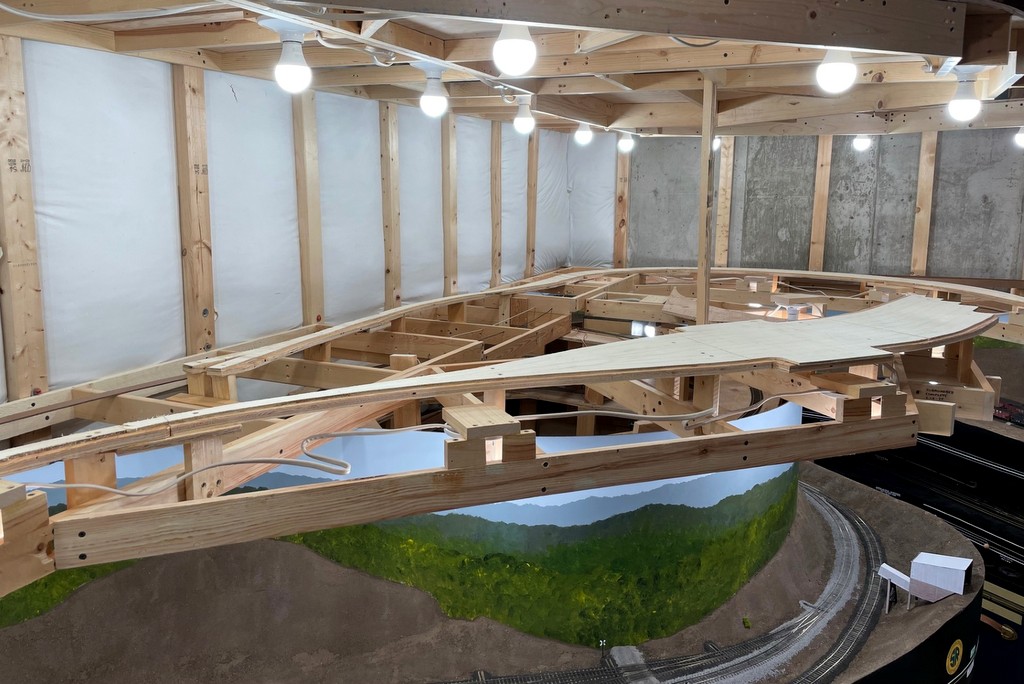
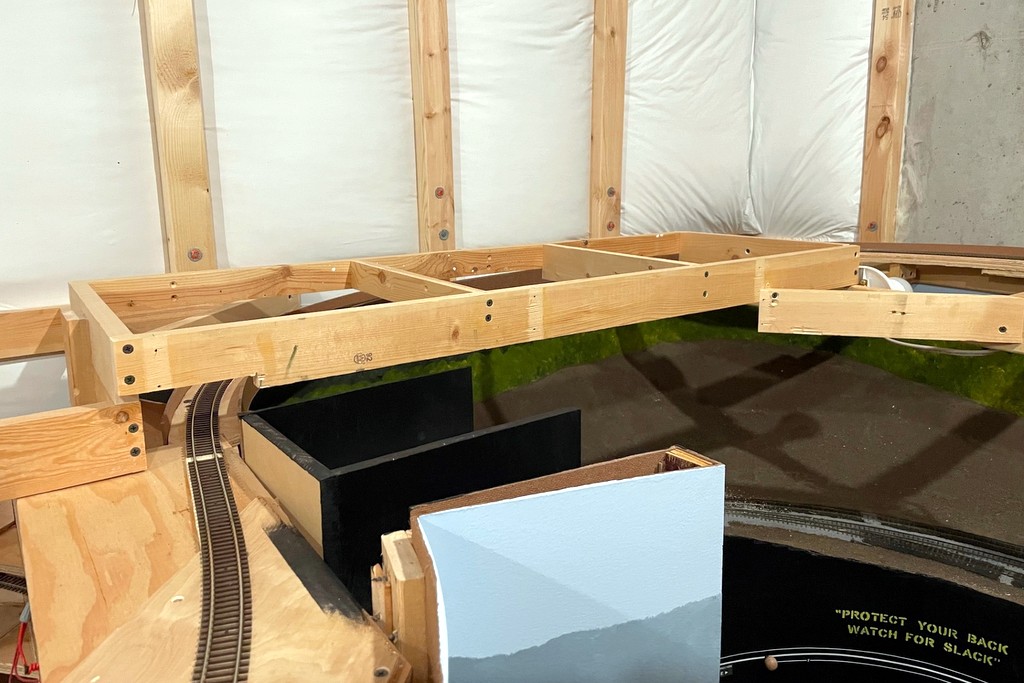
The raw backdrops of hardboard installed around the edges–all that remains in the backdrop along the peninsula
Here’s the last piece of subroadbed to be installed on the layout–it will hold the large Benedict tipple
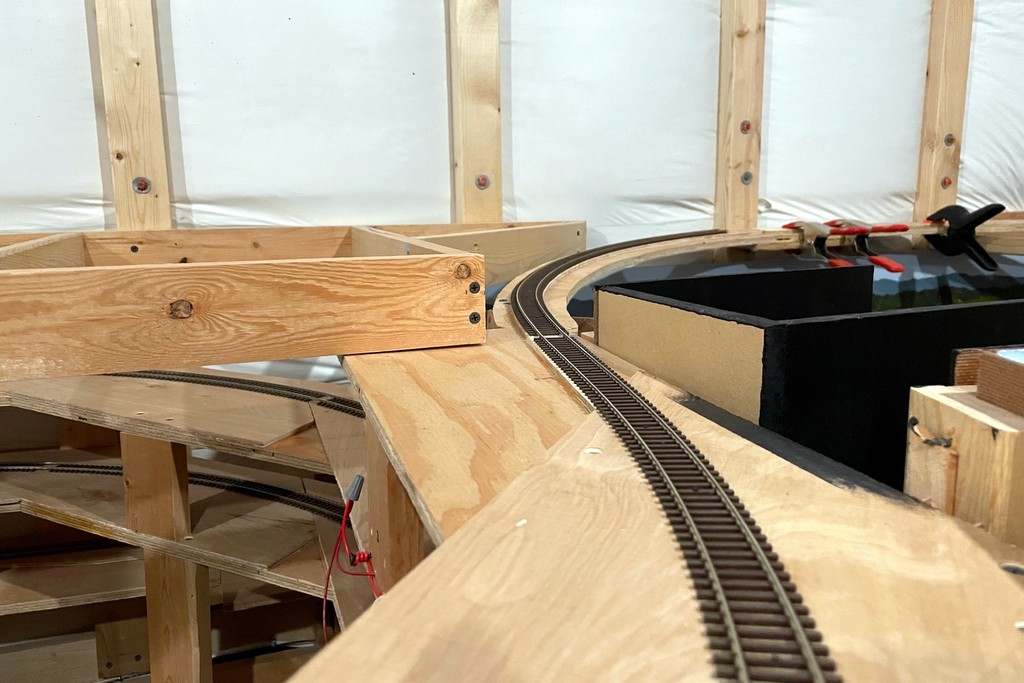
Shortly after the last ops session I went back into layout construction mode. Today I finished the last of the subroadbed! I completed the subroadbed from Turners Siding all the way to Monarch and Benedict. Sadly, in the process I lost one of my planned tipples due to research. In a 1969 aerial photo there’s what looks like a small truck-dump loader on the tail track for the Benedict switchback–this is the end-of-the-line for the St Charles Branch. While the track in the 1969 photo is fuzzy, the loader looks like it’s along the track if you look at the track’s location in later photos, so I included a siding for it since my tail track isn’t quite long enough to do both the switchback tail track and loader. Alas, when I looked at some photos from the ’90s, it’s clear that the tail track was extended, so the original tail track in my era didn’t quite reach the structure. I could still include it, but after the last ops session, I’ve decided I have MORE than enough work for the crews to do!
This is where the Monarch tipple will go
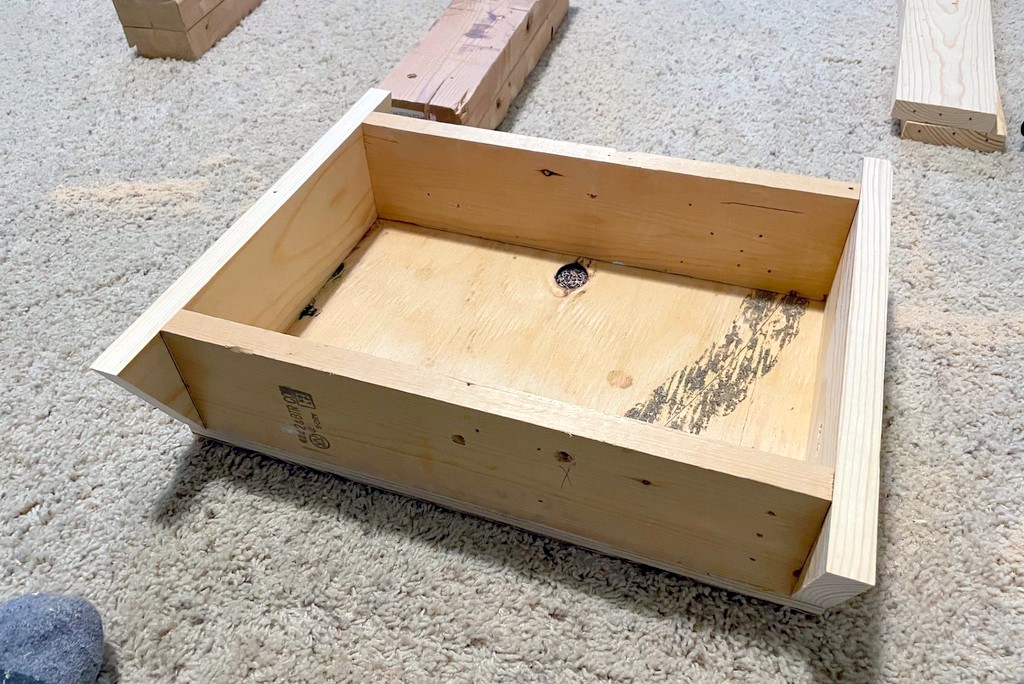
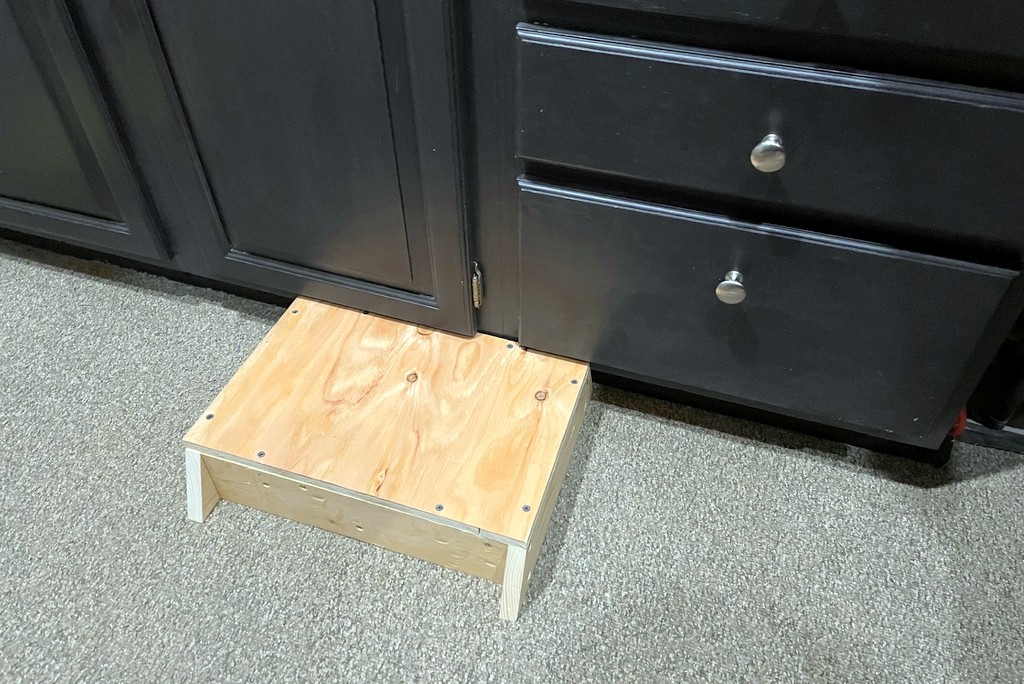
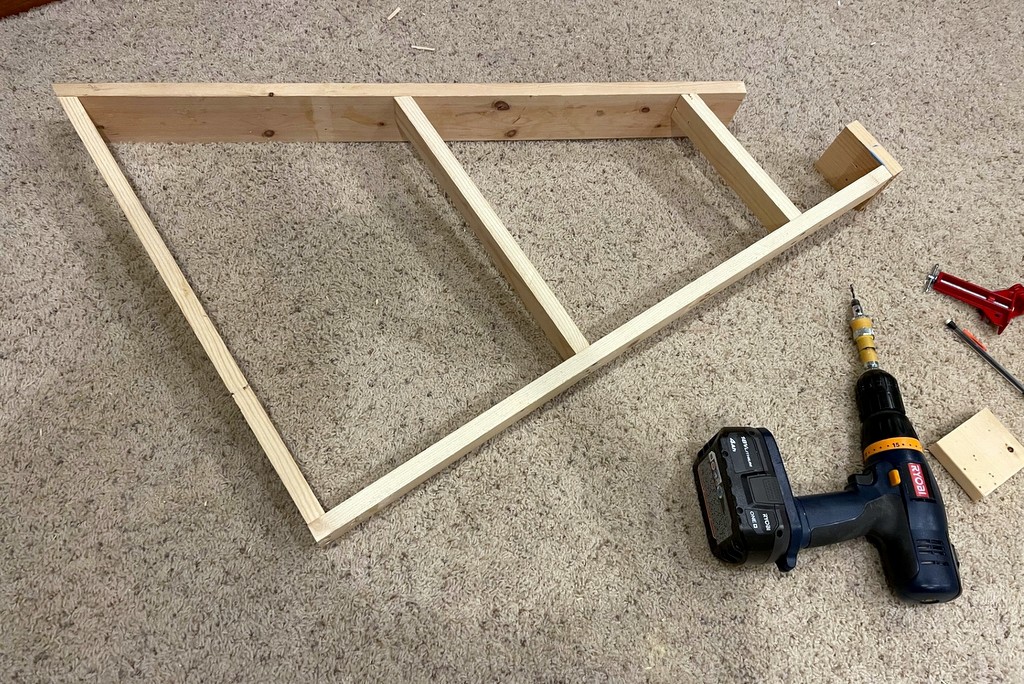
In addition to the subroadbed, I also built two movable platforms for accessing the upper deck. In the new section, some of the tracks reach 67″ high, which is at my eye level (and I’m over six feet tall). I took some lumber recycled from a friend’s old layout and built two platforms, a larger one that’s 14×20″ and a small one that’s 10.5×16″. Both are 4″ tall which is enough to see and reach all the tracks for someone a few inches shorter than me. Even though they sit pretty low, I added some angled sides to increase the stability and ensure they won’t tip when you step on them. Very simple design but plenty strong and most useful!
Both the small and larger platforms in place alongside the layout
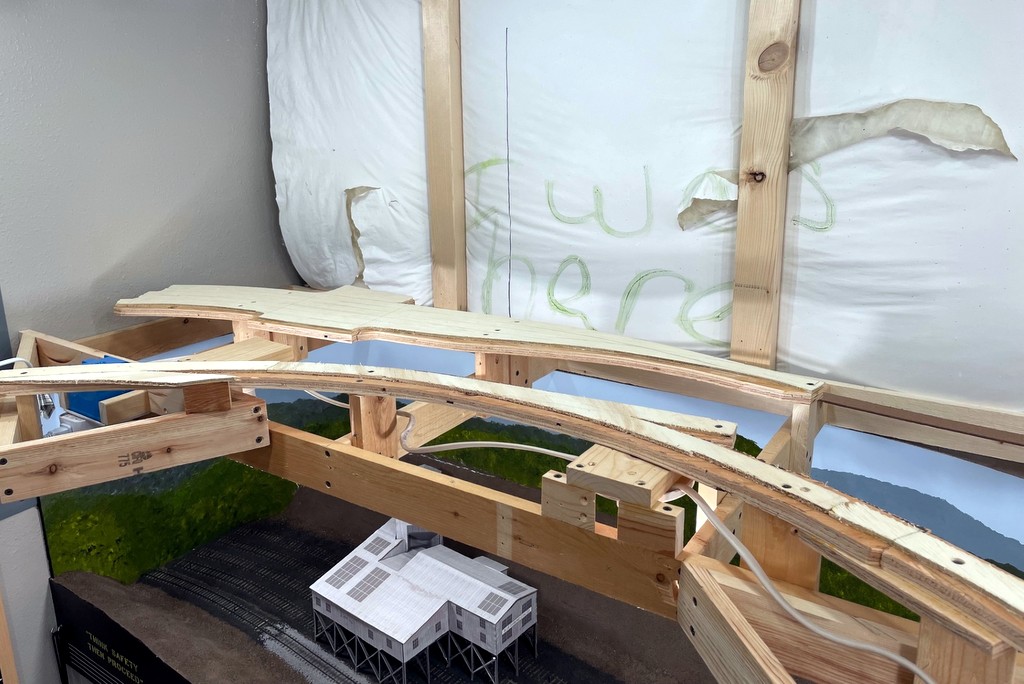
Next step is putting in the backdrops (I can finally hide the “I was here” artwork on the insulation…). Then it’s on to laying some ties and building some bridges–I’ve got two plate girder bridges and two trestles to build before I can finish the trackwork in this last section. Getting excited, though, because I’m almost to the point of being able to operate the entire layout as it was designed!
Starting to assemble the platforms. The ends are cut at 22.5 degrees to add stability
Finished platform as seen from the underside–very simple
The small platform is just the right height to allow the cabinets and drawers to open
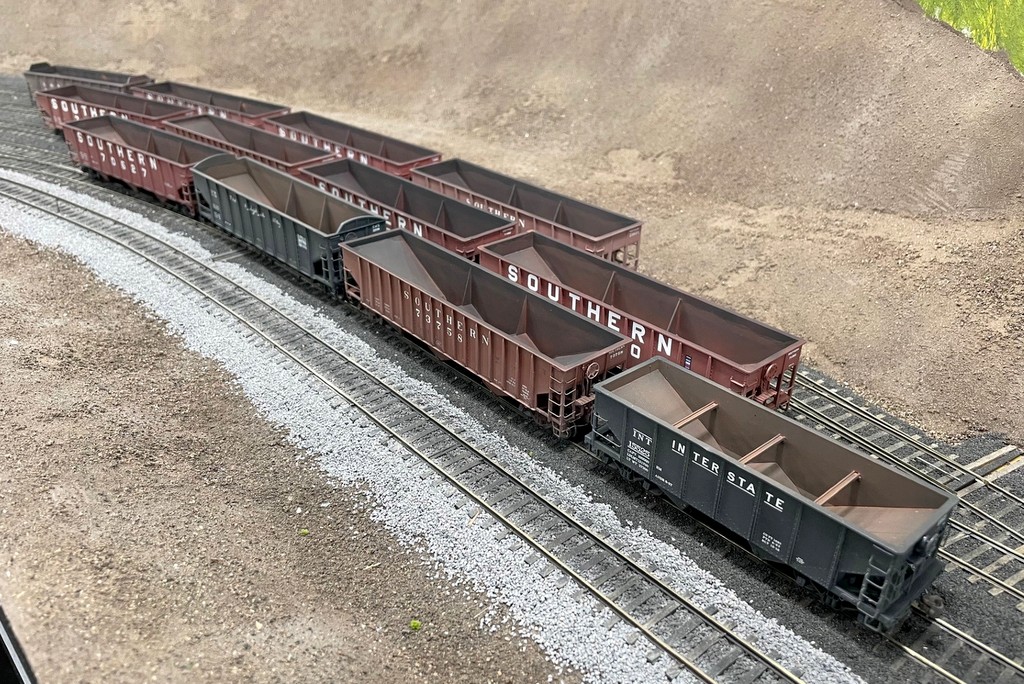
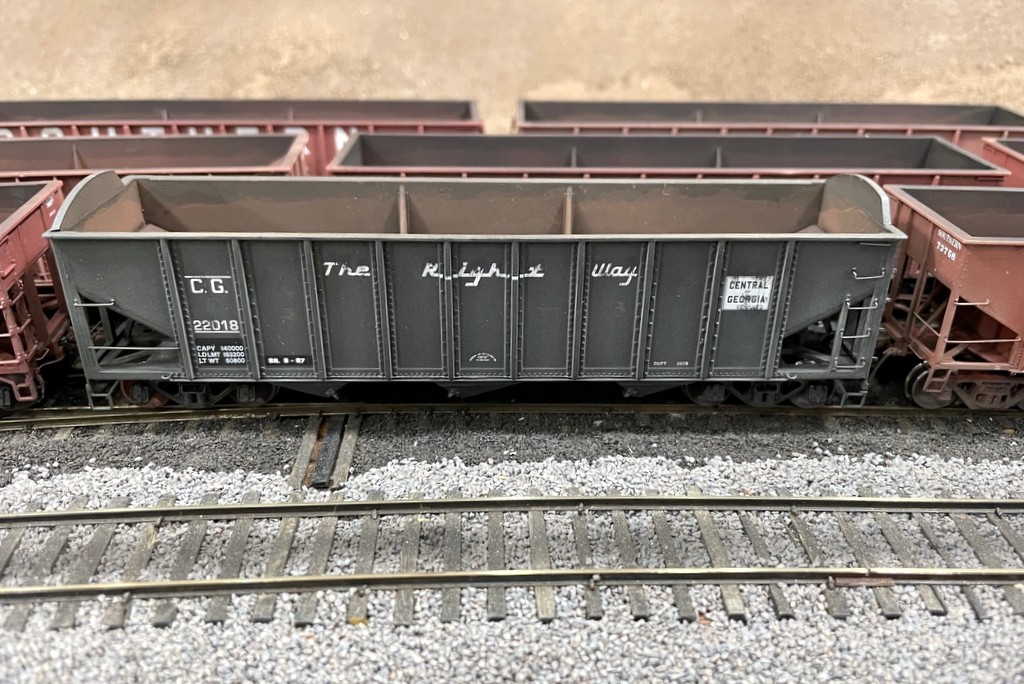
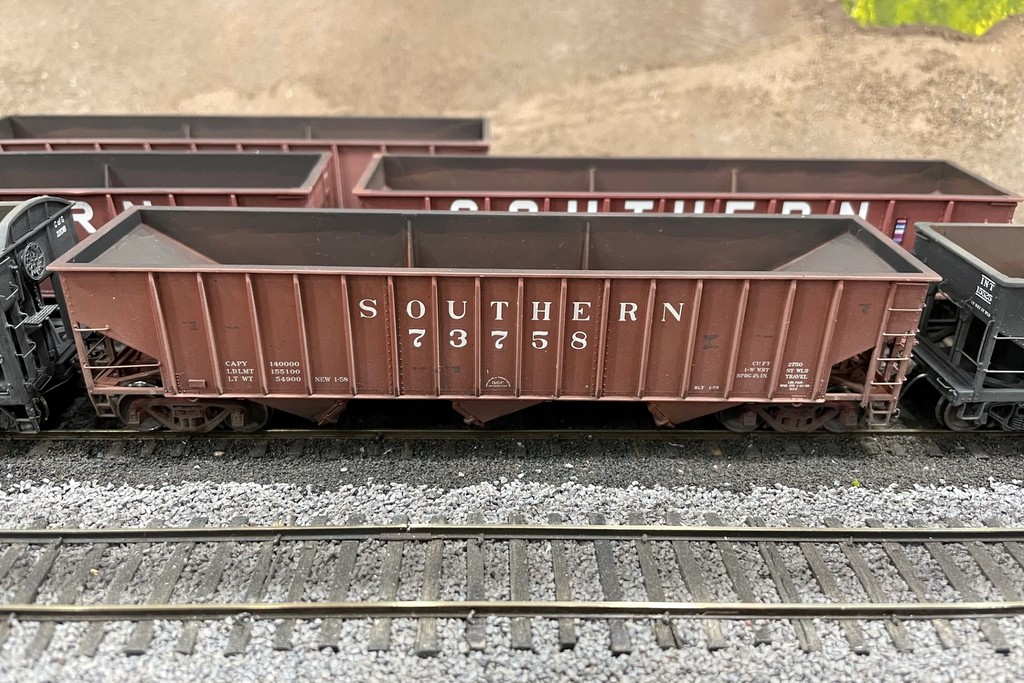
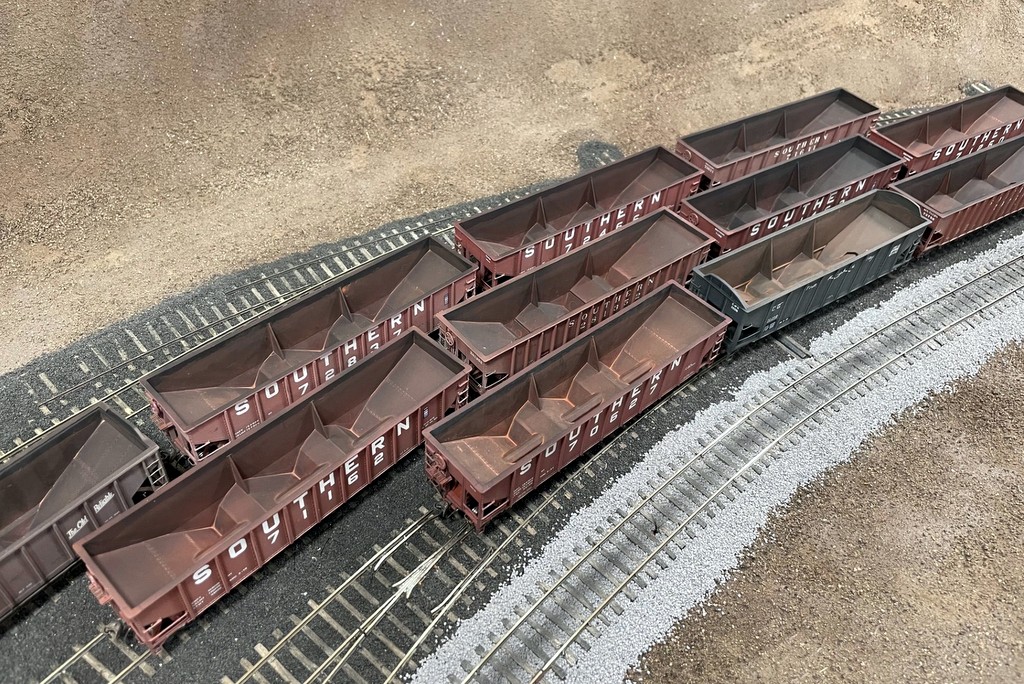
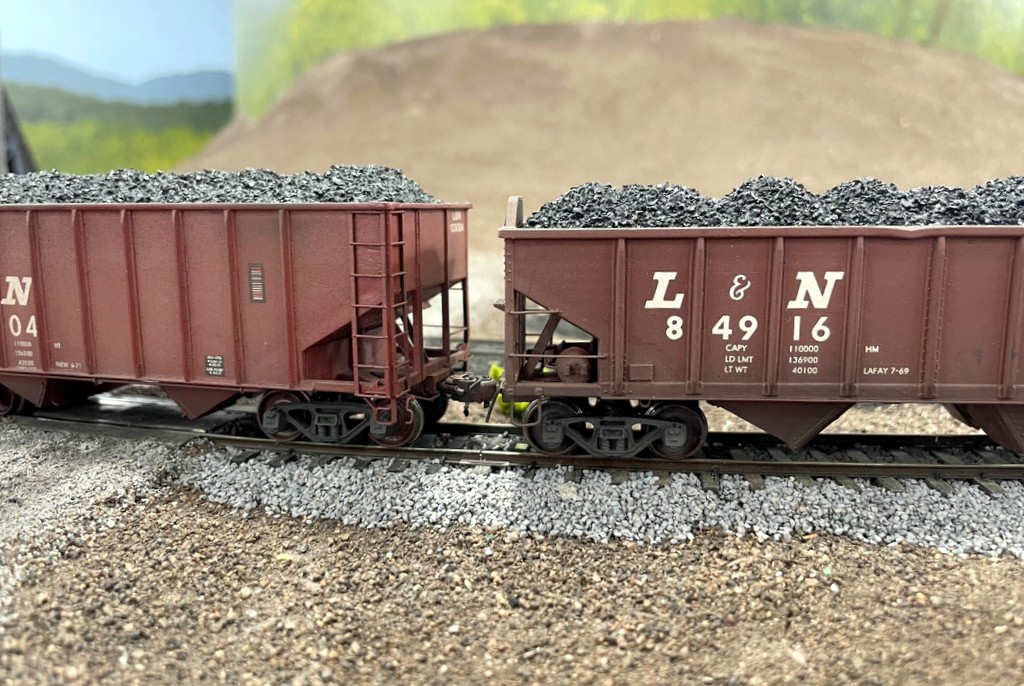
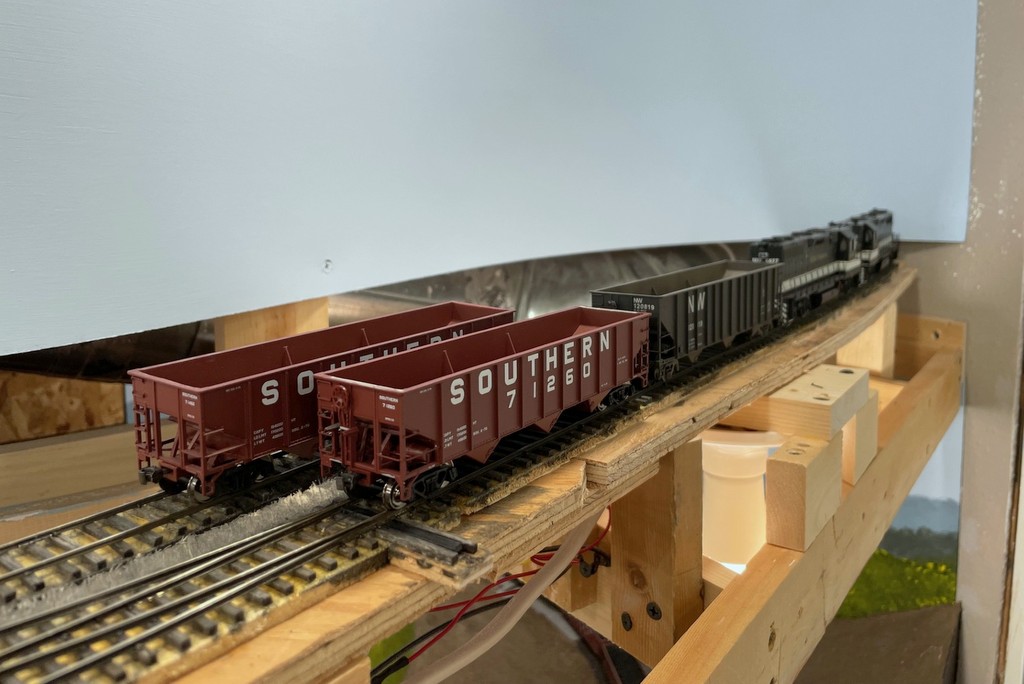
Happy New Year! A new class of hoppers has graduated from the workbench onto the layout–here’s the hopper class of January 2025! Work on this group commenced with the completion of the Gin Creek Branch and the realization I didn’t have enough weathered hoppers to complete an operating session. This group increases my number of “mainline hoppers” (70 and 100T cars) by about 40%. All these cars are factory painted, but most sport new numbers made by a combination of scraping off unwanted numbers (or portions of numbers… some of the “4s” became “1s” this way) and circular “Os” in the “SOUTHERN” and adding new numbers with K4 decal sets. Many of the Southern hoppers in the more modern lettering started as 74100 class Atlas Trainman cars with heap shields–these cars are too long to accurately represent the ex-Central of Georgia cars of this class, but they’re really close to the 70300-73749 class and have the more accurate squarish “O”. These had their heap shields removed, grabs narrowed, and details added such as tow loops, homemade coupler cut bars, homemade trainline hoses, and etched metal brake platforms.
This CofGa 70T is modified from one of the new Athearn models based on the old MDC kit
Speaking of ex-CofGa hoppers, I picked up one of Athearn’s newer-release triple hoppers painted in CofGa. This car has pretty accurate dimensions, and it has been upgraded with wire grabs, metal wheels, and more weight. It’s still got some of the chunky MDC detail (e.g., huge rivets), but it is a good improvement. I added some heap shields from the scraps I cut from the Trainman cars to get this essential detail. The remaining two Southern hoppers are some Tangent models I picked up on eBay. Both were factory numbered for the CNO&TP class 281300-281599, but the Southern had an identical class of cars numbered 73750-73949, so I renumbered one.
This is a factory-painted Tangent car that’s been renumbered to a different group
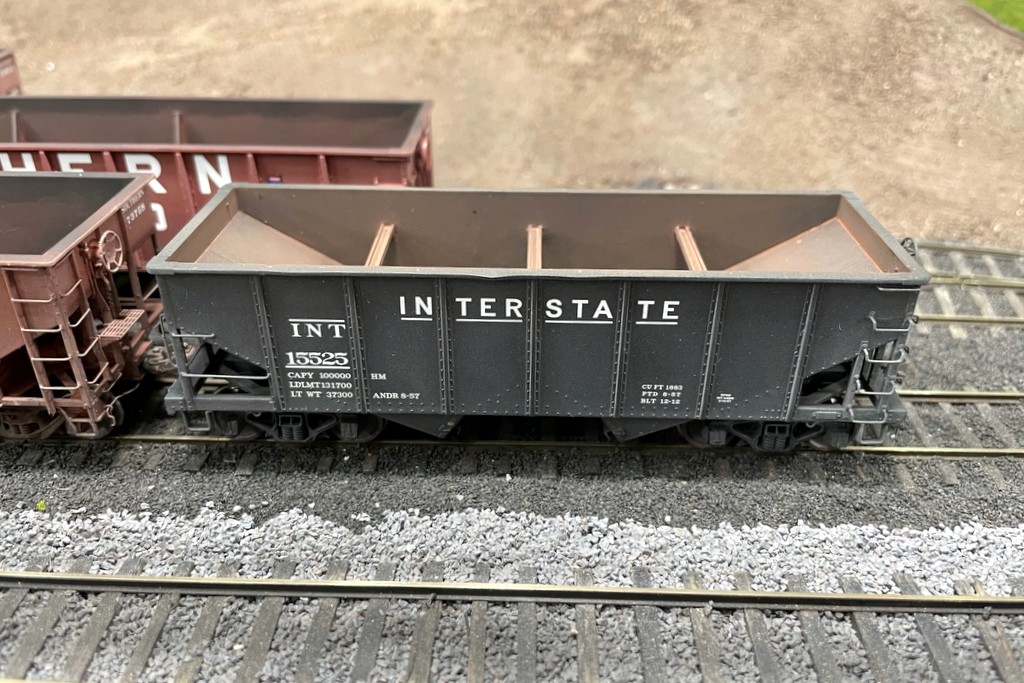
The Interstate hopper represents a class of second-hand cars purchased in 1956 from the Berwind-White Mining Company to ease the Interstate’s car shortages. It’s very similar to a Pennsylvania RR GLa hopper, so I modified a factory-painted Bowser GLa hopper with wire grabs and some of the distinctive GLa interior braces made from bits of styrene. On my layout, this car is serving out its very last years in “yellow ball” captive service between tipples and the Westmoreland Coal transloader in Appalachia, VA. Rounding out the class is a single L&N car, a factory painted Walthers Trainline PS3 hopper that got new ladders and heap shields.
Interstate Ex-Berwind hopper from a Bowser model
An in-progress shot of the Interstate GLa with bracing added
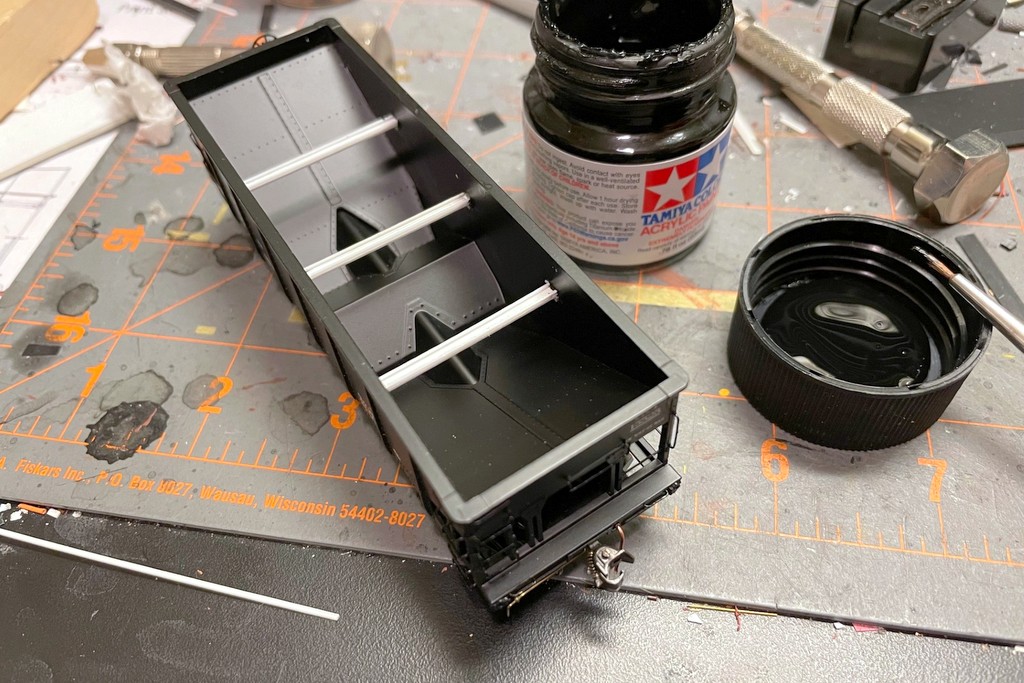
All these cars got a decent bit of weathering including drybrushed rust chips, airbrushed tan grime/fading and flat black, a flat black wash, and multiple layers of rust washes in the interior. Unlike previous classes where I’ve built cars to represent different portions of the eras I’m modeling, these cars were purpose built and weathered to represent the late ’60s, the era I’m starting with. Looking forward to employing these cars on a mine run soon!
All hoppers received a similar “old rust” treatment for their interior
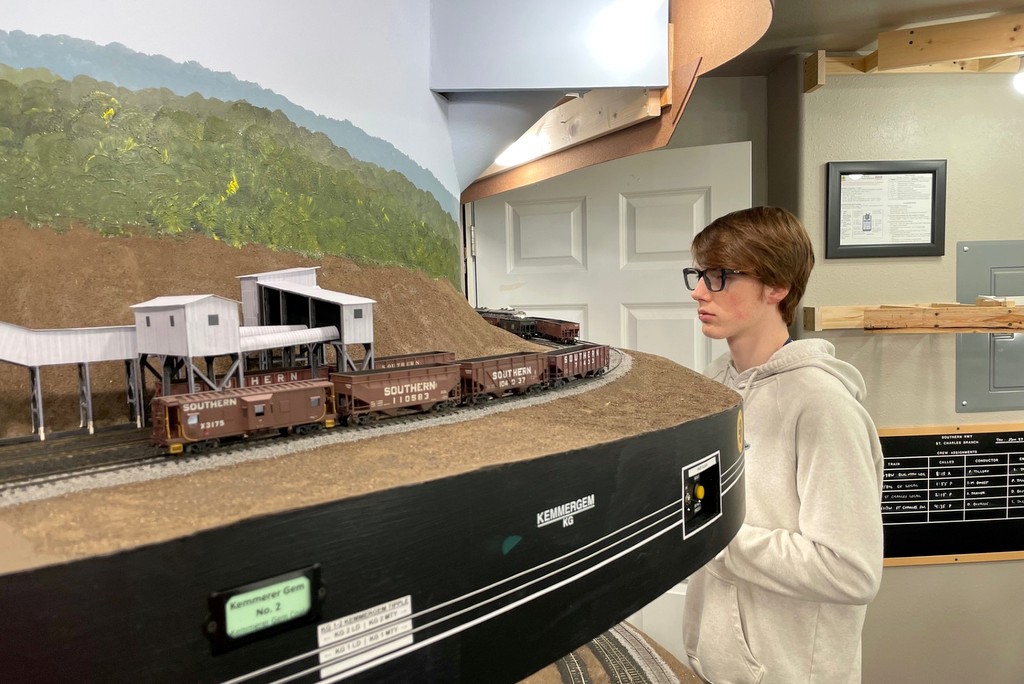
My youngest, Drew, running the Black Mountain Local at Kemmergem
It’s been a little while since a progress update, and there’s been a lot of progress. As you can see from the picture above, a portion of the upper deck is now finished to essentially the same state as the lower level with the basic scenery (covered in dirt), painted backdrop, fusee circuits for unprotected road crossings, and ballast. I also installed a few more ISE “Squealers”… five more to be exact, including two on the Gin Creek Branch (finished portion of the upper deck). Its’ so cool running a long train that crosses multiple Squealers and hearing the sounds from multiple spots in the train!
I’ve also had a couple mini operating sessions to work out the kinks on the Gin Creek Branch. The first was with regular operator Patrick, and the second was a treat with my youngest son, Drew. Drew did a great job running the Black Mountain Local and figured out a few different moves than the ones I’ve been using. When he was done, he paid me a great compliment: “that was fun… you’re such a nerd.” Guilty as charged!
Here are some pics of the progress.
Kemmergem mock-up on top of basic red rosin paper scenery
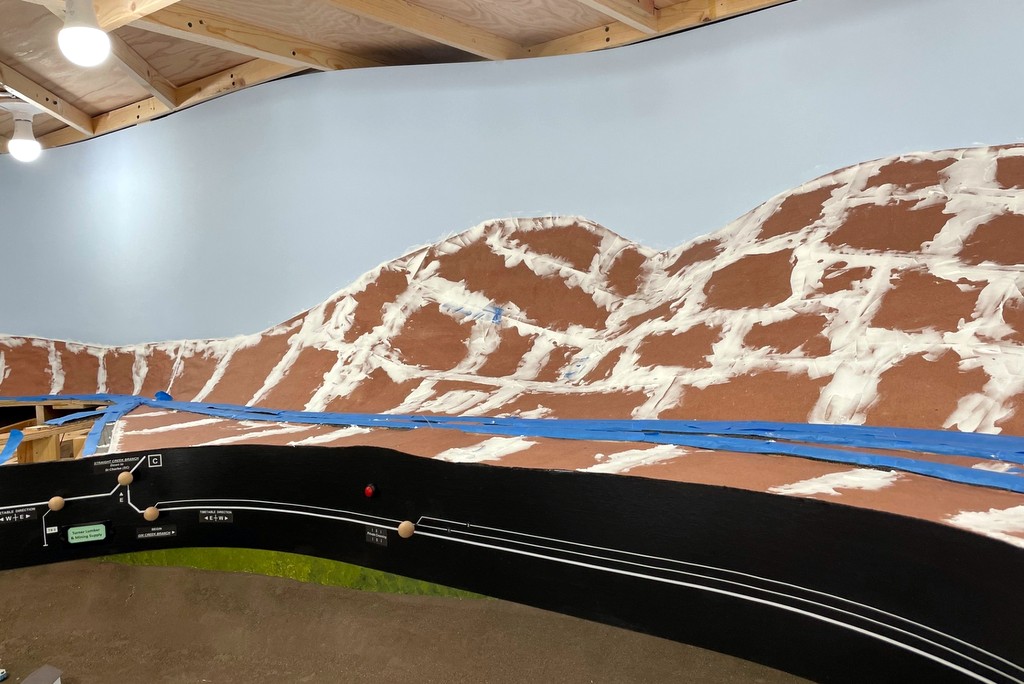
The scene between Turners Siding and Kemmergem getting some spackling compound to hide the paper seams
First section of backdrop painting on the upper deck
Basic scenery is finished at the end of the Gin Creek Branch
A pair of Fs, run by Patrick, is bringing empties up the Gin Creek Branch past Kemmergem tipple
A pair of L&N hoppers cross the ISE Squealer sensor
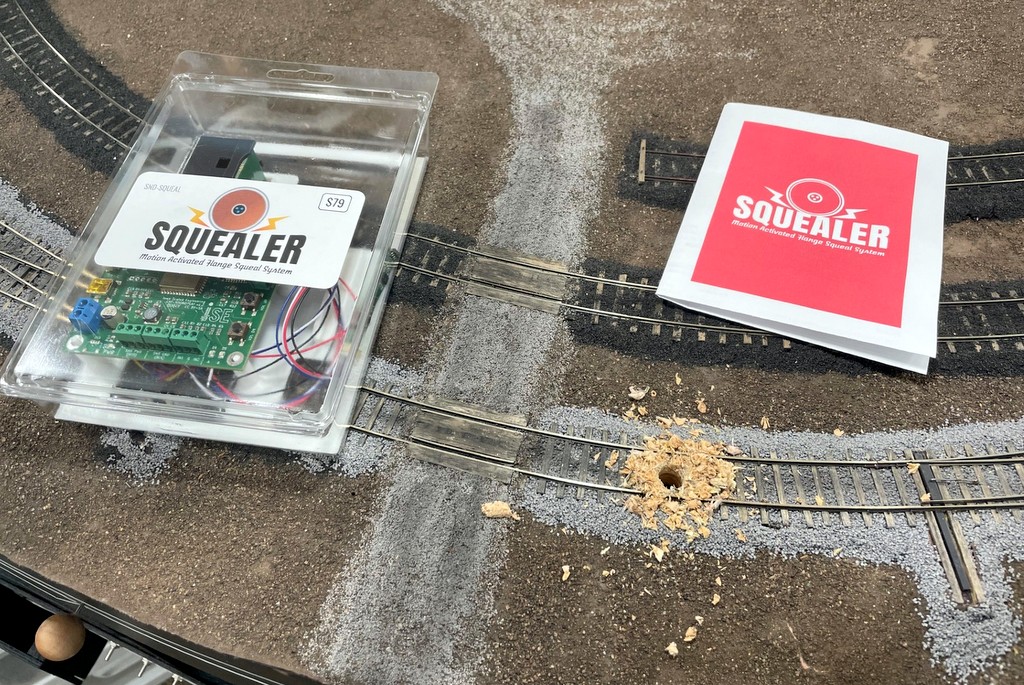
Last week I picked up a “Squealer” from Iowa Scaled Engineering at the Colorado RPM meet. I’ve been eyeing one of these for a while, and I’m so glad I finally took the plunge! If you’re not familiar with it, the Squealer is a static system installed at a curve on the track that detects the motion of a passing train and emanates recordings of high-pitched flange squeal sounds. While this may strike some like the torture of nails-on-a-chalkboard, I find the sound to be very prototypical and not annoying at all. In fact, now that I can hear my train going over a Squealer, when it’s not going over it, things sound a little empty which tells me this is a GREAT product!
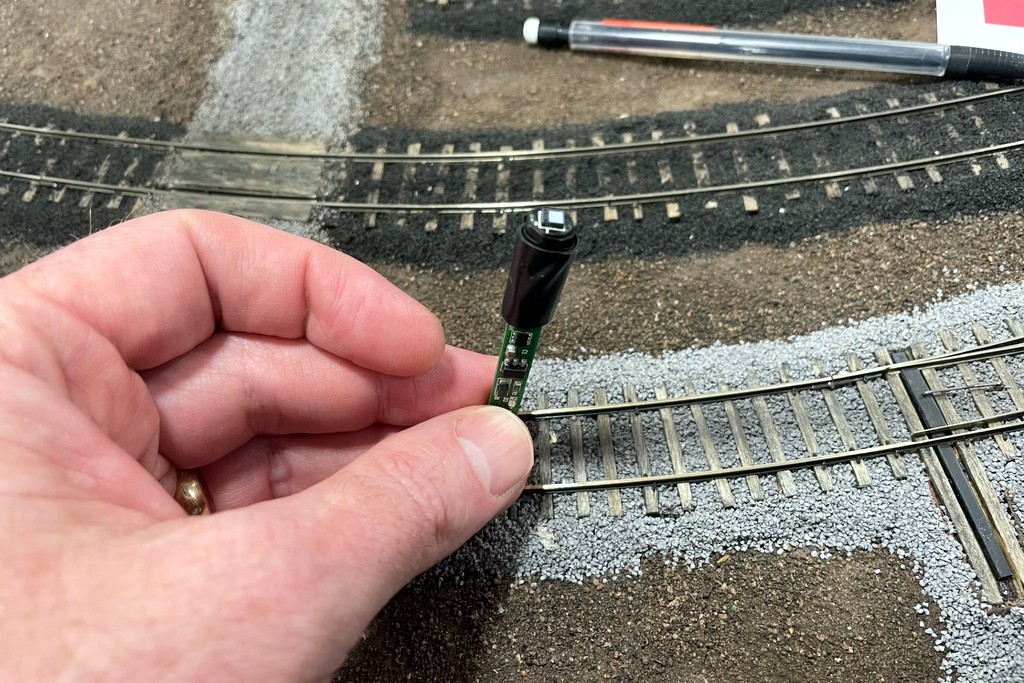
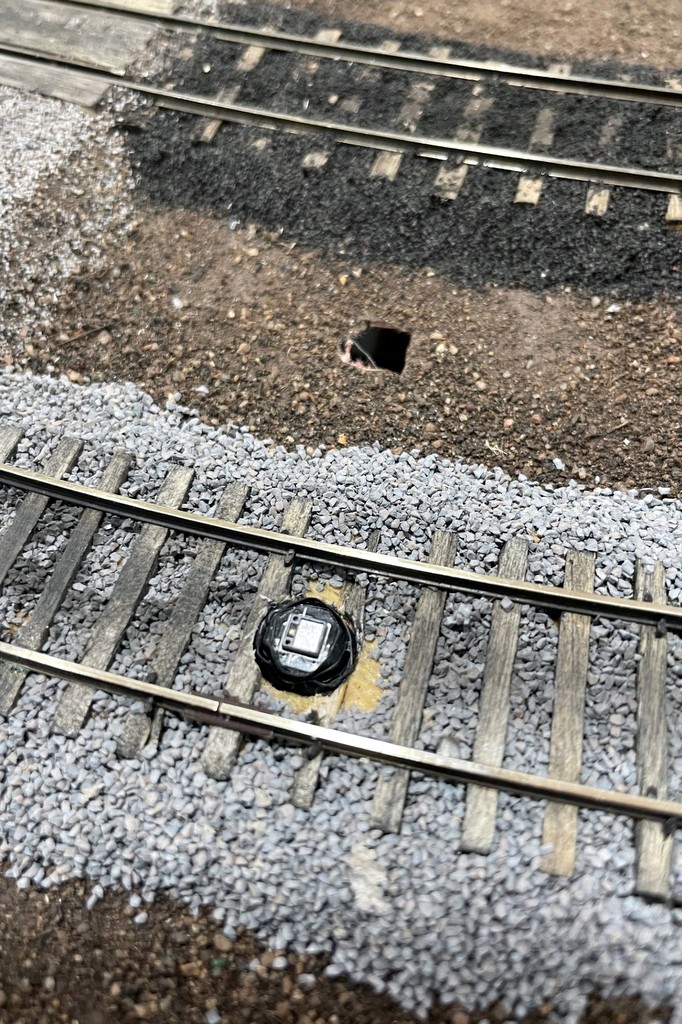
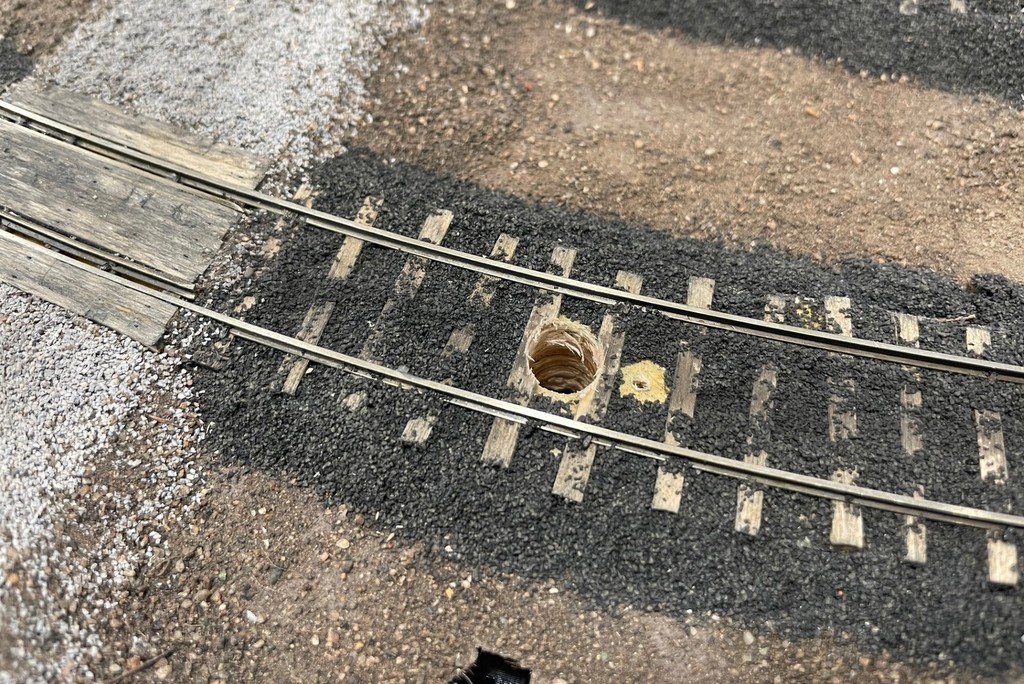
Installation was very simple and took me about an hour from start to finish, to include testing. The basic Squealer consists of a sensor (about the diameter of a pencil and around 2″ long), a speaker with a ~1″ cubed souknd enclosure, and a circuit board with terminals for connecting power and sensors, a spot for a micro SD card (in case you want to load your own sounds… I find the built-in sounds to be great), and two buttons for volume control. It supports multiple sensors, so I also picked-up an extra “TrainSpotter – Motion Detector” for an adjacent track. The trickiest thing about my installation is it was into finished track with no way to drill a hole from underneath as the instructions recommend. Instead, I had to drill downward through the ties. The instructions recommend a 3/8″ drill bit–I used this on my first sensor install and found it to be overly large. For the second sensor install, I used an 11/32″ bit and found it to be just right. I wrapped my sensors in a couple layers of electrical tape to help them fit snugly and to mitigate moisture from ballasting getting to the circuit board. Per the instructions, I lined the sensor up in the correct orientation and set it about even with the ties.
The Squealer box and the first over-sized hole… it was a little painful to drill through finished trackwork
I hooked up the sensors per the instructions. Since the white and blue wires each go to a common terminal on the board for all sensors, I found soldering the two white wires together and blues together made it much easier to install them (and keep them) in their respective slots. ISE recommends cutting a 3/8″ hole into the scenery for the speaker sound to escape. It was easy to cut a hole into my red-rosin-paper scenery and install the speaker to the adjacent sub-roadbed using a piece of 3M double-sided foam tape. I covered the speaker hole with a little piece of green clump foliage. For power, the Squealer can take a wide range of DC, so I hooked it up to my 14V DC accessory bus which works just fine. That was it for installation, and it worked as advertised right off the bat. The only adjustment I made were dropping the volume to a level that sounded right in comparison to my locomotives. I was able to carefully add and glue some ballast over the top plate of the sensor to hide all but the silver portion on top, and I noticed no decrease in performance.
I wrapped my sensors in electrical tape to make them fit snug and water resistant for the re-ballastingThe speaker hole can be pretty small, but it helps and should be close to the sensors
My only complaints (a very strong word for it) are very minor regarding the sensors: 1) they’re pretty big, so if you can’t drill the hole from underneath, you’re tearing up some ties, and 2) the sensors are very reflective and create a bright glint when viewed from certain angles. It’s a pretty complicated sensor for its size, so I don’t anticipate this can be easily fixed at a reasonable price point, and the benefit is far greater than these drawbacks.
Here’s the second sensor hole drilled with an 11/32″ bit which fit more snugly
If you haven’t already, you should check out the video to hear what it sounds like with a train. To me, it now makes it sound like all my cars have sound decoders… at least in that one spot. That means I’m now plotting to put a series of Squealers all around the layout on all major curves (probably 3-5 per deck) so you can enjoy the extra ambiance no matter where you’re working. It’s not cheap, but now that I’ve experienced, I am a huge fan, and it would sound flat to go back, just like I could never go back to locomotives without sound. Install these at your own risk… if you install one, you’re likely to want several!
A small clump of foliage covers the speaker hole nicely
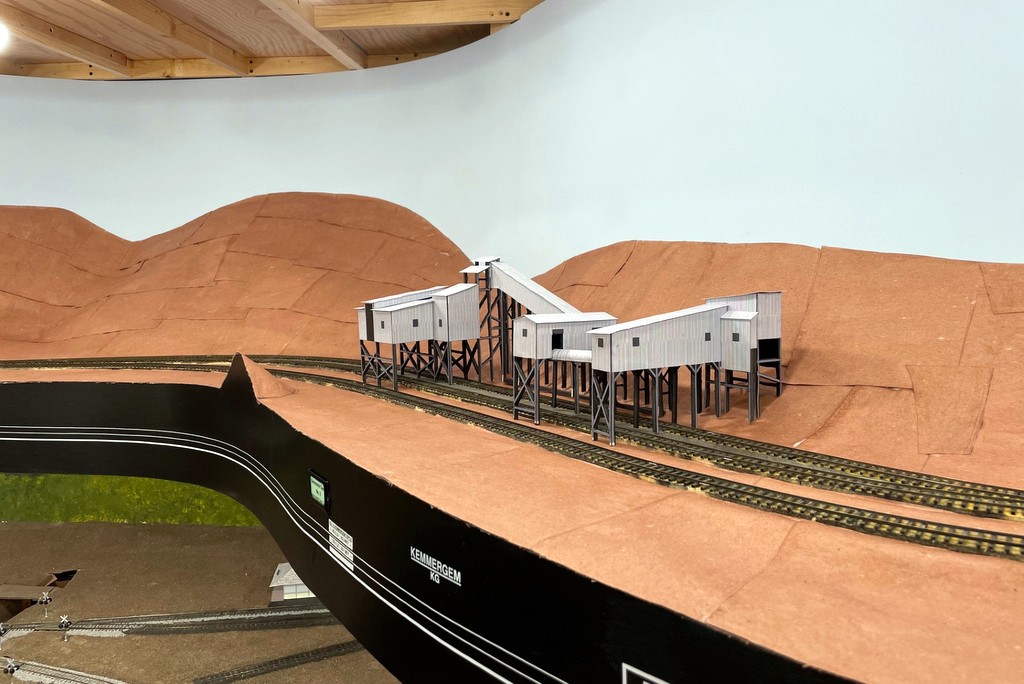
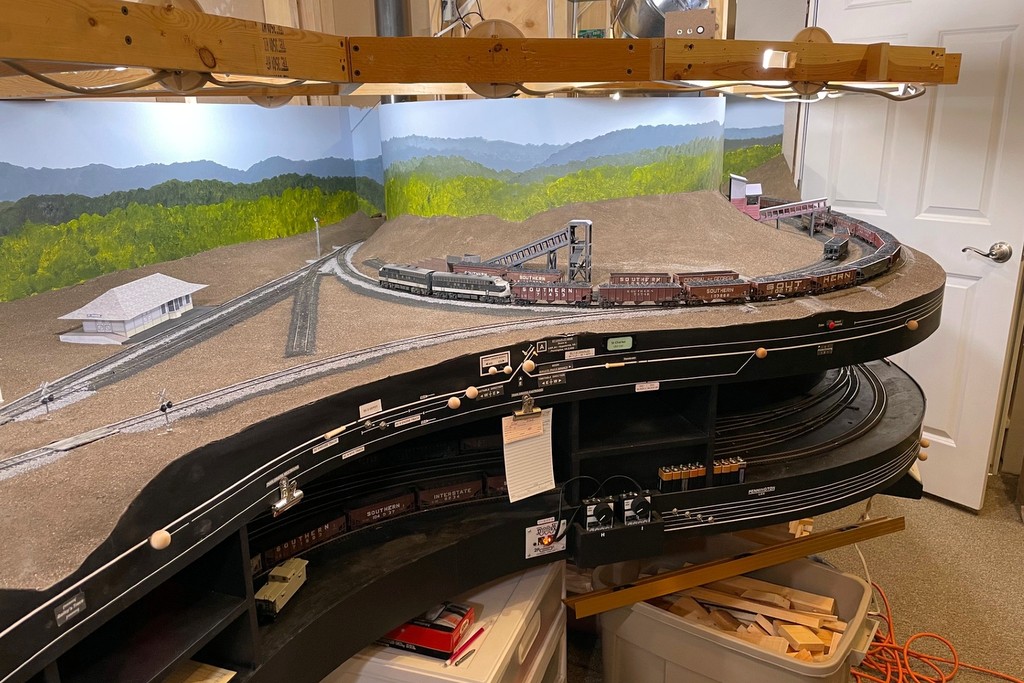
Newly completed Kemmerer Gem No.2 tipple mock-up on the Gin Creek Branch
I’ve been working feverishly on the Gin Creek Branch which served the distinctive two-track loader at Kemmergem, VA. This branch occupies about 1/3 of my upper deck and is the first piece of the upper deck to be operational. I went out of my way to make the trackwork look like a well-used and minimally maintained branch with some crooked ties and rail. This branch is also laid out on an S-curve where you can look all the way down the straight portion where the loader will lie between the curves, and because of this curve, I think this might become the “signature scene” for the layout.
Here’s the first train on the upper deck rolling through the junction onto the Gin Creek Branch at Turners Siding
The tail track just barely holds two GP38s and two triple hoppers
To get things operational, I had to run the DCC bus wires and install manual switch mechanisms. At this point, I was able to run the first train to the upper deck and make sure everything worked. It’s a cool arrangement with double-ended loader tracks but a short tail track that barely holds two GP38s and two triple hoppers. I’ve also installed a stub track alongside the tail track for the Ralph Baker coal company that built a truck dump here in the late ’70s / early ’80s. Since I’m currently running the ’60s, I decided to use the track to house a small ramp-style loader (which will be replaced by Ralph Baker in late ’70s ops sessions). Switching the track arrangement is a lot of fun and requires some extra thinking since the spur to Ralph Baker is a facing-point stub track, and the only run-around is under the Kemmerer Gem No.2 tipple. You’ve got to place the cars for Ralph Baker and the cab behind the empties for the big tipple and then push them into the right tracks using the loads and empties under the big tipple.
View of the south end of the loader at Kemmergem
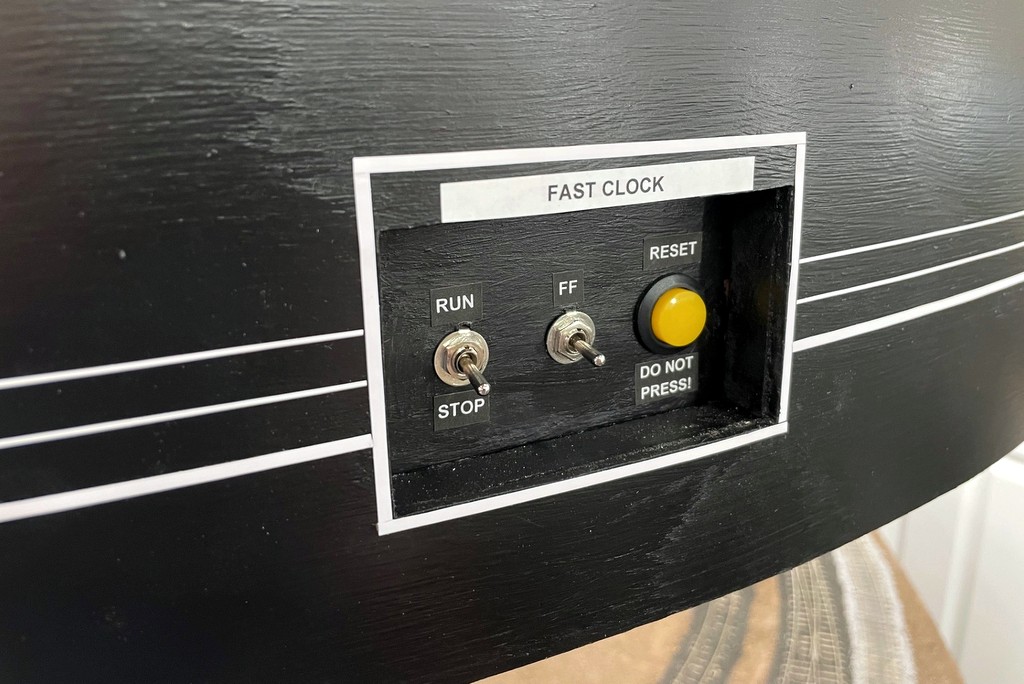
While it was “operational,” there was still no tipple, and the switches had to be thrown by reaching far under the layout. With an upcoming ops session, I was motivated to give it a bit more finish, so I cut and painted the fascia and put in the switch controls. I also took the opportunity to install my fast-clock controls in their permanent place, a little cut-out in the fascia. What’s a mine run without a loader, so I created another temporary “paper doll” mock-up from cardstock prints and foamcore for the Kemmerer Gem No.2 tipple. This is a really cool looking loader that has two loading points with a long covered conveyor between them making the thing look a bit like a corrugated diplodocus dinosaur. I created some drawings of a slightly compressed version based on a series of photos from the ’50s-’90s (it didn’t change too much) including some great detail shots by Robby Vaughn. While I was at it, I created a little temporary dock for the Ralph Baker spur (which I’m calling “Darbyville Dock” for the ’60s sessions). A couple of paint brush handbrakes on the steeper spotting locations, and the branch was ready for an ops session!
The prototype Kemmergem tipple shot by Robby Vaughn in the late ’90s
Gluing the prints onto foamcore for the tipple
Mock-up for one of the two loading points waiting for a paper roof
Mock-up of “Darbyville Dock” at the end of the Gin Creek Branch–note the gnarly trackwork on the tail track to the right
Here’s the finished fast-clock control panel recessed into the upper deck fascia.
Rails for the Kemmergem Loader are almost complete
Progress on the upper deck is now in full swing! I’ve got the ties, some of the rail, and the backdrop for the Gin Creek Branch (Kemmergem) in place. This is the first rail I’ve laid on the upper deck, so it’s been good to knock the rust off. It’s been a good reminder that I really enjoy hand-laying track and find it relaxing. I’ve also finally followed through on a promise I made to my wife nearly 5 years ago to add some storage above the layout. It is nice being able to get some things off the floor and out of the way. Next step is finishing the rails and adding the wiring for the track.
My son recently got married, and his wife’s father came over to run some trains
On another note, my oldest son got married this month! His wife’s dad likes model trains, so it was fun having him over for a little impromptu ops session running the mine run to Mayflower.
Ties in for the Kemmergem loader
The upper deck backdrop is 24″ tall to create some distance from the lighting valance benchwork
The end of the Gin Creek Branch goes under the stairs and an air duct–this was by far the most challenging piece of backdrop to install!
Amazing what a lick of paint will do!
First rail laid on the upper deck! This is the junction of the Black Mountain main (left) and the Gin Creek Branch to Kemmergem (right)
The grungy, little used spur for the lumber yard and mining supply at Turners Siding–this is the only piece of code 55 rail so far, and I plan to bury it in dirt, so why bother with ties
My wife is very happy that after nearly 5 years I’ve delivered on the promise of adding some storage above the layout
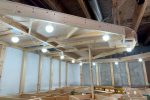
View showing the upper deck lighting and lighting benchwork. A 12″ valance will cover the lights
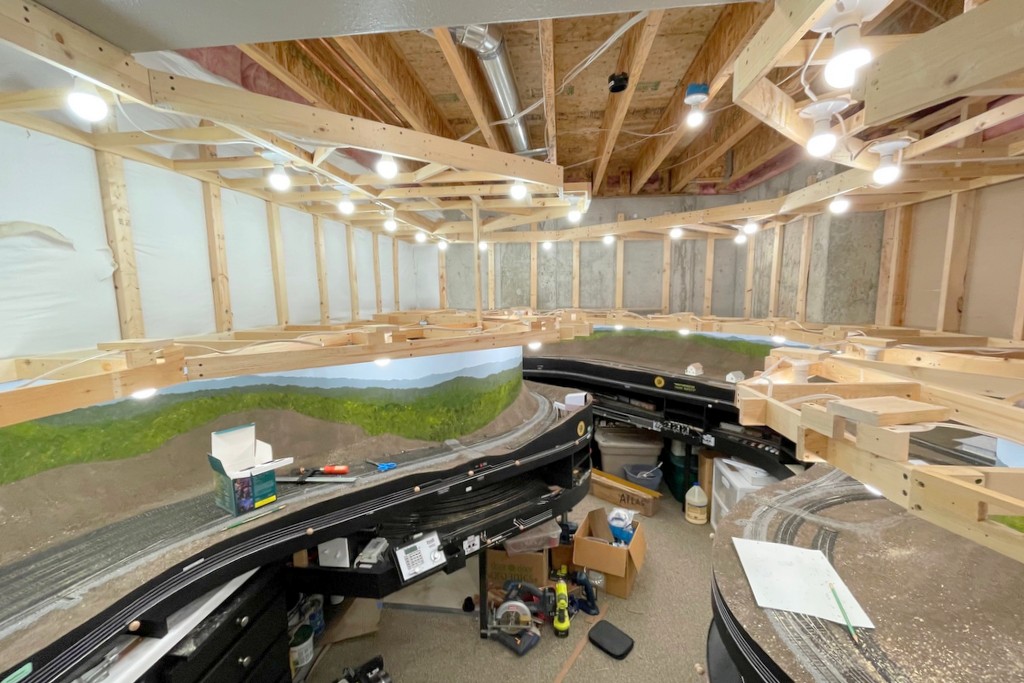
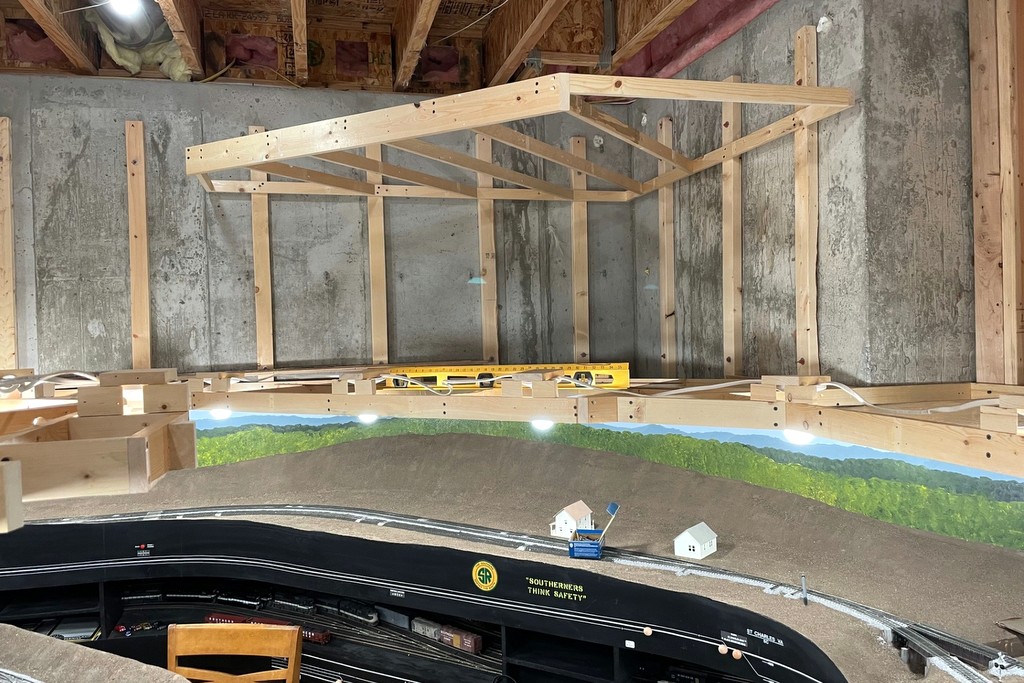
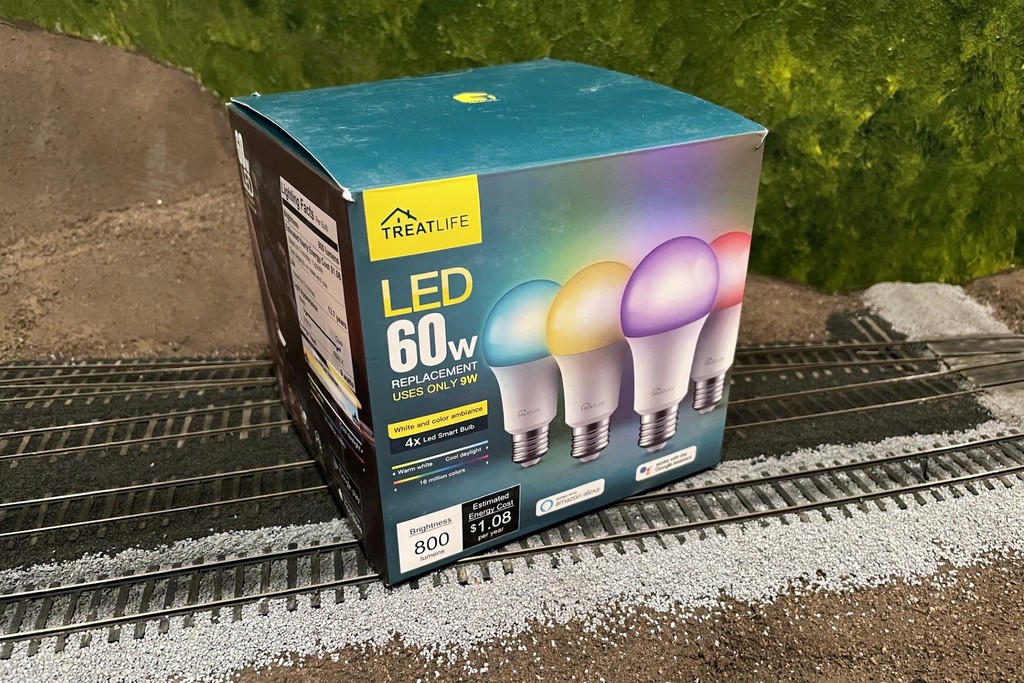
Passed a big milestone this last week, the completion of all benchwork! The last layer of benchwork was the lighting valance above the upper level. It was made from 1×4″ boards for the valance and 1×2″ supports ripped from 1x4s for the rest of the structure. This allowed me to place the light fixtures for the upper level, 22 total fixtures spread out about every 2 feet. Like the lower deck, the lights are multi-color, dimmable, LED smart bulbs controlled by an app on my phone. I’ve got them grouped to work as a whole either by deck or the whole layout including overheads.
Here’s the very last piece of benchwork ready to be installed
While the bulbs only draw 9W, they’re 60W equivalents… 47 60W-equivalent lightbulbs in a 12×16′ room!… Let’s just say it’s about as bright as daylight which is the idea, right? Even with all these lights, I’m still only drawing around 420W total, so I’m nowhere near the max capacity of the circuit. Technology is pretty cool! Next step, track for the upper level.
Overview of the layout room showing most of the 47 LED lightbulbs
A wide-angle view of the layout showing how the lighting benchwork follows the shape of the lower levels
No, that’s not a typo! I’m about halfway through my fourth level of benchwork for this layout. The first level is staging, the second is the lower deck, the third is the upper deck, and the fourth is for the lighting valance. I decided to go ahead and knock this out before putting any track on the upper level so I can install the lighting before I start hand-laying track (which will be most helpful). The good news is once I complete this level, it will complete my benchwork for the layout!… at least phase 1… if there are future phases.
My basement ceilings are 9 feet high, so I’m putting the lighting benchwork around 7.5 feet. The backdrops for the upper deck will be a lot taller than the lower deck, but this is necessary because you’re looking up at them. There will be a 1-foot tall fascia on the front of this level to constrain the view a bit and to hide the lights. I’m making it strong enough to hold some thin plywood so I can use the top to store some lighter things–a requirement from “building management” to compensate for me taking over the storage room.
Here’s the first piece of lighting shelf benchwork–you can see the backdrop will be taller on the upper deck
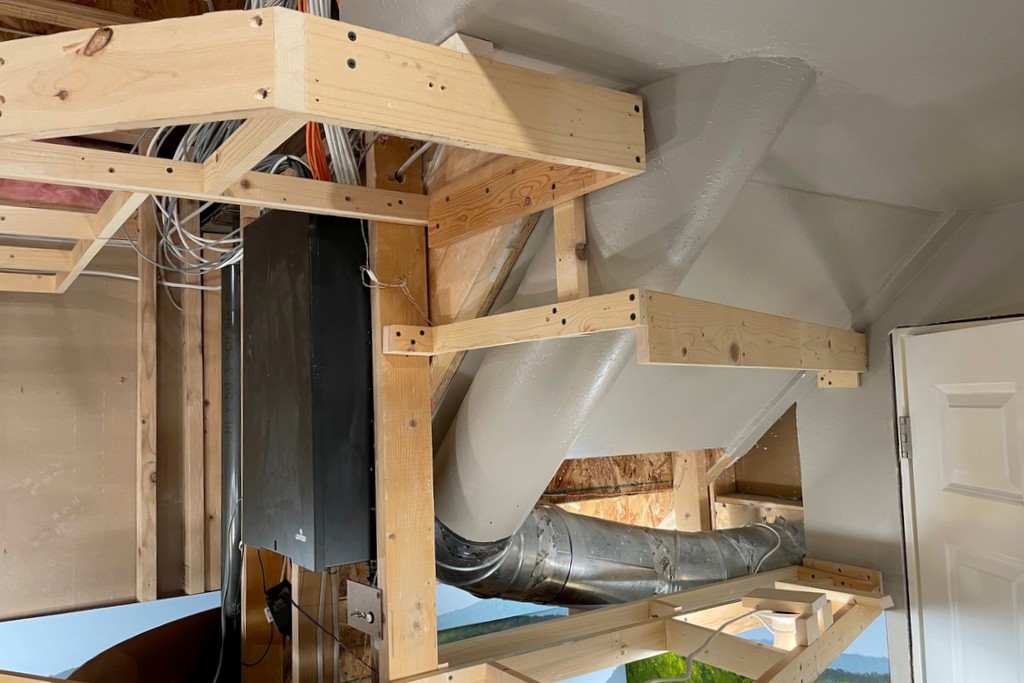
Part of the layout is under the stairs, and there’s an air duct in the way requiring some creative construction
A shot from the door of the completed upper-deck benchwork
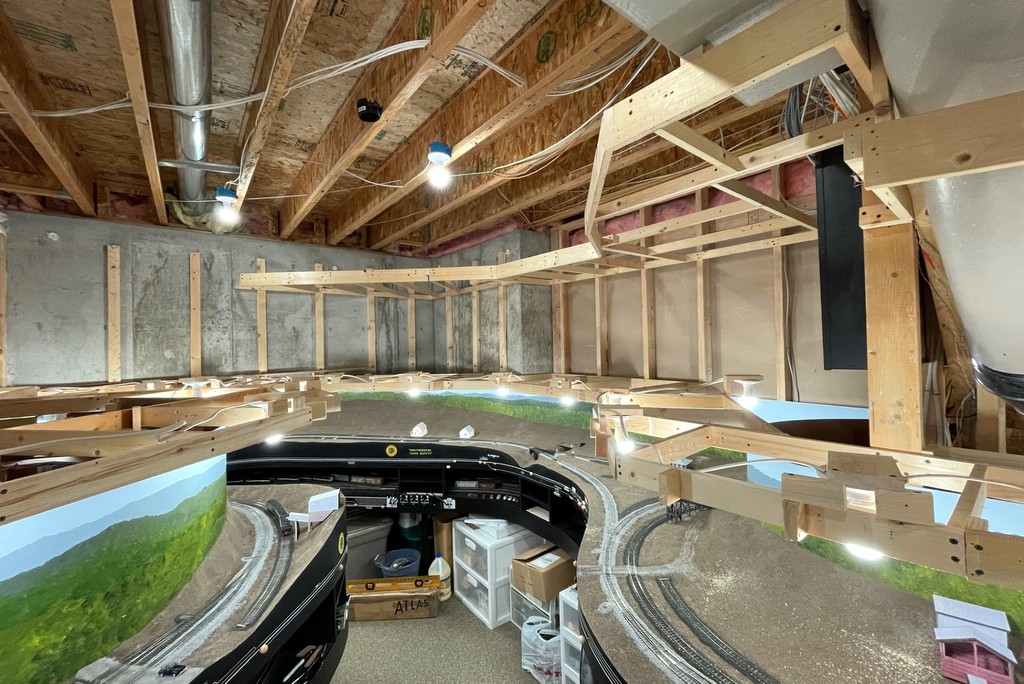
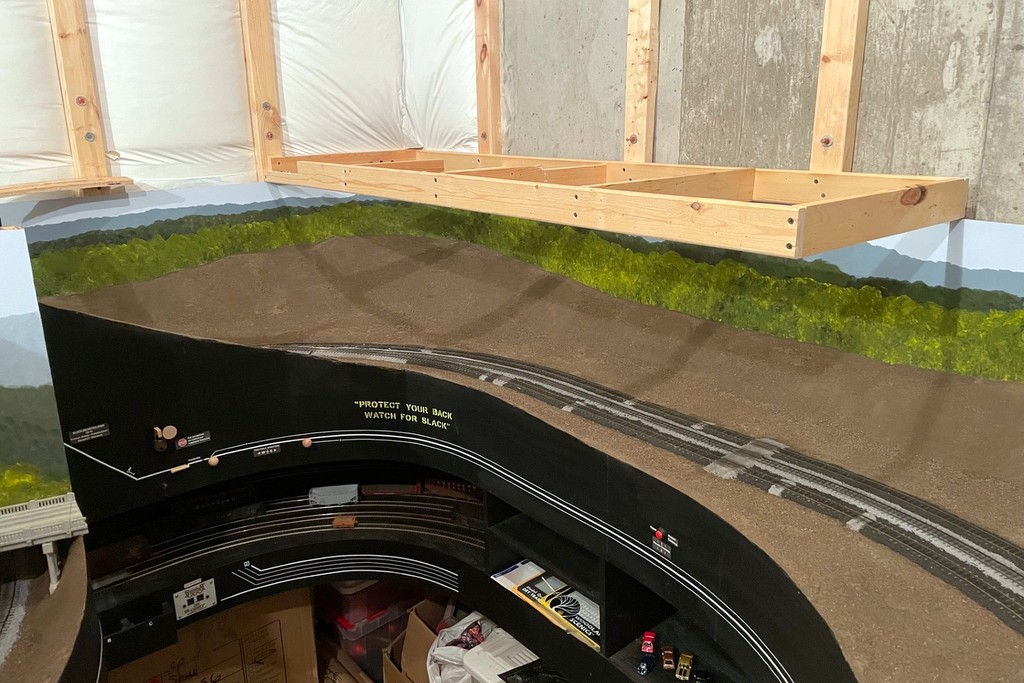
The layout passed another milestone this past weekend–the upper-deck benchwork is now complete! Most of it was pretty straightforward, and the average deck height (top of benchwork) is 60″. A few sections required some creative engineering and some non-90 and 45 degree cuts. One tricky section was the top of the helix where the tracks transition through the upper deck benchwork. I used a piece of elevated benchwork and a plywood bridge to make this transition.
This was a challenging section to engineer–the track comes off the helix, ducks under a piece of elevated benchwork, then runs on top of the upper deck
Another tricky section was the last piece which holds the tail track for the switchback to Benedict at the end of the line. This piece goes in front of the basement breaker panel, so I had to engineer it so the door can be easily and fully opened and accessed, and I designed this section to be removable in case any major work is required someday. As you can see from the first photo, the lighting is in but very visible–these will be hidden behind fascia once the upper-deck trackwork is in.
This was the last piece of benchwork for the upper level. This piece allows the breaker box to be opened, and it’s removable in case there are bigger issues
Here’s a representative CV Local with an RS3, 11 hoppers, and a cab nearing the top of the grade
With a portion of the upper-deck benchwork in place, I was able to complete the connector track from the top of the helix to the top of the grade along the back of the layout. The moment of truth had arrived where I would figure out if a key assumption I had made would hold true. My helix is aggressive: 24″ radius and 3% grade! At the top of the helix is an S-curve into another 24″ curve in the opposite direction and a short straight section to reach the top of the grade. Based on experience with the first helix (also 24″ radius and 3% grade), I estimated my lightest engine could pull about a dozen empty hopper cars and a caboose up the helix. The lightest engine is an Athearn RS3 used on the CV Local, and in the 1960s and early ’70s, this job only hauled a handful of cars onto the St. Charles Branch, perhaps 6-10 on a given day.
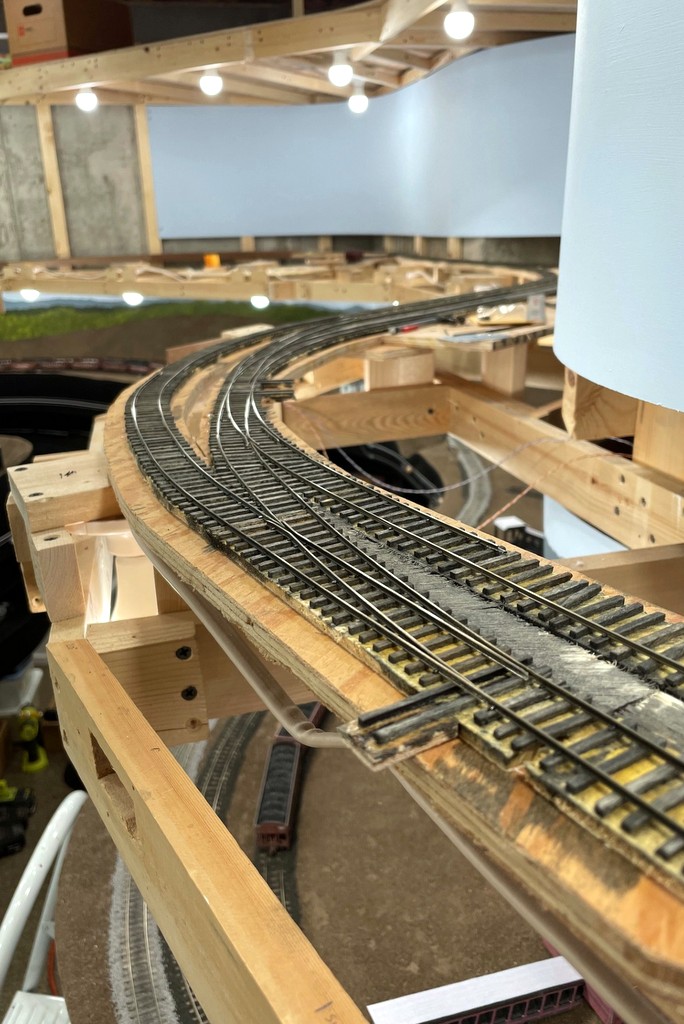
Here’s the track where it exits the helix and continues up-grade to the right through the upper-deck benchwork
I loaded up an RS3 with 12 cars (including 3 really heavy Tangent cars) and headed for the first helix. With the Tangent cars, the RS3 stalled out on the grade–uh oh! I removed one hopper and tried again. Thankfully it was able to climb the first hill, albeit with the throttle at 1/4 speed and the Tsunami2 howling at run 8! After a brief respite of relatively level track in St. Charles, the train attacked the second helix to the upper deck. Three-and-a-half turns and 20″ higher, the train exited the helix and entered the S-curve, coming to the crest of the grade without stalling. So, 11 cars is my current limit, and while it’s slightly less margin than I had hoped, it’s good enough that it won’t restrict my operating scheme.
Two Southern F-units have no trouble pulling 33 cars to the top of the 3% grade
Just to be sure, I latched a pair of Intermountain F7s to 33 Southern hoppers and tried the same thing. No problem! Two locomotives have plenty of power to haul more than enough cars up the grade. It was cool to see trains actually running on the upper deck, even if the section they’re currently in will be hidden by hills.
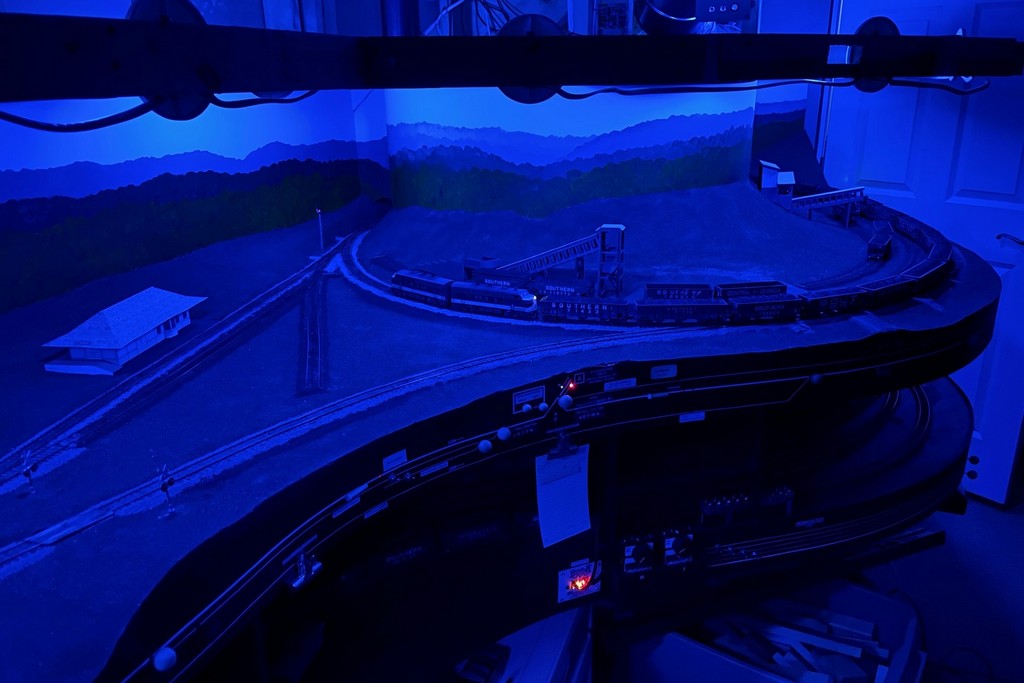
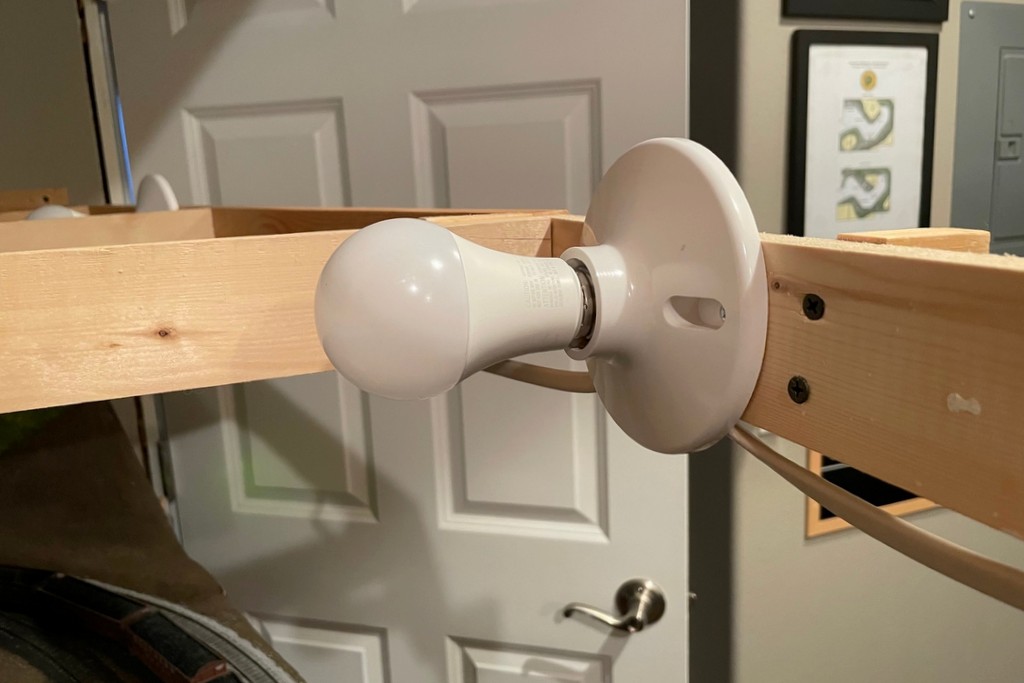
The first layout lights are in! Here’s the “cool white” that I like for daytime
While my light is nowhere near as impressive as God’s light in Genesis, it still makes me glad to see a little more light on the trains in the basement. Now that I’ve got some upper-deck benchwork in, it opened the way to try out the layout lighting I’ve been wanting to do for a while. I’ve looked into LED strings and other bundled lights, but in the end, I’ve settled on using individual multi-color LED “smart lights” I can control with my phone. It’s not the cheapest solution (about $7 a bulb, and my layout needs 40), but it’s bright, and they’re customizable for a dizzying array of colors and brightness!
This is a more modern evolution of the lighting on my last layout which used cheap plastic fixtures and compact 40W lightbulbs. I was able to recycle the fixtures and wiring for this project, but the technology is so much better than my previous little analog dimmer. Not only are the LEDs brighter, but they run cooler, only use 9W each, and I can get a nice “cool white” that looks a lot more like sunlight than incandescent lights. I was also able to play around with the colors and dimmer, and a wide range of effects are possible including a nice moonlit night and a warm sunrise/sunset. It’s also easy to “group” them so one command changes all the bulbs simultaneously.
The dimmable, multi-color LEDs can give a lot of different moods like this “moonlit night”
I’ll keep playing with them to try to mitigate the glare spots and shadows. I’m also going to figure out a way to automate going from nighttime to sunrise to day–I’m sure it’s possible with all the Smart Home controls out there now. One thing I hadn’t counted on is the lit portion of the bulb is about 2″ further out from the fixture than the old incandescents. For now that’s creating more shadow along the front of the layout than I’d like. When I put the valance in for the upper deck, I’m inclined to move it out over the aisle a few inches to try to improve this, and I might mount a few of these in the overhead fixtures as well. For now, I’m calling this experiment with 8 bulbs a success, so now I’ve ordered more to keep working around the rest of the layout.
The fixtures for the lighting are simple plastic screw-in basesHere’s what I’m using, TreatLife 60W equivalent (9W actual) multi-color LED smart lights