The
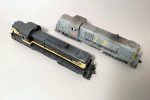
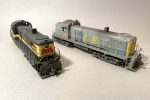
Standard diesel power on the L&N Cumberland Valley Local (CV Local) that served the St Charles Branch was a single RS3 until around 1974 when they were replaced with a single C420. The RS3 was the quintessential L&N mine run power of the ’60s and early ’70s, and these units sported a variety of paint schemes through the years. While the Phase III RS3s with rectangular carbody filters, prominent number boards and gyralights were more common, the early Phase IIs made regular appearances as well. I picked up two factory painted Athearn models a couple years ago to become CV Local power. I’ve been noodling on them for at least the last year, and the combined Southern Railway Historical Association (SRHA), L&N Historical Society (LNHS) and Railway Prototype Modelers (RPM) meet at Chattanooga, TN in October 2022 gave me the impetus to get these across the finish line.
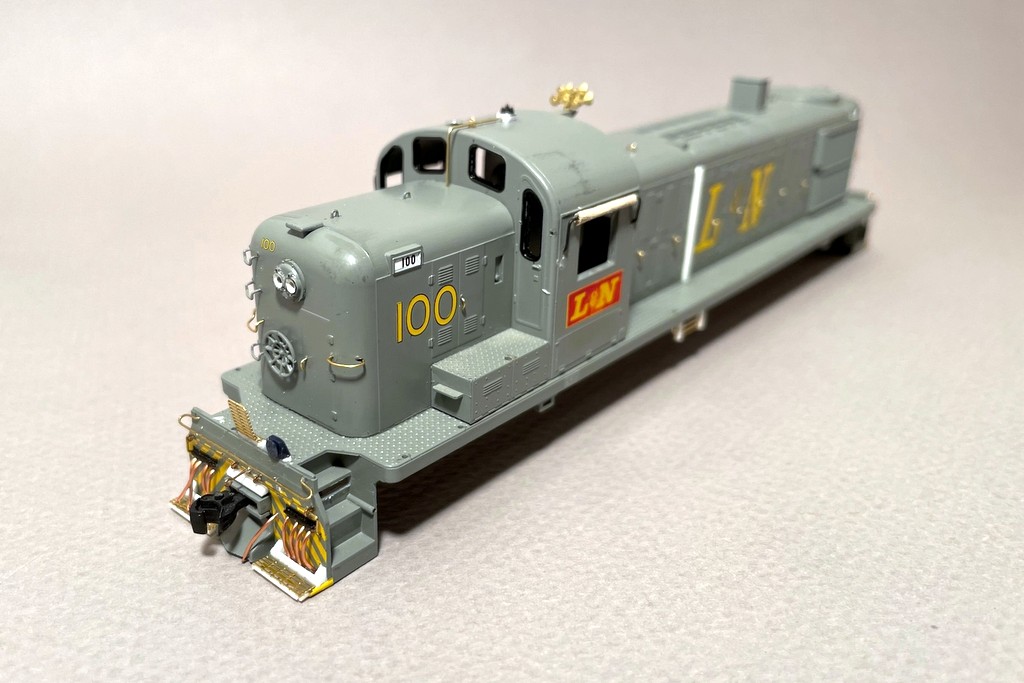
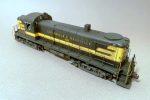
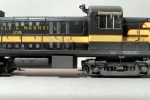
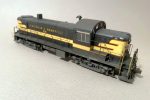
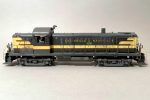
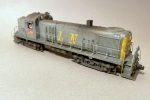
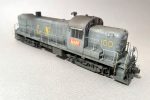
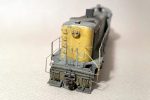
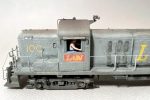
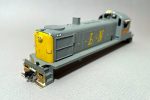
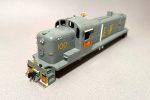
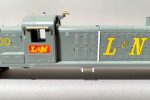
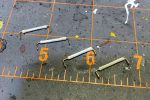
The Athearn models are decent, especially the body shape (old MDC shell), crisp paint, and fine handrails. The detail level, however, especially on the pilots, left a lot to be desired. I ended up scratchbuilding a ton of parts for these models which was actually a lot of fun and very rewarding! First things first, the black locomotive came as 102, and it had the original parallel exhaust stack these units were delivered with. I wanted 108 because it actually served as CV Local power in 1964 still in its original paint, so I scraped off the “2” on the long hood, scraped off the number-board decals, and replaced them with Microscale numbers from an L&N set. I also replaced the stack with a transverse stack from a spare shell and filled the old holes. For L&N 100, I “faded” the red L&N herald on the cab sides with a little wet sanding to make it look as though the red paint was wearing off and leaving the yellow underneath, something evident in many photos.
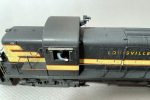
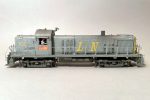
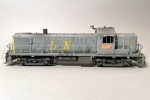
On the body, I scraped off the hood-door latches and replaced them with pieces of bent wire. I added some scratchbuilt lift rings to the long hood as well, and I bent new long grabs to curve around the hood ends as the factory grabs did not adequately capture their curves. I replaced the factory horns with some Overland 5-chime forward Nathan M5s as the factory horns were either incorrect or oversized. For unit 100, I scratchbuilt the antenna conduit and base from brass wire, eye bolts, and styrene with a DA whip antenna on top along with a scrap round cab-top vent from the scrap box. I also scratchbuilt the oil cooling coils under the right side (long-hood forward) from wire and styrene, and a piece of styrene rod completed the piping along the right side of the hood. The L&N units also had a rectangular hole below the third step on all corners, so I carved this out of the shell by drilling holes and cutting out the rectangle with a sharp X-Acto blade.

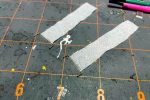
One fun detail was the cab sunshades. The L&N used simple canvas sunshades that rolled around a bracket. My friend Stuart Thayer showed me years ago a canvas radiator cover for a switcher he made from tissue paper, so I tried that here. I bent the bracket from .015″ wire with the horizontal section about 5 scale feet wide. I cut a strip of tissue paper (Kleenex brand, to be exact) about 4 scale feet wide and very long for the canvas. There are 2 windows on the engineer’s side of the RS3 and 3 on the fireman’s side, but the bracket and sunshade appear to be the same size. To adjust for the window spacing, I centered the canvas on one bracket and shifted it toward the rear of the cab for the other to cover the third window. After attaching the end of the “canvas” to the bracket with CA and letting it dry, I rolled the tissue tightly around the bracket a few times, cut the end off, and secured it into a roll using CA. A little black paint for the bracket and sand-colored paint for the canvas finished the project.

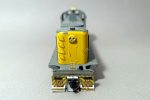
The pilots on the model are very bare with grabs in the wrong spots and no MU detail. The first detail upgrade was to scratchbuild some simple MU hose boxes and the angle on top of the coupler box from strips of styrene. This left the footboards too short, so I made new footboards from some brass roofwalk material and styrene. For the MU hoses, I decided to bend my own using one of my favorite modeling materials, copper wire from some old Cat 5 ethernet cables. I simply drilled holes into the pilots, bent the MU hoses, cut them to length, and glued them in with the ends in the hose boxes except for a few hanging out which I cut a little longer and pinched with pliers to simulate glad hands. The coupler cut bars are also a first for me. Rather than the U-shaped bracket over the coupler I’m used to, the L&N’s RS3s had a single long rod extending from the pilot with an eye bolt on the end. I scratchbuilt an impression of this from eye bolts and bent .012″ brass wire. Some formed wire and an eye bolt also formed the safety grab across the top of each pilot. The final pilot details were an MU cable receptacle (scrap box parts from Proto GP7s/9s) and scratchbuilt drop steps. The drop steps on 108 are solid pieces of sheet styrene cut to shape and rounded with a file. The see-through steps on 100 were made from brass roofwalk material.
For the underbody, I added the equipment boxes on the fireman’s side next to the fuel tank. For 108, I scratchbuilt this detail using several pieces of sheet styrene. For 100, I recycled a piece I’d cut from an ancient Athearn U33C shell when I’d narrowed it to make an L&N U30C. For the trucks, the biggest detail was the speed recorder on the fireman’s side. I scratchbuilt this detail using a piece of sprue for the main cylinder, styrene rod to attach it to the truck (after pulling off the journal box and exposing the square hole), and styrene rod filed to a rounded point for the center piece. The cable is copper ethernet wire bent to shape and held to the sideframe with an eye bolt.
Perhaps the most challenging detail modification was the end railings. The factory railings have MU stands that were easy enough to trim off, but the L&N used squared-off outer railing supports instead of the angled versions on the factory model. Engineering plastic is notorious tough to work with, so I hemmed and hawed over just leaving the factory angle before deciding that the squared look was distinct enough to warrant the effort. I started by using the corner of a file to notch out the 135-degree angle I would need to bend to 90 degrees to make it more pliable. Next, I cut the lower attachment spot of the angled support and cut the angled piece slightly shorter so it would bend to 90 degrees without overlapping the stanchion. Next, I roughed up the side of the stanchion so it would better take CA and glue (it doesn’t really “take” glue well even with roughing, but it does still better than leaving it slick). Finally, I cut a small piece of styrene to wedge alongside the stanchion and hold the angled piece at 90 degrees and secured everything as best I could with CA and liquid model cement.
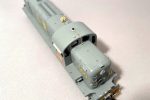
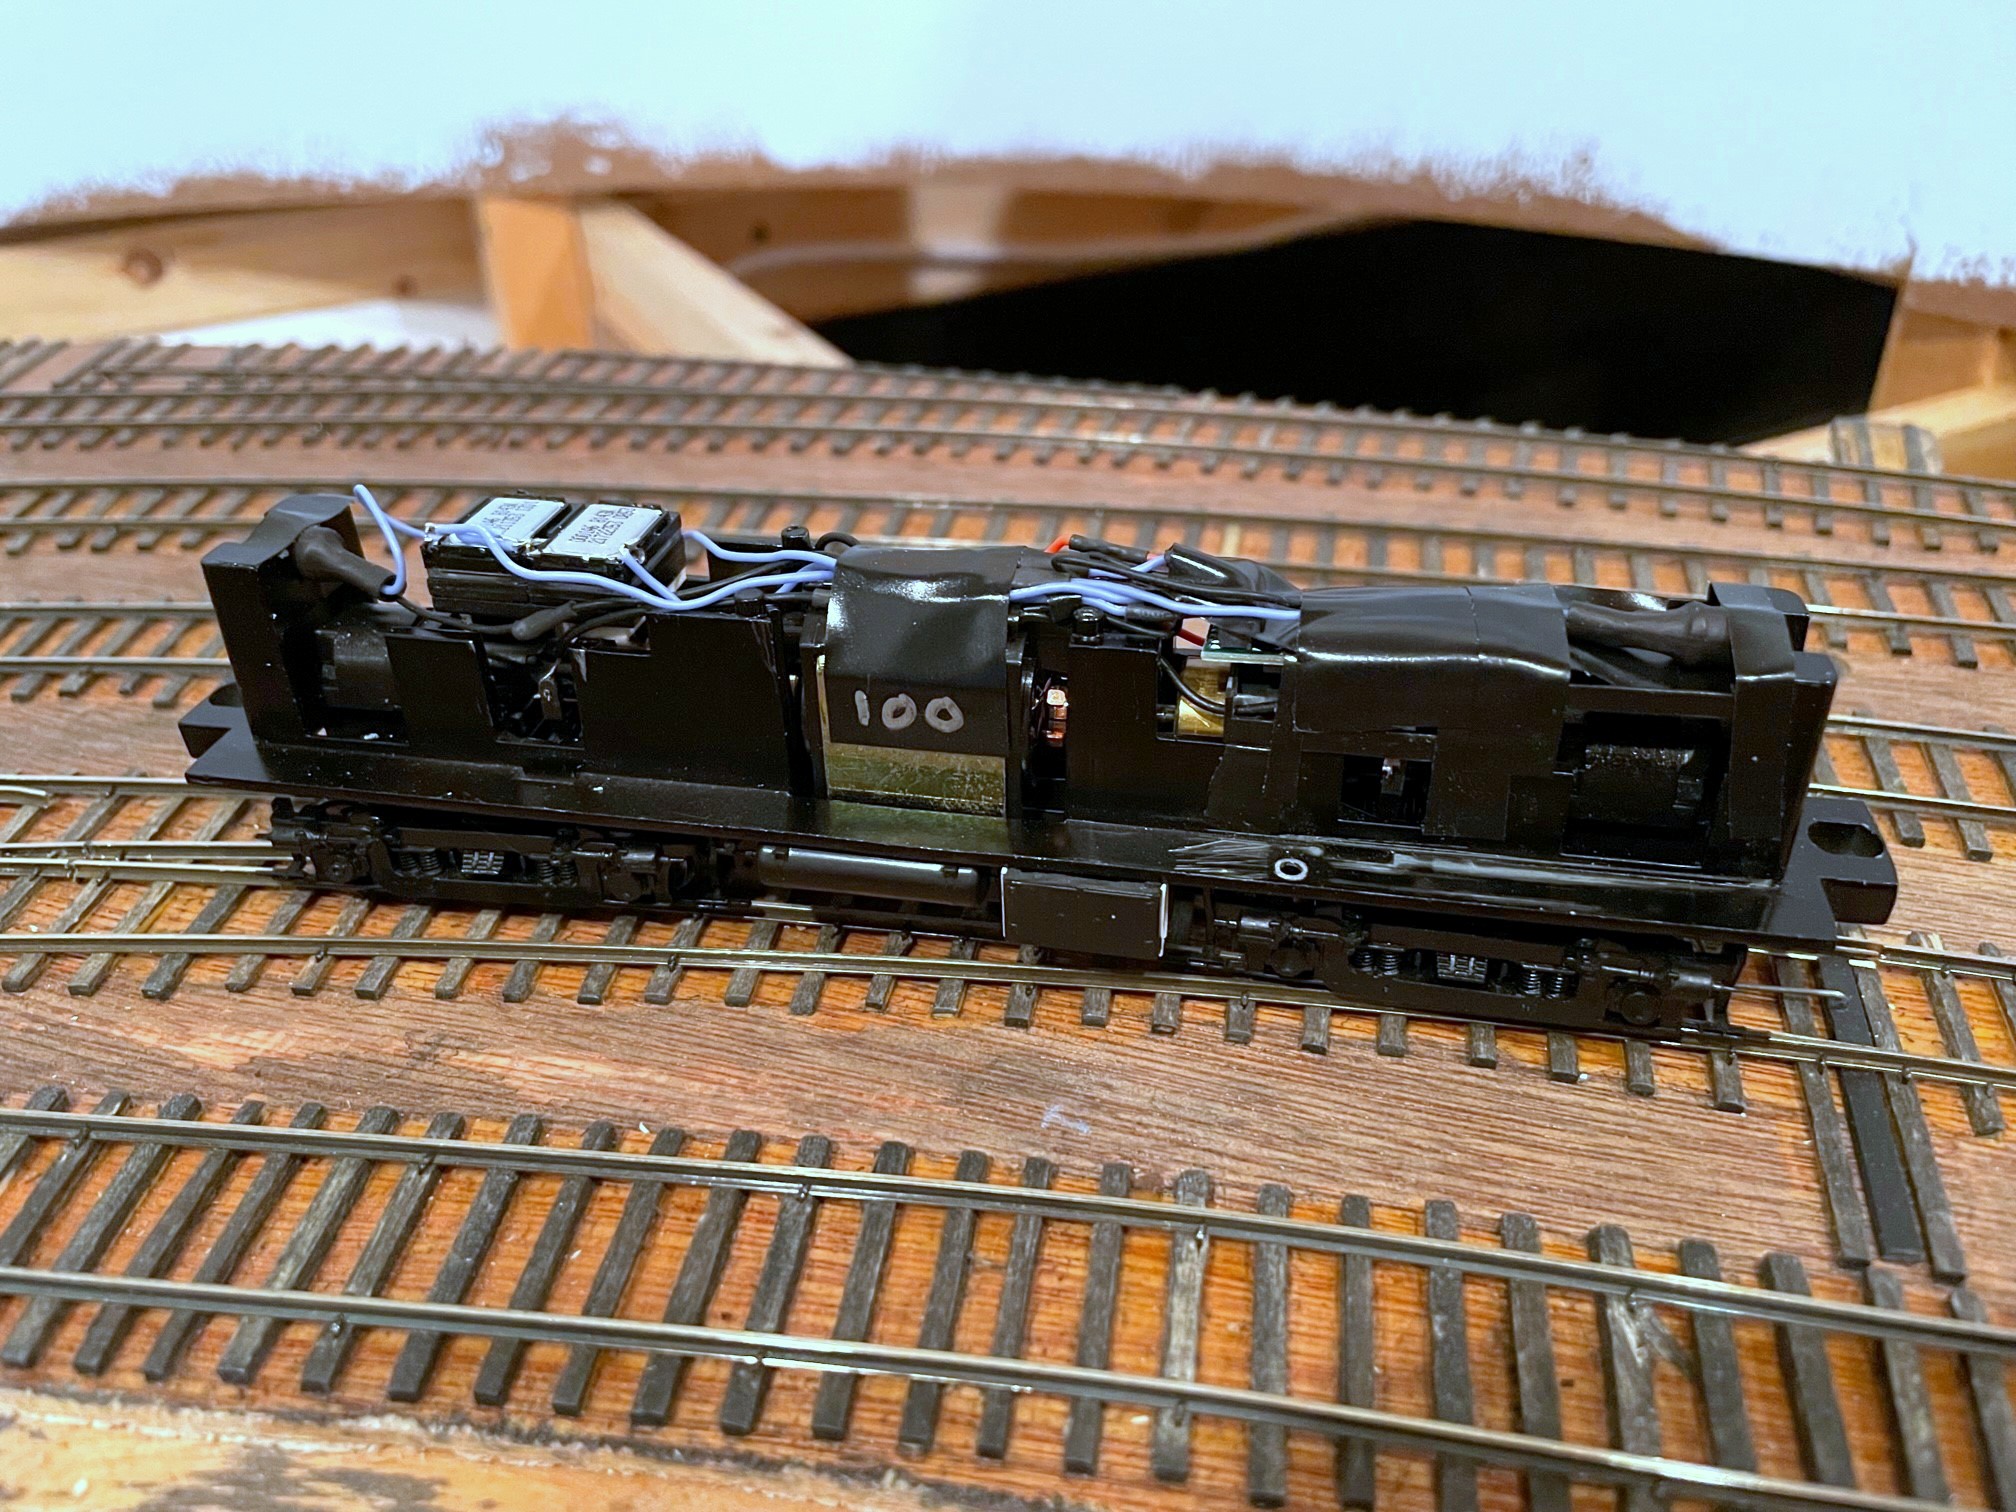
On the inside, the toughest thing was adding sound. There is hardly any room at all inside the shell, so I had to make several compromises. I chose a 21-pin Soundtraxx Econami decoder because it’s very small, and the Alco 244 sound it produces is pretty decent. There is only one ideal open spot inside the shell, so I decided to use it for the speakers, a pair of LokSound 11x15mm “sugar cubes” wired in series with the small LokSound baffles installed. This meant the decoder needed to go in the cab section. This required me to cut away the center section of the body within the cab to allow the decoder to sit on top of the truck assembly and extend into both the long- and short-ends of the hood. This is not a 21-pin model, so I made a custom 21-pin harness by soldering short bits of wire that fits snugly into the decoder holes onto the locomotive wires.
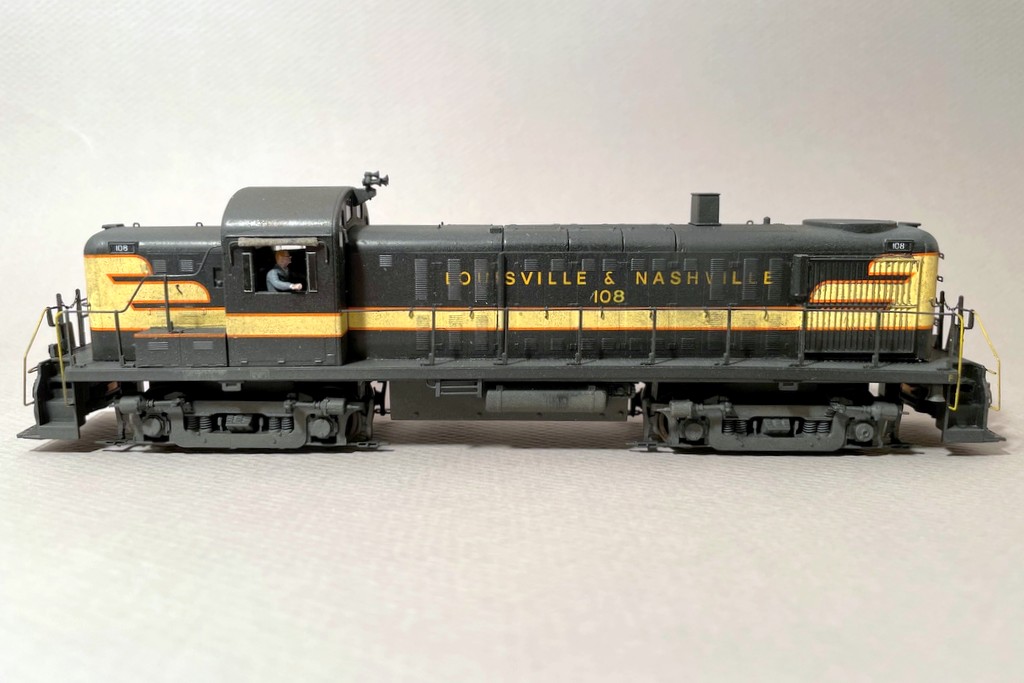
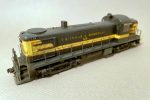
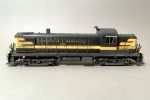
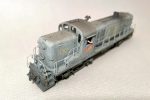
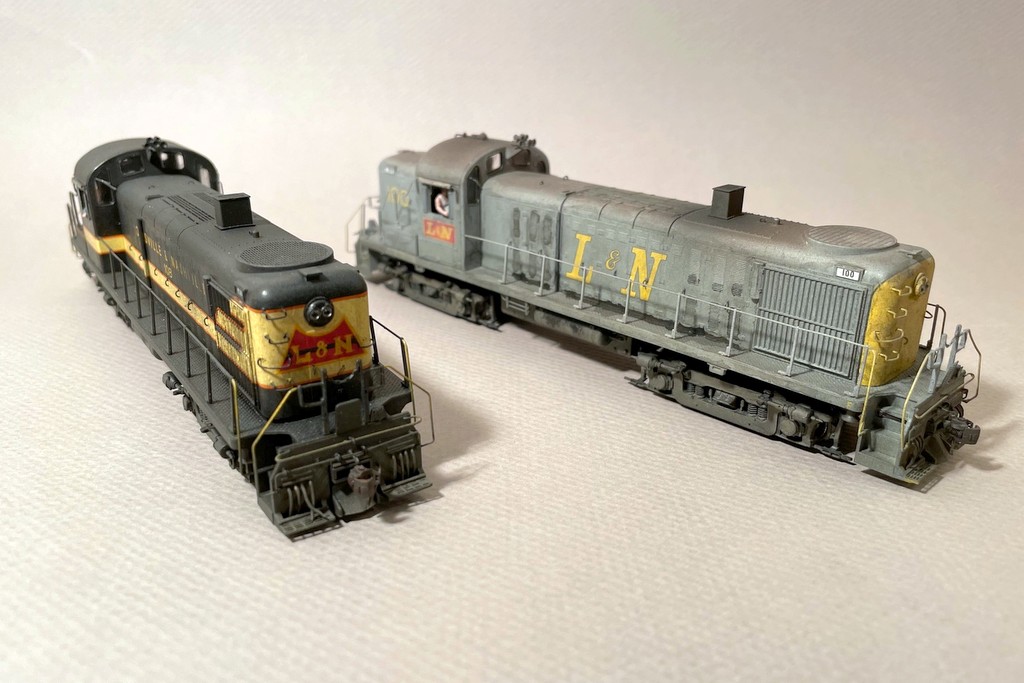
Once all the details were in place except the handrails, I touched everything up with black paint on 108 and gray paint I mixed to match 100. For 108, I was weathering to pictures of 108 on the CV Local in 1964 (see Ron Flanary photo here)–the fading on the roof is apparent, but the paint is otherwise fairly intact. I weathered 100 to pictures of it at DeCoursey Yard in Cincinnati in 1972 (see Brian Woodruff photo here), and it’s filthy! The first thing I noticed was 100’s factory paint was too dark. To “fade” it, I used a lighter gray and airbrushed it to lighten it up significantly. I wish I’d taken a picture of this step so you could see how much lighter it was–the weathering darkened it back up again, so I’m really glad I lightened it beforehand! I also sprayed a little dark gray onto the top of 108 to simulate fading, and I sprayed a little dark rust color onto both roofs and in front of the stacks and drybrushed some streaks under the battery boxes. Next, I gave them both a good black wash to grubby them up a bit. 100 also got some “oil stains” along the bottom of the carbody and in some of the hood door louvers. I’m happy with the lower oil stains but not the louvers–in retrospect I should have continued more layers of wash rather than using a thicker (but still watered down) black as it didn’t wipe off cleanly… my story is someone tried to wipe off the oil, and it just smeared… This model’s weathering is actually “backed off” a little from prototype photos to represent ~1968-70, believe it or not!
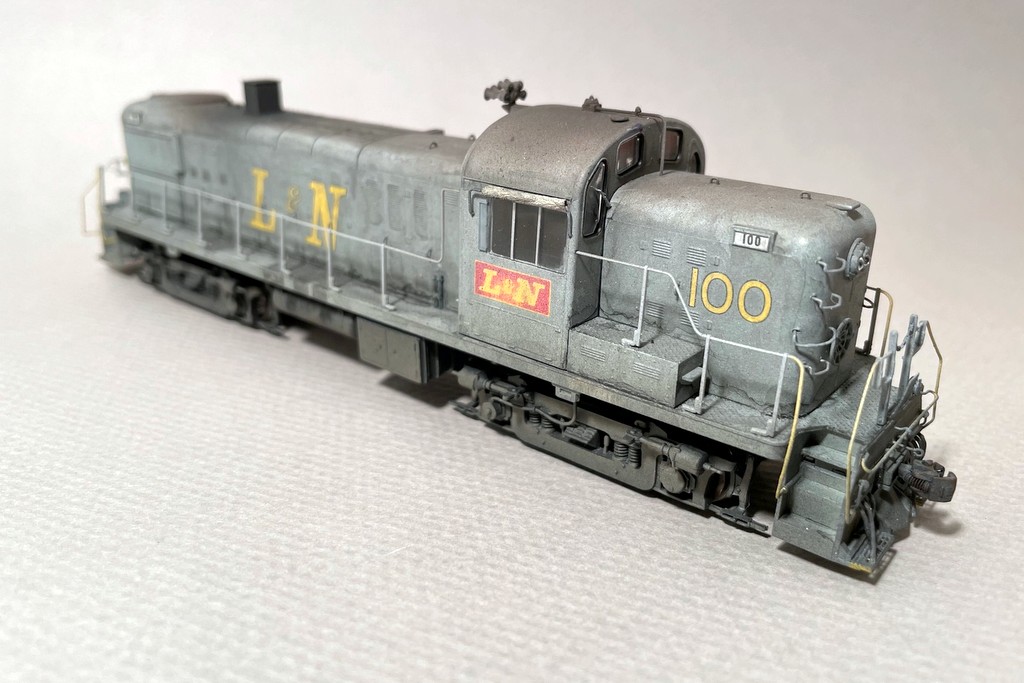

After the washes and oil stains, I put the handrails on and added liberal sprays of tan and flat black to weather the pilots, trucks and fuel tanks. I also used tan lightly on the lower sides and top, and I used flat black liberally around the exhaust stack and lightly on the rest of the roof. At this point, all that was left was to reinstall the windows, add wipers, and paint and insert the engineers (two bicyclists from a Preiser kit) which required amputation of the left legs to get them between the cab sides and body sides. They add a lot of interest, and as these units always operated solo on the CV Local, it made sense to add them. The final details were headlights made from bits of fiber optic cable with the end melted into a lens shape and some cab wind deflectors, simple bits of leftover clear styrene packaging cut to size and painted on the back and edges.
So now between these RS3s and C420 1317, I’ve got sufficient L&N power to run the CV Local from about 1962-1977. I still plan on modeling a couple of PhIII RS3s at some point, to include one in boring spartan black (sigh…), but at least the L&N crew on the layout will have some nice-and-dirty locomotives to go with the gurgly and lumbering burble of the Alco 244 prime mover as they shift hoppers around the coal fields of southwestern Virginia!