Monthly Archives: January 2023

Configuring DCC Consists for Directional Horns

As I’ve stated in previous posts, sound decoders have drastically changed my approach to DCC consisting. In an ideal world, I want all movement controls (forward, reverse, braking, dynamics) within a consist to be controlled by a single throttle, and I want only the lights, horns and bell of the lead unit to respond when an operator selects these functions. Digitrax’s “universal consisting,” unfortunately, doesn’t allow function-controlled movements like braking to go to the entire consist. Also, if you reverse the direction of the consist, you have to rebuild the consist to control both movement, lights and sound with the new lead unit. This is not a big deal for trains that only run in one direction, but every single one of my trains is an “out and back” where the lead unit of a consist switches, sometimes several times in a session. Asking operators to rebuild the consist every time they switch the train’s direction is not ideal.

Moving to “advanced consisting” (decoder-aided consisting) solved many of these problems but not all. Using the “consist” tab in JMRI, I was able to use the directional lighting features built into my Soundtraxx Tsunami 2 decoders to set the lights on the end units in a consist to “respond to consist address” but only in forward or reverse, thus solving the challenge of only getting the end lights in a consist to illuminate. The horns and bell, however, cannot be set to only operate directionally using the consist controls, so I was stuck with picking one loco in the consist to respond to all the horn and bell commands… this works, especially if all units use the same horn type, but it bothered me a bit to hear a Nathan M5 from the trailing GP35 instead of the Nathan P3 from the leading GP38. When I posed this question to a group of Digitrax experts, one of them pointed me to this video from Soundtraxx where someone had figured out how to use “alternate sound levels” function in the Tsunami 2 decoders to get directional horns, so I had to give it a try. The video left a few steps out, perhaps because they were using “simple consisting” (same address), so I had to experiment a bit to figure out how to make it work with advanced consisting, but in the end, I was able to get the consist to perform [almost] exactly as I had hoped using the following method.

The Gist

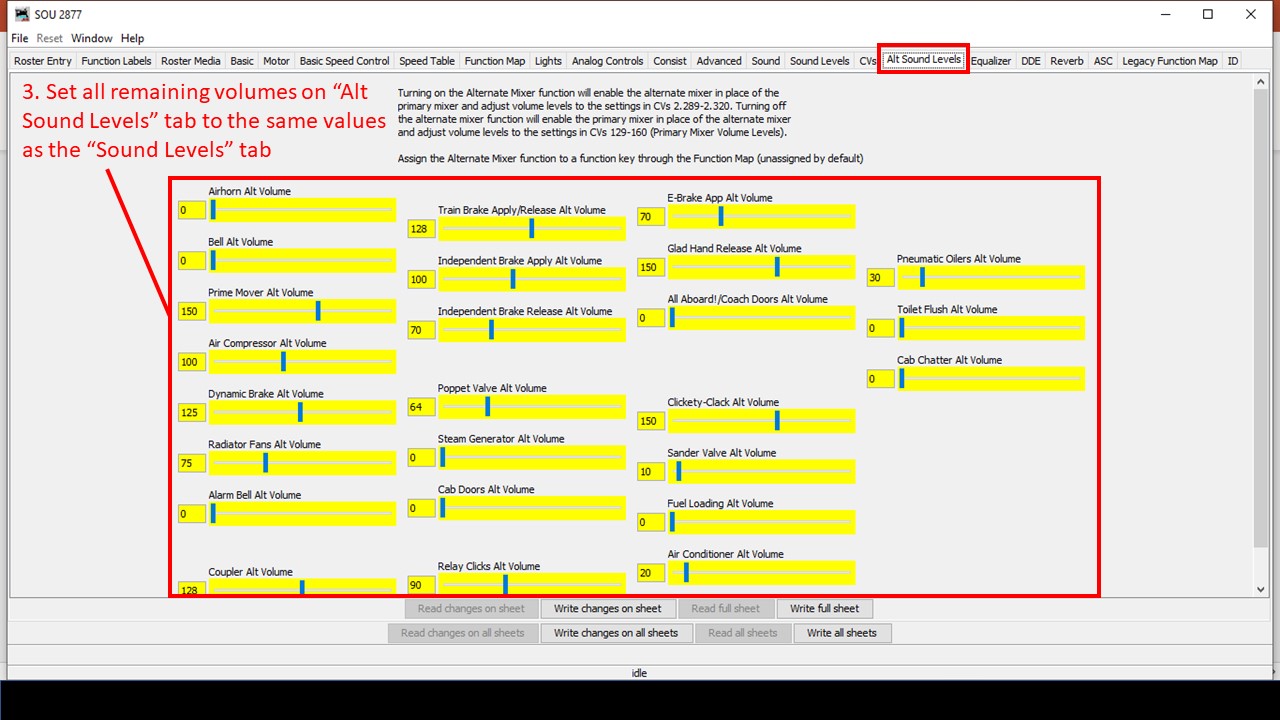
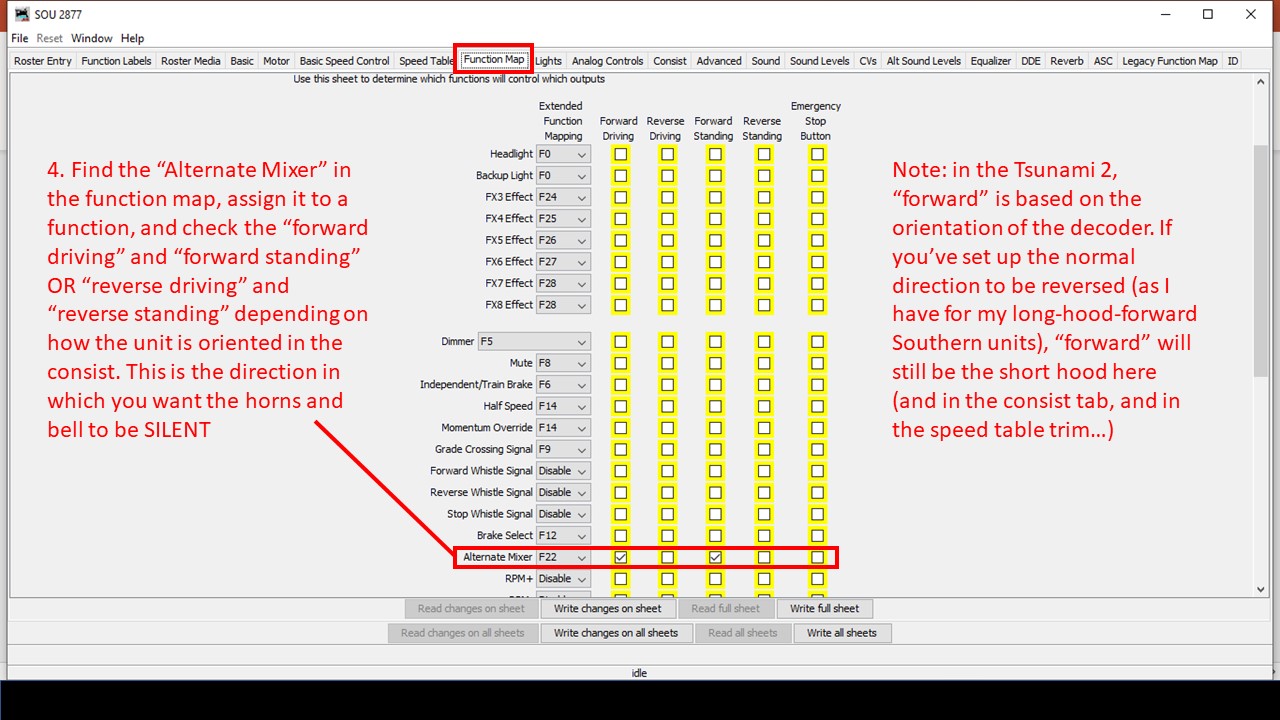
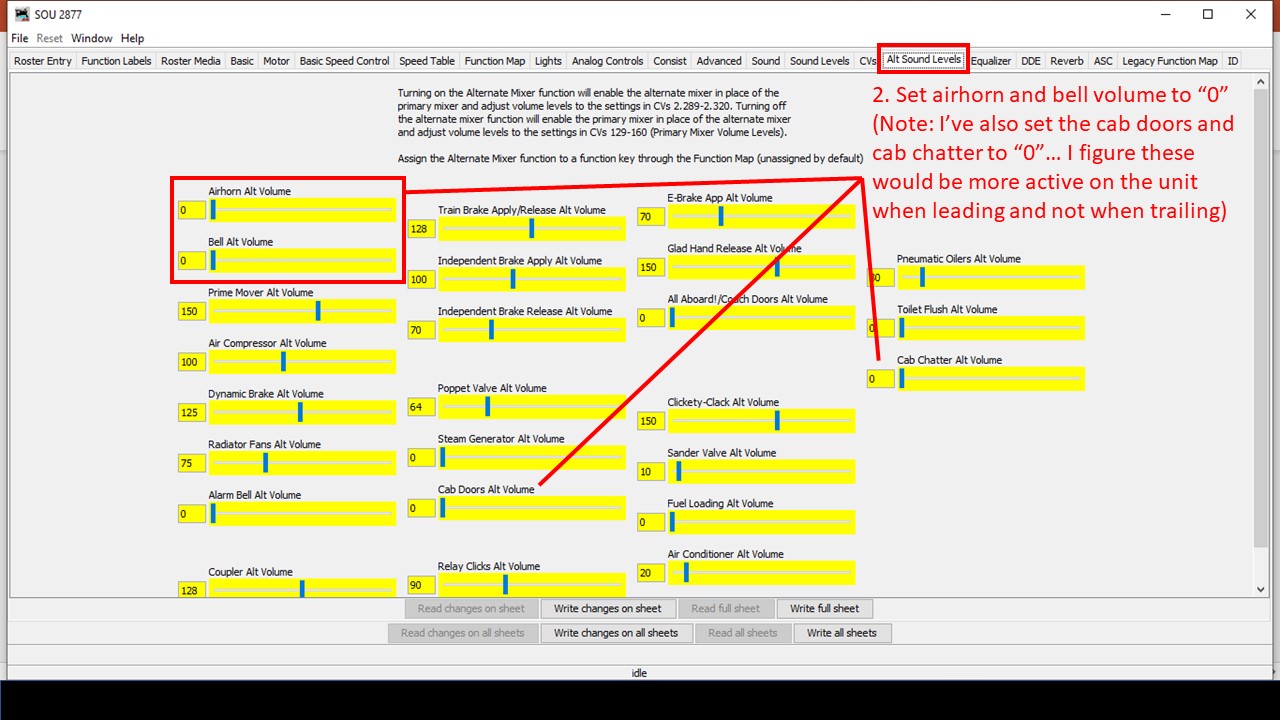
Soundtraxx Tsunami 2 decoders have an “alternate sound mixer” designed to make it easy to select a new set of alternate sound levels with the press of a function button. Additionally, the “function mapping” in Tsunami 2 decoders allows you to set any function to operate automatically when the command station commands the decoder in “forward driving,” “reverse driving,” “forward driving,” or “forward standing” conditions. The trick is to set all the alternate sound levels to match the primary sound levels EXCEPT the horn and bell which are set to volume “0,” then use the function map to configure the alternate mixer to operate any time the decoder is moving in the trailing direction (forward or reverse based on how it’s sitting in the consist), and finally to set up the decoder to “respond to consist address” for horn and bell functions. When you set up the locomotives on the ends of the consist in this manner, it has the effect of silencing the horns and bell when the locomotive is trailing and not leading. Here are the steps in JMRI.
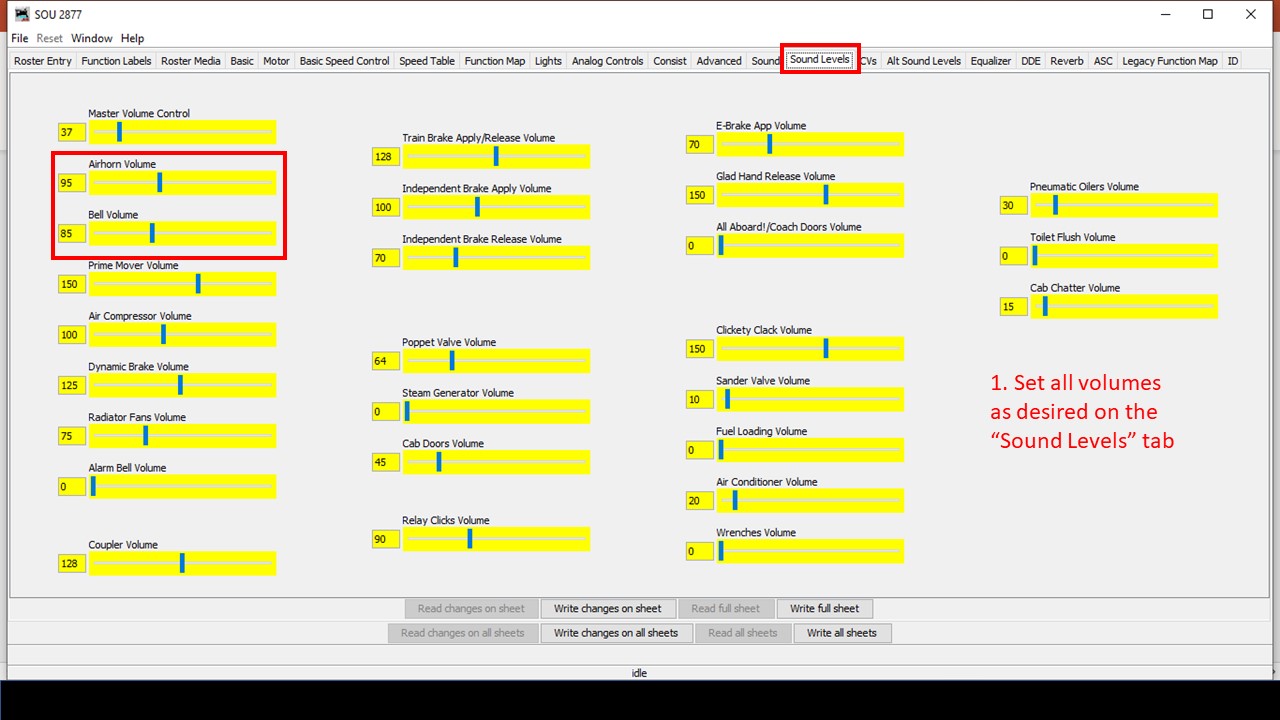
Consisting for horns and bells 1
Step 1. Set the sound levels in the primary sound mixer


Consisting for horns and bells 2
Step 2. Set the horn and bell to “0” in the alternate sound mixer


Consisting for horns and bells 3
Step 3. Copy all other sound volume values from the primary to the alternate sound mixer


Consisting for horns and bells 4
Step 4. Set up the “alternate mixer” to operate with forward or reverse direction (the direction in which it’s trailing in the consist)


Consisting for horns and bells 5
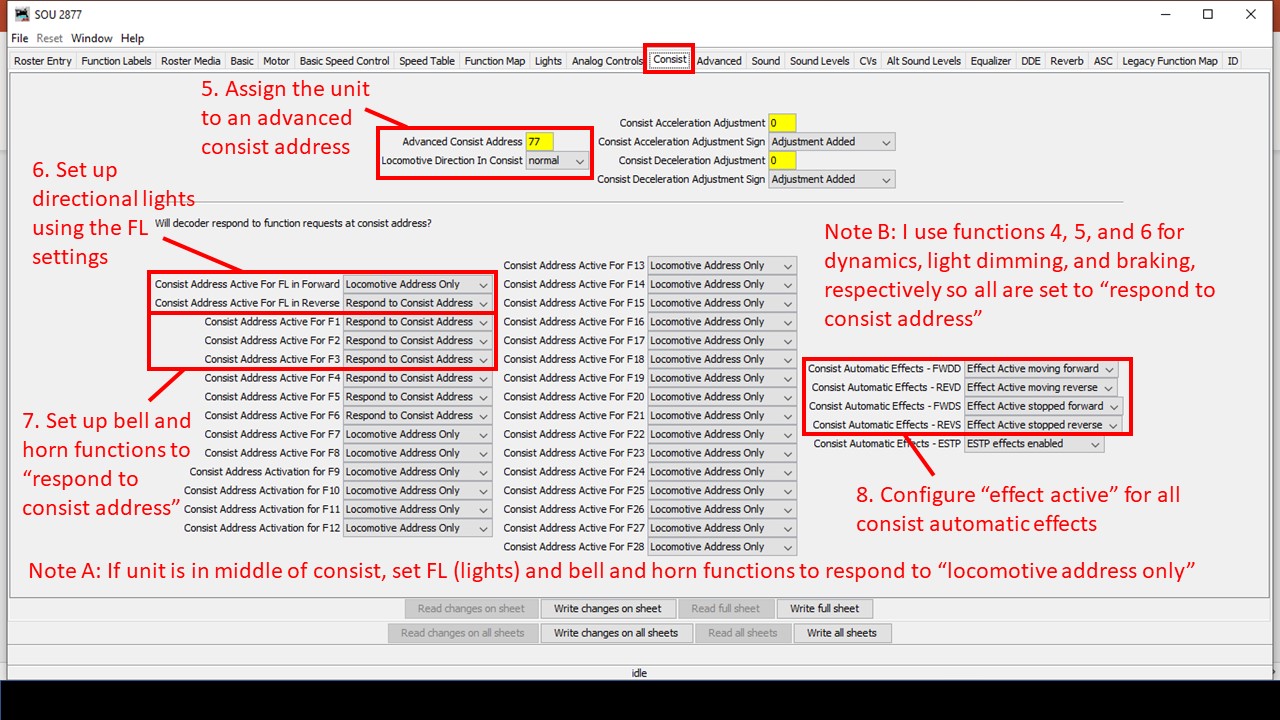
Steps 5-8. Set up the advanced consisting so directional lights and functions for horn and bells “respond to consist address” and enable the automatic functions


Some of the settings will depend on where the locomotive is in the consist and whether or not its on the end. For a locomotive in the middle of the consist, you can either set the decoder’s light, horn and bell functions to “locomotive address only” in the consist tab, or you could place check marks in all four columns in the function map (forward driving, reverse driving, forward standing, reverse standing) so only the alternate mixer with zero volume for bells and horn are used. If you change the orientation of the locomotive, you may need to change the FL settings in the “consist” tab and swap from “forward” to “reverse” check marks in the function map. Also, if you’re using a locomotive on the end that doesn’t support an alternate mixer (like the Soundtraxx Econamis I have in some locomotives), then you’ll need to pick just one of the locomotives to “respond to consist address” to provide the horn and bell for the whole consist and disable the directional checks in the function map.

That’s it! Now when you run a throttle using the advanced consisting address, the lights on the ends will be directional, AND only the horn and bell of the leading unit will respond to the throttle’s horn and bell functions no matter which direction you’re running. Click on the video at the top of the page to see this in action, and if you’ve got some even better tips and tricks for this, please leave them in a comment below!
Protecting Model Train Grade Crossings with Simulated Fusees

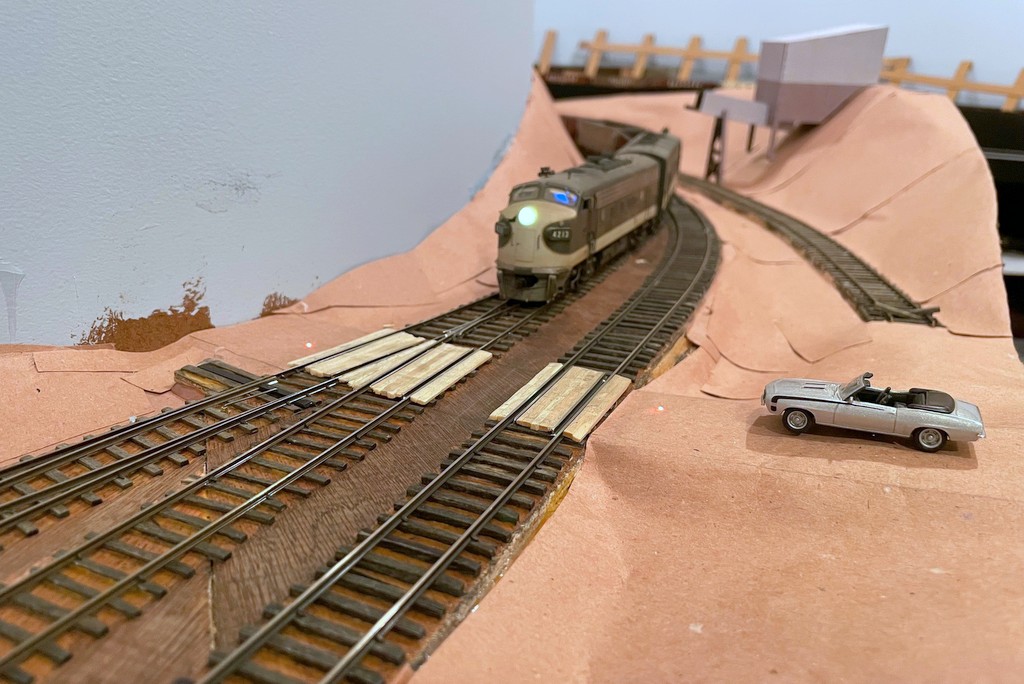
Fusees protecting a grade crossing
The St Charles Switcher crew throws down a couple fusees to protect the Pot Branch Road grade crossing near Mayflower

I enjoy trying to copy every element of prototype railroading I can… as long as there’s at least an element of fun in it. When I saw this short video showing a Western Maryland crew dropping fusees (pronounced “fyoozees”) to protect a grade crossing, I started thinking about how I might model this. Fusees are used by railroads for many purposes including dropping them on tracks to warning following trains of their presence–because of this purpose, fusees are designed to burn for a set time, commonly 10 minutes. Fusees can also used to protect grade crossings that don’t have flashing lights like the one in the WM video, especially when it’s dark or posting a flagman wouldn’t be practical or safe. Since I want to model nighttime ops, and I haven’t made any HO scale flagmen to post yet, I decided I wanted some simulated fusees to protect the handful of crossings I have on the layout.

My first attempt was pretty simple and economical, just two fiber optic cables embedded into the “road” (it’s just paper and cardboard at this point) on either side of the grade crossing routed to a bi-color LED that I connected to the DCC track bus (creates a reddish orange glow) and a simple SPST push-button switch. To keep the fiber optic cable from falling through the road, I melted the end into a mushroom shape by holding it near a hot soldering iron. The other ends were taped together and inserted into a piece of shrink tubing around the LED. It was functional enough to protect the crossing, but I really wanted a way to 1) put the fusees on a timer, and 2) make them look a little more realistic.

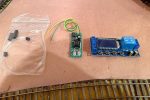
Parts to make a simulated fusee
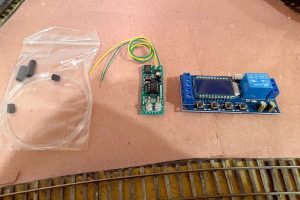
The basic parts to make a simulated fusee including fiber optics, the Bakatronics flares / fusee circuit, and the timer circuit

The timer issue was solved by searching Amazon and looking at a lot of different timing circuits. I finally settled on this one, though it’s probably overkill. I like it because you can choose one of several timing modes (fun to play with for other projects), you can set the timer for however long you want to keep the relay “on,” and you can easily see the timing settings on the display. To make them more realistic, I started with an internet search for “model railroad fusee,” and after chasing through some links in model railroad boards, I discover the Bakatronics BK-111 “Simulated Flares / Fusees Kit.” It looked promising, especially since it’s designed to power two fusees that “light” and extinguish several seconds apart (like one person is walking a short distance between lighting them, just like a grade crossing). I ordered two just to make sure it would work, and I was not disappointed! When activated, they “light” at different times, flicker independently for a while, then the first one goes out, then the second with a nice slowly diminishing burn out… really cool looking!

Fusee control
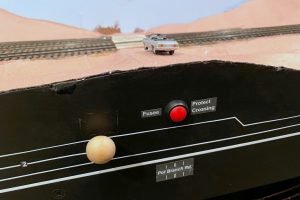
The fusees are controlled with a simple momentary SPST switch on the fascia

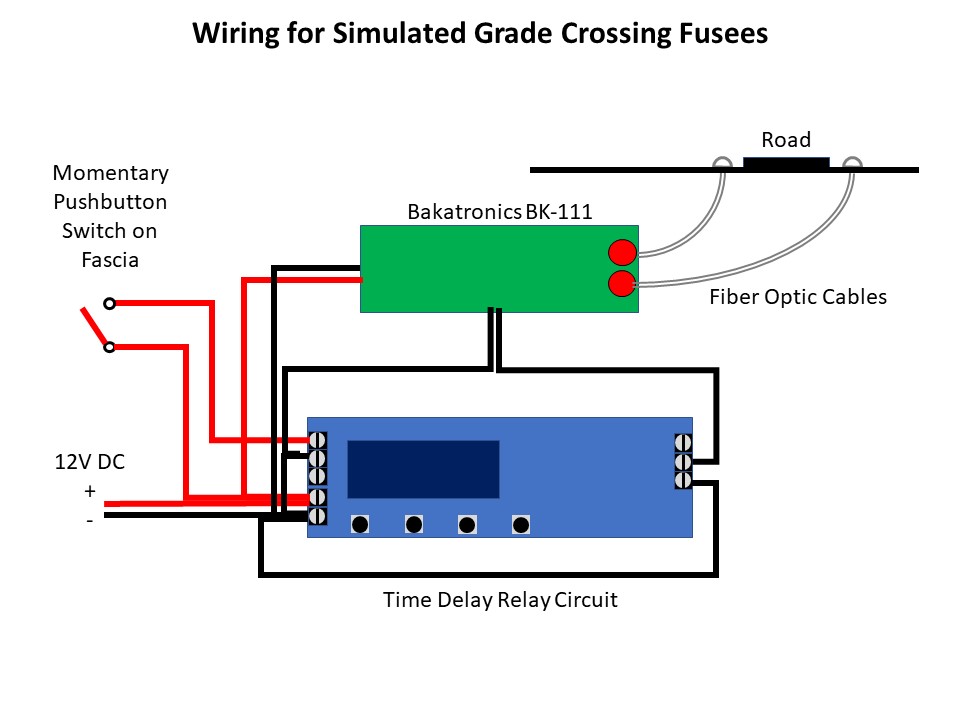
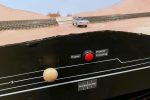
The Bakatronics fusee circuit is designed to work with either a momentary switch (stays on for about 30 seconds) or an on/off switch (stays on as long as the switch is closed). Instead, I wired the fusee circuit to the timer circuit so I could set the time the fusees stay lit exactly, and all the operator has to do is push a button once. I use a 4:1 fast clock, so a 10-minute burn should last about 2.5 minutes / 150 sec. The Bakatronics circuit add some time on its own, so I found a setting of 135 sec on the timer keeps the fusees lite for about 10 scale minutes, and like the prototype, the crew only needs to worry about whether or not to put down another set of fusees (push the button again) if the first set “burn out.” Both the timer circuit and fusee circuit run off a ~12V DC bus I have running around the fascia, previously to power semaphore lights. Here’s a video of the fusee in action…

We used these on my last operating session, and I thought they added a neat bit of prototype thinking for the crews–we had to think about protecting the crossings while moving the trains, and the flickering fusees gave a visual representation of the action taken. I can’t wait to try them at night when I’ve got the final lighting installed!

Wiring Diagram for Grade Crossing Fusee Circuits

Operating Session – Dec 29, 2022

Ops Session 12-29-22 St Charles Switcher
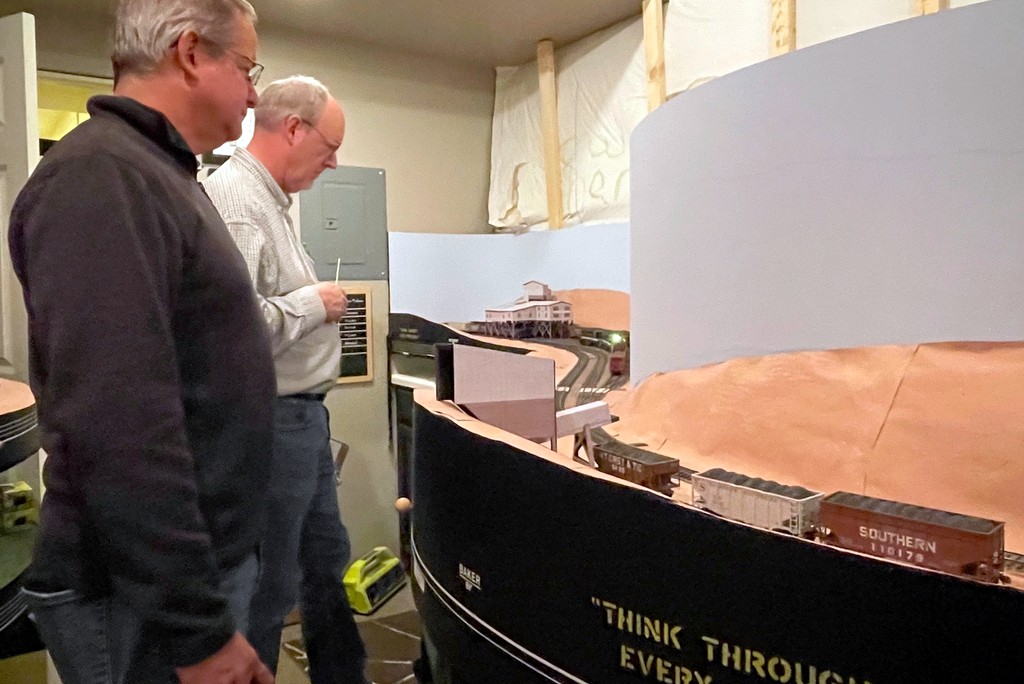
Patrick and Stuart work Mayflower with the St Charles Switcher
Ops Session 12-29-22 St Charles Local
Patrick runs the St Charles Local figuring out how to get 10 pounds of cars to fit in a 5 pound sack

Or is it “operating session Aug 2, 1976?”… Regardless of the date, it was a lot of fun hosting two great friends, Stuart Thayer and Patrick Tillery. This was the first-ever 3-operator session on the layout, and despite only having one of the two decks complete, it still took the three of us the better part of three hours to run four trains. Part of that is because I know Stuart and Patrick are both experienced operators and prototype buffs, so we put some “veteran mode” rules into effect. In addition to the normal rules of “get the cars where they need to go,” “follow signals,” and “follow the timetable and orders,” we had to protect crossings (more on that in a later post), unlock/set/lock semaphores to protect the branches we were operating, cut cars to avoid blocking a new road across two yard tracks, and follow all blocking instructions including placing all loads ahead of empties.


Trains included a “Black Mountain Local” that simulated bringing in the previous night’s haul from the non-existent upper-deck tipples, an L&N “CV Local” to handle the L&N’s trackage-rights agreements at two tipples, Train 61/60 the “St Charles Local” bringing empty hoppers out of Andover (staging) and returning with loads, and the “St Charles Switcher” working St Charles area tipples and the Baileys Trace Branch to Mayflower. With the “veteran mode” rules in effect, even the simplest of trains still took a while to operate. Just the movement of the Black Mountain Local out of the helix (including a stop to reset the semaphore) and blocking in the three-track yard took a full scale hour (15 minutes real-time). Despite the simplicity of the St Charles Local’s job (bring empties, pick up loads), the yard’s prototypically small size creates the need to use the tracks and wye creatively to swap out cuts, and the instruction that all empties (in this case empty covered hoppers) have to go behind the loads, drives the sequence of picking up cuts.

Ops Session 12-29-22 St Charles Switcher
Having completed work at Baker, Patrick slows the mine run to a crawl on the way back to Mayflower as Stuart protects the crossing with fusees

Growling L&N C420 1317 plied the Southern’s rails without incident with Stuart at the throttle, but his luck was not to hold when he took the throttle for the St Charles Switcher with GP38AC 2877 and GP35 2649 at his control. Let’s just say that there is a certain switch at Mayflower that 2649 decided it needed to jump every time, and it only needed to cross that switch 18 times to work the tipple. Despite several breaks to ensure proper gauge and freedom of motion in 2649’s trucks and tweaking some spots in the switch with a gauge and pair of pliers, 2649 was determined to stay on the ground. Of course, now that the session is over, 2649 navigates that switch just fine… sigh. I still have a long way to go until things are bulletproof.

There were several “firsts” in this session:

  • First 3-operator session
  • First use of the new semaphore in St Charles
  • First use of the new “fusees” I’m installing at all the grade crossings
  • First use of the new-and-improved crew assignment board
  • First time a “tipple” has been in place at Baker (a new mock-up)
  • First use of a new “speed-retarding system” on the steep portions of the St Charles Yard (spaced-out monofilament line)
  • First use of the new “safety slogans”… and no one was seriously hurt 😉

And of course some areas for improvement and “lessons learned”:

  • Too many derailments–I still need to improve my trackwork to make it bulletproof
  • I need to make blocking instructions more prominent if I want them to be followed
  • I don’t think the use of the train-order semaphore in St Charles is as understandable as it needs to be
  • I still need to work on the crew assignments to better balance how much each operator works
Ops Session 12-29-22 St Charles Switcher
The St Charles Switcher arrives back in St Charles completing the ops session
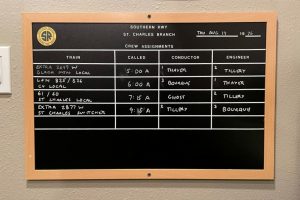
Ops Session 12-29-22 Crew Assignment Board
Crew assignment board for the session–I modified it halfway through to give “operator 1” more jobs… still working on balancing things