Just one more 1/2 turn to go before reaching the main level
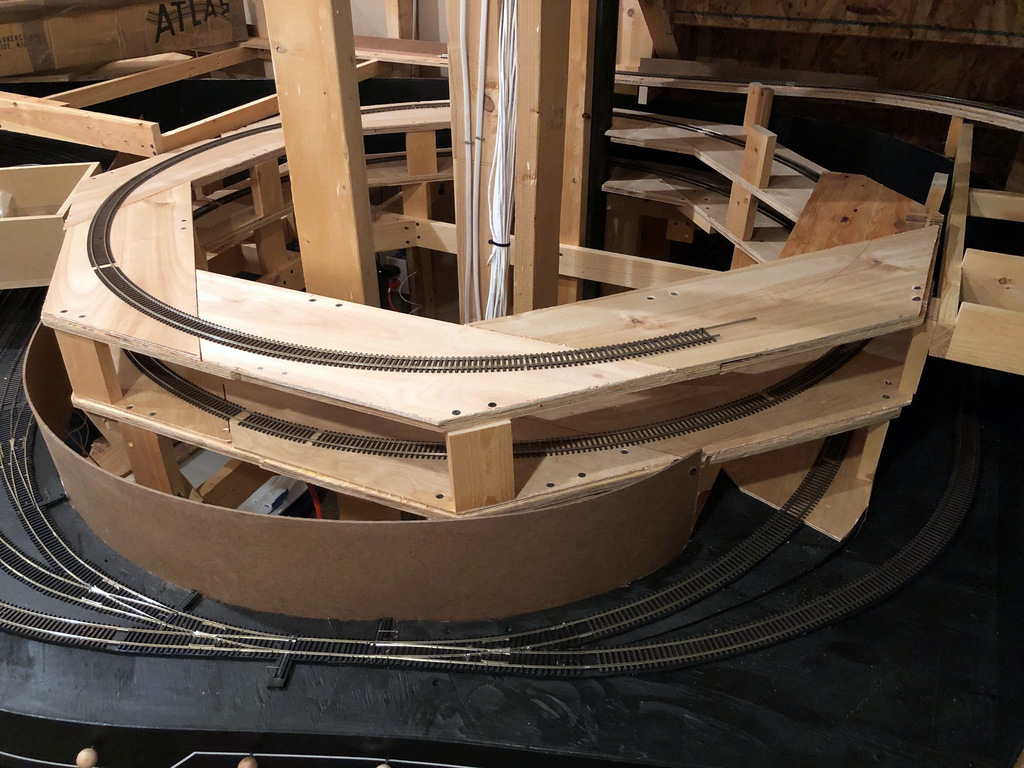
Just [almost] finished the first helix. Man, am I glad not to have to work around a floating wall for the second one! As promised, I’ve written an article on how to design and build a helix that’s strong, reliable, easy to build and an efficient use of space and material–it’s a design I call the “Double Pinwheel Helix.” I’ve built two helices this way now, and I haven’t seen another design that comes anywhere close to being this simple to build using nothing but plywood and a circular saw (no jigsawing for hours), and it’s very forgiving if you don’t cut the pieces exact or your space is a little wonky.
Rather than post it here, I put the article on Appalachian Railroad Modeling where more people would be able to find it and hopefully be inspired to overcome their fear of building a helix. You can find the article here. Here are a couple of photos so you can see the progress.
The key to the double pinwheel design is lots of clamps to ensure the lamination of pieces is thorough
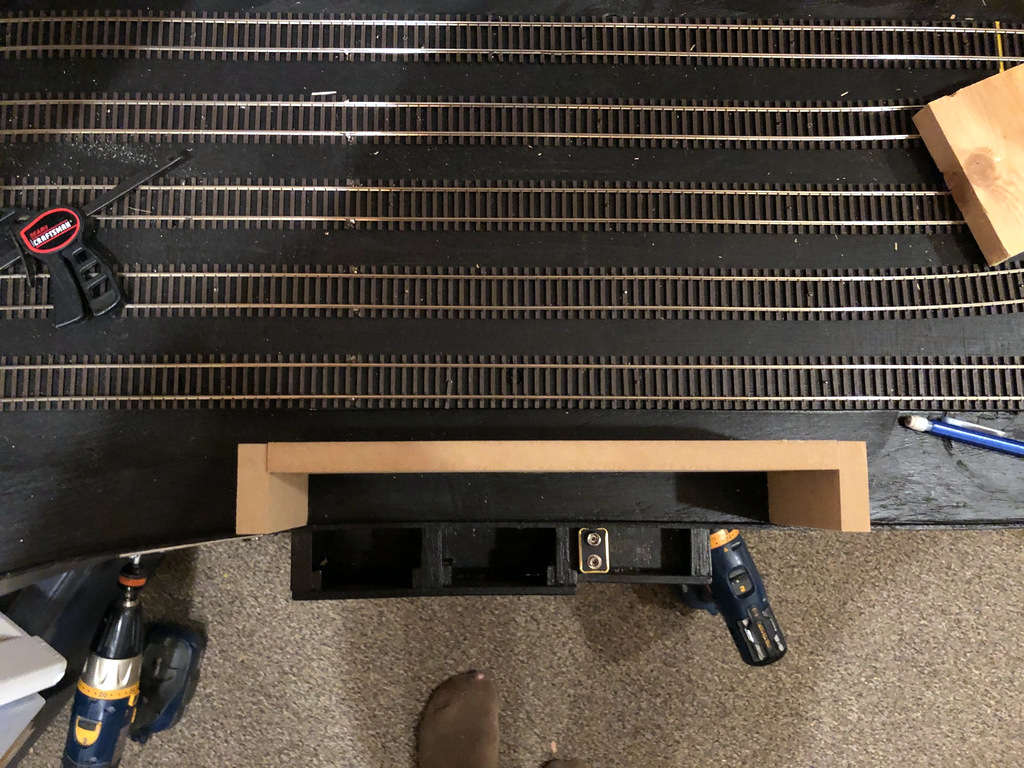
My undergrad is in Human Factors Engineering, the science of designing things so people can use them easily and intuitively. Though I’ve never been a Human Factors Engineer in my work, I enjoy applying the principles I learned to my model railroad. The first step of human factors for a layout is usually the space for operators–designing aisles wide enough to accommodate your people and give them access to the areas of the layout they’ll need. The next step is figuring out what other needs for space they’ll have while operating. One of those space needs is a place to store their “stuff” they use while operating–enter the fascia pocket!
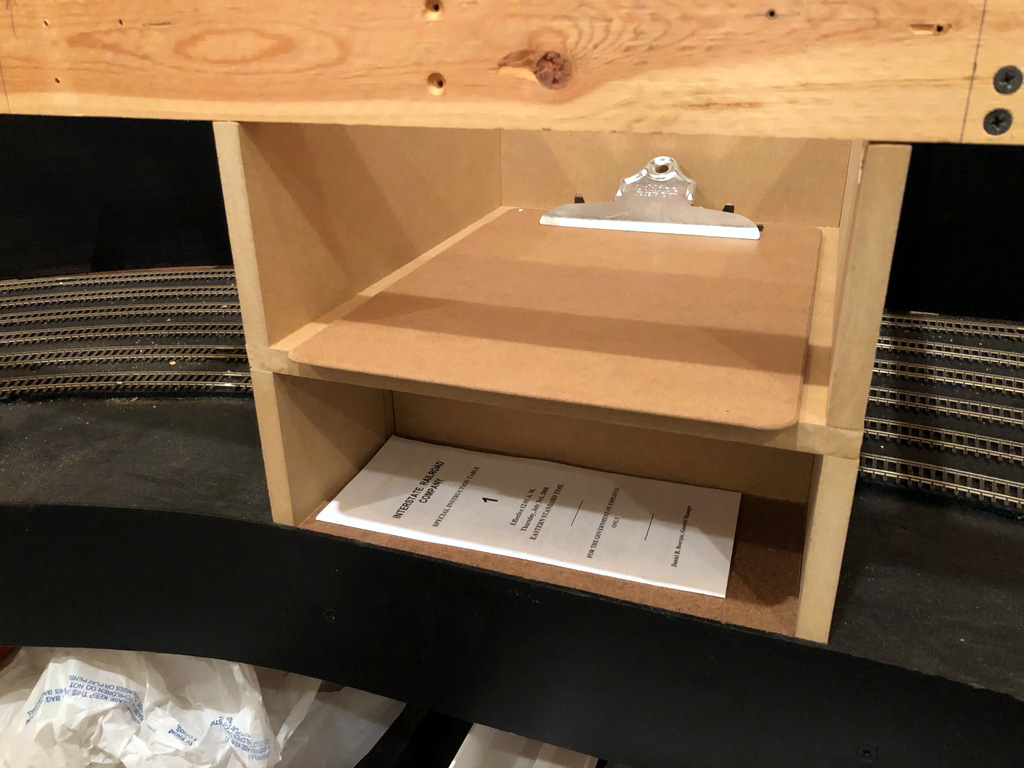
I’m continuing my practices from my former Interstate RR layout. Upon being assigned a train, each operator will be given a clipboard with their train information (location, engine number(s), throttle assignment, etc.), instructions on how to work the train, any applicable train orders, a map/diagram of the layout, a switchlist, a pencil, and a decoupling tool. The operator will need this clipboard throughout the session, and since I DON’T want operators setting their clipboard on top of the layout, it’s important I design in convenient spaces for these clipboards.
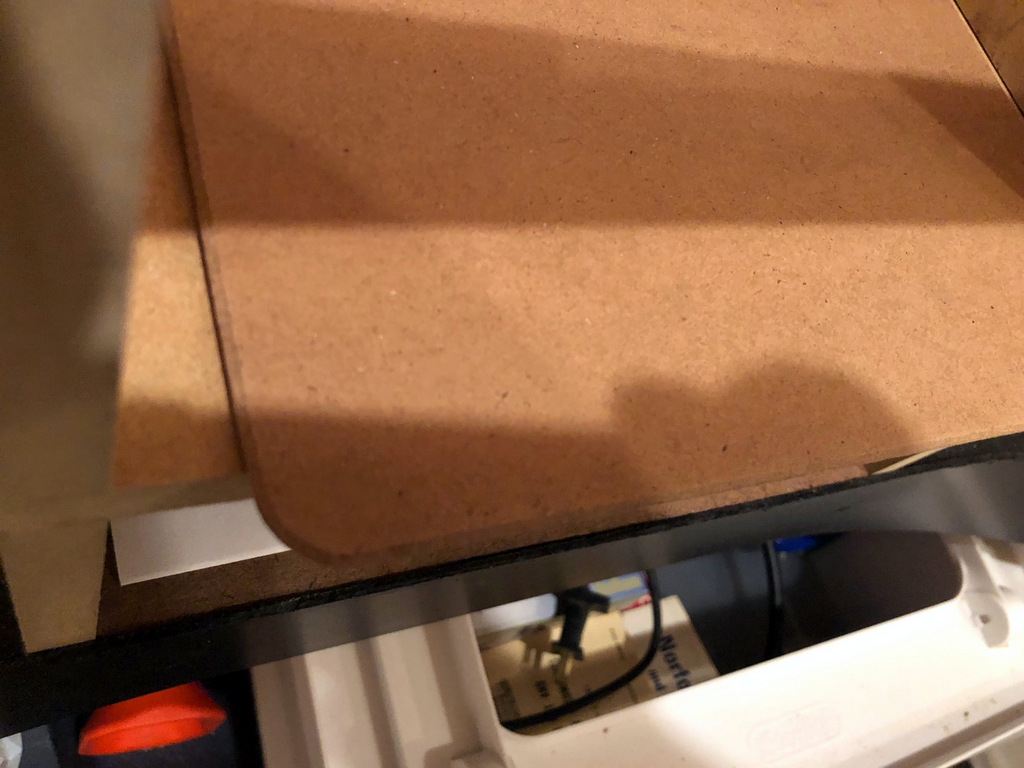
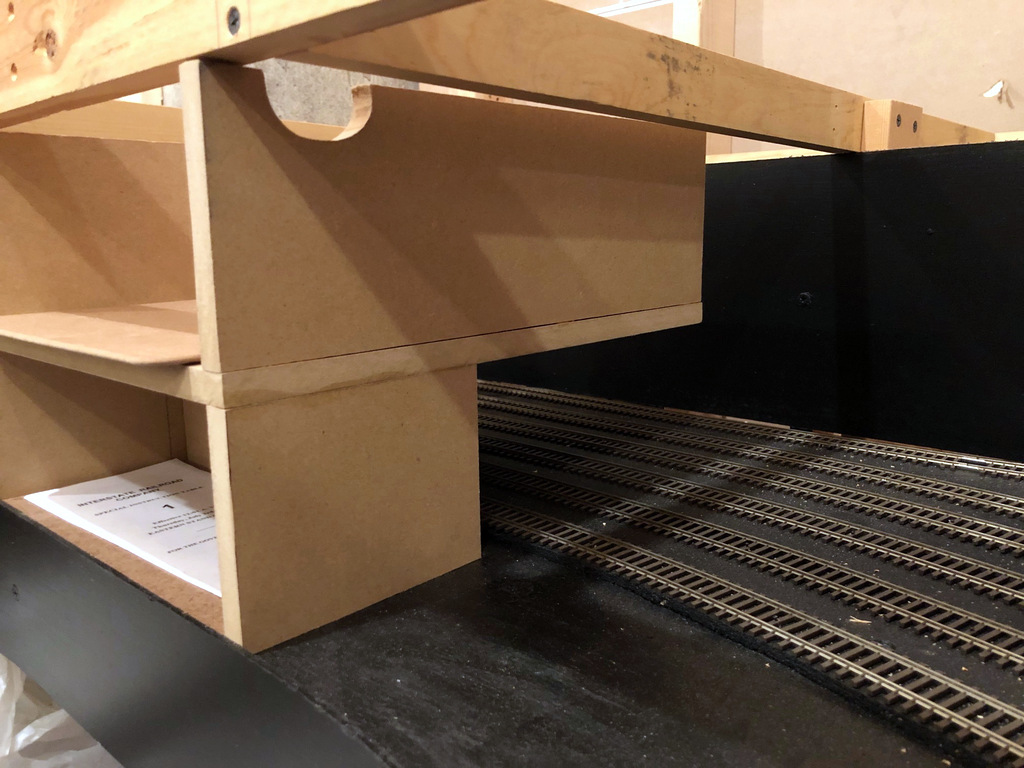
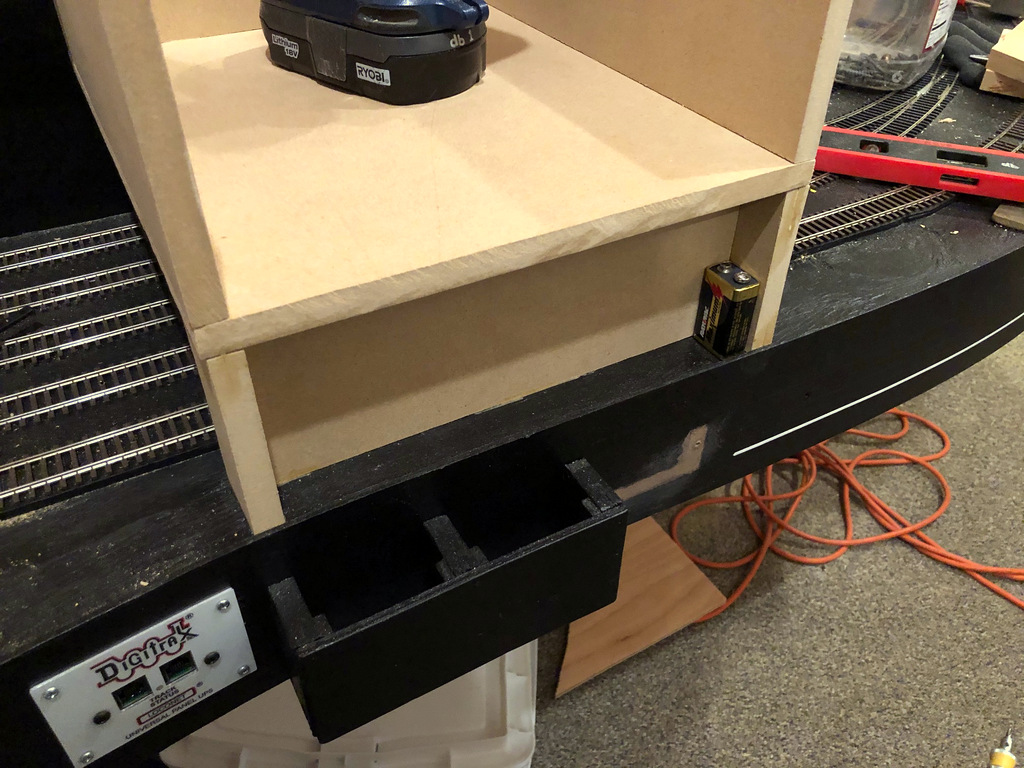
This is what a nearly finished pocket (still missing paint) looks like–this one will store a clipboard up top and timetables or switchlists below
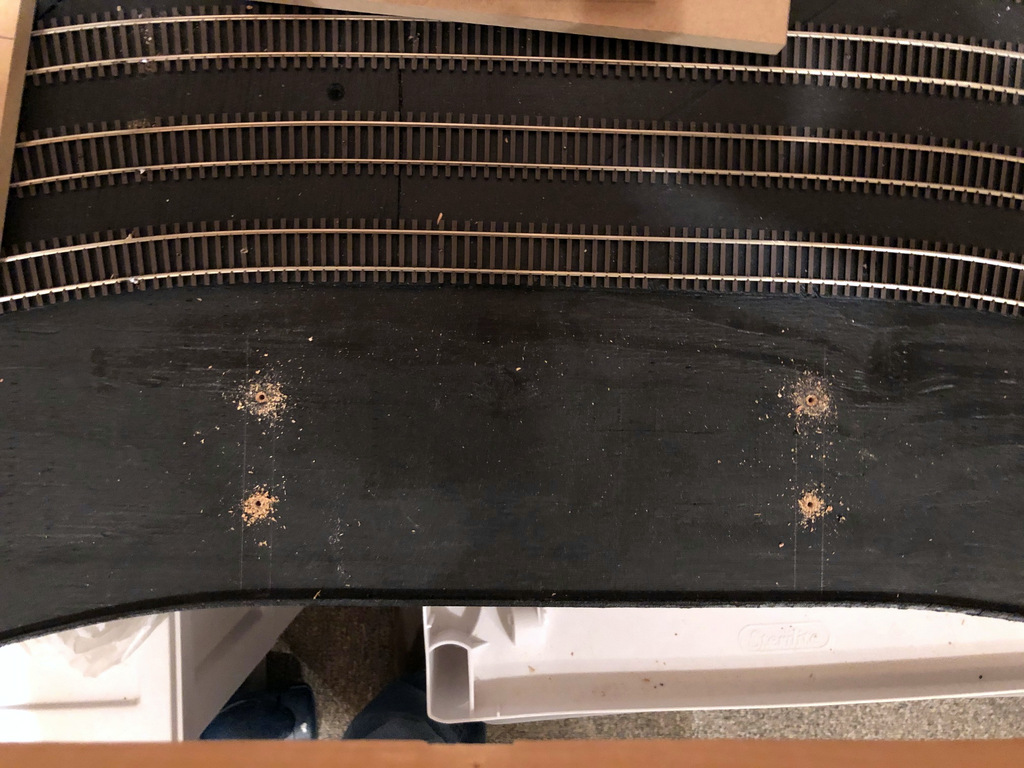
Once I put in the first section of main-level benchwork above the staging level, I had a nice ~8.5″ space between levels that might work for this purpose, but I needed some way to keep the staging tracks safe. I decided to build clipboard pockets over the staging tracks since trains only need about 3.5″ of the 8.5″ for clearance. The clipboards are 9″ wide and 13″ long, so I’m making each clipboard pocket 10″ wide and 12.5″ deep–this will ensure the clipboard sticks out about 1/2″, just enough to ensure the clipboard is easy to grab without impeding on the aisle or snagging on operators.
To support each pocket, I need a base about 3.75″ tall between the staging base and the pocket. I’m using these as storage pockets for useful things for operators as well. The pocket depth depends on how far the staging tracks are set back from the fascia. In some areas, I can make pockets 12″ deep for papers. In other areas, I can make pockets 4.5″ deep to hold extra switch lists, timetables or hand-outs. Some areas where the track is close only allow a ~1″ pocket. . . hmm. . . I know, that’s perfect for storing extra 9V batteries for the wireless throttles!
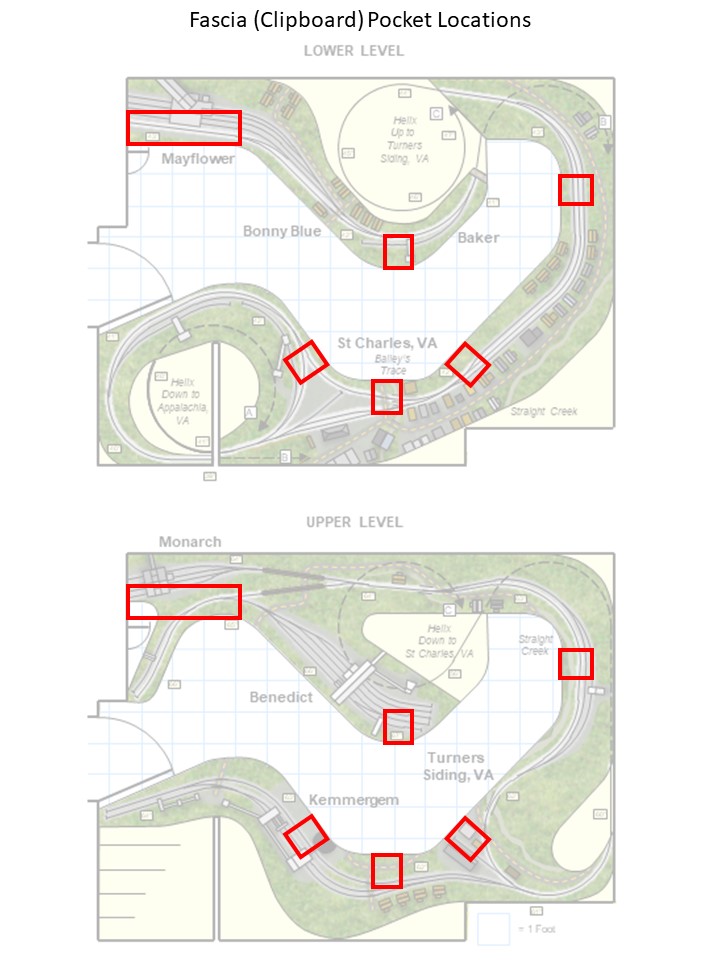
The next step was figuring out where to put them. I wanted them in spots useful for operators, but they also needed to be away from the yard ladders in staging and spread apart enough to allow easy access to all staging areas. I decided on five locations that line up well with the action on both decks. A sixth area is formed by a counter top a few inches under the benchwork for Mayflower. There will be a pocket within 2-3 feet of an operator for about 90% of the layout.
Overview of two pockets showing the ample space between them for accessing staging
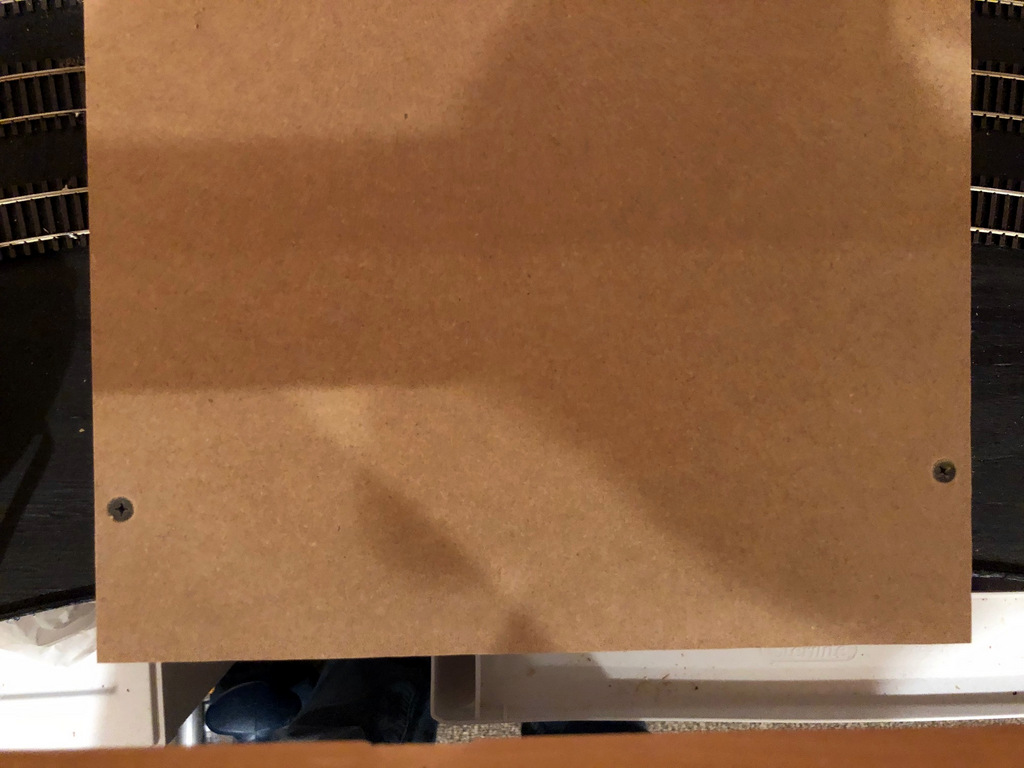
I made my pockets from 1/2″ MDF–strong and smooth. To secure the base to the staging level, I mock fit it in place, drew an outline, and used the outline to drill pilot holes through the subroadbed. After gluing the base pieces in place, I went back and drilled up through these holes into the MDF to lock it in place. Next, I secured the deck for the clipboard pocket to the base using glue and countersunk screws since the back would be suspended over the staging tracks. Finally, I glued the side pieces on top of the clipboard deck to finish the pocket. While I could have made the side pieces solid and mounted the clipboard deck inside them, I figured this method would be more durable as there’s no way for the deck to break away from the sides.
These pockets are certainly nothing fancy or extraordinary, but I find its often the small, ordinary things that make a difference. In this case, I’m hoping the ability to easily find a space to put their “stuff” will make operating on this layout just a little more enjoyable and stress free.
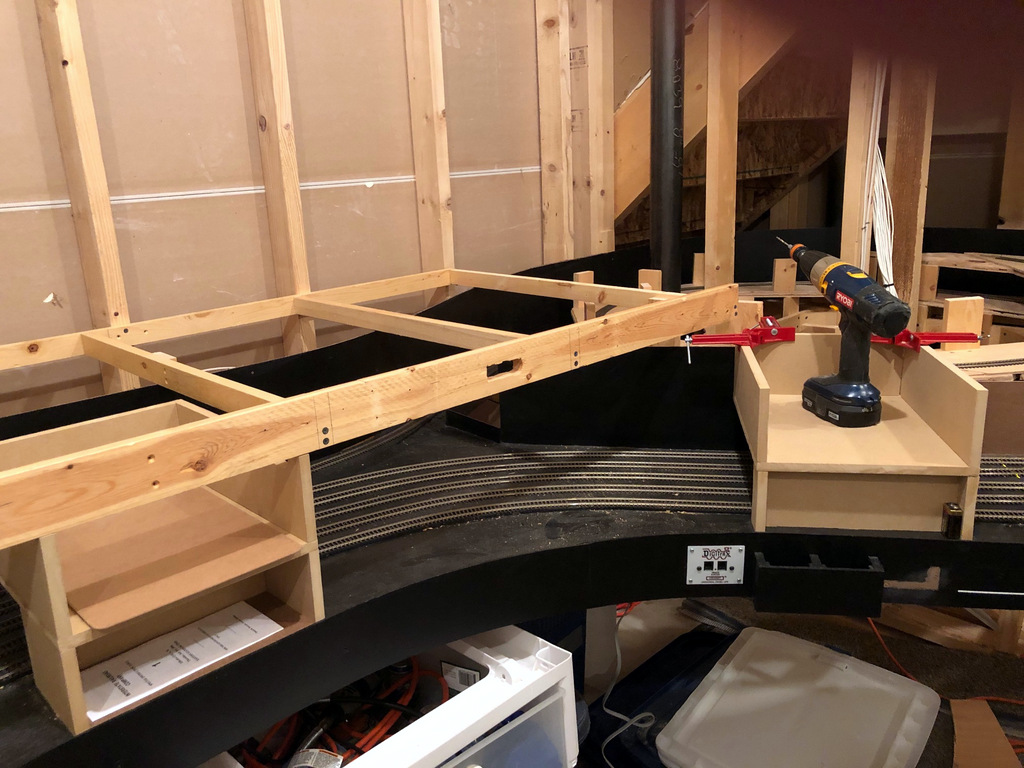
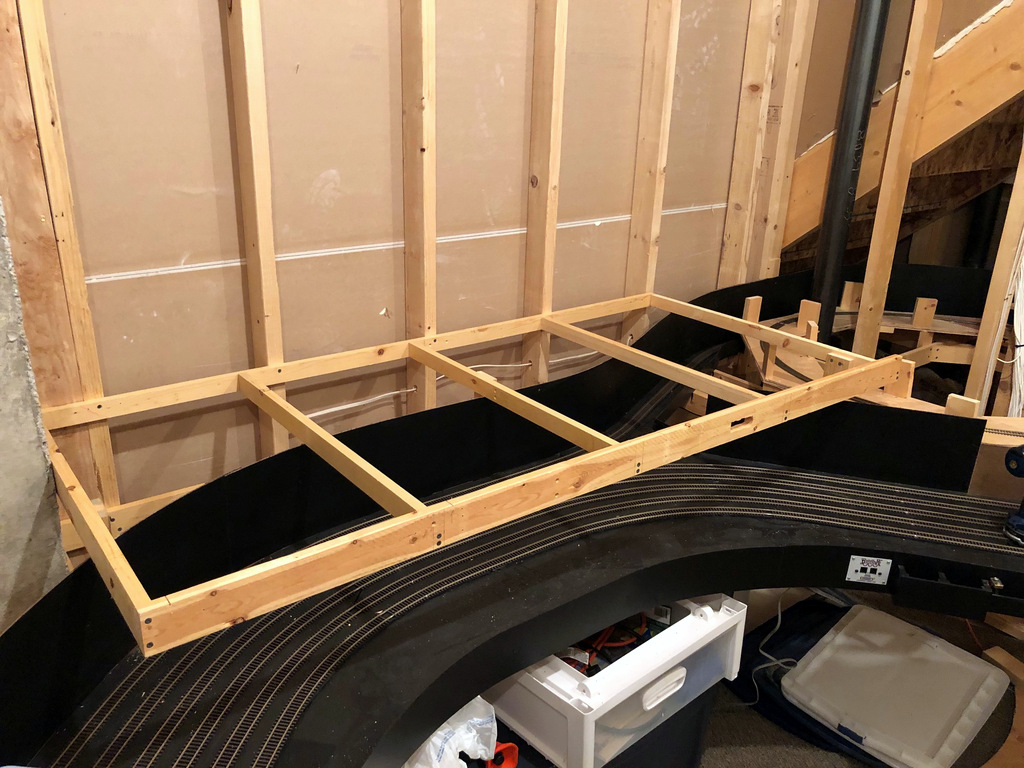
A 68″ x 32″ piece of benchwork in and of itself is not terribly exciting, but to me, this piece is. It’s the first of many pieces for the main level, so it represents the first benchwork that will be covered in operational tracks and scenery. It’s the first piece that lets me feel the level of the trains during an operating session.
Here’s the first piece of benchwork for the main level
I had to pause on the helix project (you can see it half-built in the corner) because I ran out of plywood and had to wait a while to resupply. That got me thinking, though, that I need to put up a piece of benchwork so I can 1) see where the helix needs to connect, and 2) work the hidden track between St. Charles and Baker/Mayflower in before covering it with the helix. The hidden track will run right on top of this benchwork and under St. Charles; the St. Charles tracks will be about 2-3″ higher.
This piece of benchwork is a little strange in that it’s made of both 1×2″ and 1×3″ lumber. I needed the 1×2″ slimness to get the hidden track as low as possible, and I needed the 1×3″ on the fascia to give me plenty of room for switch controls and more support for leaning operators. It’s built to mirror the staging benchwork below it, so three risers in the middle of the crosspieces help make it sturdy.
I’ll admit progress has been painfully slow lately, but there is progress!