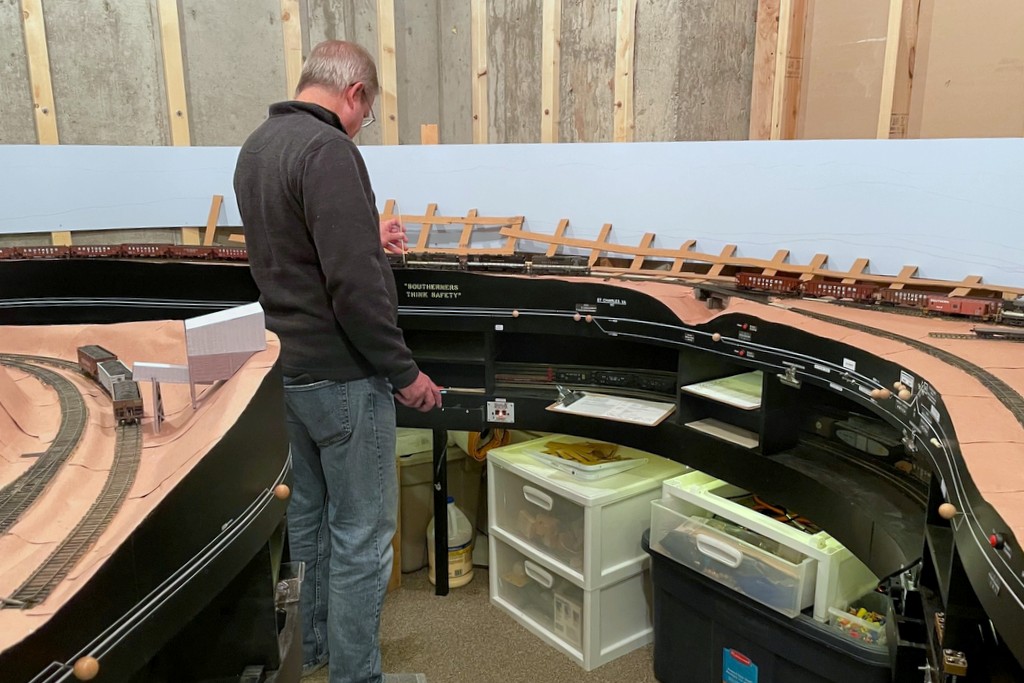
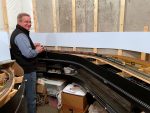
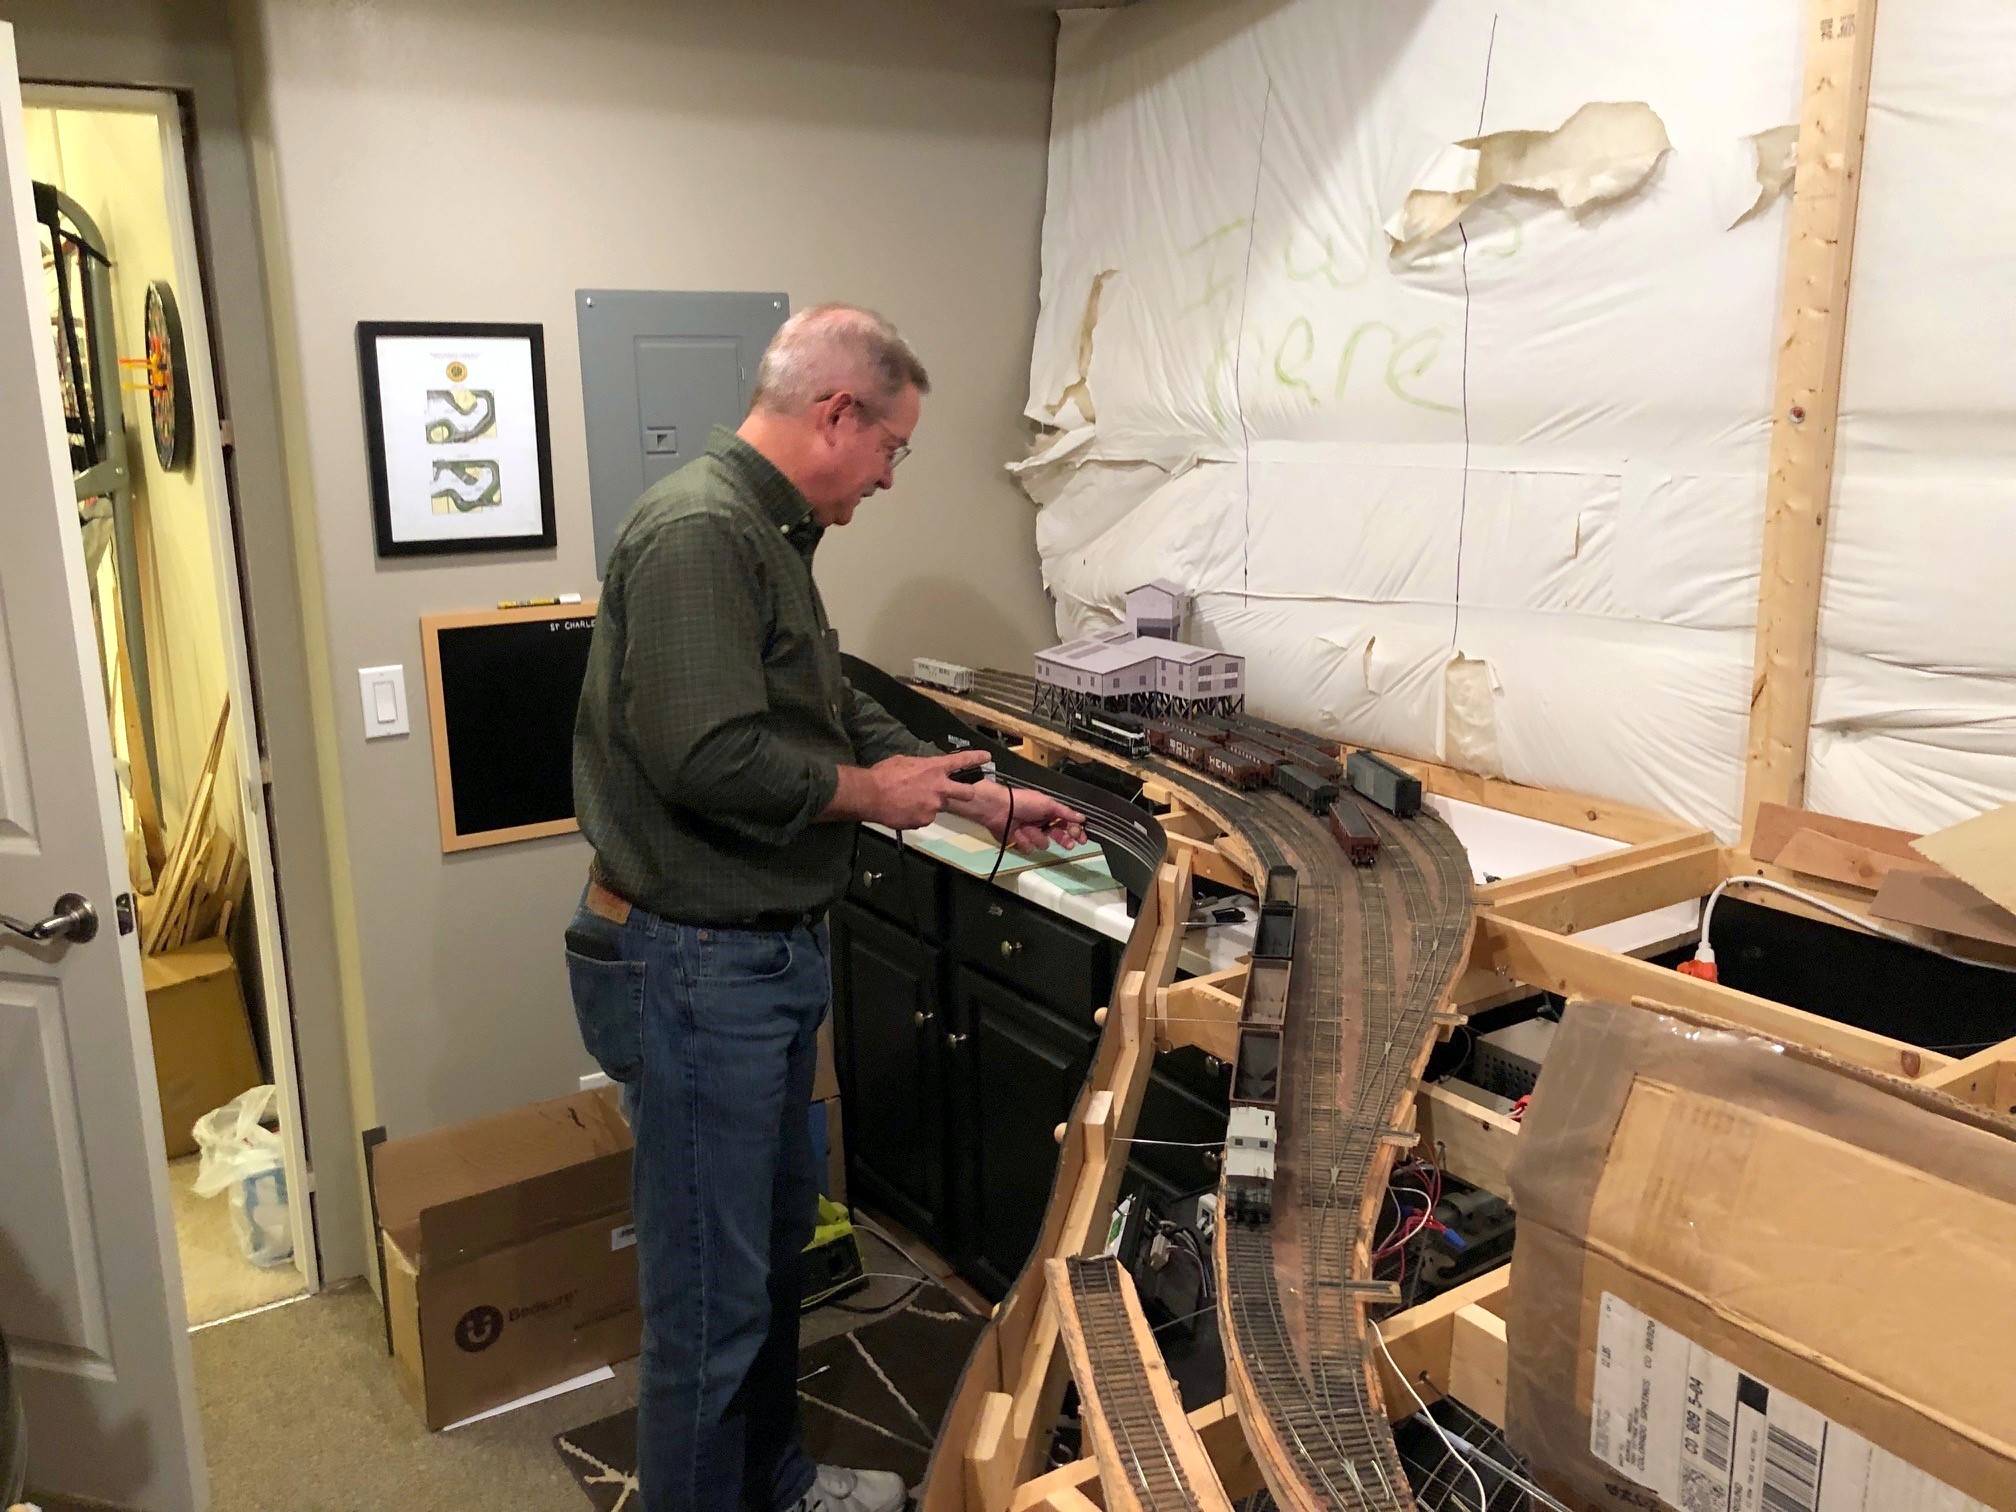
Here’s a look at last Saturday’s progress including finishing most of the lower level scenery base and painting the rest of the backdrop
I had a happy aligning of the stars on Saturday where my wife was gone for the day, I didn’t have any big “chores” to do, and I had just learned how to paint backdrops! All that combined into a day spent furiously trying to finish up the lower-level scenery forms so I could paint the rest of the lower-level backdrop. It was a good day, and I’m pretty happy with the results. I learned that the painting is my favorite part, roughing in the scenery with cardboard strips is my second favorite, and papering over the cardboard with section after section of red rosin paper is a distant third. Round 2 of backdrop painting went a little smoother than round 1 as I think I had a better grasp of the techniques, and the paint brushes seemed to work better on their second use. I liked the results of round 2 so much I went back and redid some sections of round 1.
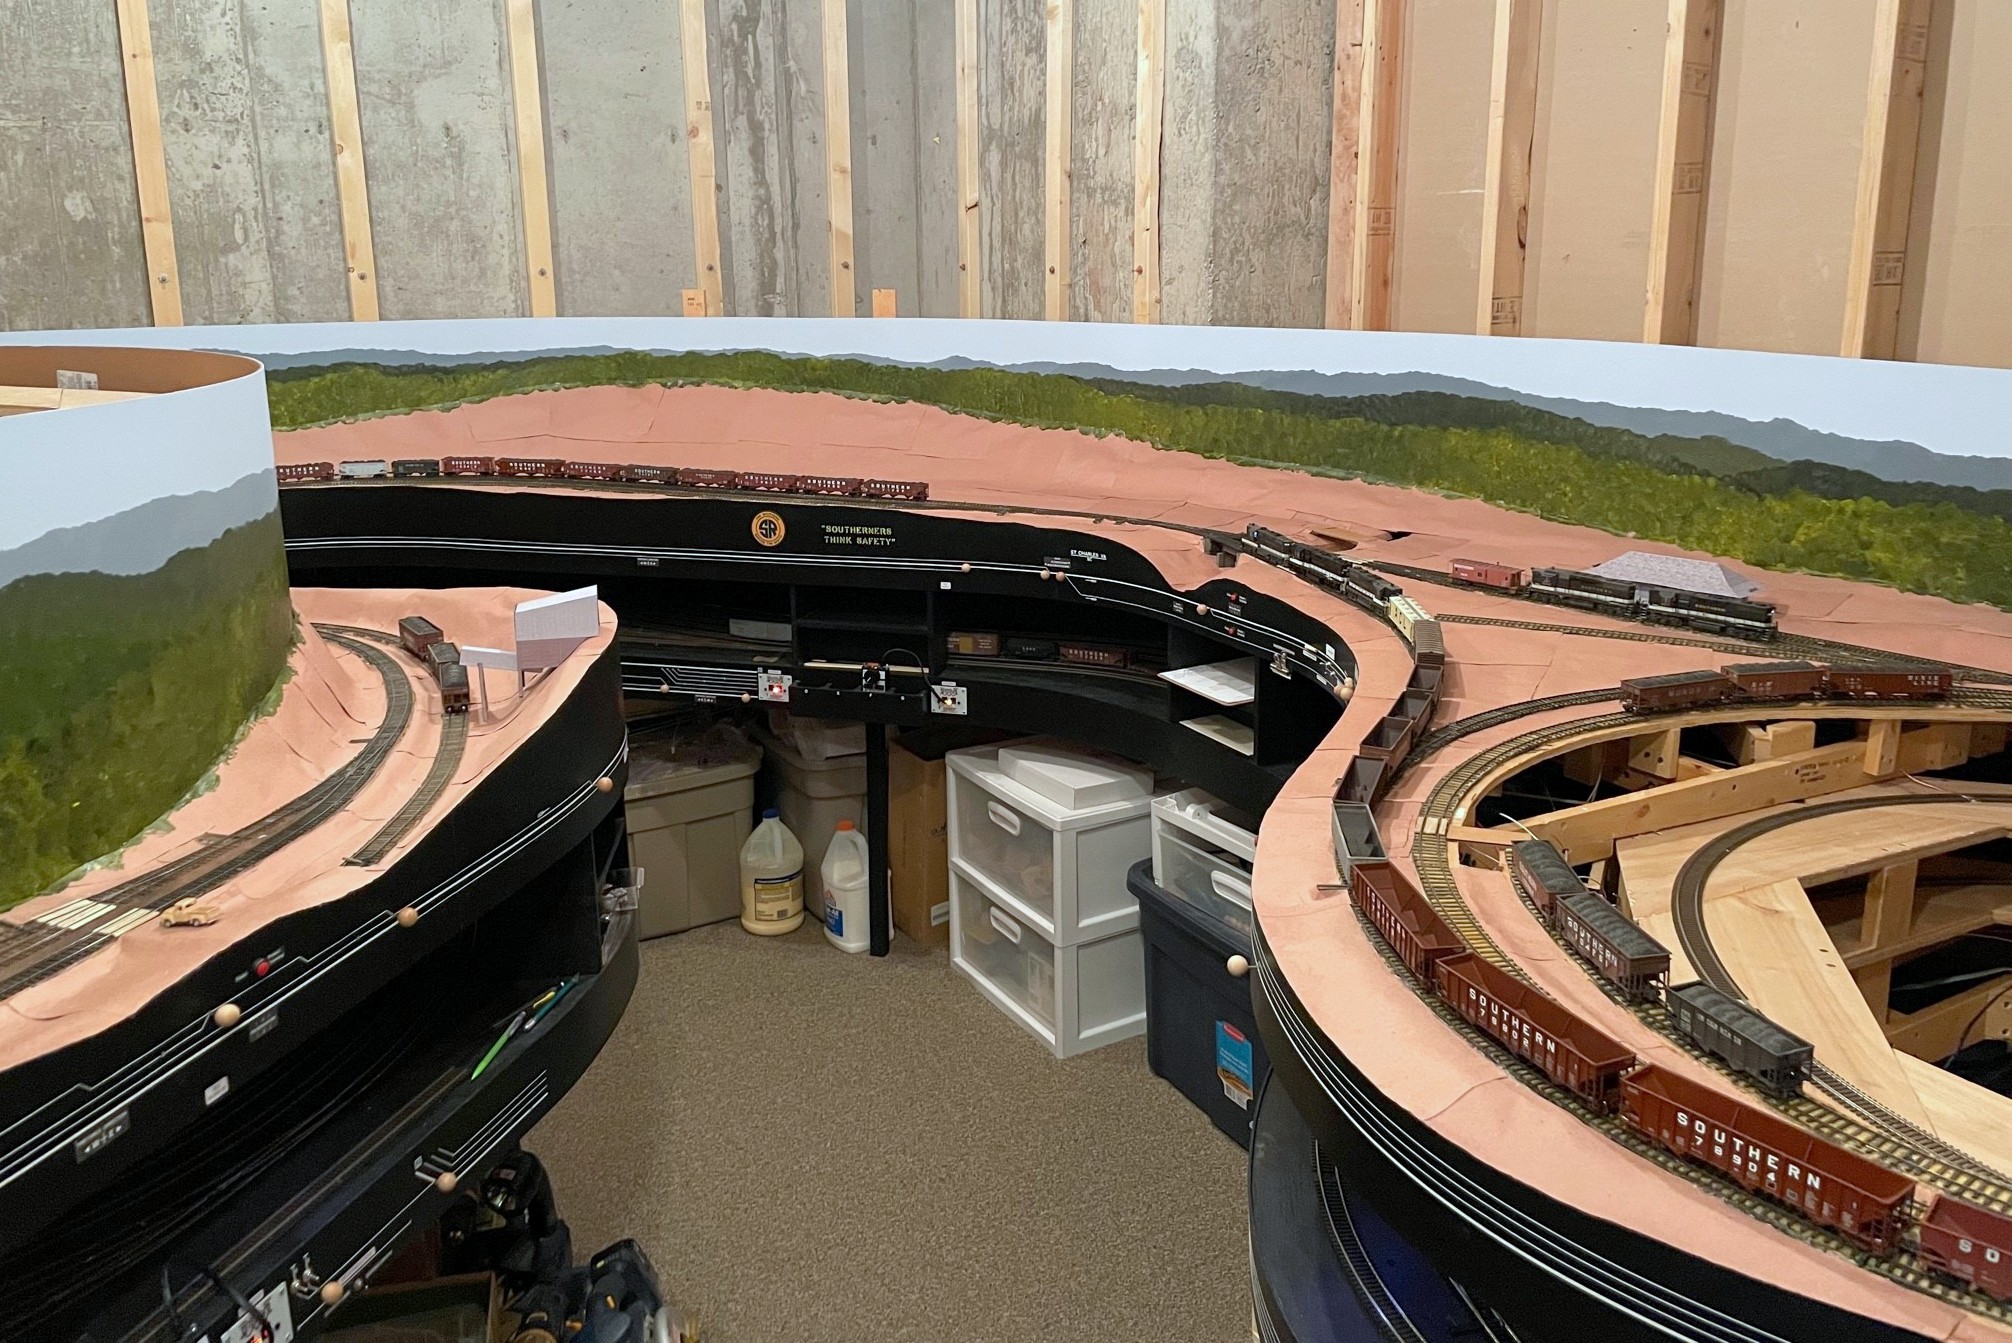
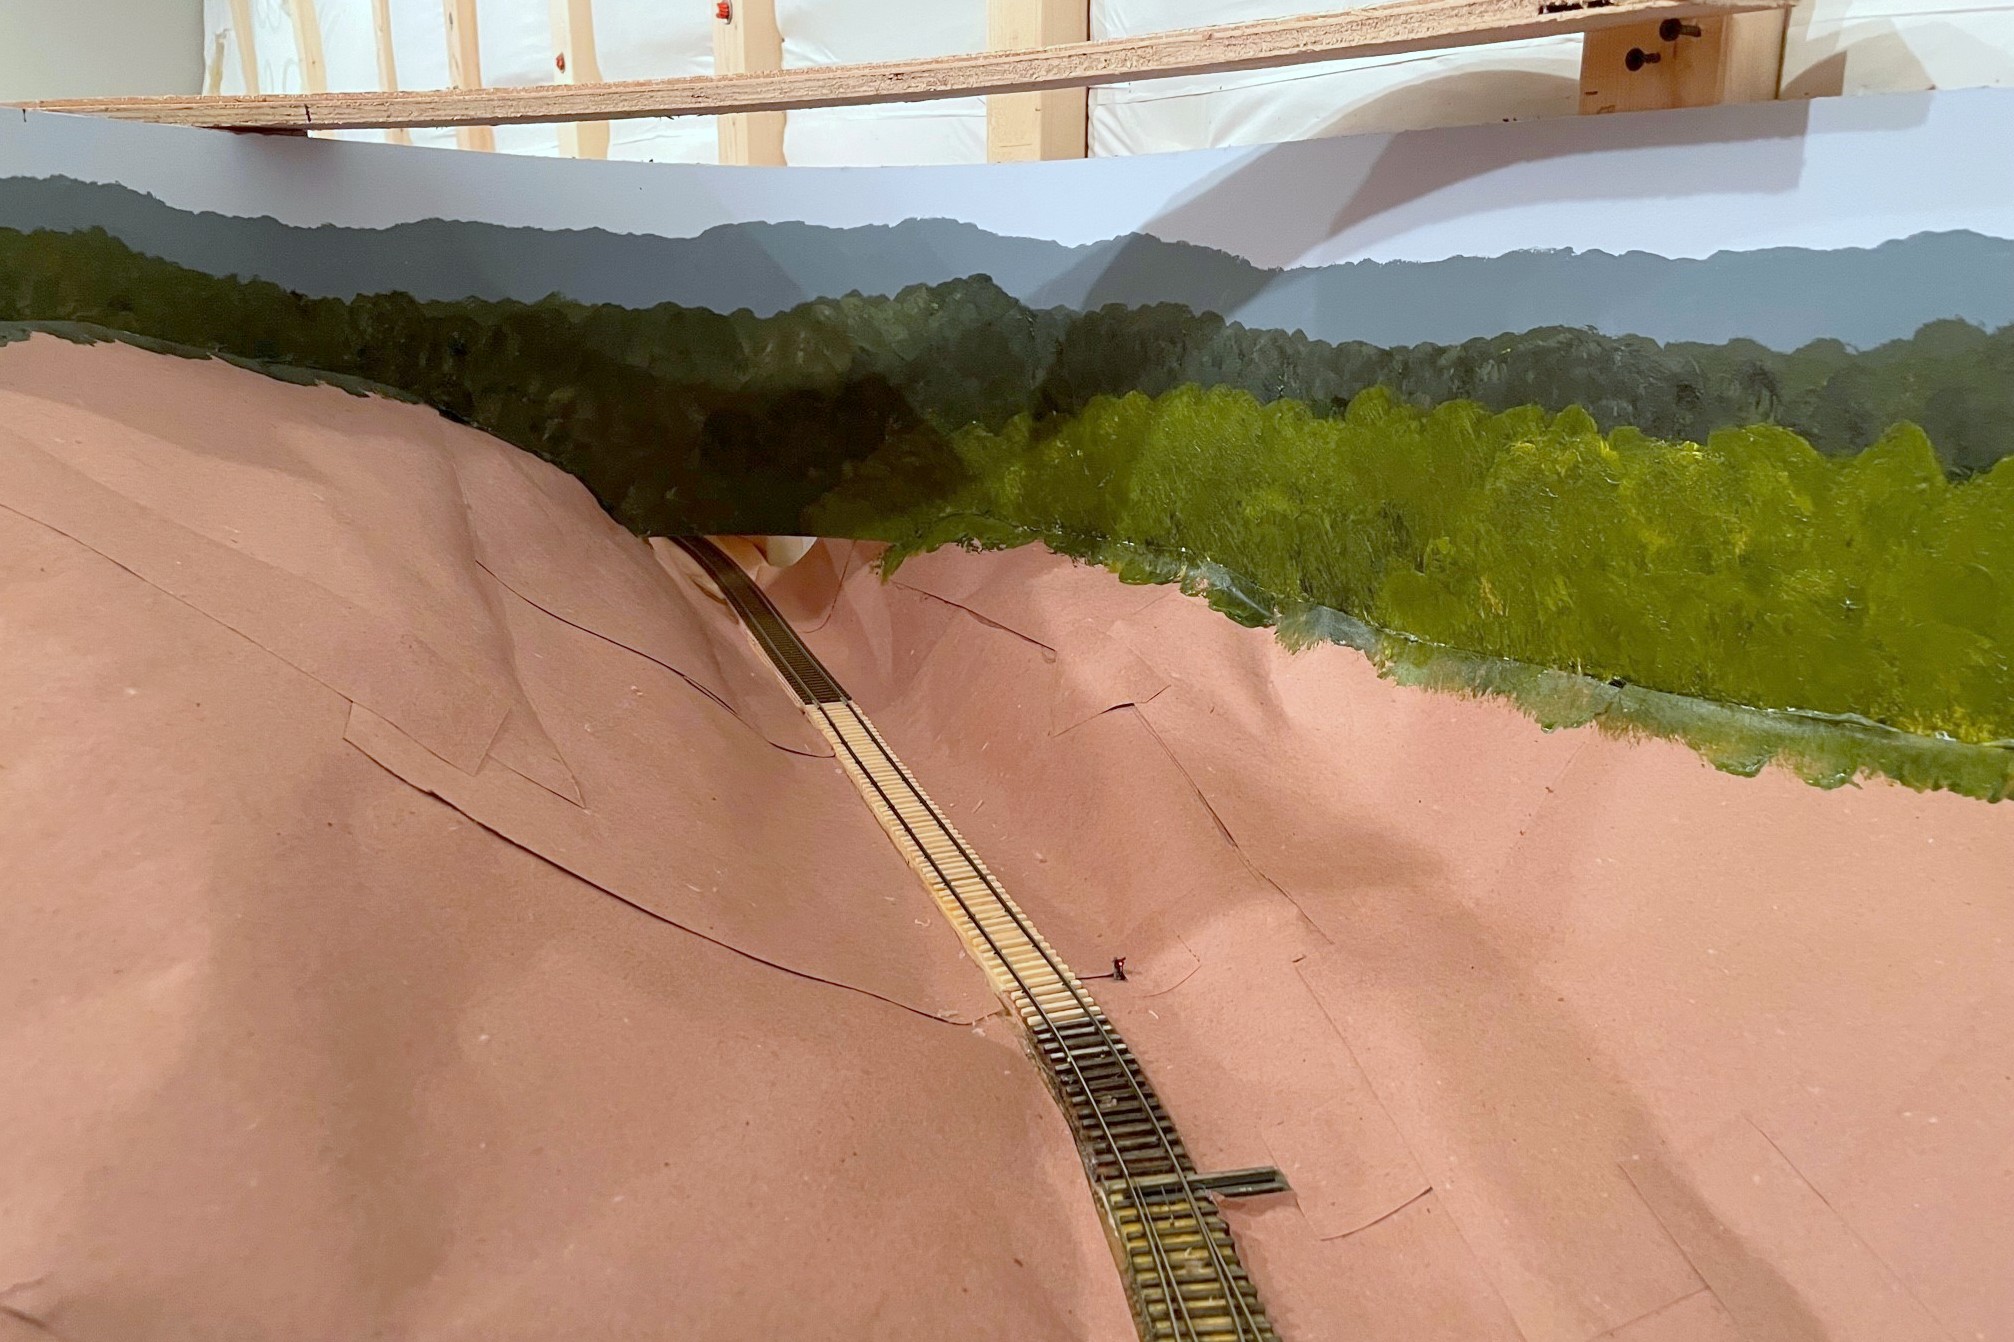
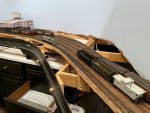
The St Charles Local traverses the wye with the newly painted backdrop. It will soon descend through the backdrop in the corner, a hole much tougher to spot now
The scenery covers over the hidden track along the back wall that joins St Charles and the Mayflower section, so I decided to do a test run… I can now verify that I can indeed – by twisting at odd angles, reaching into small gaps, and fishing it out the last couple feet with a long string of hoppers – free a stuck train from the most remote part of my hidden track! Lesson learned–when you use hot glue for scenery, it tends to leave a lot of strings hanging down, and go figure, locomotives don’t pick up electricity so well when their wheels are covered in bits of glue string! A little wheel cleaning and some extra sweeps of the hand through the area (again at odd angles via small gaps), and trains now traverse this area nicely.
Where the two lower-level scenes transition–the backdrop on the right is lower than the left, hence less blue sky
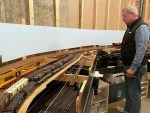
I’ve only got one section left that still needs a backdrop and scenery forms, over the helix from staging. Painting the backdrop in the corner was the big barrier to adding this, so that will likely be the next step, and the LAST step before building upper-level benchwork… it’s getting pretty real.
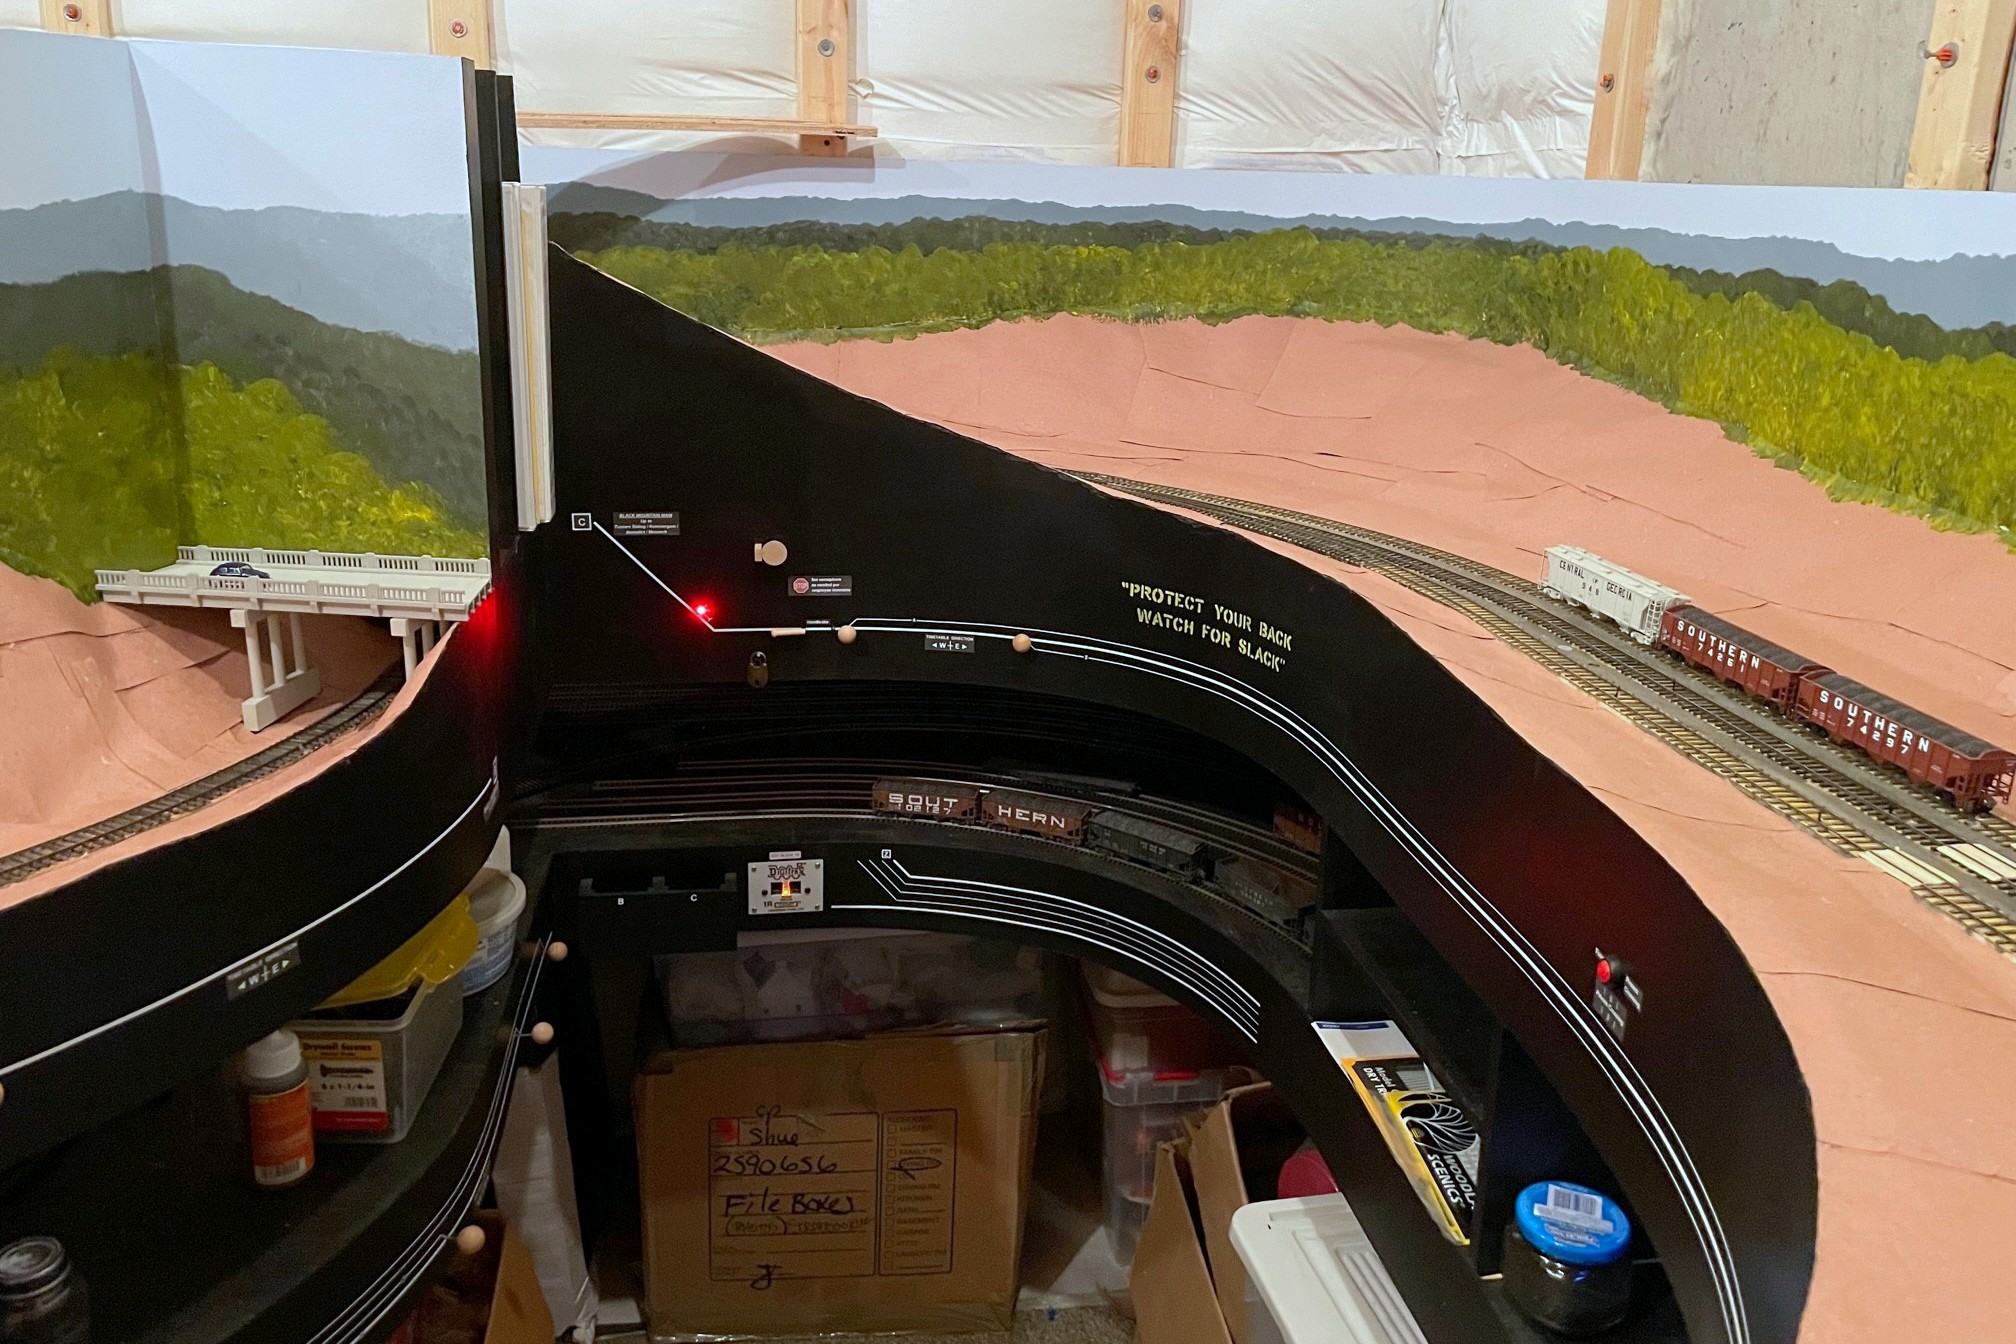
Here’s where trains will leave the lower level and enter the helix to the upper level–I think the backdrop painting along with a few trees will hide the transition well
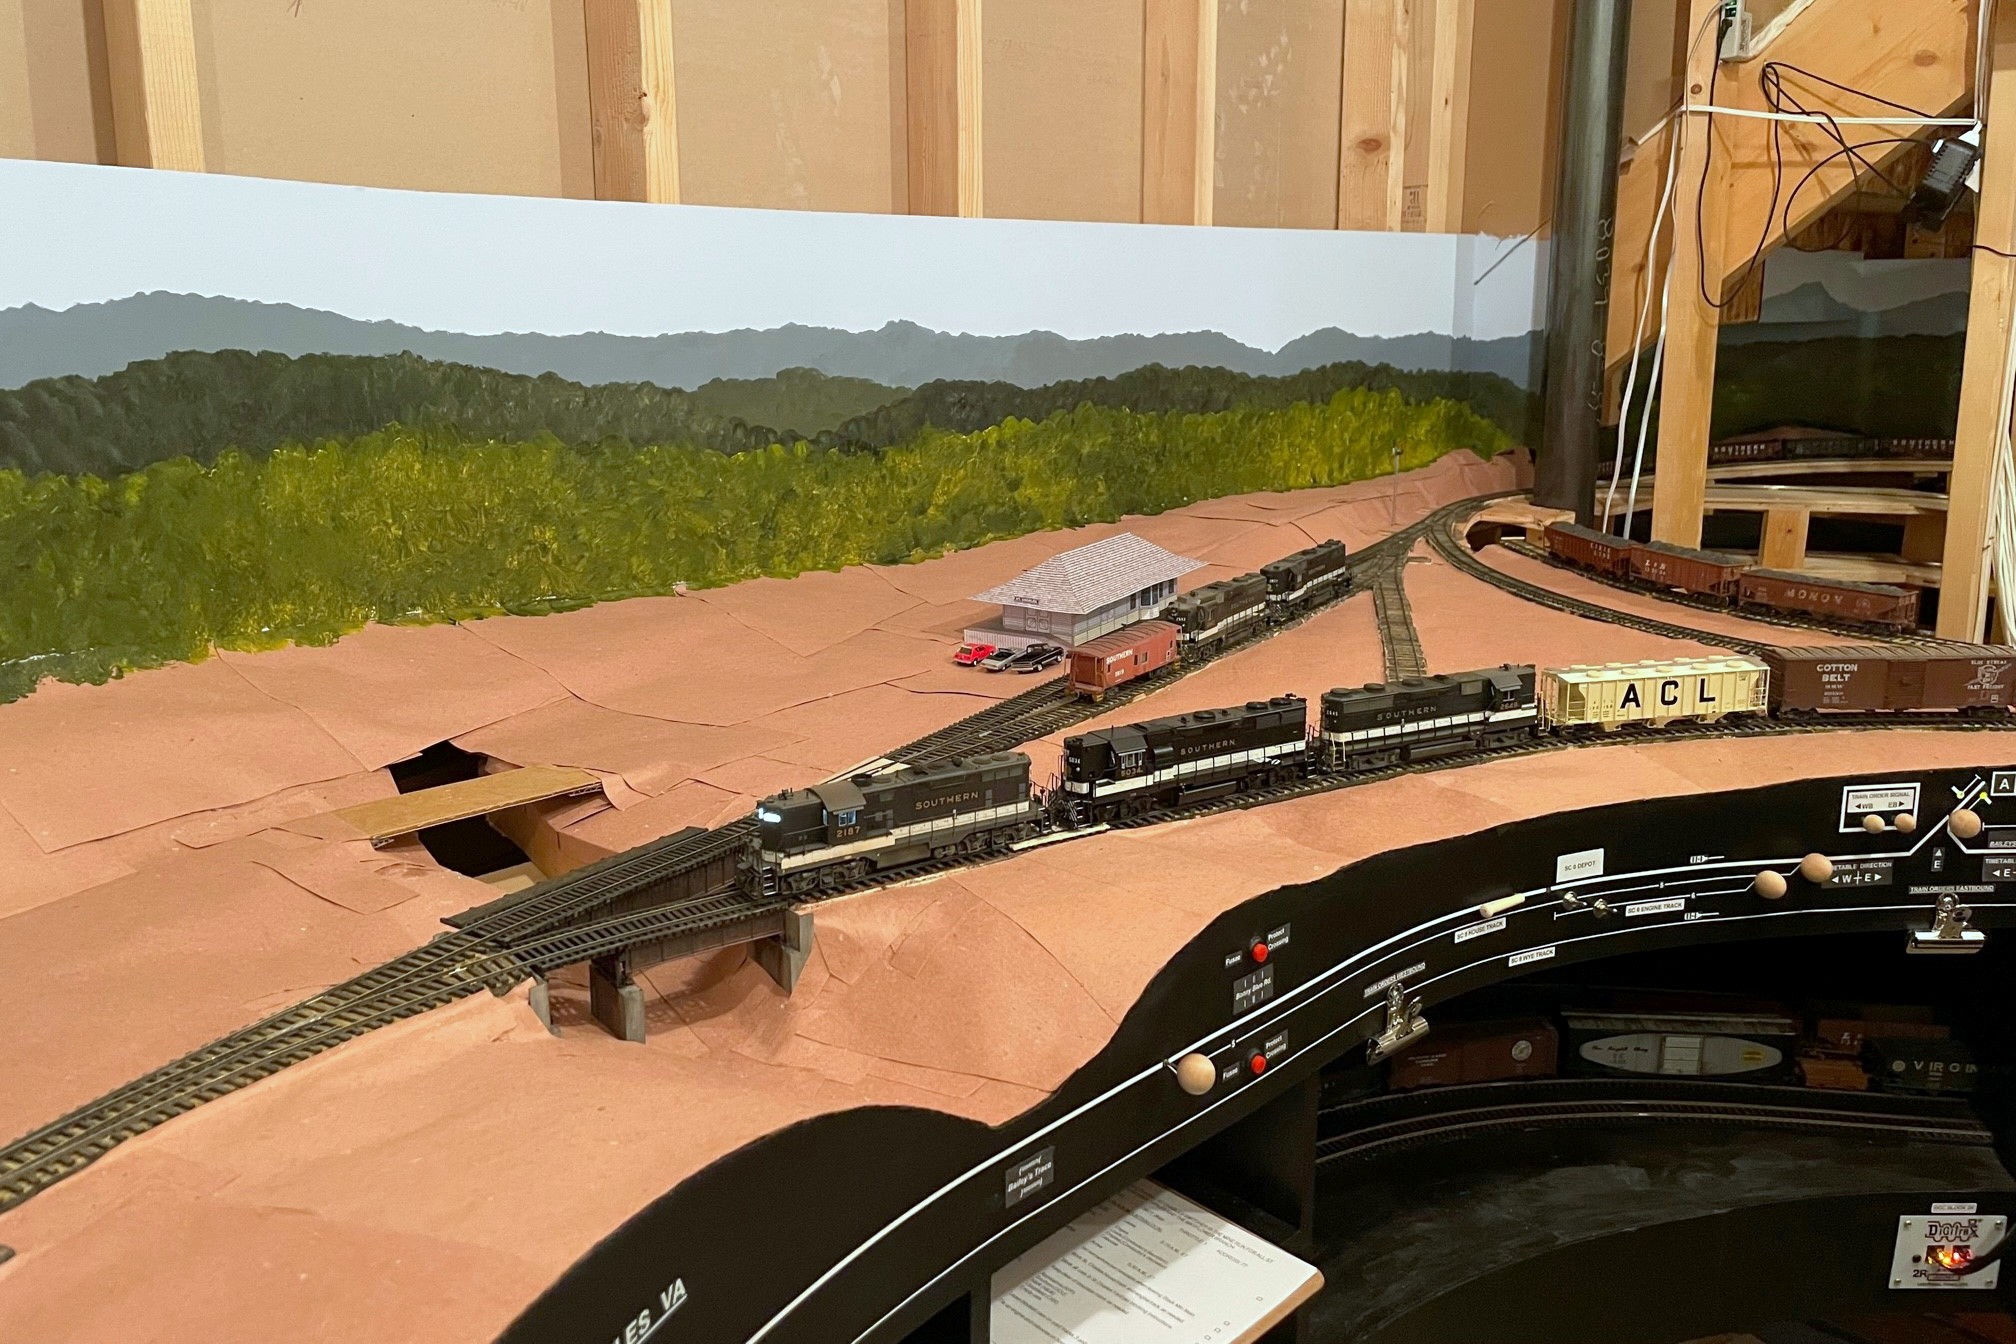
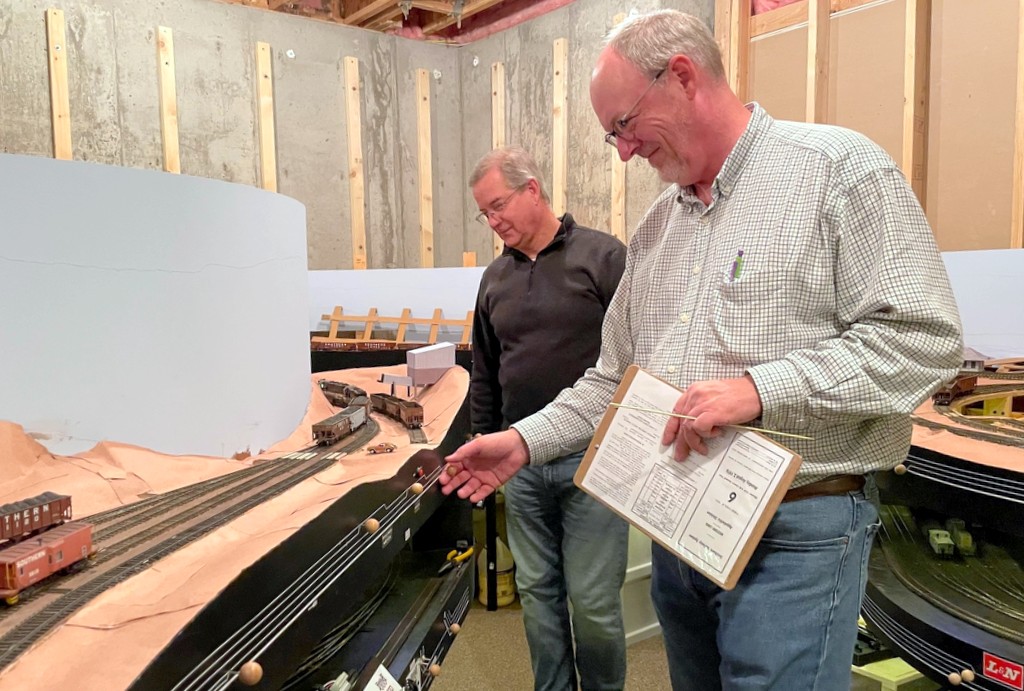
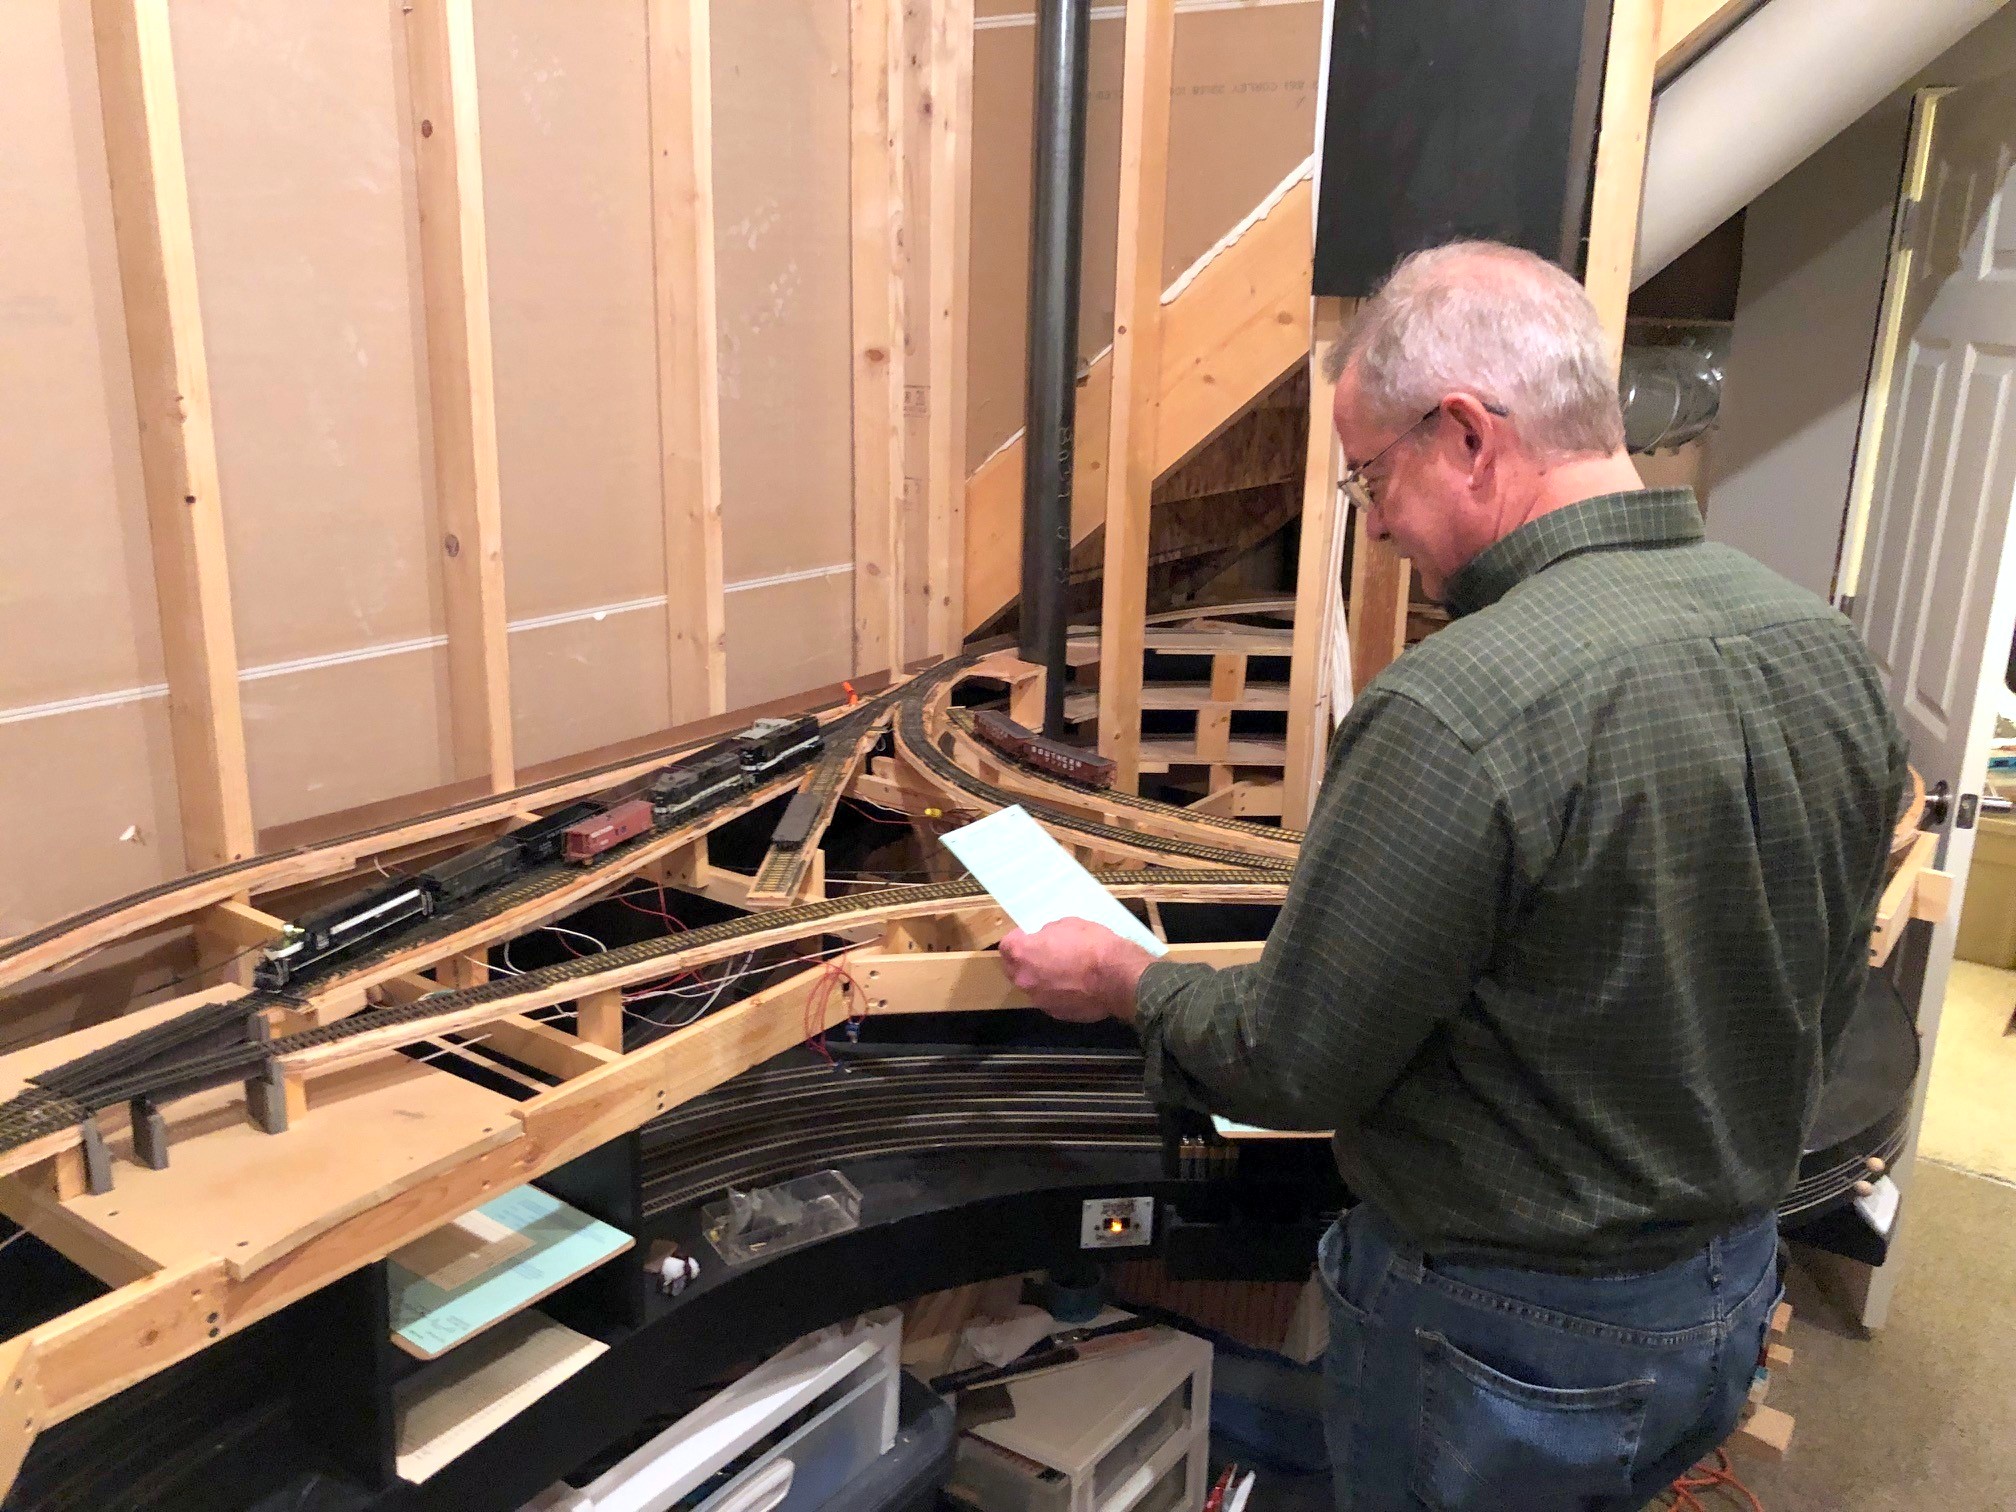
Patrick and Stuart work Mayflower with the St Charles SwitcherPatrick runs the St Charles Local figuring out how to get 10 pounds of cars to fit in a 5 pound sack
Or is it “operating session Aug 2, 1976?”… Regardless of the date, it was a lot of fun hosting two great friends, Stuart Thayer and Patrick Tillery. This was the first-ever 3-operator session on the layout, and despite only having one of the two decks complete, it still took the three of us the better part of three hours to run four trains. Part of that is because I know Stuart and Patrick are both experienced operators and prototype buffs, so we put some “veteran mode” rules into effect. In addition to the normal rules of “get the cars where they need to go,” “follow signals,” and “follow the timetable and orders,” we had to protect crossings (more on that in a later post), unlock/set/lock semaphores to protect the branches we were operating, cut cars to avoid blocking a new road across two yard tracks, and follow all blocking instructions including placing all loads ahead of empties.
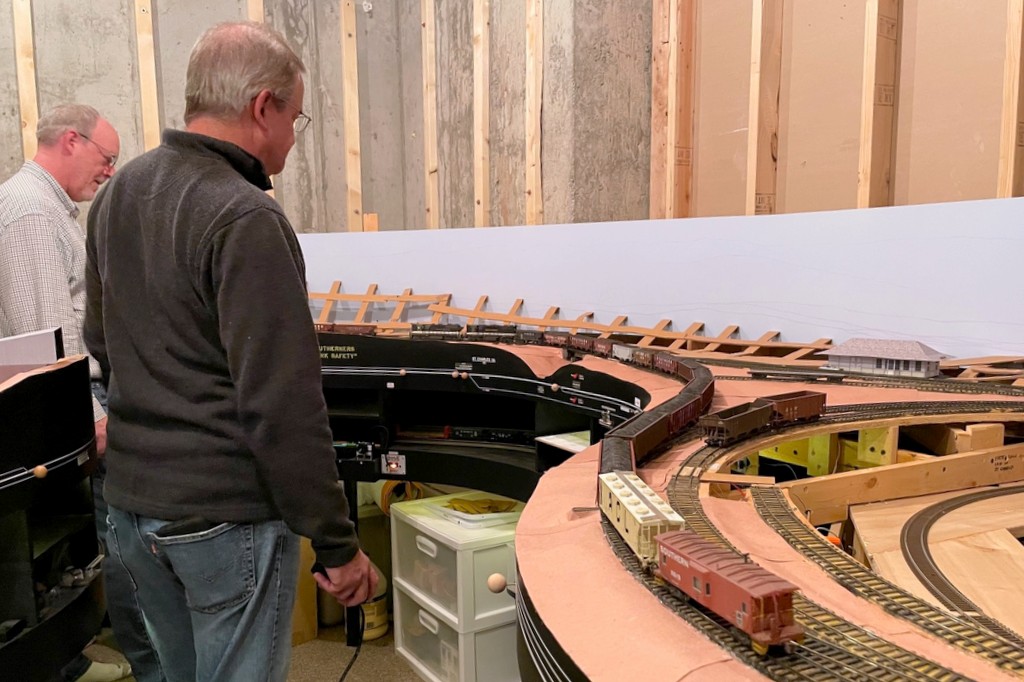
Trains included a “Black Mountain Local” that simulated bringing in the previous night’s haul from the non-existent upper-deck tipples, an L&N “CV Local” to handle the L&N’s trackage-rights agreements at two tipples, Train 61/60 the “St Charles Local” bringing empty hoppers out of Andover (staging) and returning with loads, and the “St Charles Switcher” working St Charles area tipples and the Baileys Trace Branch to Mayflower. With the “veteran mode” rules in effect, even the simplest of trains still took a while to operate. Just the movement of the Black Mountain Local out of the helix (including a stop to reset the semaphore) and blocking in the three-track yard took a full scale hour (15 minutes real-time). Despite the simplicity of the St Charles Local’s job (bring empties, pick up loads), the yard’s prototypically small size creates the need to use the tracks and wye creatively to swap out cuts, and the instruction that all empties (in this case empty covered hoppers) have to go behind the loads, drives the sequence of picking up cuts.
Having completed work at Baker, Patrick slows the mine run to a crawl on the way back to Mayflower as Stuart protects the crossing with fusees
Growling L&N C420 1317 plied the Southern’s rails without incident with Stuart at the throttle, but his luck was not to hold when he took the throttle for the St Charles Switcher with GP38AC 2877 and GP35 2649 at his control. Let’s just say that there is a certain switch at Mayflower that 2649 decided it needed to jump every time, and it only needed to cross that switch 18 times to work the tipple. Despite several breaks to ensure proper gauge and freedom of motion in 2649’s trucks and tweaking some spots in the switch with a gauge and pair of pliers, 2649 was determined to stay on the ground. Of course, now that the session is over, 2649 navigates that switch just fine… sigh. I still have a long way to go until things are bulletproof.
First use of the new “fusees” I’m installing at all the grade crossings
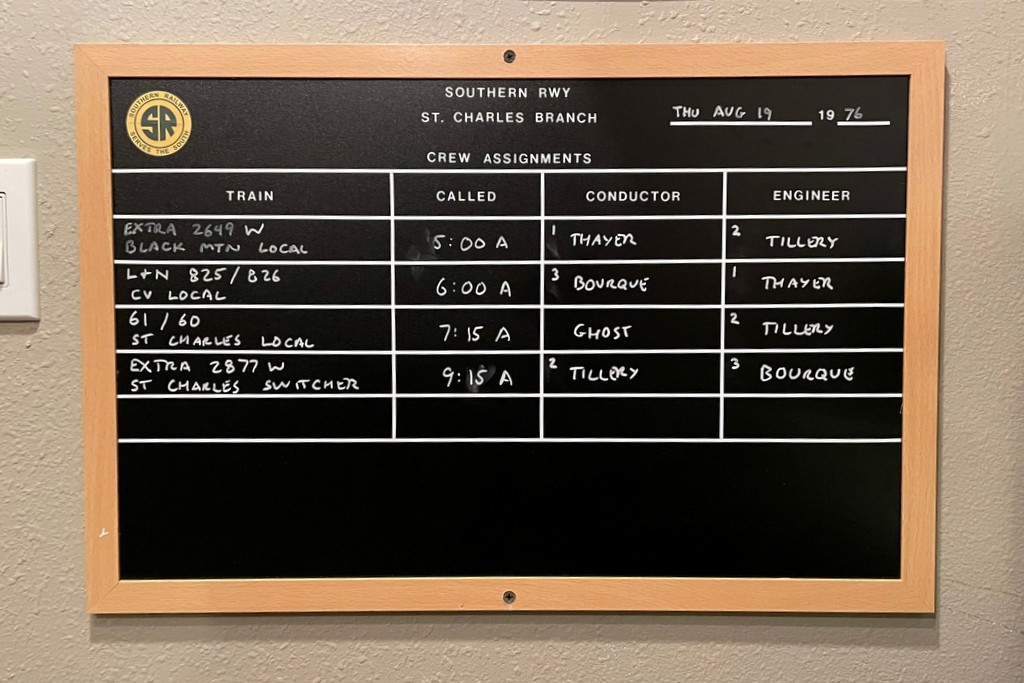
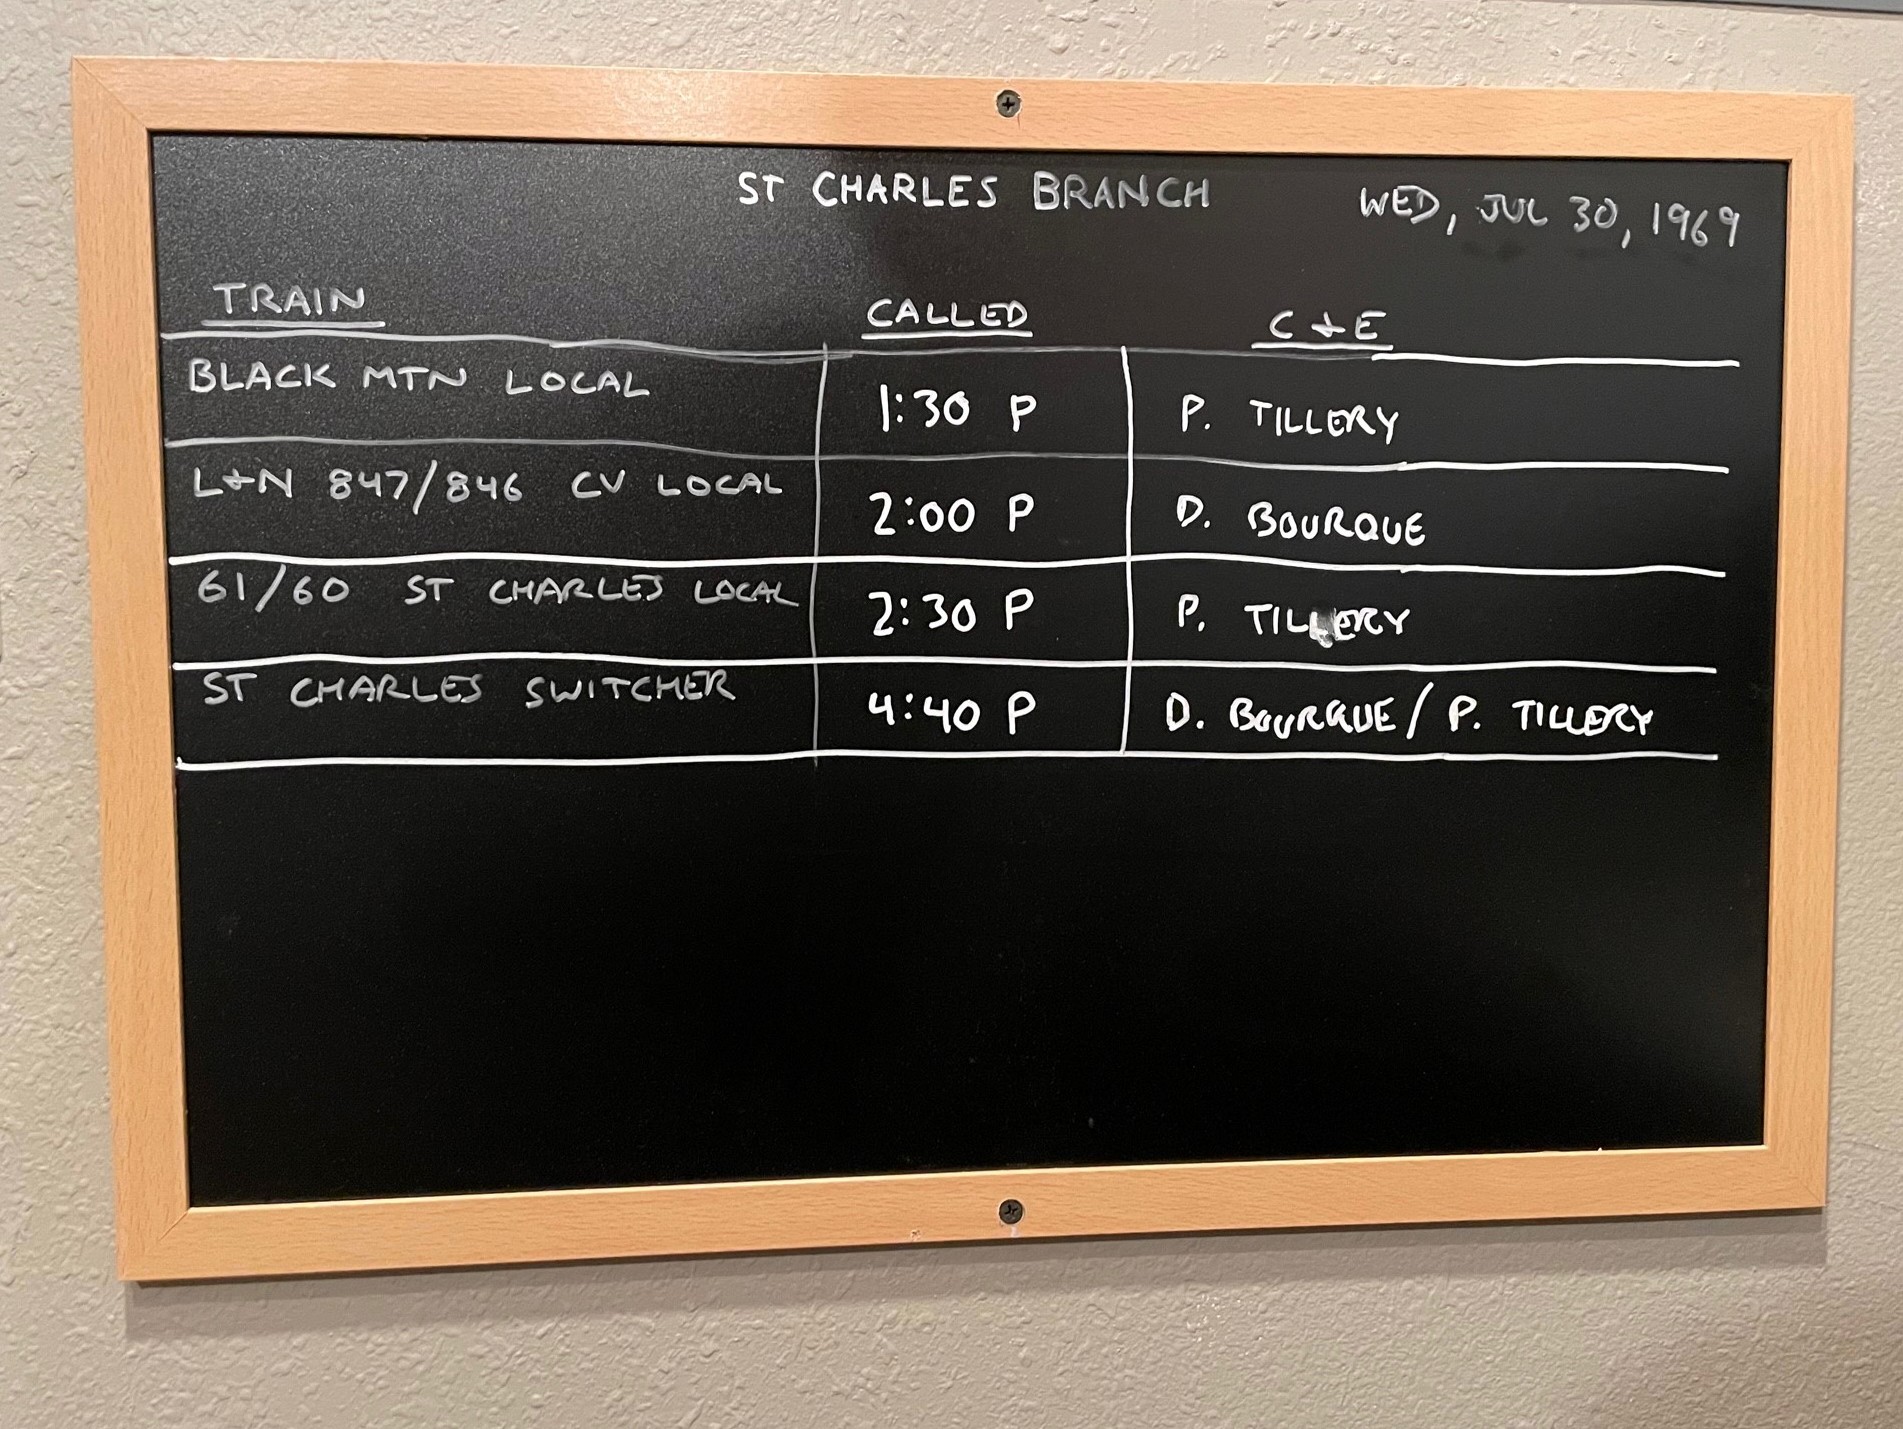
First use of the new-and-improved crew assignment board
First time a “tipple” has been in place at Baker (a new mock-up)
First use of a new “speed-retarding system” on the steep portions of the St Charles Yard (spaced-out monofilament line)
First use of the new “safety slogans”… and no one was seriously hurt 😉
And of course some areas for improvement and “lessons learned”:
Too many derailments–I still need to improve my trackwork to make it bulletproof
I need to make blocking instructions more prominent if I want them to be followed
I don’t think the use of the train-order semaphore in St Charles is as understandable as it needs to be
I still need to work on the crew assignments to better balance how much each operator works
The St Charles Switcher arrives back in St Charles completing the ops sessionCrew assignment board for the session–I modified it halfway through to give “operator 1” more jobs… still working on balancing things
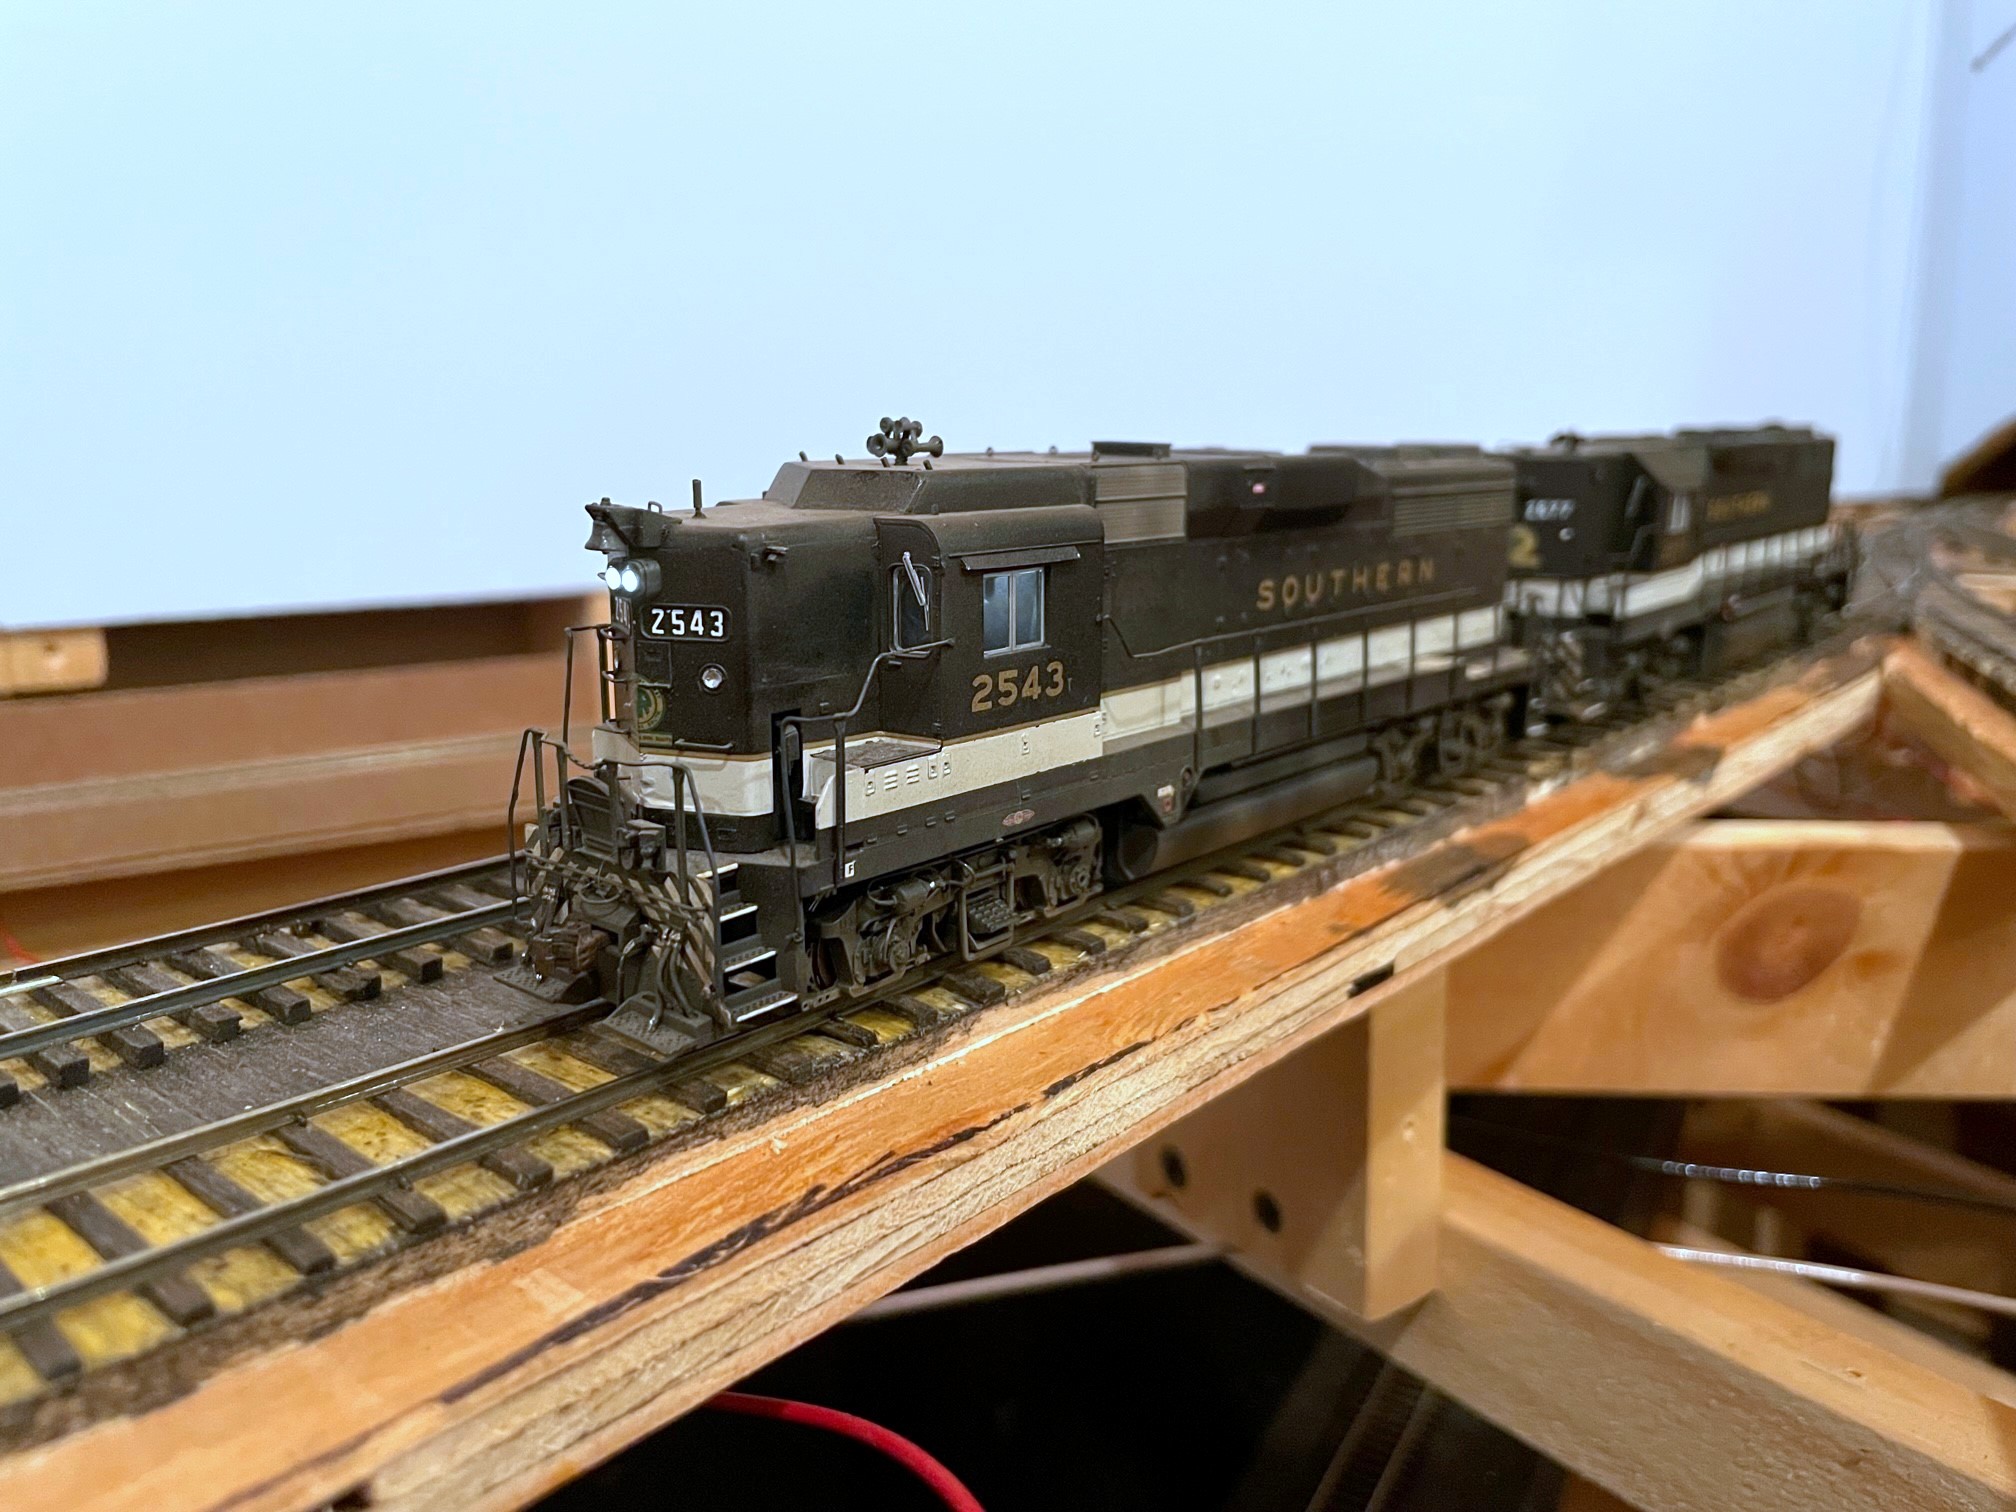
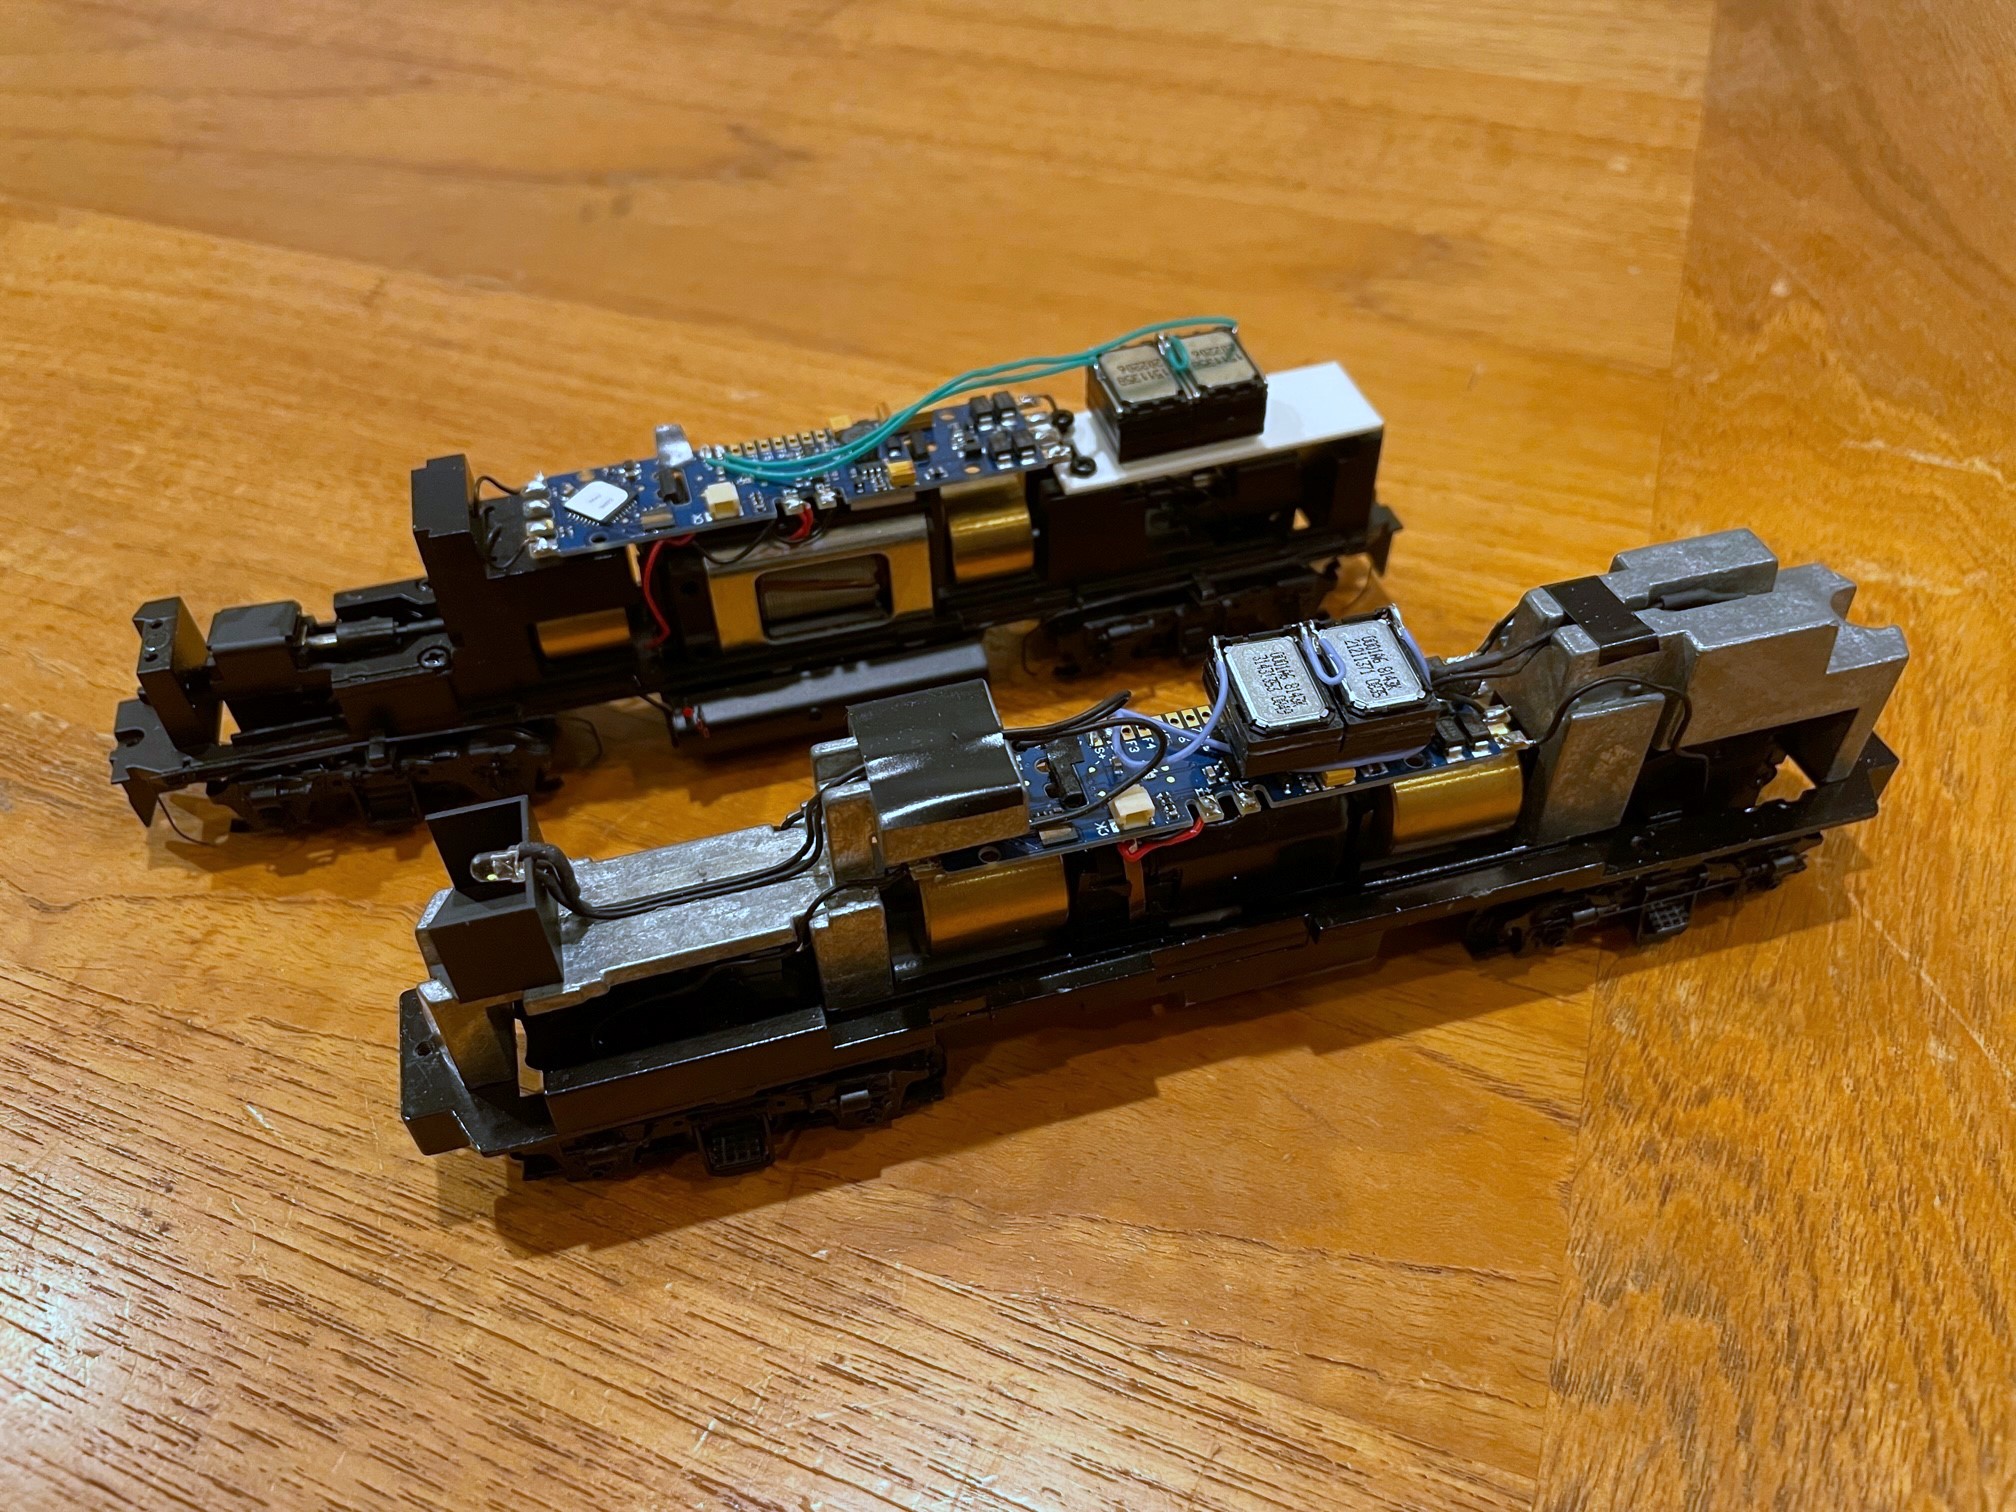
These two were my first consist of Tsunami 2s and taught me a lot of lessons on speed matching
First, beware someone with 6 months of experience offering you advice… ok, if you’re still reading, I like your sense of adventure! I steered clear of sound decoders for years because I knew as soon as I started, I would need to upgrade the whole fleet to be happy, and it was going to be a huge investment in money and time. Other than a one-time fling with a Digitrax Soundbug many years ago, I really dipped my toe in the water when I picked up a couple of locomotives sound equipped from the factory a few years back, an Athearn GP38-2 with Soundtraxx Tsunami and an Atlas C420 with ESU LokSound v4. I tried installing one cheap drop-in sound decoder in an Athearn/MDC RS3, and that was not a positive experience, so I stopped for a while. Finally in February, I decided it was time to figure this out, so I did a bit of research and dove in! Here are a few things I’ve learned in the first 6 months and 12 sound decoder installs.
It’s not as tough as it looks. Not gonna lie, I’m the adventurous kind of person who doesn’t mind taking a hacksaw to a $200 locomotive, but I was SUPER intimidated by installing sound! What I found is once you’ve got a few basics down, it’s only a little more difficult than installing a standard decoder (which isn’t that difficult). The toughest part is finding a good space inside the locomotive to mount the speaker(s) while still leaving room for the decoder and other vitals. I’ve only destroyed one sound decoder in the process (more on that later), and I have gone back and redone some of my first installs based on lessons learned over time–extra time but no biggie.
You get what you pay for. Big surprise, this maxim applies to sound decoders too! I tried to go cheap at first and found a “great deal” on a one-piece drop-in decoder for an Athearn RS3. It even came with a speaker on-board–what a deal! Installation was very easy, but to me it sounded like a screeching lemur with its tail caught in a coffee grinder… the horn was tolerable, but the rest of the sounds were painfully inadequate and unconvincing. I tried building a baffle around the thin piece of plastic acting as the speaker, but it only improved the bass performance slightly with no improvement to the actual sounds. In the end, it was a waste of money and time, and that decoder spent most of its short life with the sound switched to “off.” If you love the screeching lemur decoders, I’ve got two more I’ll sell you cheap!
Following that experience but still wanting to save a LITTLE money, I tried out the “Econami” decoders from Soundtraxx. These were about twice as much as the screeching lemur decoder but still only 2/3 the price of a full-fledged sound decoder, so it seemed like a good place to start. The Econami was lightyears ahead of the screeching lemur in terms of sound quality (same basic sound quality as the Tsunami 2 series), and it had all the features I thought I wanted. After I equipped a few locomotives with Econamis, I splurged on my first Tsunami 2, mainly because the Econami didn’t have the EMD 567 turbo sound I needed for a GP30. Once I played with the “extra features” I didn’t think I cared about, I found that those features were worth the extra cost, at least in my “lead” locomotives. So what’s the difference? First, I’m very happy with my Econamis and would still highly recommend them for “in the consist” locomotives that use the prime movers available on the decoder (Alco 244, EMD 567 non-turbo, EMD 645 turbo, EMD 710 turbo, GE FDL-16). The prime mover sounds are, indeed, the same as the sounds on the Tsunami 2s. However, the Tsunami 2s have more noticeable depth and variety to the secondary sounds like valves, compressors, radio chatter and even toilet flushes. The biggest difference I’ve found is how the sounds correspond to the throttle and loads if you take the time and effort to really configure them which I’ll talk about later.
The tight quarters inside an Athearn RS3–the decoder is under the cab to the right side
Sound decoders are tough, but you can destroy them. I’ve found sound decoders to be tougher than they look, but they’re far from indestructible. They’re designed with either wires or soldering points that make them easy to connect to your locomotive, and I haven’t destroyed one with a soldering iron yet. However, sound decoders pack a LOT onto a little board, so the individual components can be small and fragile. I found this out with an Econami decoder I installed (poorly) in an Athearn RS3. I got everything to almost fit, but I needed just another millimeter of clearance, so I pressed the decoder down. Well, because of my poor choice of installation location, it forced a metal protrusion of the frame into one of the board’s components, and that was that! No more blue light, no more sound, no more movement, lots of heat where there shouldn’t have been… toast. So, be gentle with them, and don’t do anything to make direct contact with the frame or to put pressure on any single component. Expensive mistake but valuable lesson!
Take your time arranging the components in the install. The one decoder I fried was a victim of poor component placement in the locomotive. Usually the decoder sits above the motor like any other decoder, but it doesn’t have to–I’ve placed the decoder in the cab of a couple of RS3s because there just wasn’t room above the motor. The tougher trick is finding a good spot for the speaker(s). Most locomotives currently in production will leave a good spot for this, but many of my locomotives were purchased well before sound was much of a thing. I’ve crammed speakers in the long hood, the short hood, in the cab, on top of the decoder, you name it! A couple of times on some old Proto units (they filled every last inch of those shells with weight), I’ve had to take a hacksaw to the weight and carve out a piece of real-estate in the nose. I find that mounting the speakers to the frame assembly is more convenient and practical than mounting them inside the shell, but you can do either. Just make sure the speaker is sitting on something reasonably solid like a piece of the frame, or in some cases, a thick plank of styrene cut to go across the top of a truck. For attaching the speakers, I like to use 3M double-sided foam tape because it holds well while still enabling a little movement from the speaker so it doesn’t rattle its mount. The 3M tape is tough to remove if you want to change things, though, so I know others have sworn by servo tape.
Sound installations require a LOT of wires, so I’m careful not to make the wires too long, and I use liberal amounts of shrink tubing and electrical tape to keep the wires from making a rat’s nest inside the shell. I’ve found my wiring has gotten a lot neater over the course of a dozen installations, so expect a little trial-and-error here.
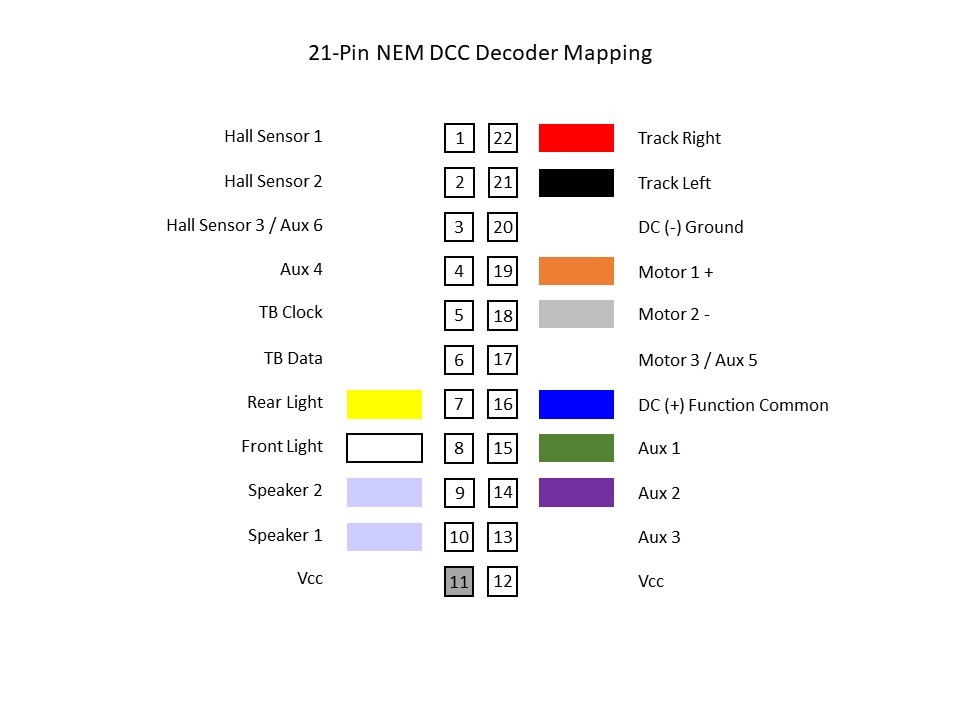
Basic mapping of a 21-pin connector for DCC (use at your own risk)
You can, indeed, hardwire a 21-pin decoder without a harness (but it ain’t fun or recommended). One of the downsides of the Soundtraxx Econami is it’s only offered in two sizes, the larger “plug-n-play” (ECO-PNP) board and the much smaller 21-pin version (ECO-21PNEM). The PNP is a drop fit for many locomotives, especially locomotives from the previous generation of factory DCC or “DCC ready” units. But it is kind-of long. The 21-pin is about 1/2 the footprint, so it’s the perfect size for smaller HO-scale locomotives where the PNP won’t fit, but… surprise, it needs a 21-pin harness which is only found in newer locomotives. I tried to buy a 21-pin harness, but they’re expensive enough that it effectively makes the Econami install the same price as a similarly sized, full-featured Tsunami 2 TSU-2200 series decoder. Hmm… could I hard-wire the 21-pin decoder? Turns out the answer is “yes,” but it’s definitely “off label” use that will probably void your warranty, and I would only do it in dire circumstances. For me, “dire” happened to be the cramped quarters of an old Proto 2000 GP7 and an Athearn/MDC RS3 (once I removed the screeching lemur). There are two tricks to this process: 1) know which pins do what. This was surprisingly difficult to figure out, and I ended up translating a diagram from German (the translated diagram is included for you here). 2) use solid wire that fits firmly into the socket to connect the wires. I bent the pin wire in an “L” shape, soldered it to the locomotive wires, and covered the wire-attached half of the “L” with a piece of small shrink tubing to keep it insulated from other nearby wires. This has worked great in 3 installs and has held up to >3 months of use! But again, not ideal… do this at your own risk.
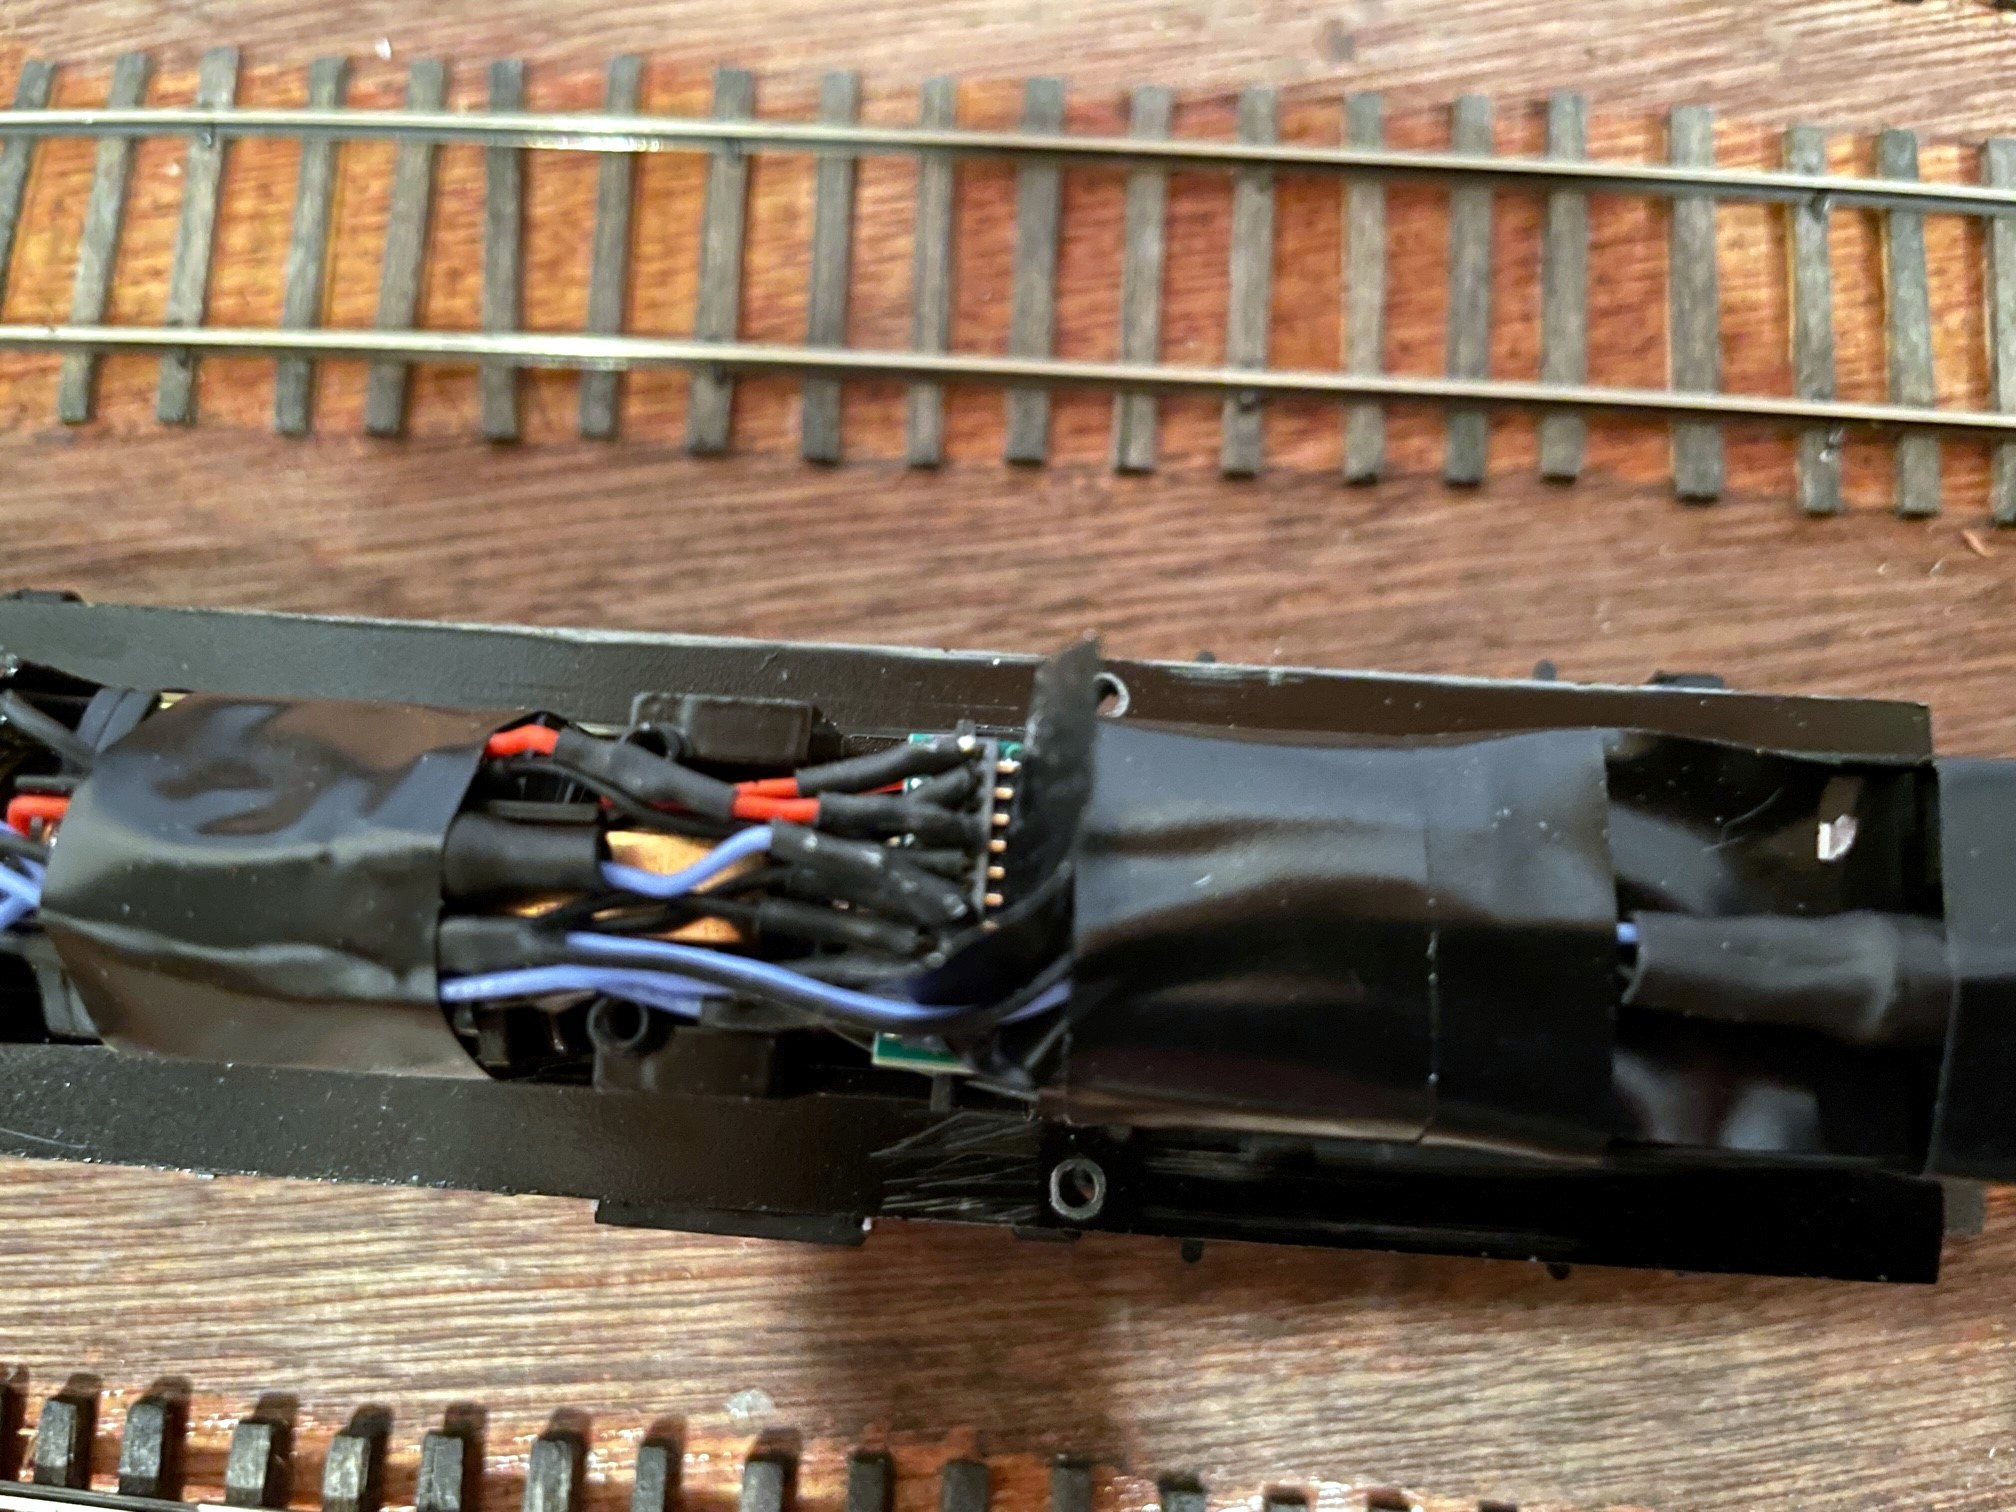
Poor picture, but this shows the homemade pins connecting an Athearn RS3 to a 21-pin sound decoder
When in doubt, try 2 sugar cube speakers (and call me in the morning… no wait, don’t call). There are some real sound artists out there who have a lot of intelligent things to say about speakers… I am not one of them. If I had to boil down everything I read about speakers into 2 things it would be: 1) use the biggest speaker you can fit, and 2) use a baffle (the housing that goes behind a speaker). First-generation locomotive speakers were variations of the traditional paper cone design, but more recently, smart phones have ushered in a revolution in small speaker technology, and we benefit from tiny but impressive speakers nicknamed “sugar cube” speakers. Two sugar cube speakers take up about the same room as a traditional oval cone speaker, but a pair seem to provide clearer sound and slightly more bass, so I’ve settled on a pair of sugar cubes as my basic, minimum speaker requirement in most locomotives. I use the LokSound sugar cubes because they come with a nifty little baffle kit that includes options for a shallow or deep baffle and options to mount one or two speakers to the base. If they’ll fit, I like to pair the sugar cubes with the deep baffles on a single base, but the shallow baffles sound almost as good if you don’t have the room for the deeper sides. I’ve seen some 3D printed baffles to go with sugar cubes as well, and I’ll definitely be giving these a try soon.
Impedance mismatching is a thing, but it isn’t the end of the world. Impedance, a form of resistance, is measured in ohms like a resistor. Those real sound artists of whom I am not one have written a lot of great articles on impedance and why it’s good to match the impedance of the decoder to the impedance of the speaker. I can’t explain it, so I’ll take them at their word! A typical sound decoder impedance is around 8 ohms (like the Soundtraxx units I use) as are many speakers, including the sugar cubes. But wait, I remember from somewhere that if you run two identical resistors in series or parallel you change their resistance by either double (series) or half (parallel). No worries! unless you’re running your decoder at max volume, this is not likely to be an issue. For example, LokSound recommends using speakers between 4 and 32 ohms, so there is a range. Just stay safe in the 1/2 to 2x range and don’t get too crazy. For reference, I wire my 2 sugar cubes in series.
Tsunami 2 PNP installs on an Athearn Genesis GP38-2 (left) and Atlas GP38 (right)
When it comes to volume, less is more. Speaking of volume, I’ve found that on a layout with multiple sound locomotives, less is more on the sound volume. I usually set my master volume around 10-20% of the max output. I like to hear it in my ear at the volume I would expect to hear it if I were standing at the same vantage point (about 150 scale feet away) as an HO-scale person. I also take the time to tweak the levels of individual sounds to avoid letting any one locomotive dominate the room and to focus on the main sounds like the prime mover, horn, and bell. I keep the horn and bell pretty muted, though, as not everyone in the train room needs to know every time a train comes to a crossing. I set them just loud enough to be heard clearly over the prime mover by the crew initiating the horn or bell (to everyone else it’s an annoying distraction from their train).
Also, listen to the engine for a while and see what secondary sounds you like and don’t like and adjust them. For me, the poppet valves of the Econami decoders sound very loud and sharp and express themselves a bit too often, so I set the decoder to make these sounds more quiet and less frequent. On the full-featured Tsunami 2s, there are a myriad of secondary sounds. Most add well to the symphony, but I didn’t appreciate all of them. For example, the sound of a socket wrench is not something I’m used to hearing when train watching, so I turned the volume on this “extra” to zero for most of my locomotives. Other sounds like the radio chatter, doors opening, and toilet flushes I turned down so they’re barely audible. Again, I want the prime mover to shine and the background sounds to be in the background.
Configure each locomotive a little differently. Speaking of the extra sounds, decoders will come from the factory with a default setting for volumes and frequencies of sound. If you don’t tweak these, you may end up with decoders with “random sounds” being synchronized with other locomotives… not very realistic. I make sure each locomotive has a slightly different rate for sounds that can be rate-configured to avoid this and make the sound of each locomotive slightly unique.
JMRI Decoder Pro makes programming sooooo much easier. Decoder programming is all about configuration variables (CVs), and sound decoders have a LOT of things to configure! Soundtraxx uses a ton of CVs (like 500 for their Tsunami 2). LokSound has fewer CVs, but each CV can be used to configure multiple options by adding together the numbers associated with the options you want and entering the sum into the CV (it’s math, but at least it’s pretty simple math). You can skip a ton of this math and programming CV by CV by using JMRI’s Decoder Pro–it’s seriously awesome, and I never appreciated it more than when programming sound decoders! It turns programming into a set of selections on conveniently grouped tabs and uses plain language descriptions of variables instead of CV numbers. This is particularly helpful with Soundtraxx programming because each CV only controls one or two options, so its easy to separate them. It’s a little more complicated with LokSound because the decoders are “blank” and the sounds loaded separately after manufacture, usually by a dealer. They’re loaded as a “sound project” into the decoders “slots.” While there are some conventions on what sounds go into what slots, it’s really up to the person who designs and loads the sounds, so instead of sounds being conveniently labeled as “prime mover volume” and “horn” in Decoder Pro, you have to work with labels like “slot 1” and “slot 2”–still easier than manually programming each CV. JMRI and Decoder Pro are free software, and all you need is some kind of computer/DCC interface which most DCC systems offer. While you can use it with a stand alone programming track, I’ve found “programming on the main” to be a much better option for sound because you can hear every change in real-time.
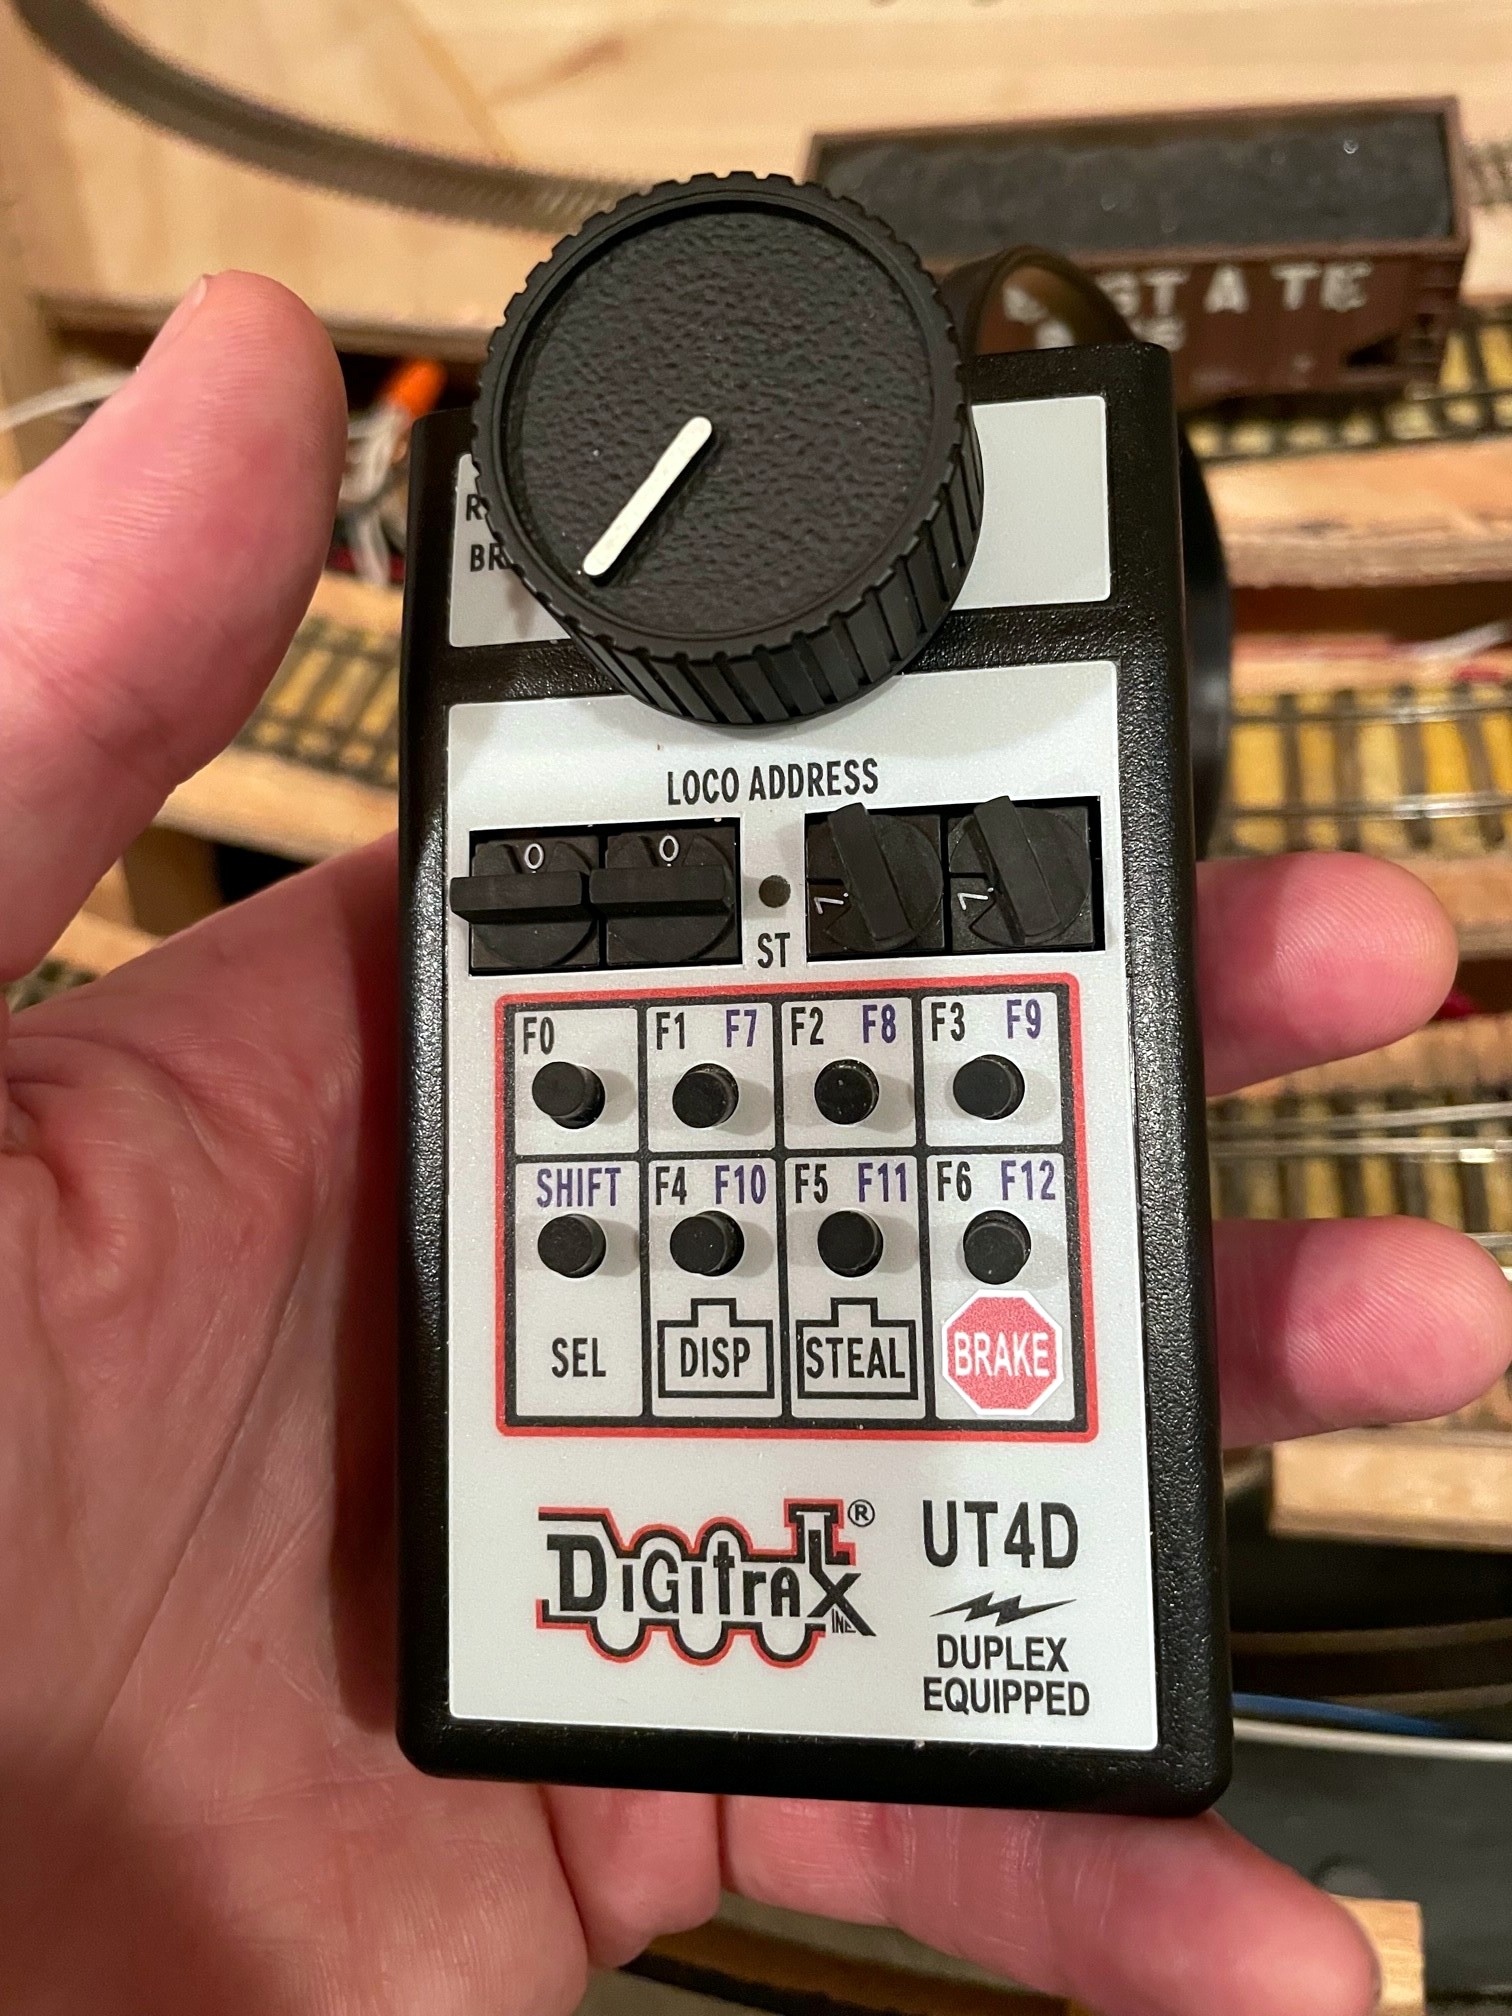
When using lots of momentum, it’s important to know where the brake is–a bright red sticker makes it easy
Put the most used functions in F0-F6. Most newer decoders, including the Soundtraxx and LokSound decoders, allow you to “remap” the functions from the normal DCC convention to wherever they’re needed. Sound wasn’t a common thing when DCC conventions were set, so it’s not surprising that the conventions may not allow for convenient access to sounds. Also, the number of buttons on a throttle is limited, so you want to make sure the ones easiest to access (single push) are the ones you need most often. DCC is amazing, and I’m so grateful for those who made it happen for the hobby–they were brilliant! However, there is one unconscionable omission in DCC that I do not understand: braking. All decoders allow the programming of acceleration and deceleration (momentum), but some have no braking function so there’s no way to slow the locomotive down except to “e-stop” (ouch) or wait for the momentum to bleed off. The combination of momentum and a sound decoder is AWESOME, so I knew I wanted this and a way to easily control braking via the throttle. The sound decoders I’ve played with all have braking options, but the braking is implemented differently in each decoder. With enough tweaking, I was able program braking that feels right into both the Soundraxx decoders (Econami and Tsunami 2… not so much on the Tsunami in the Athearn GP38-2) and LokSound decoder. While sounds like couplers are cool, I decided easy access to a “brake” button was more important, so I had to remap my functions. As I use Digitrax UT4 throttles, all the important functions needed to be programmed into F0-F6, the only “one push” functions on the UT4. Here’s how I mapped them:
F0 – Headlight on/off (standard)
F1 – Bell (standard)
F2 – Horn (standard)
F3 – Short horn (standard on Soundtraxx)
F4 – Dynamic brakes (sound only, no braking action)
F5 – Light effects (gyralight if equipped, dimming if not)
F6 – Brake (complete with a nice stop-sign sticker on my throttles)
You need to play around to really make them sing. To get the most realistic sound out of a decoder, you need to really play around with it and make lots of tweaks (there’s a reason there are so many CVs). On a real locomotive, the sound is not tied to speed as much as load and demand. For the economy decoders like the Econamis, you get what you get, and the prime mover pitch is tied to the throttle setting. You can use function buttons to increase and lower the RPM sound, but who wants to have to control their throttle AND RPMs separately? Some might, not me. What you REALLY want is for the decoder to sense the load and other factors and change the pitch according to the load. The key to this is the decoder’s use of Back EMF (BEMF) which essentially allows the decoder to sense the load on the motor. With the LokSound decoders, the use of BEMF to control the prime mover sound appears to be native in the decoder’s function. For the Tsunami 2s, it took a bit more work to configure this, but it is SOOOO worth it! Soundtraxx calls this “Dynamic Digital Exhaust” (DDE), and it requires the tweaking of a few CVs, two to tell the decoder your idea of “low speed” and “moderate speed,” one to control the prime mover based on the difference between your throttle setting and current speed (this is where building in some accel/decel really helps), and one to tell it how sensitive to be to the BEMF.
By 1) adding in a good bit of momentum, 2) turning up the “speed differential” CV to full blast and 3)upping the BEMF sensitivity to about 30% of max, I get a locomotive that sounds very realistic to my ear. When I move it from idle, I crank the throttle up immediately to where I want the speed to be. The prime mover howls to life with a roar because it senses a difference in its current speed (zero) and the desired speed. The locomotive, still belching sound, then begins to creep slowly up to speed, and the prime mover quiets a lower level as the actual speed closes on the desired speed. After that, the BEMF helps it know if it’s under load or not, so it’ll drop back to near idle going downhill, and it will notch up if moving uphill, especially if its moving a lot of cars uphill with it–perfect!
Another tweak I highly recommend is the dynamic brake setting which can be done even on some of the economy decoders. For most model applications, you don’t actually want the application of dynamics to slow the train. You’re going to control the train speed with the throttle, and the “dynamics” are just ear candy as they’re presumably helping you keep the speed in check going down a grade. Soundtraxx has a CV you can select that will drop the engine sound to idle if the dynamic brakes are applied. I like this because when I’m heading down a grade with a loaded train, a single function button push allows me to drop the prime mover sounds to idle and bring up the dynamic brake whine while still moving the train at a realistic speed. Cool!
Speed matching is really important for the cool features. I’ve always been a “close enough” guy for DCC locomotive speed matching. This has served me just fine until now. I was so excited when I figured out how to use DDE to make my locomotives sound amazing in response to throttle inputs and loads, and then I put two of these amazing locomotives together in a consist. When just the the two of them were creeping along together downhill and their prime movers were screaming at “notch 8,” I knew something was wrong. Turns out, if locomotives aren’t perfectly speed matched, one is always pushing or shoving on the other. The BEMF in the decoder translates this as “load” and adjusts the sound accordingly which means notch 8 sounds for notch 1 action. I spent hours painstakingly speed matching locomotives to a single locomotive I picked as the “pacer” using 28-step tables and trim for each locomotive. This was time well spent as multiple locomotives sound far more realistic now that they’re not fighting each other.
Advanced consisting is a big help. Before sound, I used Digitrax’ “universal” (command-station) consisting almost exclusively. Now that I have sound-equipped locomotives, I’ve switched to “advanced consisting” (decoder-aided consisting). Advanced consisting has a couple really useful features. First, you can configure the locomotives on the ends of the consist to only use their headlights when the consist is moving in a particular direction–this is crucial for my layout where switching is common and the consist changes directions all the time. Also, you can configure most functions in any locomotive to respond to either the consist address or only the locomotive address. This allows you to pick a single locomotive in the consist to respond to horn and bell functions–I wish this could be configured to respond based on direction as well (the lead locomotive’s horn and bell are used and switch based on direction), but alas, this doesn’t seem to be a feature yet. Most importantly for sound, this allows me to program functions like dynamics and braking to respond to the consist address in ALL locomotives so they work as a team in both sound and braking.
Once you pick a manufacturer, stick with them. I’m not here to tell you which manufacturer to pick, but I will say, its a lot easier if you pick a manufacturer and stick with them! I heard this advice from others, and I now wholeheartedly agree! It’s far easier to make your fleet act in concert, especially when M.U.’d, if things like momentum and braking are implemented the same in all the decoders. While it may sound appealing to have a smorgasbord because you like one manufacturer’s Alco sound and another’s first-gen EMD sounds, it will limit your ability to implement consistent features and “feel” across the fleet. Having said this, I still use (and love) the one LokSound-equipped C420 I have even though everything else is Soundtraxx. Thankfully, the L&N train it powers is usually run by a single locomotive, so I just had to tweak it to feel and act more like the Soundtraxx equipped locos, but it doesn’t need to be a perfect match because it’s never M.U.’d.
My only LokSound decoder is in an Atlas C420 that runs solo
Every manufacturer has their pluses and minuses, so pick the features that work for your operations (aka “why I picked Soundtraxx”). You really can’t go wrong with the leading manufacturers, and you’ll find zealots and haters for each. They all do things differently, though, so ultimately you have to figure out what your priorities are. I hear great things about TCS WowSound, but I have no personal experience to share. I wanted to jump in, so I evaluated the LokSound and Soundtraxx locomotives I had on hand to see which I wanted to use on the fleet. When just listening to the sound, especially as it changed based on how I was operating the locomotive, I prefered the LokSound. However, when I began playing around with things like braking and tweaking CVs, I found the Soundtraxx was far more intuitive to configure, and now that I know how to use DDE in the Soundtraxx decoders, I’m able to get a lot of the same sound dynamics out of my Tsunami 2s that seem to be pre-programmed in the LokSound. I can live with complicated programming, so what it really came down to for me was one simple thing: Soundtraxx has a reasonably featured “economy” line that works for many of my locomotives. Interestingly, as I’ve gained experience, I’m still happy with the Econamis, but I will probably invest in full-fledged models from here on out because their extra features enhance my enjoyment enough to justify the extra cost. The Econamis will still have a home in B-units, mid-consist units, and units that only see service occasionally.
If you’ve stuck with this article to this point, good for you for listening to a rookie! I hope some of my learning points will help you as you make decisions and jump into the world of sound decoders. While I won’t encourage a battle of which manufacturer is best, I would encourage those of you with experience in this area to add some of your own lessons in the comments. If you’ve learned nothing else from this, I’ve hoped you’ve at least learned that it’s not a good idea to use a sound decoder that sounds like a screeching lemur.
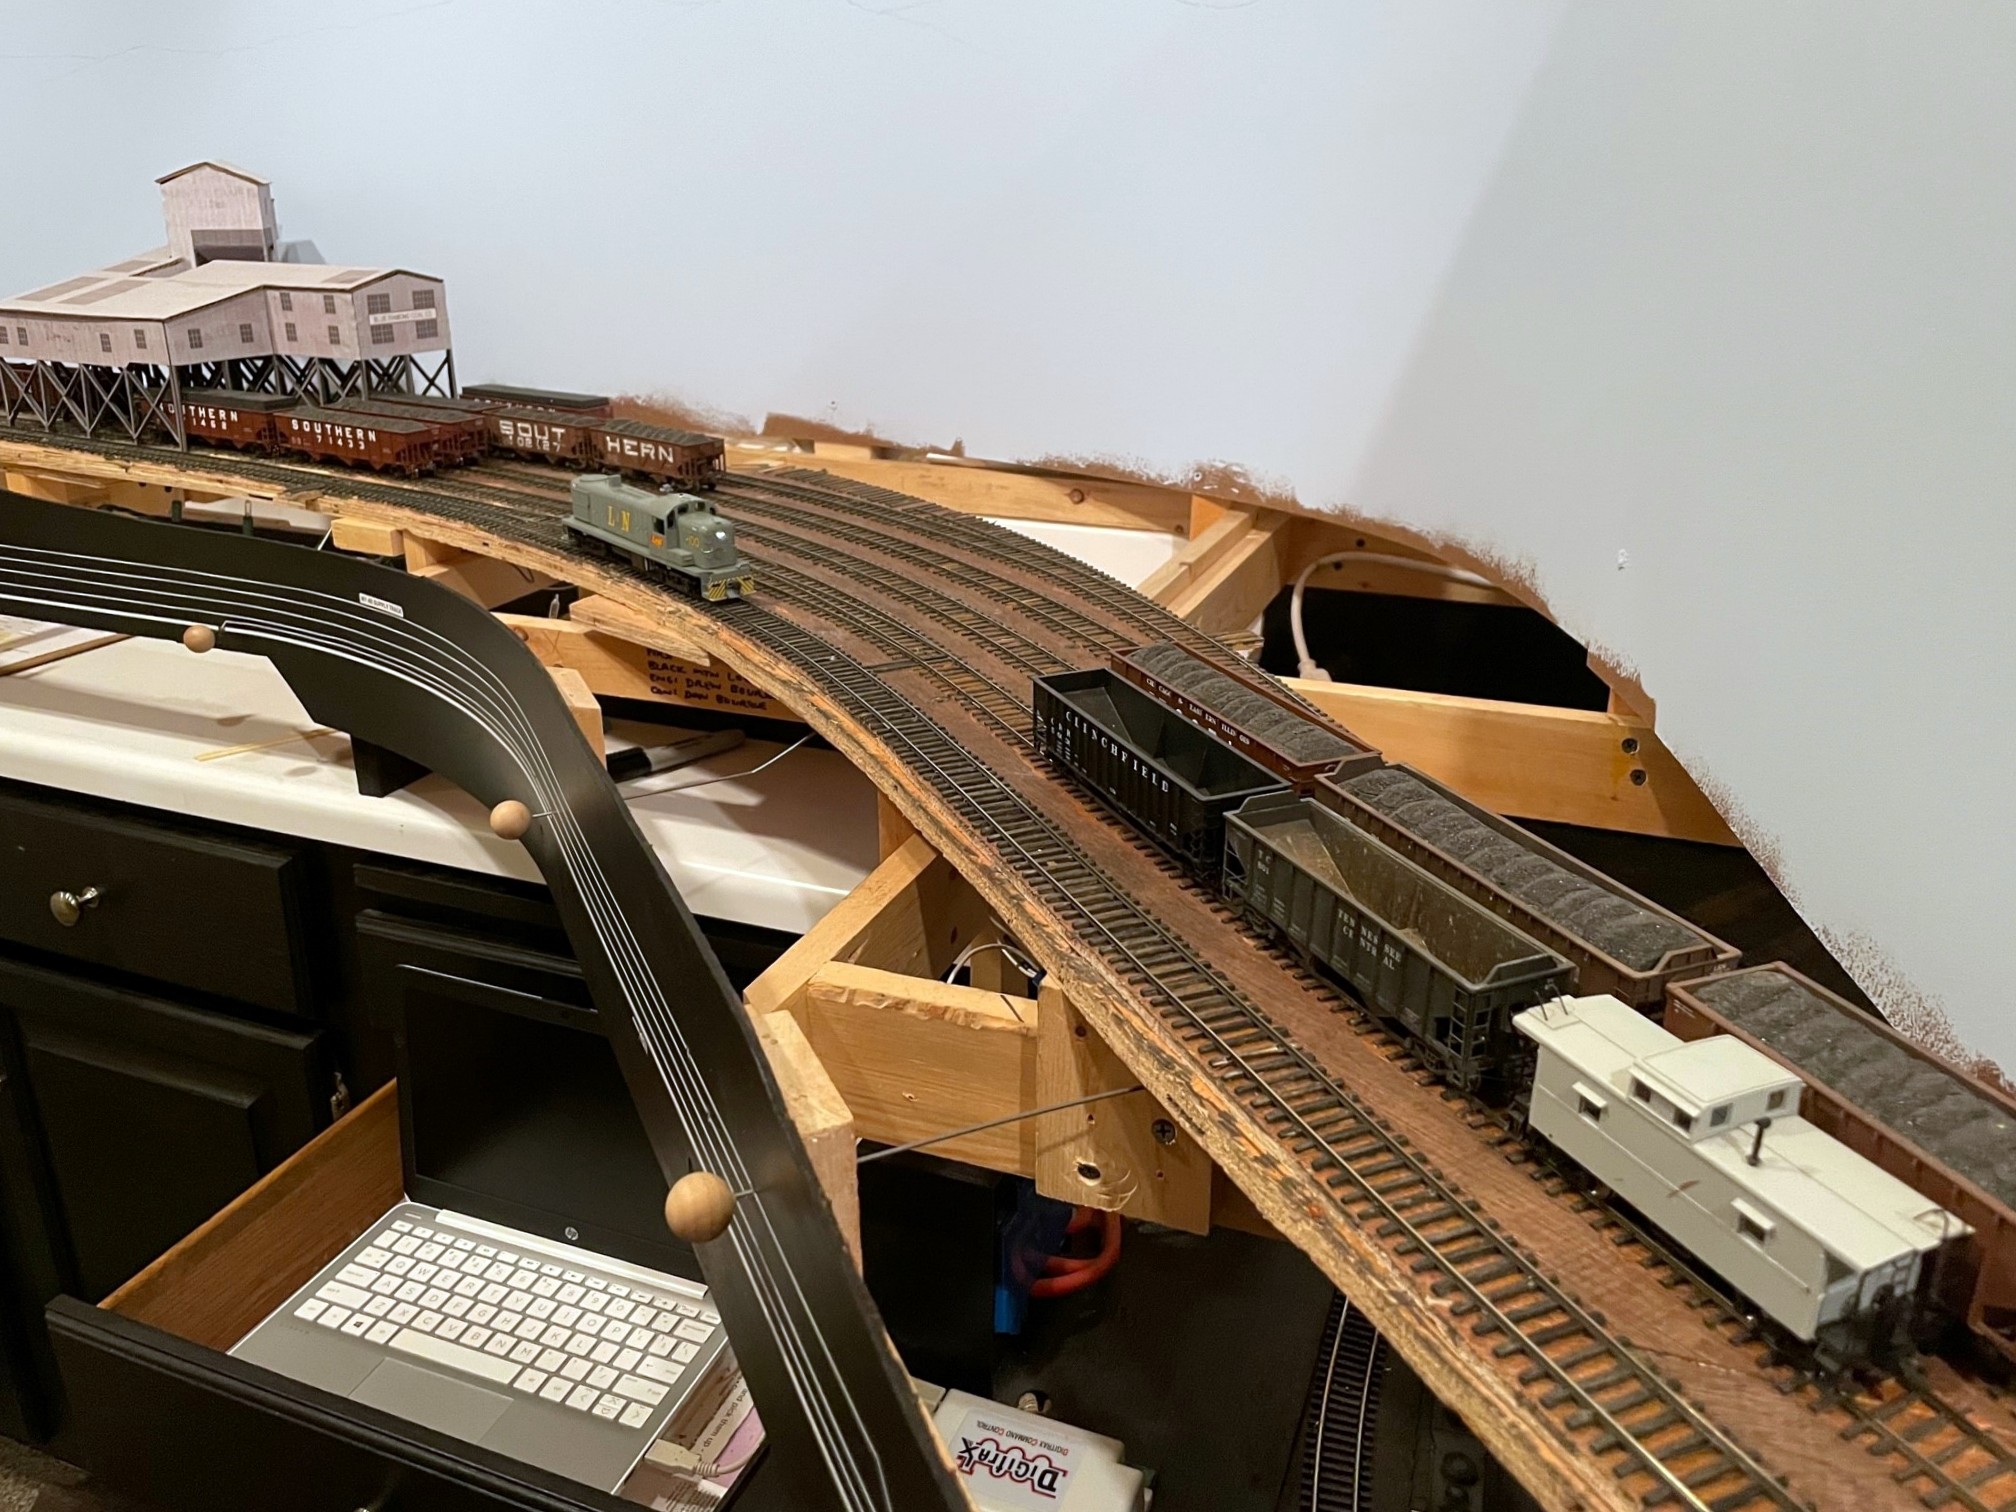
Patrick working the St Charles Local–dropping off fresh empties and picking up loads to take back to Appalachia and Andover
Yesterday was the second operating session on the St Charles Branch, and Patrick Tillery was again my partner in crime. Despite only having the tracks for one deck complete, we were able to run 4 trains, and it took us about 2 1/2 hours to get all the chores done. That’s a pretty good showing for only 1/2 the layout and 2 operators! I learned a lot in the session, mainly which switches to keep working on to avoid derailments, but at least we didn’t have any repeat offenders, so I’ll call it progress!
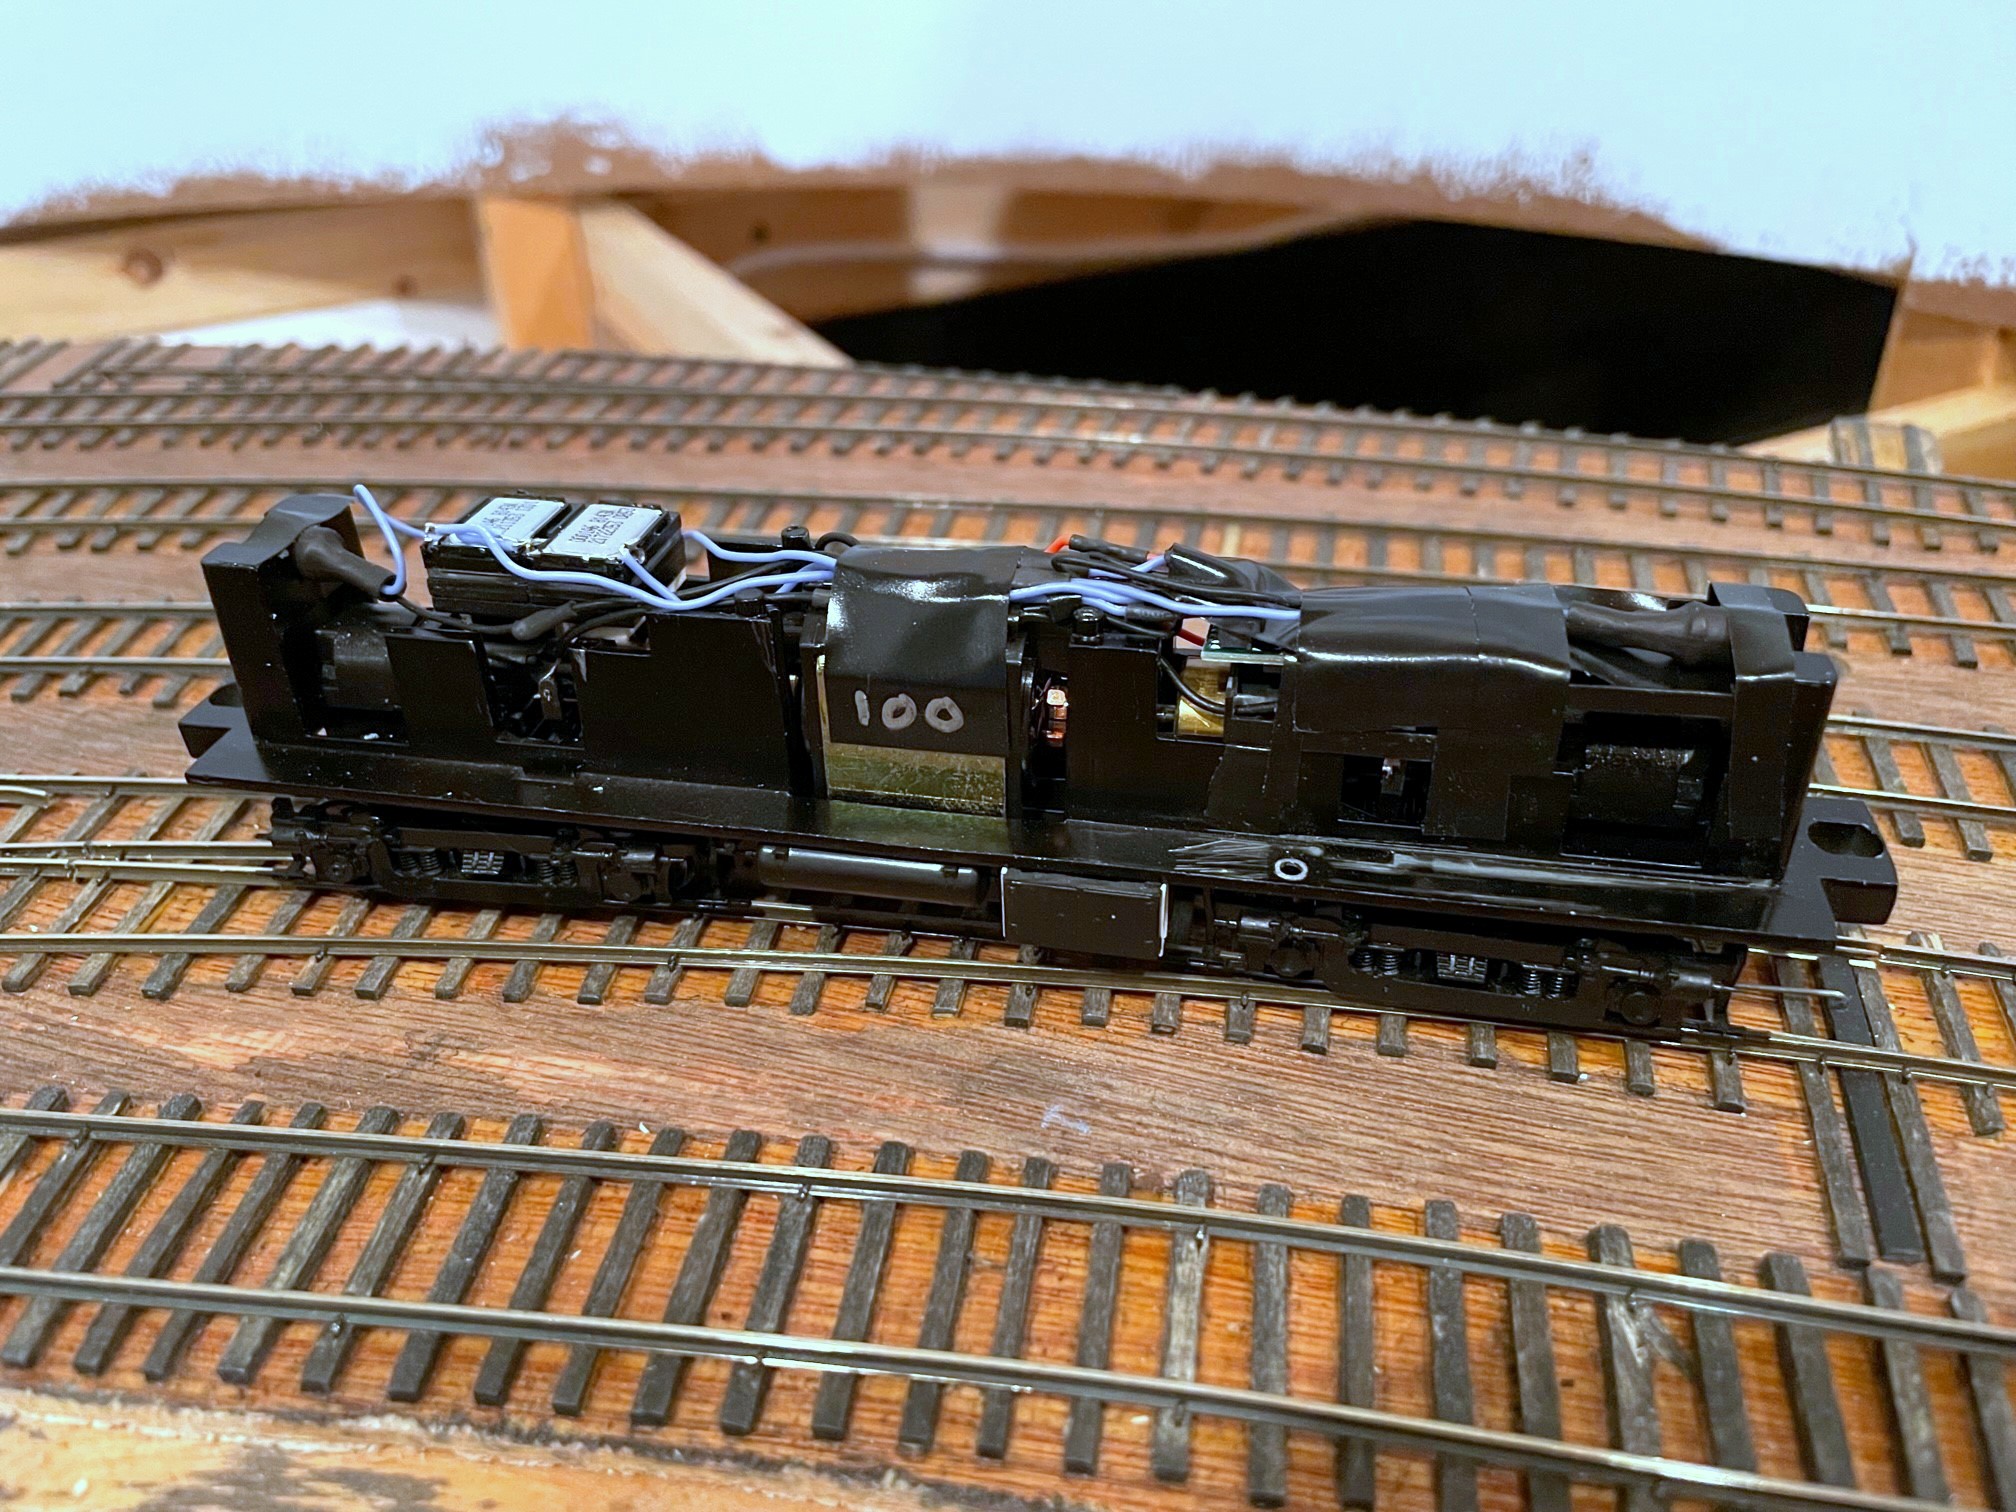
L&N 100 (still an “in progress” model) works Mayflower as the power for the CV Local
For this session, I picked the date July 30th, 1969 which meant F-units for the Southern’s mine run and and RS3 for the L&N. We ran a “busy day” with two Southern mine runs. Since the helix was recently completed, I staged the “Black Mountain Local” on the helix with loaded hoppers as if it was returning from the tipples which will eventually be on the upper deck, so it was more like 1/2 a train, but it did add a little more operation as the train needed to be blocked in the yard and the power tied up. It also required some “meets” in St Charles, so the orders needed to specify which legs of the wye to occupy and which to leave open for the higher priority trains. No collisions, so I guess I’ll call that a success.
In addition to having a full set of fascia controls to work with and the beginnings of backdrops, this session had some other notable “firsts”
First session with first gen diesel sounds (EMD 567s and and Alco 244)
This is the makeshift job board for session #2 and the 4 trains we ran
Some things I learned:
Even with the switch lists, I probably still need a “master switch list” everyone can access
Instructions for the crews need to be a little more explicit on the job required and not just a blocking sheet
A little momentum in the locomotives made it more fun and realistic–I’ll probably turn it up a bit more next time
Even though it’s a small chore, using the switch locks and semaphore controls added some prototypical realism and slowed things down a little (which is good)
Overall I’d call it a success. It was fun, and it motivates me to keep going! If anyone reading this is ever in Colorado Springs, give me a shout and we’ll set up another.
This is the makeshift job board for session #2 and the 4 trains we ran
Since there’s no upper deck yet, the helix served as a staging track for the “Black Mountain Local”
Patrick finishing up the Black Mountain Local by blocking cars for pick-up by the St Charles Local
L&N 100 (still an “in progress” model) works Mayflower as the power for the CV Local
Patrick working the St Charles Local–dropping off fresh empties and picking up loads to take back to Appalachia and Andover
Patrick Tillery stops at the St Charles depot while running the first-ever L&N CV Local
I’d like to thank Patrick Tillery for informing we he was coming over Monday night to check out progress on the layout which became the catalyst for the first multi-train operating session on the St Charles Branch! Despite some major obstacles such as having to reach under or across the layout to throw switches and a couple turnouts and cars that were acting up under their first real use, we managed to run 3 trains: the St Charles Local, the St Charles Switcher, and the L&N’s CV Local. These are the three primary trains on the layout during “busy times” across all eras of the layout–the timing of the trains may vary, but each serves the same basic function.
The St Charles Local is a scheduled train that runs between Appalachia/Andover, VA and St Charles. In leaner times, it serves as the mine run for the St Charles area branches. In heavier times, it serves to shuttle empty hoppers to the small “yard” at St Charles and pick up loads retrieved by the St Charles-based mine run. This is the “big train” on the layout and the only train to ever be assigned more than two locomotives.
The St Charles Switcher, known in some eras at the Black Mountain Local, is the mine run based out of St Charles that serves the area loaders. It picks up empties dropped off by the St Charles Local and plies the numerous branches and tipples dropping off empties and picking up loads. This train is the star of operations on the layout and the only train that will normally have a crew of two (conductor and engineer).
L&N CV Local runs around its empties at Mayflower with Patrick at the controls–the C420 is still in TC colors
The L&N Cumberland Valley (CV) Local is the only other scheduled train on the layout. This train works the old L&N mainline between Corbin, KY and Appalachia, VA including the modest coal loadings of the Middlesboro, KY area mines and the St Charles Branch. The L&N has trackage rights over the portion of the St Charles Branch from L&N Junction (Pocket), VA to the ends of the branches beyond St Charles which it reached via a short L&N branch between Pocket, VA and the L&N’s CV mainline at Pennington, VA. Despite several loaders in this area, the prototype CV Local never seemed to need more than a single locomotive, an RS3 or a C420, to handle the handful of hopper loads bound for the L&N.
Last night’s operating session took about 2 real hours. Patrick took the first train, the L&N CV Local, up to Mayflower to swap out 4 empties for 5 loads. Leading the train was Alco C420 400 still in Tennessee Central colors (it’s bound for the paint shop soon, but the L&N used ex-TC C420s on this line because they were the lightest on the railroad). The CV Local had to first stop at the depot track on St Charles wye to pick up an extra set of orders from the Southern dispatcher. This job took about 40 minutes from start to finish. After the L&N CV Local cleared St Charles, the St Charles Switcher with me as engineer showed up with 18 cars – 16 empties, a covered hopper of fertilizer for Mayflower, and a boxcar for the team track at St Charles. It took about 20 minutes to assemble the loads from the previous day and replace them with the fresh cars in the tiny 3-track yard. A derailment kept the L&N CV Local waiting for a few minutes until the superior train on the timetable was finally able to depart for Appalachia.
With the home rails now to itself, the St Charles Switcher left the house track next to the depot to serve four tipples with Patrick as engineer and me as conductor. We worked the two local tipples first, JAD Turner and Cavalier, before swapping out the boxcar for a now empty flat on the team track. With the locals taken care of, we swapped roles and picked up the remaining empties an the load of fertilizer and headed up the branch to Mayflower. At Mayflower, it took two sets of run-around moves to place the empties above the tipple and swap out covered hoppers on the tail track. One more run-around set us up to work the stub track at Baker before assembling all the loads and departing town. A little blocking back at St Charles yard rounded out the job which took nearly an hour.
All told, we got 2 hours of operations out of just 1/2 the layout–not bad! Despite working out a few kinks in the rolling stock and trackwork, the overall track arrangements worked well for the jobs–they required enough moves to keep operators thinking and having to make smart moves without being frustrating for lack of sufficient track. I underestimated how handy it is to have a wye for turning trains working the yard instead of having to run around the length of the train. It was also the first major use of paperwork on the layout, something I’ll describe in more detail in a future article.
I’m so glad Patrick was up to playing guinea pig for the first session, and I’ve now got a new punch list of stuff I need to fix before attempting this again. All part of the learning process!
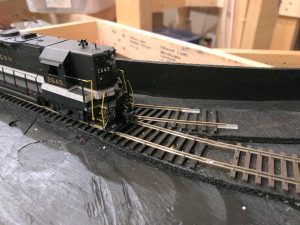
Everyone with a layout has that “special” locomotive. No, not your favorite one with the custom paint and weathering or the one with the beautiful sound system. You know, it’s the one that despite every effort you’ve made to make sure there’s nothing obstructing free movement, there’s nothing dragging, and all the wheels are in perfect gauge, still manages to find ways to fail to stay on the rails where 100s of others have succeeded before. . . that kind of special. These locomotives serve a wonderful purpose, but I’ll get to that later.
My special locomotive is Southern GP35 2649. It’s a kitbashed Athearn model with a high nose and Alco-style truck sideframes. There’s nothing remarkable about the drive system, wiring, or anything else–if anything, it might be a tad on the light side.
For the last month, I’ve been running trains on my staging level. It’s been a great exercise in working out the kinks in the trackwork and power, getting re-acquainted with my DCC system and JMRI DecoderPro, and just enjoying watching some trains run. I’ve gotten to the point where I could back a 34-car train of empty hoppers with 3 units shoving all the way around the layout and through all three of the reversing loop tracks–I was pretty proud of my work! Then came the Special. . .
My “special” locomotive, Southern GP35 2649, next to the track joint that it alone didn’t like. Yes, there’s a solder blob there, but now that it’s working for 2649, I don’t dare touch it!
Southern 2649 never got a lot of running time on my last layout as it was one of the last locomotives to make it to running shape before I had to tear things down. I decided to break it in a bit more today by running it in loops around the staging level. First long-hood forward–no problem, negotiated everything like a pro for 30 minutes! Ok, let’s reverse direction–looking good, going through the last switch. . . on the ground. Hmm. put it back on the rails, backed up, through the last switch. . . on the ground again. I repeated this process several times and determined it wasn’t the switch, but it was running over the outside rail right at the transition between hand-laid switch track and flex track. I felt the track joint–smooth as it could be. I checked the gauge–spot on. I re-soldered the joint anyway. . . on the ground. I could propel the engine over the spot by hand with no issues, but as soon as it was under its own power, it would climb right over the rail–infuriating!
I removed the brake cylinder piping on the front truck to make sure it wasn’t catching. . . on the ground. I took off the truck sideframes and smoothed out the backs of the brake cylinders to make sure they weren’t catching. . . on the ground. I finally went back to the soldering iron and re-did the entire track joint, using a screwdriver to lift up the rail a bit and a pair of pliers to push one rail further in to provide a little more curve to the rail before hitting the joint. Let’s see, will 2649 like it? . . . I stood there, looking like an expectant father who’s watched his kid fall 100 times learning to ride a bike and thinking “maybe, just maybe this time will be the one!”
Lo and behold, 2649 made it through! I watched proudly as it circled the layout like a champ, passing yard after yard of flex track, across the last switch before making it back to the starting point, and then “bah, dah, dah, dah, dah, dah”. . . the telltale sound of wheels on ties. Sigh. At least this time it was an easy diagnosis, a spike I had put on top of a rail joiner to hold it more securely in place was just a little too high. Yes, every other wheel on the layout had passed this joint 1,000s of times without incident, but alas, 2649 can find any flaw!
And that’s why I’m happy to have the very special 2649 on the roster. With 24″ radius curves, S-curves through switch ladders, and even some #4 curved turnouts, the track work on this layout needs to be flawless to be reliable. And it’s not flawless until 2649 says it’s flawless! As frustrating as its finicky nature may be, 2649 makes me a better modeler, and that’s what makes it truly special.
Layout wiring on the St. Charles Branch is simple yet very robust using common household wiring supplies. First, I’ve divided the layout into six blocks: four “main” blocks (1. Staging, 2. St. Charles, 3. Mayflower, 4. Upper Deck), and two reversing sections (1R. Staging loop, 2R. St. Charles Wye). Even though I don’t have a power block distribution circuit yet (like a PSX4), I’m wiring the layout for that eventuality and just tying all the blocks together at the command station as an interim.
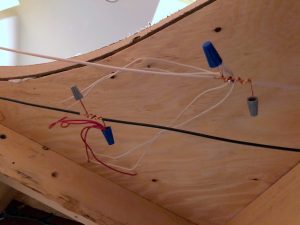
Feeders are connected to the wiring bus via wire nuts connected to pigtails along the bus.
The bus wiring for each block is copper Romex wiring. . . that’s right, Romex, the 14 AWG copper wire you use to wire household sockets and light fixtures. It’s overkill, but it’s easy to find, comes in long lengths, and the current loss for DCC applications is pretty much zero. I strip the outer sheathing, remove the bare ground wire, and use the black and white wires. I run them under the track through holes in the benchwork separated by about 2.5″. Lesson learned: if running the bus for two blocks side-by-side, make sure you label each about every other piece of wood to avoid cross-wiring blocks later.
I drop feeders at least every 5 feet, so on every 2-5 feet of bus wiring, I’ll strip off about 1″ of insulation and make a “pigtail” if you will using a length of 4″ of the bare copper wire (Romex ground wire) wrapped tighly around the bus core about 3 turns and soldered. I leave about 1″ of copper sticking off either end and cap it with a wire nut. I separate the pigtails for the white and black wires by about 4-6″ to avoid accidental contact of exposed wire.
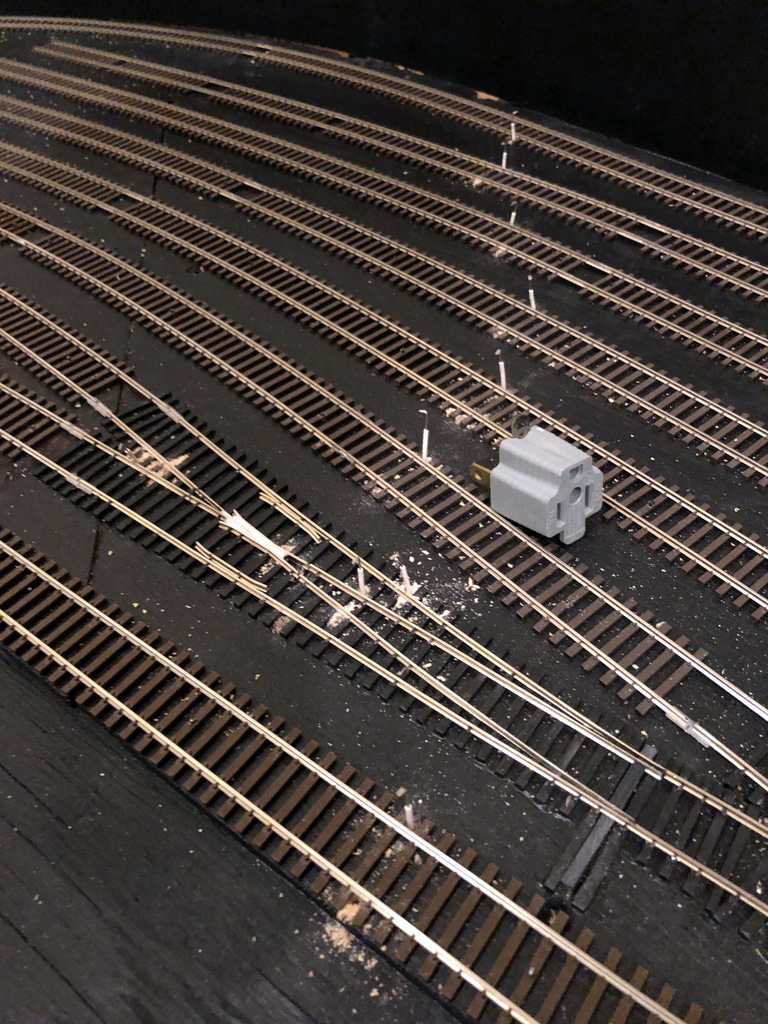
Wiring feeders from the rails to the bus under the layout. The gray plug marks the spot of connection to make it easy to cut wires to the right length.
Finally, the feeders. As mentioned, I try to drop them every 3-5 feet of rail. For bulletproof operation, every single rail on the layout is directly connected to the bus either through its own feeder or a single soldered joint to the rail next to it that’s connected to a feeder (no trusting rail joiners to carry current and signal). I drill the holes first, then drop pieces of 18 guage stranded wire through to connect to the bus. You’ll notice in the picture above the layout the little gray plug. I use this to mark the location of the pigtail under the layout so I can accurately cut the feeders to length, leaving about 1.5-2″ extra length to account for vertical distance through the subroadbed and some wiggle room for orienting the feeder to fit into the pigtail. Because I hand-lay my switches, I need a LOT of extra feeders for the point rails and frogs (connected to switches under the layout).
To make sure I hit all the holes, I leave the sawdust from drilling them in-place until all feeders are in. I also work one color at at time; white for one rail, red for the other. Once all the feeders of one color are in place, I’ll tin them with solder and solder each to the rail. Under the layout, I’ll gather together 2-3 feeders, twist them together, and tie them to the pigtail using a common wire nut (size depending on the number of wires being tied together). A little tug ensures they’re solidly in-place.
I’ve found this method creates rock-solid wiring that’s easy to modify and troubleshoot–just disconnect and reconnect the wire nuts as needed. This method also works perfectly with Digitrax DCC which prides itself on picking a slower data rate that works well with non-high-speed wiring. If using on a different system, I recommend doing some testing first.
Well, this is why you draw it out when you change the plan instead of keeping it in your head (it’s all there, right?). As I was laying tracks in the Southern staging yard, I couldn’t make the math add up on the number of tracks coming into the yard. I had five tracks and the ties laid for four switches (normally good math to go from one track to a yard), but I kept feeling something was off. . .
Sure enough, I had laid ties for one extra switch! In the original plan, the yard ladder took the Southern from one track to five (four staging tracks plus the lead for the reversing loop), but when I modified the plan in my head to allow continuous running, one of the staging tracks that was co-opted for the continuous run no longer needed to connect to the yard lead. Yup, one extra switch!
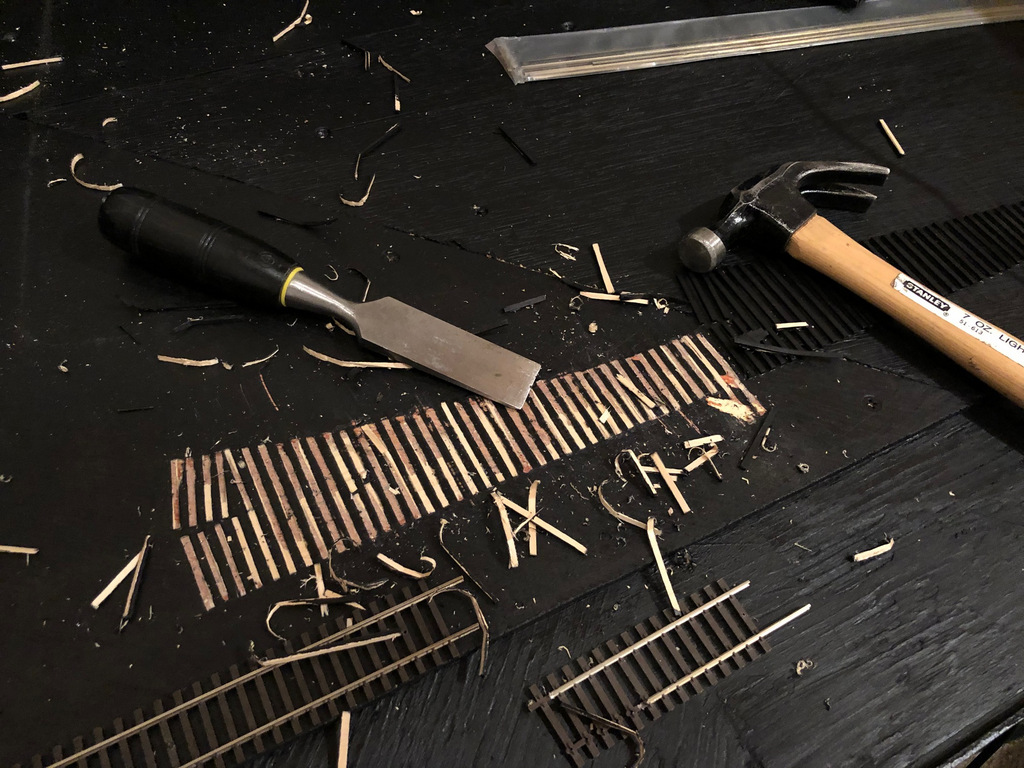
Here’s what happens when you make a change to your plan in your head but don’t write it down. I ended up laying ties for one extra switch in the staging yard–glad I figure this out before laying rail!
Thankfully, I had only laid ties and not rail, so a little chisel, sandpaper and a Sharpie put things (almost) back to right. As those of you with layouts can attest, I’m sure this won’t be the last mistake I make, but I’m glad it was caught before I put a lot more work into something I’d have to tear out.