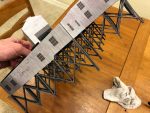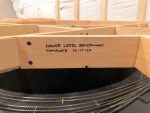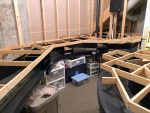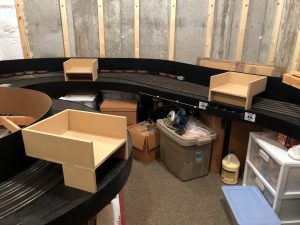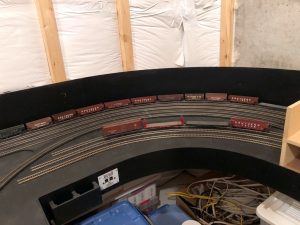
Lower Level Benchwork Complete!


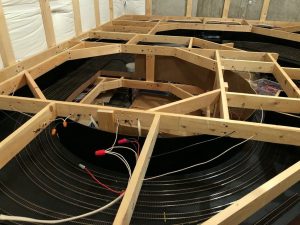
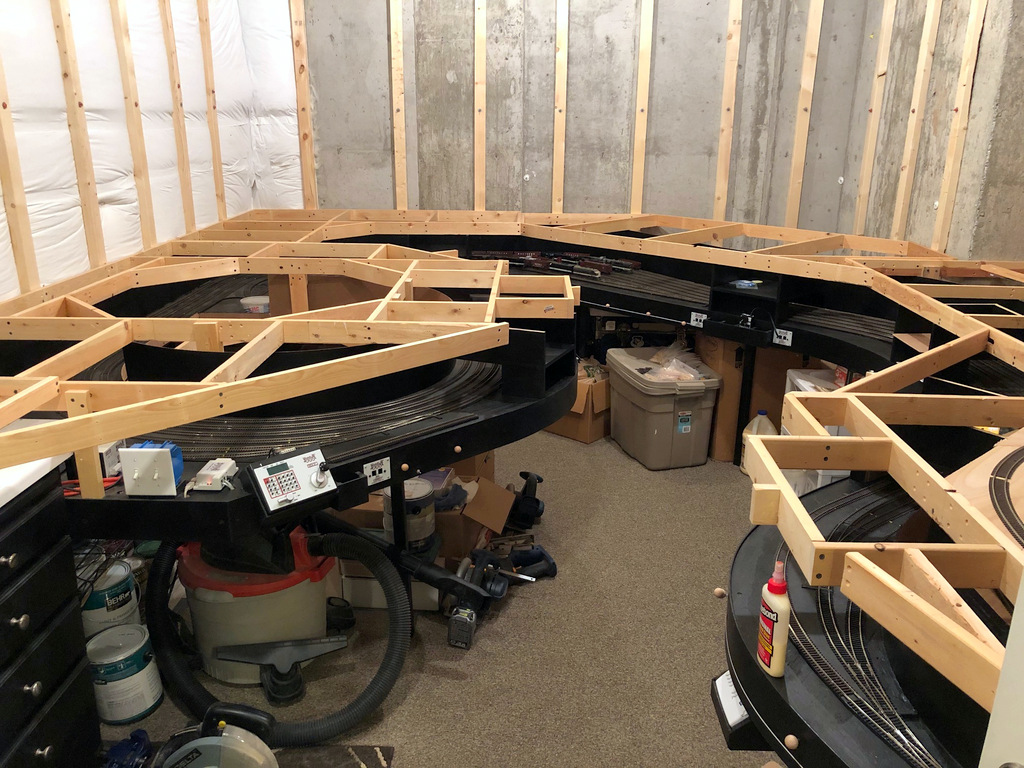
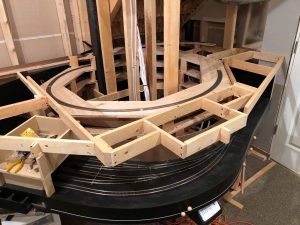
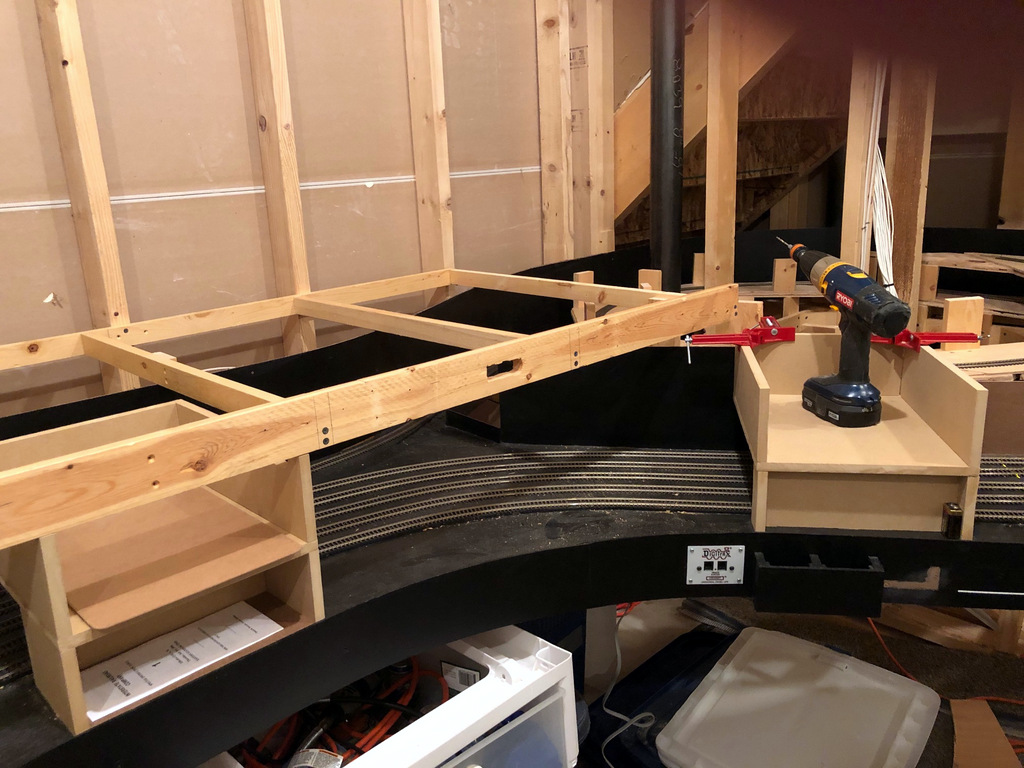
Finished Lower Level Benchwork
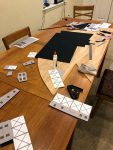
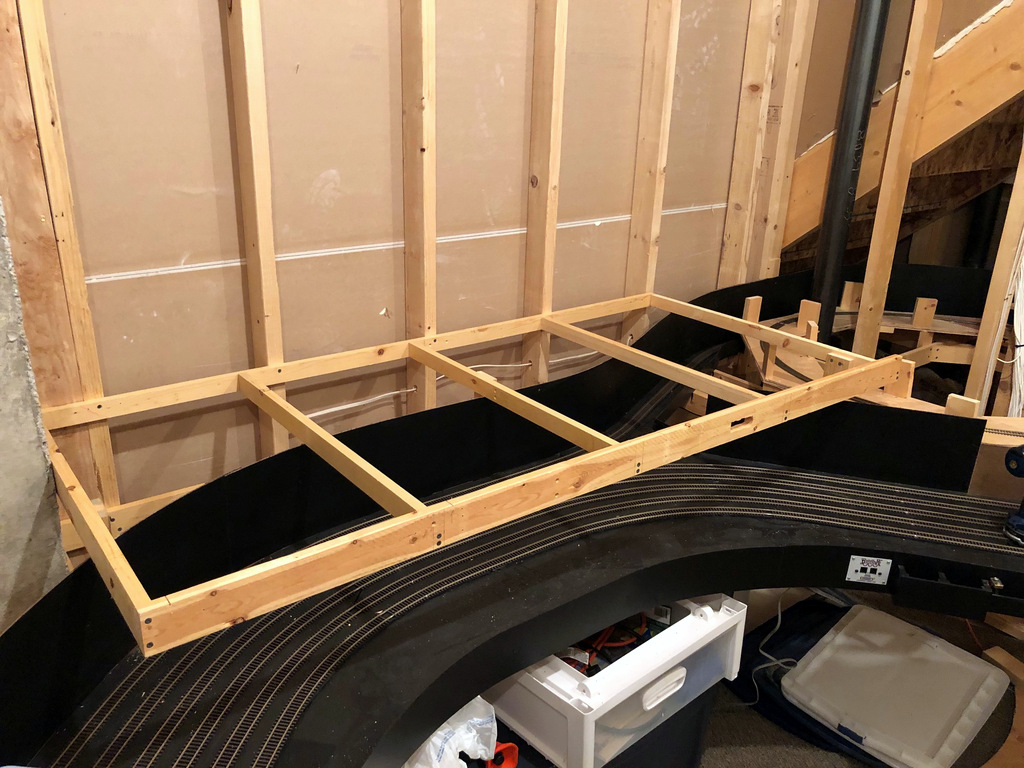
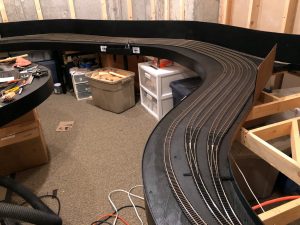
Finished lower level benchwork as seen from the door

Well, the train garage now has a roof. Or in other words, I reached a major milestone today by completing the benchwork for the main level. What made this particular project tricky was I’m trying to match the fascia contours of the staging level exactly so they look like they’re one thick deck with staging under and trains over. The upper level won’t need to match, so parts of that project will be slightly easier.

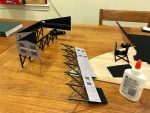
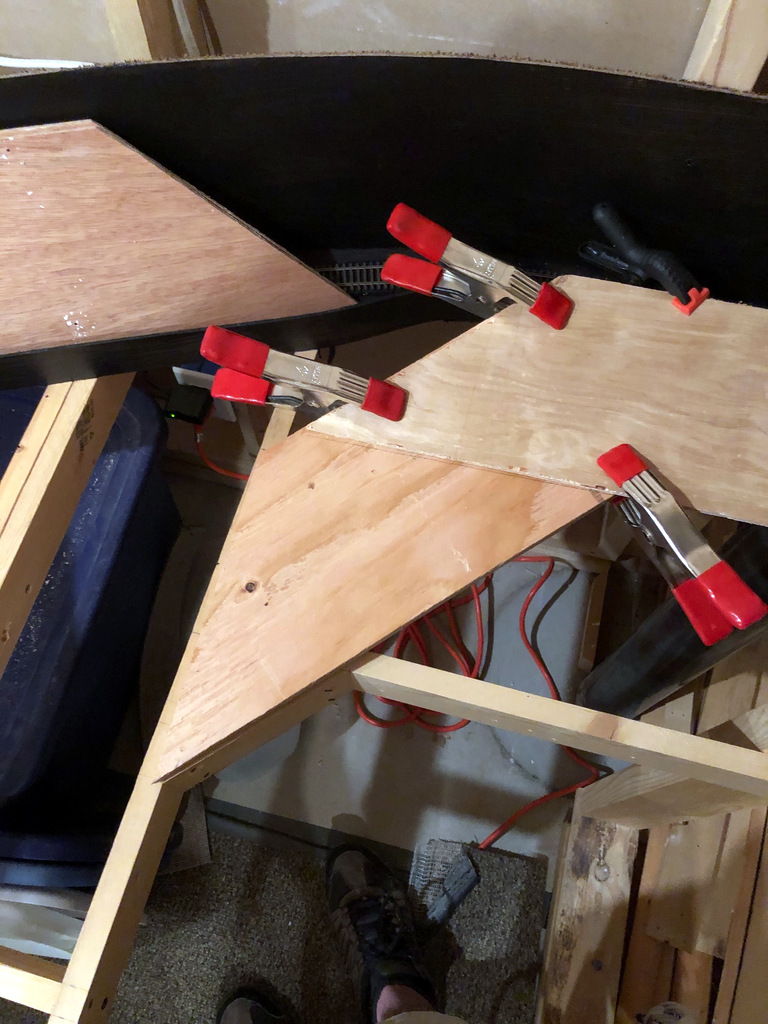
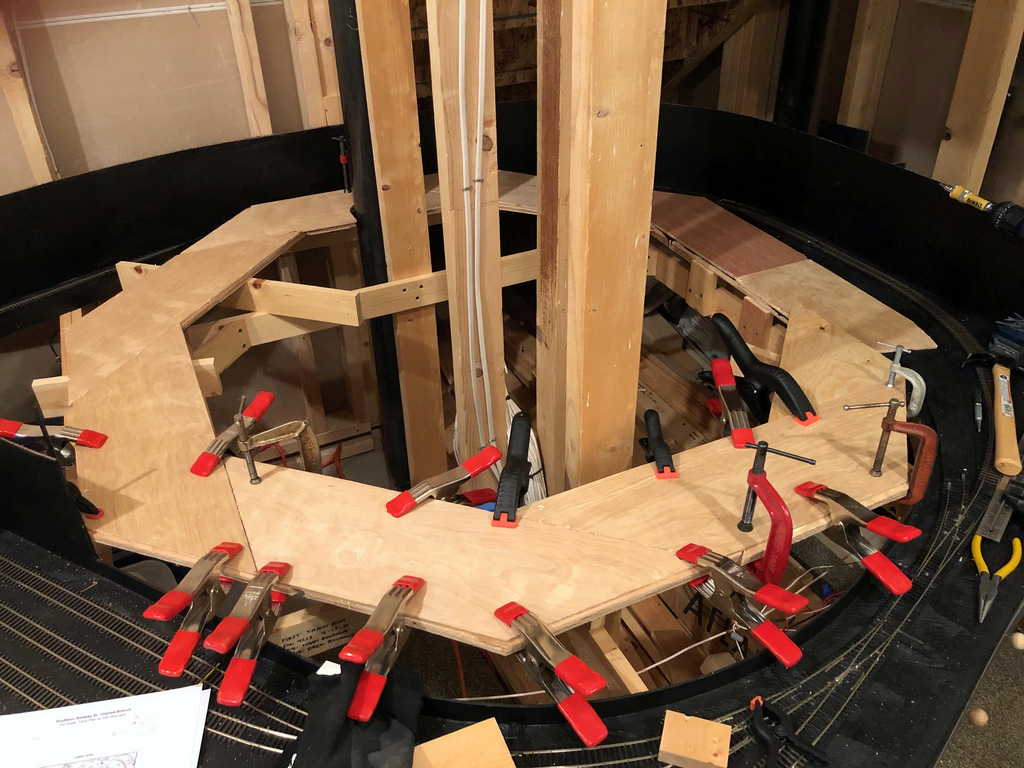
All the benchwork is open box, so most pieces were fairly easy to build. However, building the peninsula benchwork was tedious because 1) I needed a pretty big, single piece of benchwork to give it strength to reach from the wall to the edge of the peninsula, and 2) I needed a very specific octagon pattern at a very specific place in the middle of the peninsula to serve as the foundation for the second helix which will take trains from the lower (main) to the upper deck. I’m very glad I have an open basement area just outside the train room where I can build big pieces of benchwork. I’m also glad my wife announced she’d like to replace the carpet in the basement soon, so I’ll take advantage of this window for making messes on the carpet without repercussion!

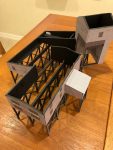
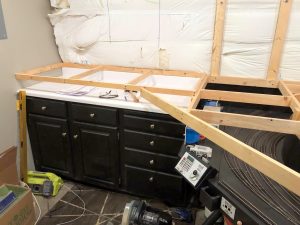
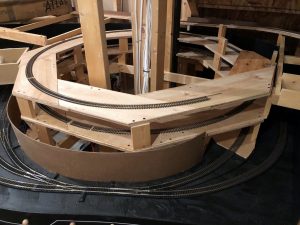
Finished Lower Level Benchwork
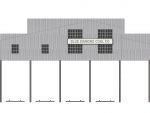
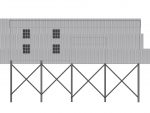
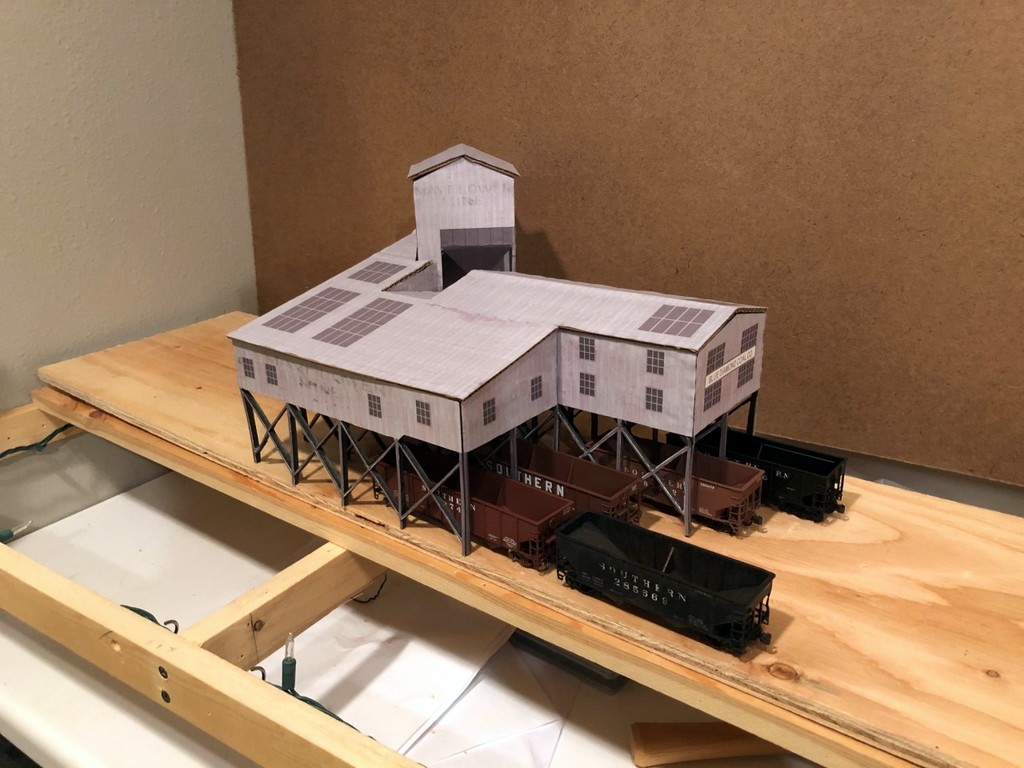
Benchwork for the Mayflower tipple in the corner–I really like how this space is turning out!

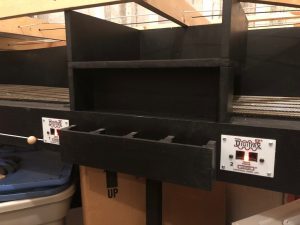
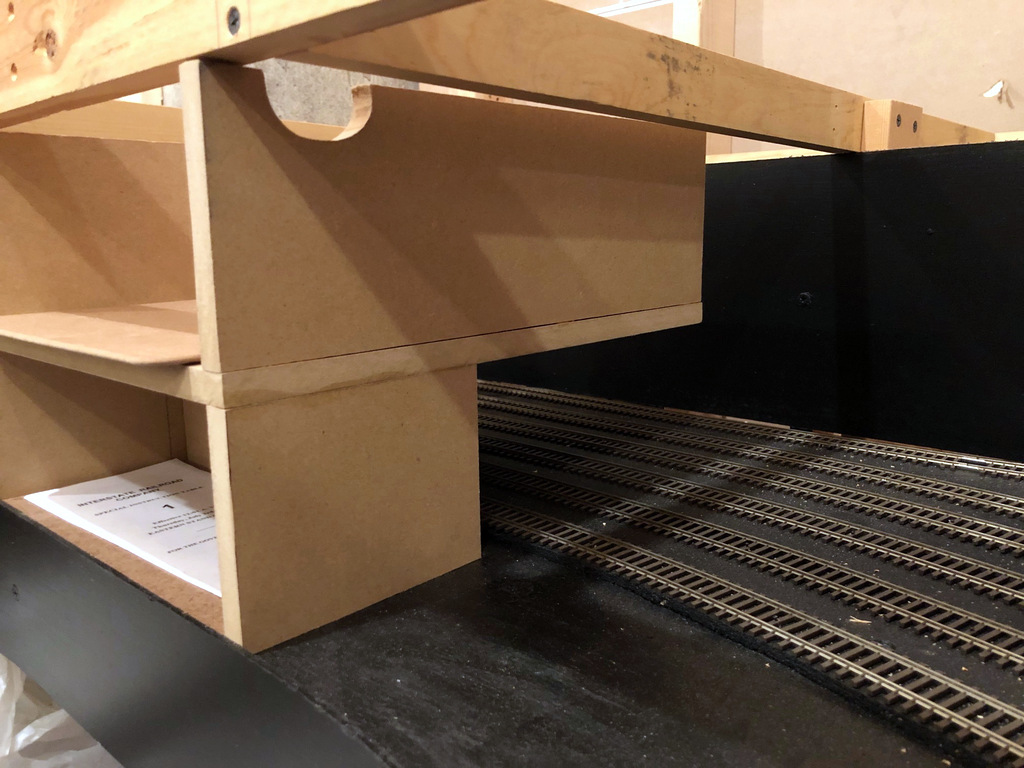
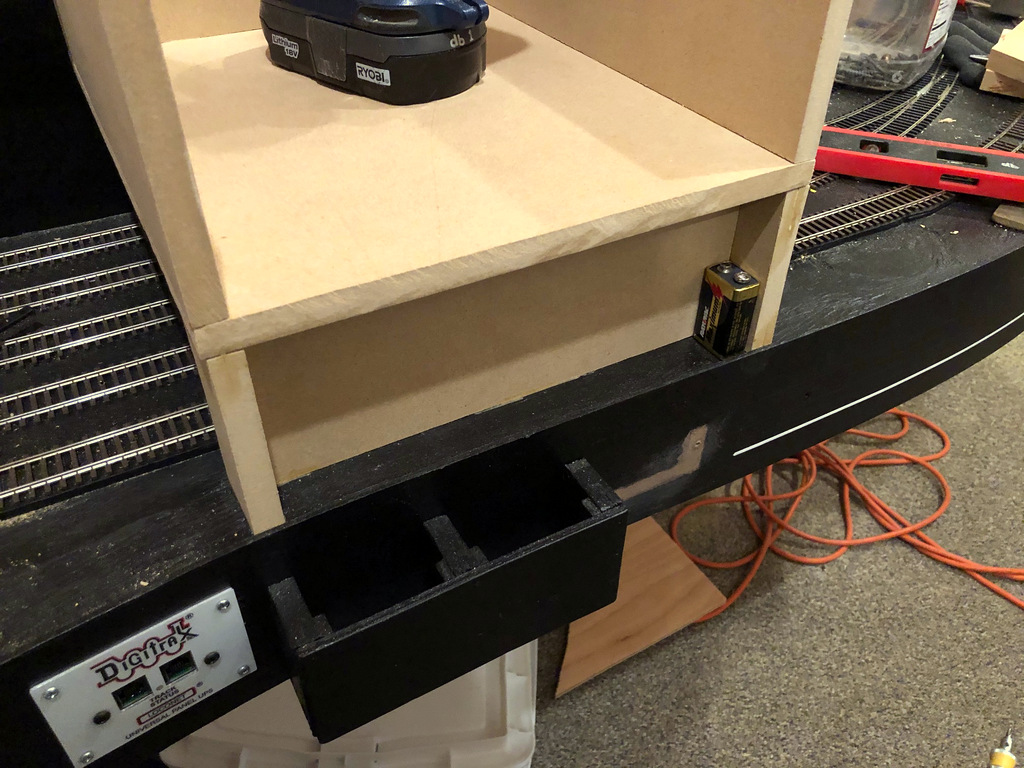
Now that I can really see it, I really like the space I’ve got between staging and the main deck. I could have brought the staging up a couple inches and still be ok, but it’s nice being able to see trains in staging just by backing up (instead of squatting down), and I like the functionality the fascia cubbies (now painted black) add – something not possible with less vertical space. I also like how the cabinet corner is turning out. I’ll still be able to reach all the drawers and the DCC components next to the cabinet easily, and it will make the corner under the Mayflower tipple look really finished when everything’s done.

Next step is to build the hidden connecting track between St. Charles and Mayflower (already started), and then comes the first subroadbed and track that will be part of the visible layout with scenery–exciting!

Final Touches for the Staging Level

Final fascia pockets
The final 3 fascia pockets are in place in preparation for benchwork being laid on top of them

I spent a few hours on the layout this past week primarily getting the staging level ready to have benchwork for the main level laid on top of it. There will only be 8″ or so between the decks, so it will be tough to do things like swing a hammer to nail down track once the main level goes in. I pounded the 100s of track nails down well to avoid trouble later, and I finished the final 3 fascia pockets for holding clipboards and other operator paperwork. As you can see, I tried to pick places where nothing is going on behind the pockets so I’m not covering switches or key viewpoints for spotting trains or clearing fouling points and the ends of tracks. Not sure exactly what I’ll keep in the lower pockets, though the one in the back corner is big enough to hold 8.5×11″ papers, so I finished it out with a masonite floor. I will say, I grossly underestimated the amount of sawdust MDF makes!
Extra storage tracks
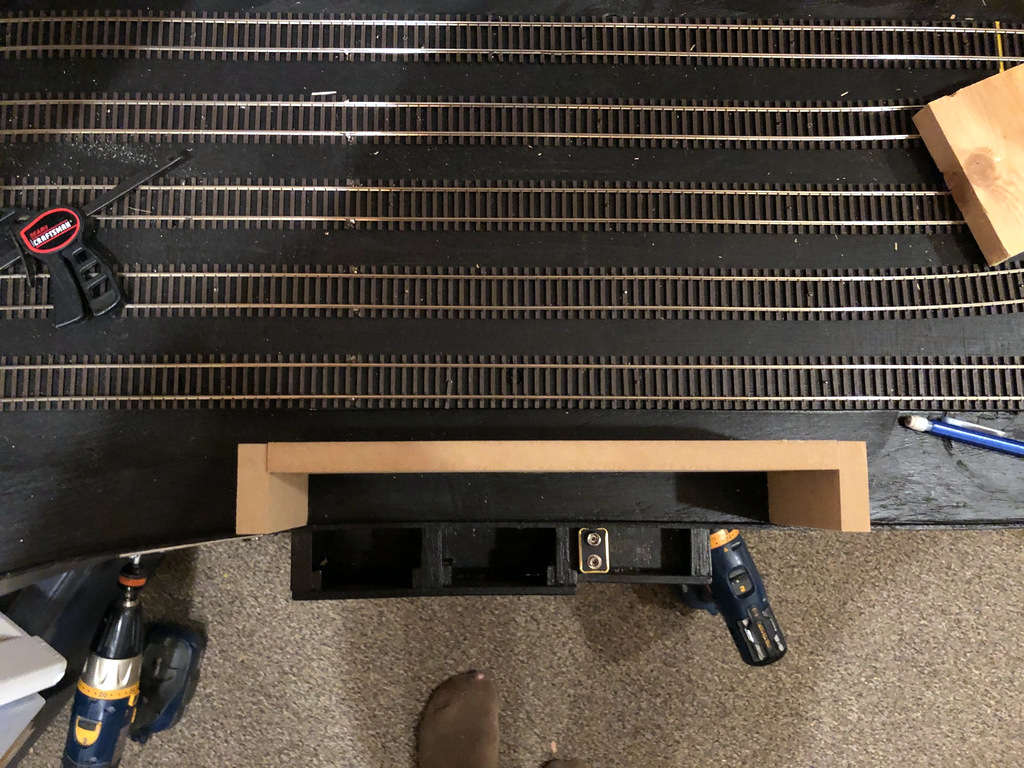
Using some extra space on the staging level for car storage tracks

While I was at it, I decided to fill up some of the extra space on the staging level with a few car storage tracks. Who doesn’t need more places to store cars, right? I’ve got plenty of staging, but being a coal railroad with little non-coal traffic, I wanted a place to store some of the extra non-coal cars that won’t be used every session, and I wanted to store them where I could easily add them to trains without taking up an actual staging track. I just nailed in 3 tracks directly onto the subroadbed in a spot that’s easily accessible and doesn’t block anything critical behind it like switches or fouling points for the active staging tracks. It’ll hold about 15-18 cars which will help. I’ve already got a coupe extra short staging tracks for the locomotives. These are connected to the railroad via a switch because I didn’t want to be picking up locomotives every time I swapped them out–I’m ok with the extra handling of freight cars.

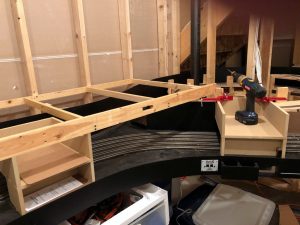
While I’m giving an update, here’s a picture of the toughest benchwork on the layout so far–it’s the corner by the door that goes around the staging helix. What made it so tough is I wanted to match the curvature and location of the staging-level fascia below, and it happens to be a series of complex curves with NONE of the edge on a 90 or 45-degree line. I also wanted it to be secured well enough to walls, cantilevers and the helix that it wouldn’t need legs down to the staging level. I ended up building it in-place around the helix, and I’m satisfied it will do the trick.

Helix corner benchwork
Some of the toughest benchwork on the layout to match the curvature of the staging fascia and work around the helix

Double Pinwheel Helix

Nearly complete helix
Just one more 1/2 turn to go before reaching the main level

Just [almost] finished the first helix. Man, am I glad not to have to work around a floating wall for the second one! As promised, I’ve written an article on how to design and build a helix that’s strong, reliable, easy to build and an efficient use of space and material–it’s a design I call the “Double Pinwheel Helix.” I’ve built two helices this way now, and I haven’t seen another design that comes anywhere close to being this simple to build using nothing but plywood and a circular saw (no jigsawing for hours), and it’s very forgiving if you don’t cut the pieces exact or your space is a little wonky. 
Rather than post it here, I put the article on Appalachian Railroad Modeling where more people would be able to find it and hopefully be inspired to overcome their fear of building a helix. You can find the article here. Here are a couple of photos so you can see the progress.

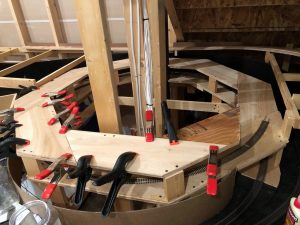
Building the Double Pinwheel Helix
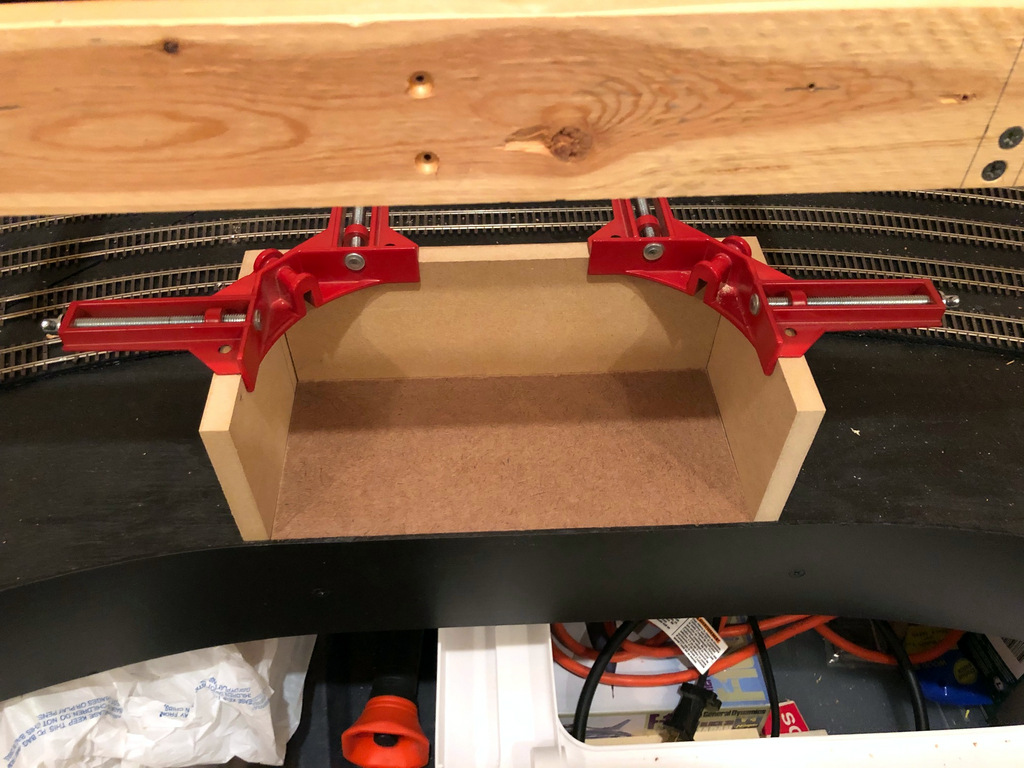
The key to the double pinwheel design is lots of clamps to ensure the lamination of pieces is thorough


Fascia Pockets for Operators

My undergrad is in Human Factors Engineering, the science of designing things so people can use them easily and intuitively. Though I’ve never been a Human Factors Engineer in my work, I enjoy applying the principles I learned to my model railroad. The first step of human factors for a layout is usually the space for operators–designing aisles wide enough to accommodate your people and give them access to the areas of the layout they’ll need. The next step is figuring out what other needs for space they’ll have while operating. One of those space needs is a place to store their “stuff” they use while operating–enter the fascia pocket!

I’m continuing my practices from my former Interstate RR layout. Upon being assigned a train, each operator will be given a clipboard with their train information (location, engine number(s), throttle assignment, etc.), instructions on how to work the train, any applicable train orders, a map/diagram of the layout, a switchlist, a pencil, and a decoupling tool. The operator will need this clipboard throughout the session, and since I DON’T want operators setting their clipboard on top of the layout, it’s important I design in convenient spaces for these clipboards.

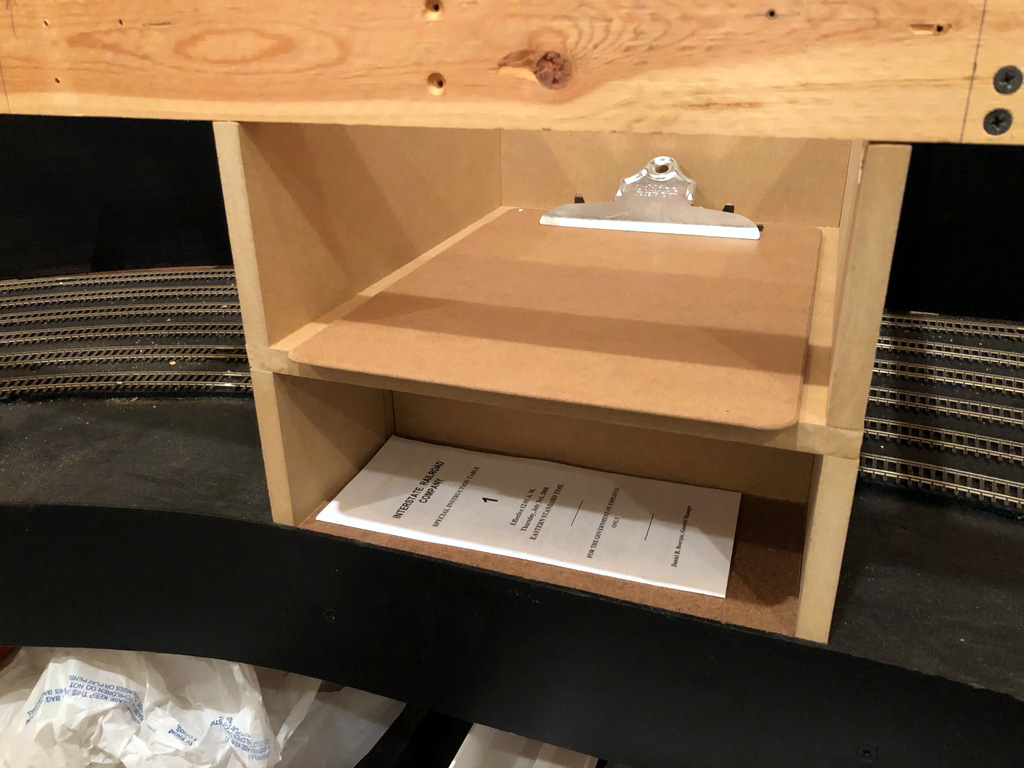
Fascia Pocket - almost finished
This is what a nearly finished pocket (still missing paint) looks like–this one will store a clipboard up top and timetables or switchlists below

Once I put in the first section of main-level benchwork above the staging level, I had a nice ~8.5″ space between levels that might work for this purpose, but I needed some way to keep the staging tracks safe. I decided to build clipboard pockets over the staging tracks since trains only need about 3.5″ of the 8.5″ for clearance. The clipboards are 9″ wide and 13″ long, so I’m making each clipboard pocket 10″ wide and 12.5″ deep–this will ensure the clipboard sticks out about 1/2″, just enough to ensure the clipboard is easy to grab without impeding on the aisle or snagging on operators.

To support each pocket, I need a base about 3.75″ tall between the staging base and the pocket. I’m using these as storage pockets for useful things for operators as well. The pocket depth depends on how far the staging tracks are set back from the fascia. In some areas, I can make pockets 12″ deep for papers. In other areas, I can make pockets 4.5″ deep to hold extra switch lists, timetables or hand-outs. Some areas where the track is close only allow a ~1″ pocket. . . hmm. . . I know, that’s perfect for storing extra 9V batteries for the wireless throttles!

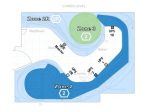
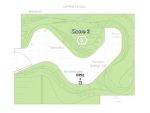
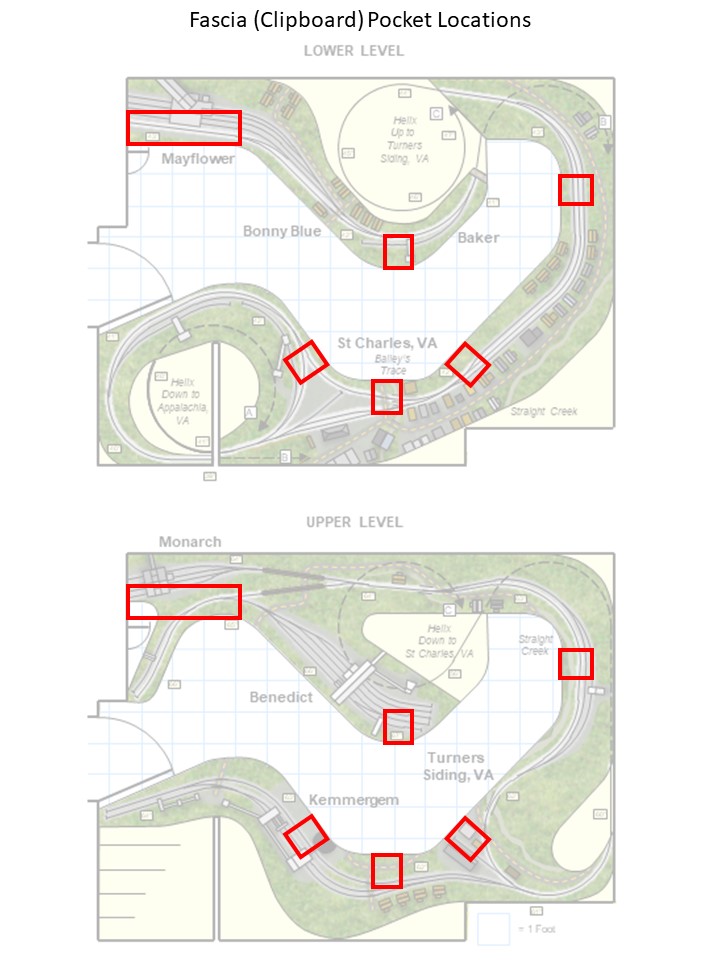
The next step was figuring out where to put them. I wanted them in spots useful for operators, but they also needed to be away from the yard ladders in staging and spread apart enough to allow easy access to all staging areas. I decided on five locations that line up well with the action on both decks. A sixth area is formed by a counter top a few inches under the benchwork for Mayflower. There will be a pocket within 2-3 feet of an operator for about 90% of the layout.

Clipboard Pocket Locations
Fascia Pocket - positioning
Overview of two pockets showing the ample space between them for accessing staging

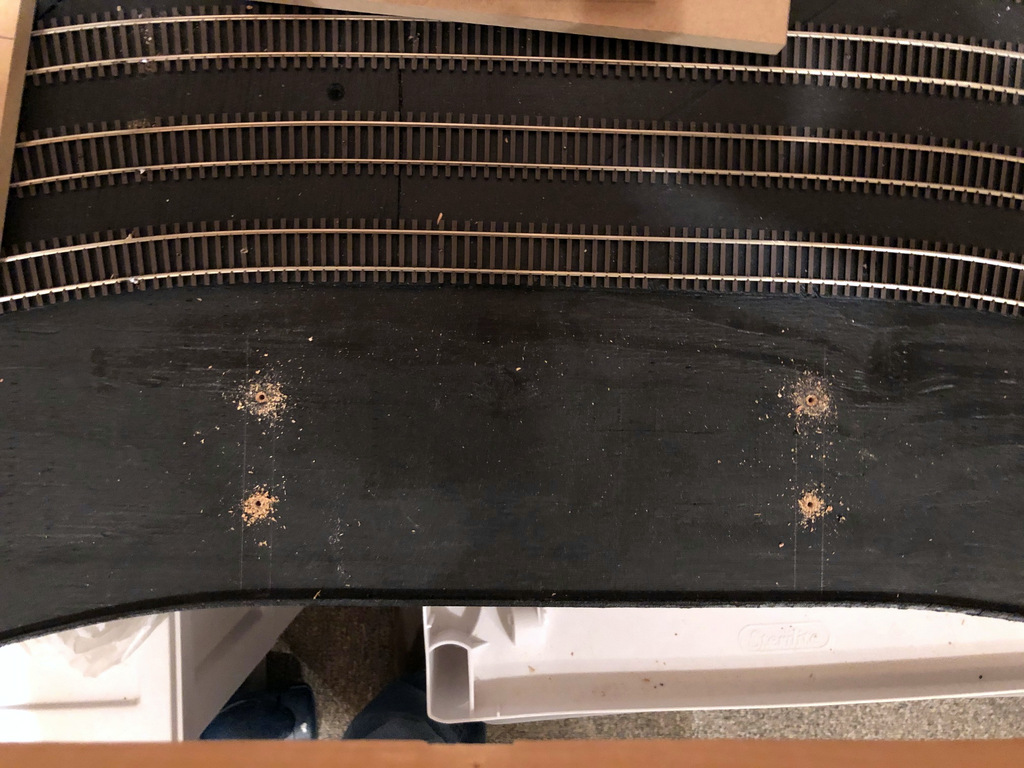
I made my pockets from 1/2″ MDF–strong and smooth. To secure the base to the staging level, I mock fit it in place, drew an outline, and used the outline to drill pilot holes through the subroadbed. After gluing the base pieces in place, I went back and drilled up through these holes into the MDF to lock it in place. Next, I secured the deck for the clipboard pocket to the base using glue and countersunk screws since the back would be suspended over the staging tracks. Finally, I glued the side pieces on top of the clipboard deck to finish the pocket. While I could have made the side pieces solid and mounted the clipboard deck inside them, I figured this method would be more durable as there’s no way for the deck to break away from the sides.

These pockets are certainly nothing fancy or extraordinary, but I find its often the small, ordinary things that make a difference. In this case, I’m hoping the ability to easily find a space to put their “stuff” will make operating on this layout just a little more enjoyable and stress free.

First Benchwork for Main Level

A 68″ x 32″ piece of benchwork in and of itself is not terribly exciting, but to me, this piece is. It’s the first of many pieces for the main level, so it represents the first benchwork that will be covered in operational tracks and scenery. It’s the first piece that lets me feel the level of the trains during an operating session.

First piece of benchwork for main level
Here’s the first piece of benchwork for the main level

I had to pause on the helix project (you can see it half-built in the corner) because I ran out of plywood and had to wait a while to resupply. That got me thinking, though, that I need to put up a piece of benchwork so I can 1) see where the helix needs to connect, and 2) work the hidden track between St. Charles and Baker/Mayflower in before covering it with the helix. The hidden track will run right on top of this benchwork and under St. Charles; the St. Charles tracks will be about 2-3″ higher.

This piece of benchwork is a little strange in that it’s made of both 1×2″ and 1×3″ lumber. I needed the 1×2″ slimness to get the hidden track as low as possible, and I needed the 1×3″ on the fascia to give me plenty of room for switch controls and more support for leaning operators. It’s built to mirror the staging benchwork below it, so three risers in the middle of the crosspieces help make it sturdy.

I’ll admit progress has been painfully slow lately, but there is progress!

Starting the First Helix

After a couple months of just breaking in the staging level and working out the bugs (and retiring from the Air Force, and going camping, and taking a trip to South Dakota…), I finally starting building again yesterday. I’ve got the first turn of the first helix that connects staging to the wye at St. Charles complete. 1.5 more turns to go.

First turn of the staging helix
First turn of the staging helix complete with track

This is the second time I’ve used this method to build a helix, and I really like it. I call it the “double pinwheel”–each level is essentially two layers of 8 identical trapezoids of plywood, each put together like a pinwheel with the two layers overlapping. It’s very easy (once you do the math to figure out your trapezoid and cut a master), it’s very forgiving, and it’s very strong after the glue dries.

Some particulars on the helix. It’s a 24″ radius helix that gains 4.5″ per turn. That works out to a 3% grade which should work fine for all the trains that will use it. The track you see looping around it (in the black painted area) is the continuous running loop connection. I was able to let a short string of cars run away from the top, and they negotiated the switches without a hitch at warp speed, even the #4 with REALLY short points going into the L&N staging yard you can see in the photo above (phew).

I’ll write a full article on the double pinwheel helix soon as I don’t know of anyone else who uses this method (let me know if you do). In the meantime, here are some progress pics.

The “Special” Locomotive

Everyone with a layout has that “special” locomotive. No, not your favorite one with the custom paint and weathering or the one with the beautiful sound system. You know, it’s the one that despite every effort you’ve made to make sure there’s nothing obstructing free movement, there’s nothing dragging, and all the wheels are in perfect gauge, still manages to find ways to fail to stay on the rails where 100s of others have succeeded before. . . that kind of special. These locomotives serve a wonderful purpose, but I’ll get to that later.

My special locomotive is Southern GP35 2649. It’s a kitbashed Athearn model with a high nose and Alco-style truck sideframes. There’s nothing remarkable about the drive system, wiring, or anything else–if anything, it might be a tad on the light side.

For the last month, I’ve been running trains on my staging level. It’s been a great exercise in working out the kinks in the trackwork and power, getting re-acquainted with my DCC system and JMRI DecoderPro, and just enjoying watching some trains run. I’ve gotten to the point where I could back a 34-car train of empty hoppers with 3 units shoving all the way around the layout and through all three of the reversing loop tracks–I was pretty proud of my work! Then came the Special. . .

My "special" locomotive
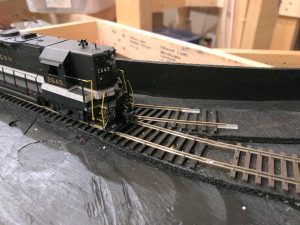
My “special” locomotive, Southern GP35 2649, next to the track joint that it alone didn’t like. Yes, there’s a solder blob there, but now that it’s working for 2649, I don’t dare touch it!

Southern 2649 never got a lot of running time on my last layout as it was one of the last locomotives to make it to running shape before I had to tear things down. I decided to break it in a bit more today by running it in loops around the staging level. First long-hood forward–no problem, negotiated everything like a pro for 30 minutes! Ok, let’s reverse direction–looking good, going through the last switch. . . on the ground. Hmm. put it back on the rails, backed up, through the last switch. . . on the ground again. I repeated this process several times and determined it wasn’t the switch, but it was running over the outside rail right at the transition between hand-laid switch track and flex track. I felt the track joint–smooth as it could be. I checked the gauge–spot on. I re-soldered the joint anyway. . . on the ground. I could propel the engine over the spot by hand with no issues, but as soon as it was under its own power, it would climb right over the rail–infuriating!

I removed the brake cylinder piping on the front truck to make sure it wasn’t catching. . . on the ground. I took off the truck sideframes and smoothed out the backs of the brake cylinders to make sure they weren’t catching. . . on the ground. I finally went back to the soldering iron and re-did the entire track joint, using a screwdriver to lift up the rail a bit and a pair of pliers to push one rail further in to provide a little more curve to the rail before hitting the joint. Let’s see, will 2649 like it? . . . I stood there, looking like an expectant father who’s watched his kid fall 100 times learning to ride a bike and thinking “maybe, just maybe this time will be the one!”

Lo and behold, 2649 made it through! I watched proudly as it circled the layout like a champ, passing yard after yard of flex track, across the last switch before making it back to the starting point, and then “bah, dah, dah, dah, dah, dah”. . . the telltale sound of wheels on ties. Sigh. At least this time it was an easy diagnosis, a spike I had put on top of a rail joiner to hold it more securely in place was just a little too high. Yes, every other wheel on the layout had passed this joint 1,000s of times without incident, but alas, 2649 can find any flaw!

And that’s why I’m happy to have the very special 2649 on the roster. With 24″ radius curves, S-curves through switch ladders, and even some #4 curved turnouts, the track work on this layout needs to be flawless to be reliable. And it’s not flawless until 2649 says it’s flawless! As frustrating as its finicky nature may be, 2649 makes me a better modeler, and that’s what makes it truly special.

Switch Control Mechanisms

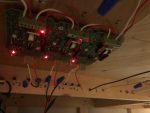
I’m taking a pause on construction to work all the bugs out of the staging level before building on top of it, so I thought I’d share my method of building manual switch control mechanisms that operate from the fascia. I developed these mechanisms for my last layout, and since they proved to work so reliably, I’m doing the same on my current layout. What I like about these mechanisms is they’re rock-solid, easy to use, and unlike alternatives such as Caboose Industries ground throws, they keep fingers away from the scenicked area of the layout. As an added bonus, using a DPDT slide switch as the “guts” not only gives it a “snap”, but it makes it easy to power frogs and LED indicators if you want them.

The Design

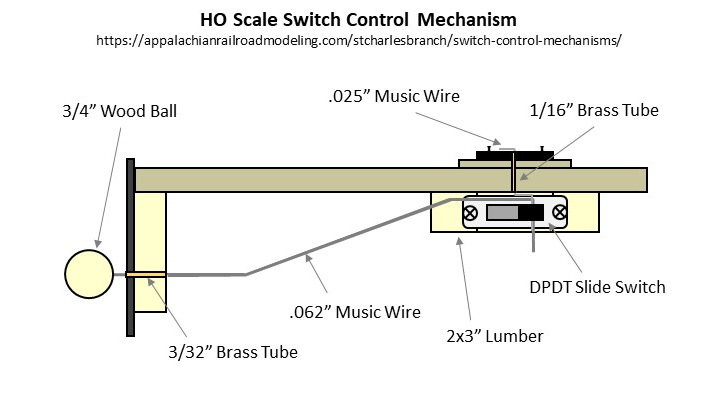
HO Scale Manual Switch Control Mechanism Diagram

The figure shows most of the relevant parts of the mechanism. It’s essentially a DPDT slide switch mounted to a piece of 2×3″ lumber for the mechanism, a piece of .062″ music wire and a 3/4″ round wood ball for the control arm, a piece of .025″ music wire for the throw, and pieces of 3/32″ and 1/16″ brass tubing where the music wire needs to go through wood.

Making the Parts

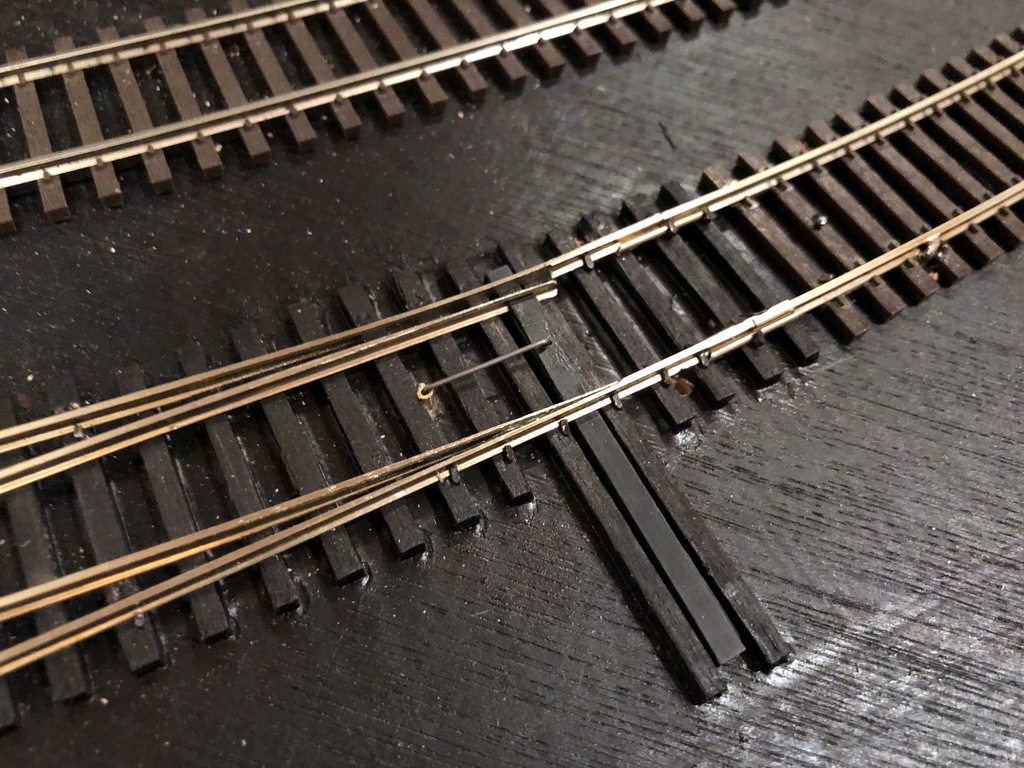
Switch throw bell crank
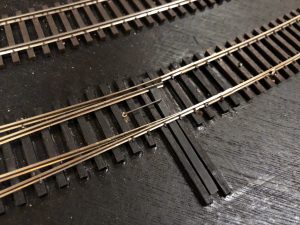
The top portion of the throw bell crank made from music wire

I create the throw first by drilling a snug hole for the piece of 1/16″ tubing about 5/8″ from the throw bar of the switch. I normally drill this dead center between the rails on the frog side of the throw, but if you have benchwork interfering below, you can put this anywhere along the throw bar on either side. I’ve found 5/8″ distance works well with the DPDT switches I use–anything shorter and it won’t throw far enough; anything longer, and the wire is not stiff enough for a reliable throw. I cut a piece of 1/16″ brass tubing just long enough to reach the bottom of the subroadbed while remaining just a fuzz above the ties on top and gently tap it in with a hammer. Next I drill a hole large enough for the .025″ music wire in the throw bar adjacent to the hole for the tubing. I cut a piece of .025″ music wire about 4-5″ long and bend one end to fit perfectly into the throw bar (clipping it to avoid dragging under the throw bar) and dropping into the tube. While holding down the top part of the wire, I reach underneath and bend the other end of the wire as tight as I can by hand opposite the direction of the throw and perpendicular to where the control arm will go–it doesn’t matter that the bell crank is in line with the throw; it matters that it’s perpendicular to the direction the control arm will need to move. Finally, I use a pair of needle-nosed pliers to bend the wire toward the ground about 3/16″ from where it exits the bottom of the tube. The bell crank is now complete, and you should be able to easily throw the switch by moving the bottom of the wire back and forth.

Switch mechanism
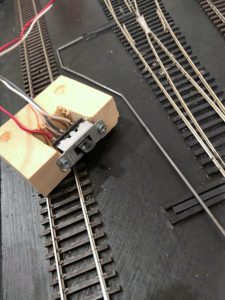
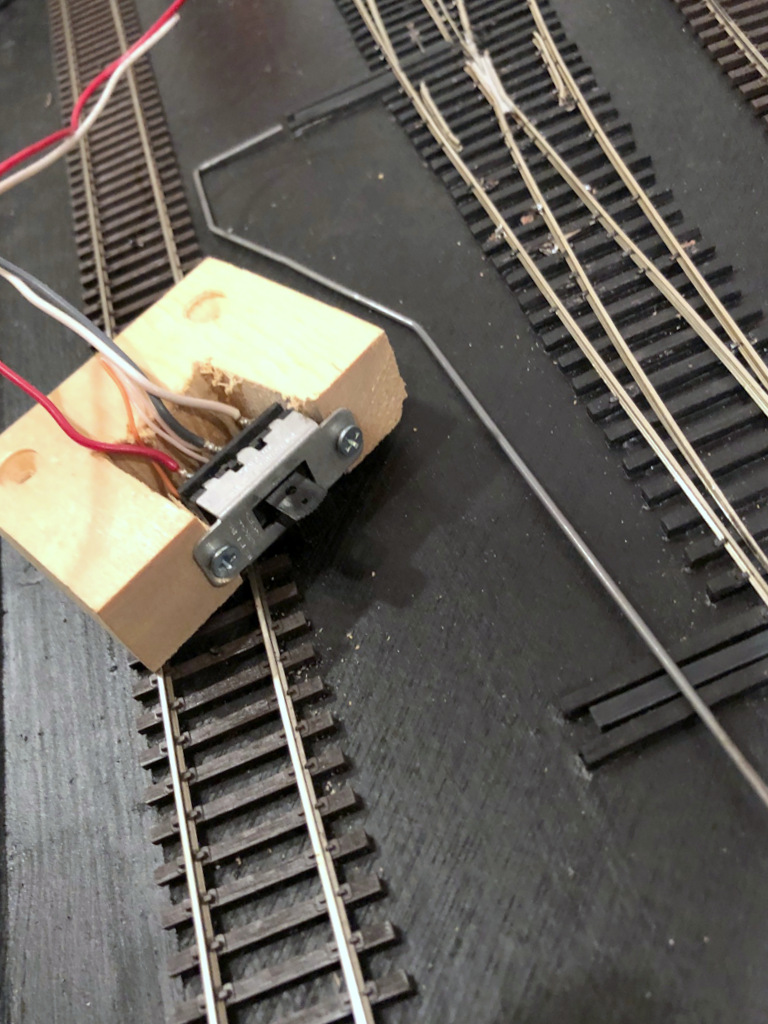
Switch mechanism ready for mounting sitting next to its control-arm wire

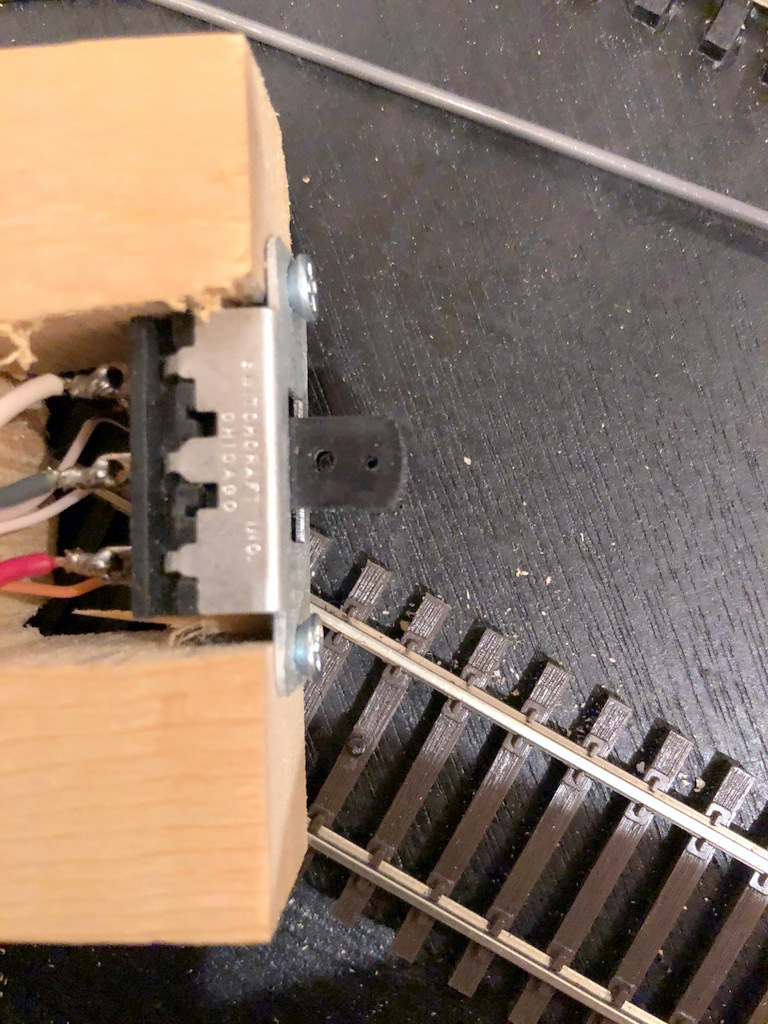
Next I build the mechanism. First I solder feeders onto the DPDT switch–I use red and white for the connections to the track bus and gray or blue in the center for the connection to the frog. Next I cut a piece of 2×3″ lumber about 2 1/2″ long (you can use any size, but smaller will be more delicate, and larger will be tougher to fit around benchwork). Then I a notch about 1″ deep just wide enough for the DPDT switch to fit. At this point I designate a “top” of the mechanism and install the DPDT switch with small wood screws. With the mechanism placed between the throw and the frog, the feeders should be REVERSED from the normal orientation of your track bus. In other words, my track bus is normally oriented red/black-front, white-back, so I install my DPDT switch with the white feeder in front. Finally, I drill two holes through the slide portion of the DPDT switch, one just big enough for the .062″ control wire and the other closer to the tip of the switch for the .025″ throw wire. I’ve found drilling both holes with the smaller bit and then enlarging one prevents the plastic from breaking. I put a little countersink into the top of the holes by spinning an X-Acto knife in them to make it easier to insert the wires. NOTE: my switches are hollow inside which makes it a bit of a pain to insert the wires sometimes–it just takes a litte patience. I finish by drilling and countersinking two holes where I want the screws for mounting it to the layout will go.

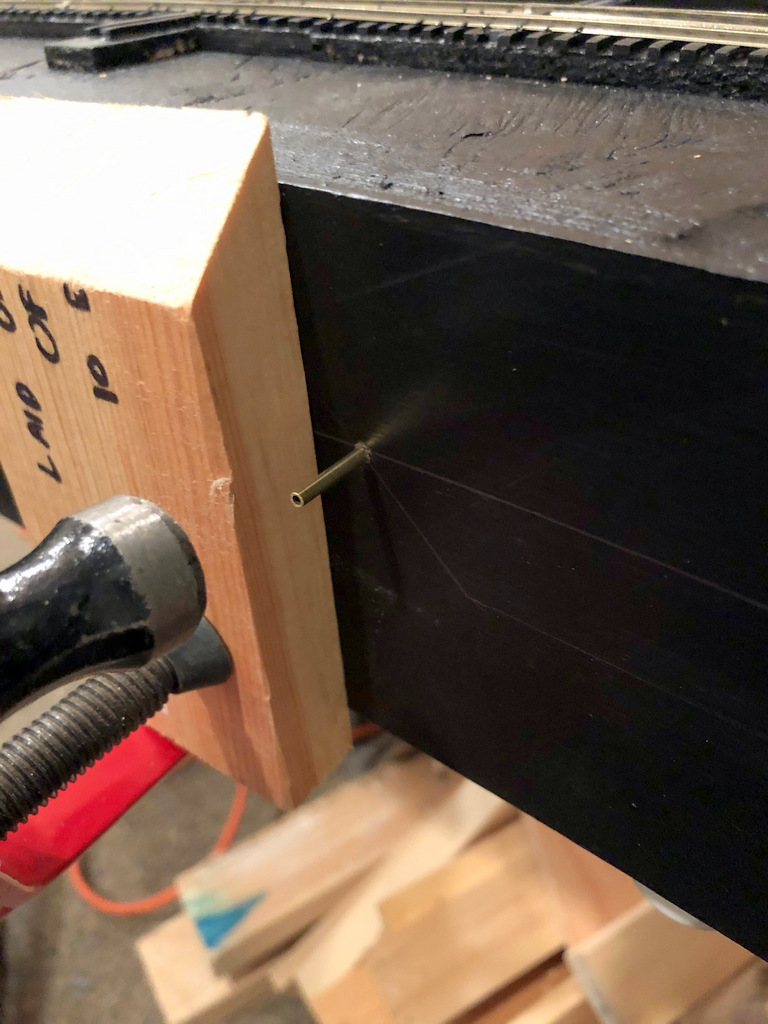
The next step is the control arm. First I decide where I want the control knob on the fascia. For me, I use a simple track diagram on the fascia with switches drawn in (more on this in a later post), so I draw the diagram first, then drill the hole that will tightly fit the 3/32″ brass tube perpendicular to the ground and aimed toward the end of the throw crank under the layout. Then I cut the 3/32″ brass tubing to fit just through the fascia and 2×3″ board edging the layout. In some spots, there is no board, so I’ll glue a square piece of 2×3″ lumber behind the fascia to ensure adequate support. There might also be other lumber between the fascia and the switch. If its a fairly short distance (<12″), I’ll drill a 5/8″ hole where the control arm will go through. If it’s a longer distance, I’ll drill a second hole for 3/32″ tubing in line with the first–this isn’t tough to do if you take a piece of straight .062″ wire, push it through the fascia tube and mark where it hits the intervening lumber. The straigher you make these two tubes, the smoother the mechanism will be. Finally, I bend a control arm. Starting at the switch end, I bend the last 1″ 90 degrees toward the ground where it will go through the slide switch, then I make a slight bend downward about 1″ from the 90 degree bend toward the fascia hole, then another bend about 1 1/2″ from where it will go through the 3/32″ tubing. The sharpness of the anlged portion depends on how much room you have between the switch and fascia and how far down on the fascia your control knob will be. The shallower the bends, the more solid and reliable the mechanism will be. I cut it with a Dremel tool and cutoff disk (enjoy the fireworks!) so it will protrude about 1 1/2″ through the fascia and file the burrs off the end.

Mounting the Mechanism

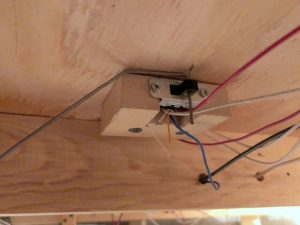
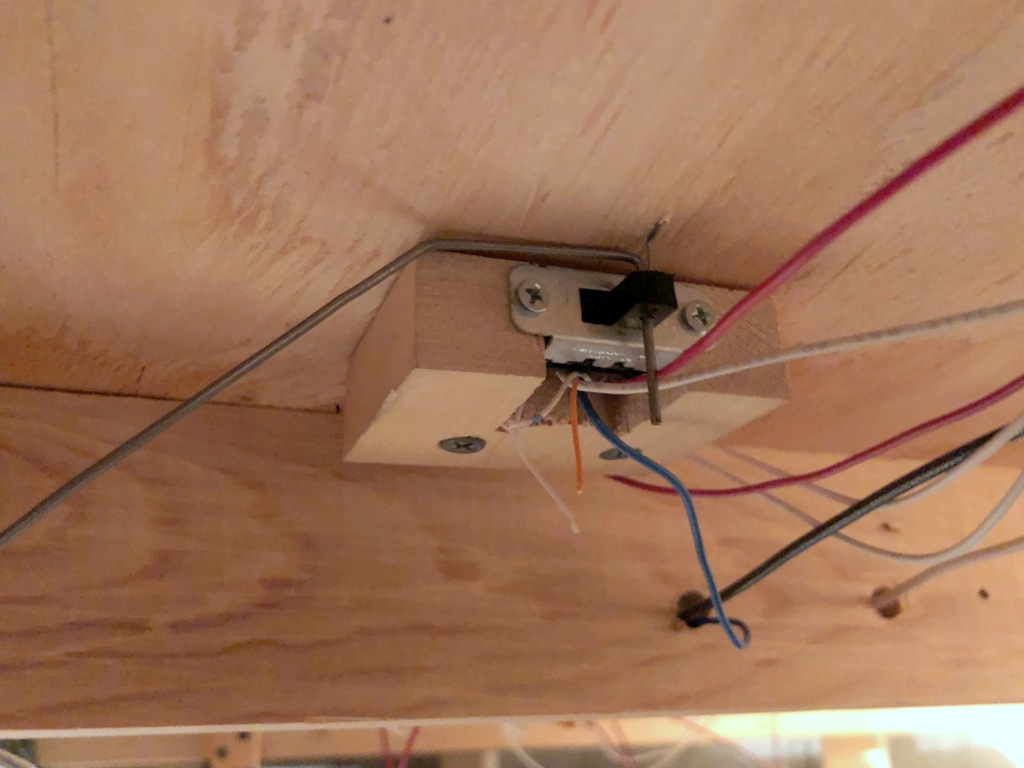
Completed switch mechanism under the layout
Here’s what a completed installation looks like under the layout

This part is straightforward, but it can be tricky and sometimes frustrating to get the switch is exactly the right spot–it requires some experience and skill to get it right, and that experience and skill requires some misfires and mistakes to gain. I first install two 1 1/4″ drywall screws into the mechanism mounting holes with about 3/32″ of the tip sticking through–this gives a way for the mechanism to grab the subroadbed a little while you’re placing it. Then I insert the control arm through the DPDT switch and run the other end through the 3/32″ tube(s) and out the fascia. Next I place the mechanism onto the .025″ bell crank (this part can be tricky and frustrating if the wire and holes don’t line up well). Once everything is inserted, I place the DPDT slide in the middle position and do the same with the throw topside–with both of these in the middle position and the DPDT slide direction in line with the control arm, I press the mechanism into the subroadbed and hold it in place. While holding the mechanism in place under the layout, I’ll try work the mechanism to ensure it throws snugly to both sides. This is a matter of trial-and-error, but once I’m satisfied, I’ll put one of the screws into the subroadbed. Inevitably, it will leave a gap between the mechanism and subroadbed because I wasn’t able to pre-drill the hole. . . no worries. Then I’ll start the second screw, go back to the first and back it out then put it back in to cinch it up, then do the same to the second. If all has gone well, the control arm will easily push the slide switch to both limits, and the throw will push the point rails snugly to each stock rail. If not, back out the screws and try again!

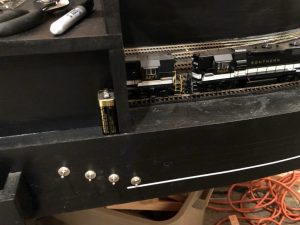
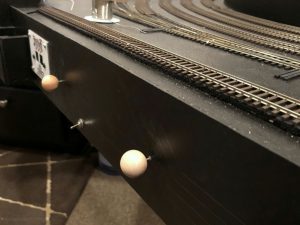
Switch mechanism control knobs
How the completed switch mechanism looks on the fascia

Once I’m satisfied that the mechanism is where it needs to be, and everything is operating smoothly, the last step is to install the control knob. I first push the control arm wire in, then cut it off with the Dremel about 5/8″ from the fascia and file smooth. Then I drill a hole straight into and about 2/3 of the way through the round wood ball. After moistening the wire and ball, I add a drop of Gorilla Glue to the wire and place the wood ball onto the wire. It should be tight enough that you have to twist it on. I like for the control knob to sit about 3/16″ from the fascia when the knob is pushed in. Work the switch a few times while the glue is wet to make sure it feels right where you’ve placed it, then let it dry. Connect the feeder wires to the track bus and the third wire to the frog and the switch mechanism is complete! While it sounds like a lot of steps, if you mass produce the 2/3″ mounts and DPDT switches with pre-drilled holes and wires pre-soldered, you can install 3-5 mechanisms in an hour.

Seeking Opinions – Layout Name Change

Up to now, I’ve called my layout the “St. Charles Branch.” While this is technically accurate, I’ve struggled with it a bit because it sounds more like a property in a Monopoly game than a rugged piece of coal-hauling railroad. Perhaps I have delusions of grandeur and want a name that’s a bit more grand like “Allegheny Midland,” “Ohio Southern,” “Virginian & Ohio” or “Cat Mountain and Santa Fe.” Of course, these are/were MUCH larger freelanced layouts, but small layouts can still do great things, so why not? . . . I’m kicking around the idea of changing the name to the “Black Mountain Railway.” The logo would look something like this.

Black Mountain Railway Logo

Why “Black Mountain?” First, Little Black Mountain is the name of the ridge that divides Virginia from Kentucky just a mile north of the end of the St. Charles Branch. The Black Mountain Railway was also the name of the first railroad to lay tracks in the St. Charles area (see prototype history). Even though the Black Mountain Railway was purchased by the Virginia & Southwestern and later the Southern Railway, the Southern mine run that worked the end of the St. Charles Branch was alternately refered to as either the “St. Charles Switcher” or the “Black Mountain Local” until at least the NS merger.

The draft logo for the layout makes it clear the focus is the Southern Railway, but it includes a little splash of color for the L&N. The shape is a black hexagon symbolizing coal, machinery and hard work (like a nut and bolt). In addition to the words “Black Mountain Railway” in Southern Dulux Gold on the hexagon are two yellow circles–while good for filling some empty space, they’re also reminiscent of the “yellow ball” markings that adorned many of the hoppers used in captive service on the line. Ok, maybe I’m stretching the symbolism a bit far, but hey. Oh, and if you’re thinking it’s a bit reminiscent of the Pittsburg & Shawmut logo, yes, it is! . . . and a hexagon is a lot easier to cut out than a circle. . .

Anyhow, I’d love your thoughts on the name change–please leave a comment below!

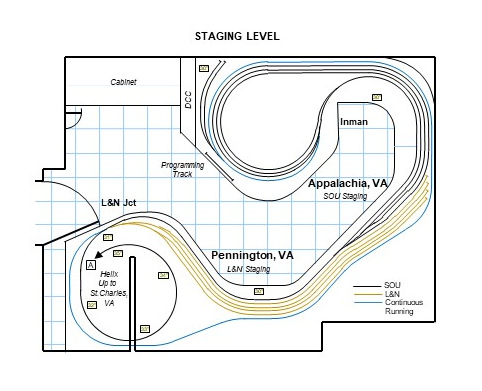
Staging Level Plan

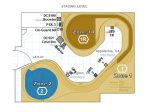
It occurs to me that I’ve been sharing all these pictures that show pieces and parts of the staging level, but I’ve never shared a drawing showing the staging plan.

St Charles Branch Staging Level Plan

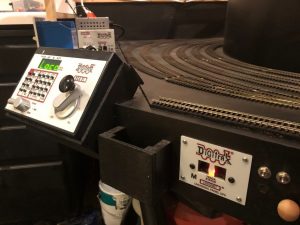
Staging takes up almost the entire space below the lower level. The notable exception is a large cabinet in one corner that houses tools and supplies and a narrow space next to the cabinet dedicated to the DCC command station, booster, and computer connection. Adjacent to the DCC command station (currently a Digitrax Zephyr Xtra) is a 19″ section of track separate from the layout for programming locomotives. This area also houses two short connected tracks for storing locomotives not in use for a given ops session–I figured this was better than handling them all the time.

The rest of the level contains the two staging yards for the Southern and L&N, respectively. Southern staging, representing Appalachia, VA, consists of three staging tracks on a reversing loop with tracks of 21+ feet. Inman represents the upper end of Appalachia Yard (as it did in real life), and I’m using this moniker to differentiate the “business end” of Appalachia from the reversing loop connection end. A forth track snakes around the reversing loop to form a continuous running connection on the other end of the layout where the helix goes up to St. Charles. I plan to use this to break in new locomotives and to entertain kids–in a pinch it can be used as a fourth Southern staging track.

Staging Level Track Complete
Tracks on the staging level are now complete. The last piece was the 4-track L&N staging yard shown here.

Under St. Charles is a 4-track, stub ended staging yard for the L&N which represents Pennington, VA where the short Pennington Branch left the L&N’s Cumberland Valley main to connect with the Southern at Pocket, VA (technically L&N Jct), not far from St. Charles. L&N tracks are 13 1/2 feet long, plenty long for the single locomotive and short string of cars that usually plied these rails. Four tracks is about three too many, but this will allow some “fiddle staging” for less commonly used cars (e.g., boxcars) and hoppers from other eras.

Hope this helps to visualize things better!

Layout Wiring

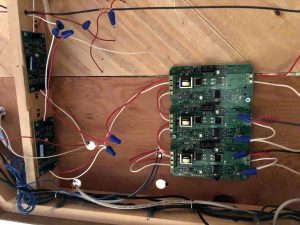
Layout wiring on the St. Charles Branch is simple yet very robust using common household wiring supplies. First, I’ve divided the layout into six blocks: four “main” blocks (1. Staging, 2. St. Charles, 3. Mayflower, 4. Upper Deck), and two reversing sections (1R. Staging loop, 2R. St. Charles Wye). Even though I don’t have a power block distribution circuit yet (like a PSX4), I’m wiring the layout for that eventuality and just tying all the blocks together at the command station as an interim.

Feeders and Bus Pigtail Connections
Feeders are connected to the wiring bus via wire nuts connected to pigtails along the bus.

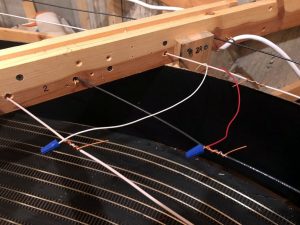
The bus wiring for each block is copper Romex wiring. . . that’s right, Romex, the 14 AWG copper wire you use to wire household sockets and light fixtures. It’s overkill, but it’s easy to find, comes in long lengths, and the current loss for DCC applications is pretty much zero. I strip the outer sheathing, remove the bare ground wire, and use the black and white wires. I run them under the track through holes in the benchwork separated by about 2.5″. Lesson learned: if running the bus for two blocks side-by-side, make sure you label each about every other piece of wood to avoid cross-wiring blocks later.

I drop feeders at least every 5 feet, so on every 2-5 feet of bus wiring, I’ll strip off about 1″ of insulation and make a “pigtail” if you will using a length of 4″ of the bare copper wire (Romex ground wire) wrapped tighly around the bus core about 3 turns and soldered. I leave about 1″ of copper sticking off either end and cap it with a wire nut. I separate the pigtails for the white and black wires by about 4-6″ to avoid accidental contact of exposed wire.

Wiring Feeders
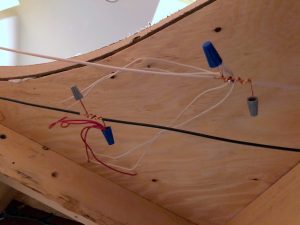
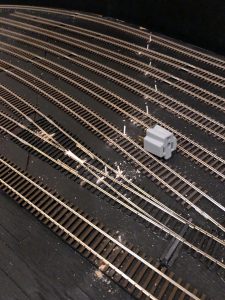
Wiring feeders from the rails to the bus under the layout. The gray plug marks the spot of connection to make it easy to cut wires to the right length.

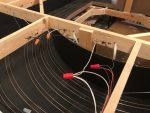
Finally, the feeders. As mentioned, I try to drop them every 3-5 feet of rail. For bulletproof operation, every single rail on the layout is directly connected to the bus either through its own feeder or a single soldered joint to the rail next to it that’s connected to a feeder (no trusting rail joiners to carry current and signal). I drill the holes first, then drop pieces of 18 guage stranded wire through to connect to the bus. You’ll notice in the picture above the layout the little gray plug. I use this to mark the location of the pigtail under the layout so I can accurately cut the feeders to length, leaving about 1.5-2″ extra length to account for vertical distance through the subroadbed and some wiggle room for orienting the feeder to fit into the pigtail. Because I hand-lay my switches, I need a LOT of extra feeders for the point rails and frogs (connected to switches under the layout).

To make sure I hit all the holes, I leave the sawdust from drilling them in-place until all feeders are in. I also work one color at at time; white for one rail, red for the other. Once all the feeders of one color are in place, I’ll tin them with solder and solder each to the rail. Under the layout, I’ll gather together 2-3 feeders, twist them together, and tie them to the pigtail using a common wire nut (size depending on the number of wires being tied together). A little tug ensures they’re solidly in-place.

I’ve found this method creates rock-solid wiring that’s easy to modify and troubleshoot–just disconnect and reconnect the wire nuts as needed. This method also works perfectly with Digitrax DCC which prides itself on picking a slower data rate that works well with non-high-speed wiring. If using on a different system, I recommend doing some testing first.

TRAINS!!!

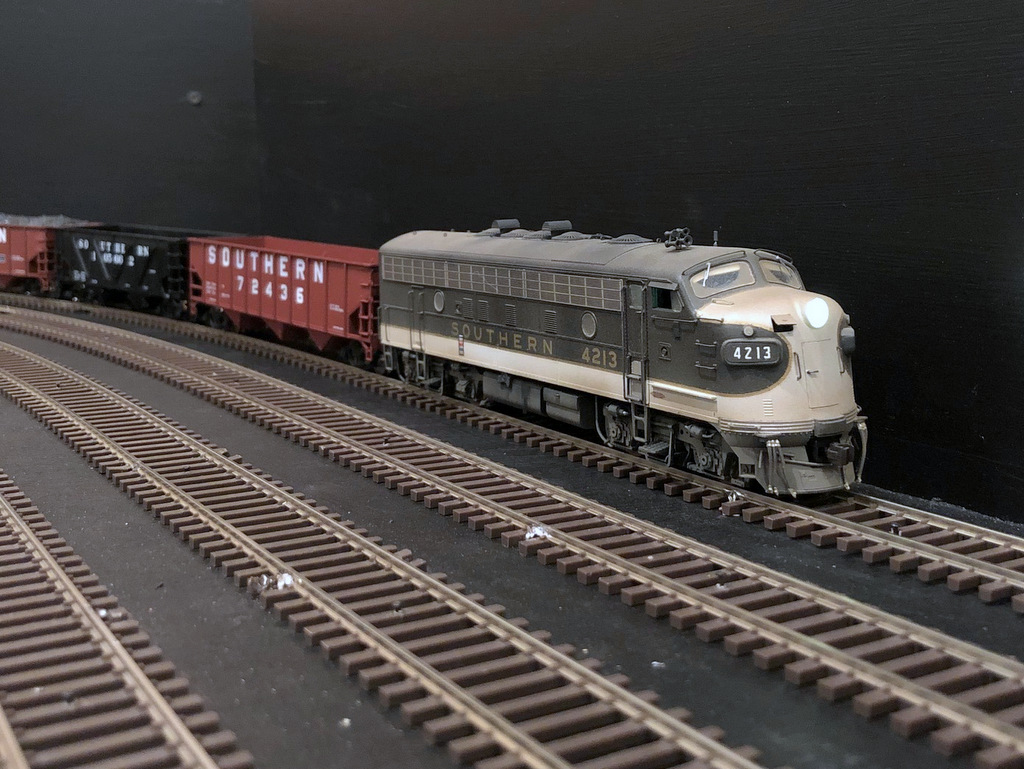
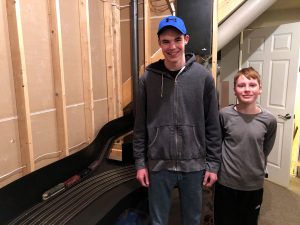
Yesterday, my “benchwork” became a “layout” with the running of the first locomotive. Of course, trusty F7A 4213 was the first locomotive, and my boys did rock-paper-scissors to determine who would be the first engineer. My oldest won, but all three of us got a chance to run around the half of the staging level with completed wiring.

First Train on the Layout
This is the first train to run on the layout on April 17th 2020
Crew of the First Train
My two sons crewed the first train on the layout

Half a train, half a level, and no scenery in sight, but it was still a magical moment to see all that planning and work to this point pay off with a moving locomotive. As a bonus, the hand-laid switches performed well (despite not having their mechanisms in place yet), only a couple of protruding track nails on and excess solder in a couple joints (easily fixed) caused any issues.

I’m more motivated than ever to keep building!!!

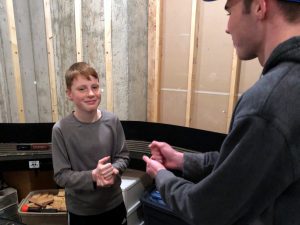
Determining the First Engineer
My sons do rock-paper-scissors to determine who will be the first engineer

Bronze Spike Ceremony

Last night, I put down the “bronze spike” commemorating the completion of track for the staging level. Not that exciting in the big scheme of things, but it is a major milestone in the layout’s progress!

Staging Level Track Complete
Tracks on the staging level are now complete. The last piece was the 4-track L&N staging yard shown here.

The last piece of the staging level to be completed was the 4-track L&N staging yard representing Pennington, VA. This yard is stub-ended with tracks about 13.5 feet long. This is enough for a locomotive, cab, and about 20-28 hoppers. Based on photos, this will be more than adequate to represent the meager traffic the L&N hauled off the St. Charles Branch. I made it four tracks because I had the space, and this will give me some room to store trains and cars from “other eras” when not being used for a particular operating session.

There is still a bit more work to do before trains can run. I need to put in the switch control mechanisms and drop about 100 feeders to the main DCC track bus under the layout.

In the photo above, taken from the door to the layout room, you can see the Southern staging yard under the mess on the far left, the beginning of the Southern staging yard and end of the L&N stub tracks against the far wall, the Southern main linking staging to the helix (will occupy the open area on the right) along the right aisle, the L&N staging yard, and the continuous running connection entering along the right-hand wall–this last track connects to the Southern main via a switch just out of view in the lower right corner.

Southern Staging Tracks Complete

Another milestone today–the Southern Railway staging yard tracks are now complete! The yard, representing Appalachia, Virginia, consists of 8 hand-laid switches and about 40 pieces of flex track. The yard is three tracks on a reversing loop, one through track for mainline running (which can be used as a fourth staging track), and two short storage tracks for extra locomotives.

Southern Staging Tracks Complete
The Southern railway staging tracks representing Appalachia are now complete. The tracks form a reversing loop under the main helix.

The shortest staging track is about 21 feet long–that’s long enough for three locomotives, a cab, and 35-45 hoppers. . . should be plenty. A second, 4-track stub-ended staging yard with shorter tracks will help with L&N trains and holding excess cars.

Staggered joints for reversing loop
Here’s one of the insulated joints going from the yard lead to a staging track on a reversing loop. I offset the joints about 1″ which is recommended for better performance of the auto-reverser.

I also fixed a problem with this website where the smaller images weren’t linked to their full-size cousins–that’s remedied now if you’d like to get a closer view of previous post pictures. Thanks to Stuart Thayer for pointing that out!

Track Spacing Tool

I’m all about simple but effective solutions to construction challenges. One of those challenges is laying multiple tracks (like a yard) on a set spacing quickly. In my case, I have staging yards designed on 2″ spacing between track centers. There are several methods for spacing the tracks: I could just measure between them with a ruler every time I put in a nail, I could mark out spaces and draw a line for the edge of the next track, or I could make a really simple tool to make this process effortless.

Enter my fancy homemade track spacing tool! It’s a piece of 1×3″ lumber about 4″ long and cut 45 degrees on one end. . . I literally pulled it out of my scrap pile. Using a combination square, I penciled in a mark exactly 2″ from the edge on the bottom of the 45 degree face, then drew a second mark one rail’s width in from the first (closer than 2″); then I repeated this from the other side so it can be used in either direction.

Homemade Track Spacing Tool
Track spacing tool for 2″ centers made from a piece of 1×3″ lumber and some pencil marks

To use the tool, put the first track into place and secure it. When it’s time to lay the second track, simply place the tool along the inside edge of the outer rail of the first track, move the second piece of track so the inside rail lines up with the pencil marks, and secure it. Move the tool down to the next spot, line up the second track, and secure it–too easy. I’ve found using the inner rail of the first track works better than a smaller spacer between outer rails, especially on curves.

Southern staging yard spacing
I’ve decided to stop modeling the Southern and model the Pennsy main instead. . . Nope, this is the Southern staging yard laid out using recycled Atlas code 83 flex track from my last layout and my handy dandy 2″ track spacing tool

You can make the tool work for whatever spacing you need just by using different marks and different sizes of lumber. It sure ain’t fancy, but it’s elegant in its simplicity.