After a couple months of just breaking in the staging level and working out the bugs (and retiring from the Air Force, and going camping, and taking a trip to South Dakota…), I finally starting building again yesterday. I’ve got the first turn of the first helix that connects staging to the wye at St. Charles complete. 1.5 more turns to go.
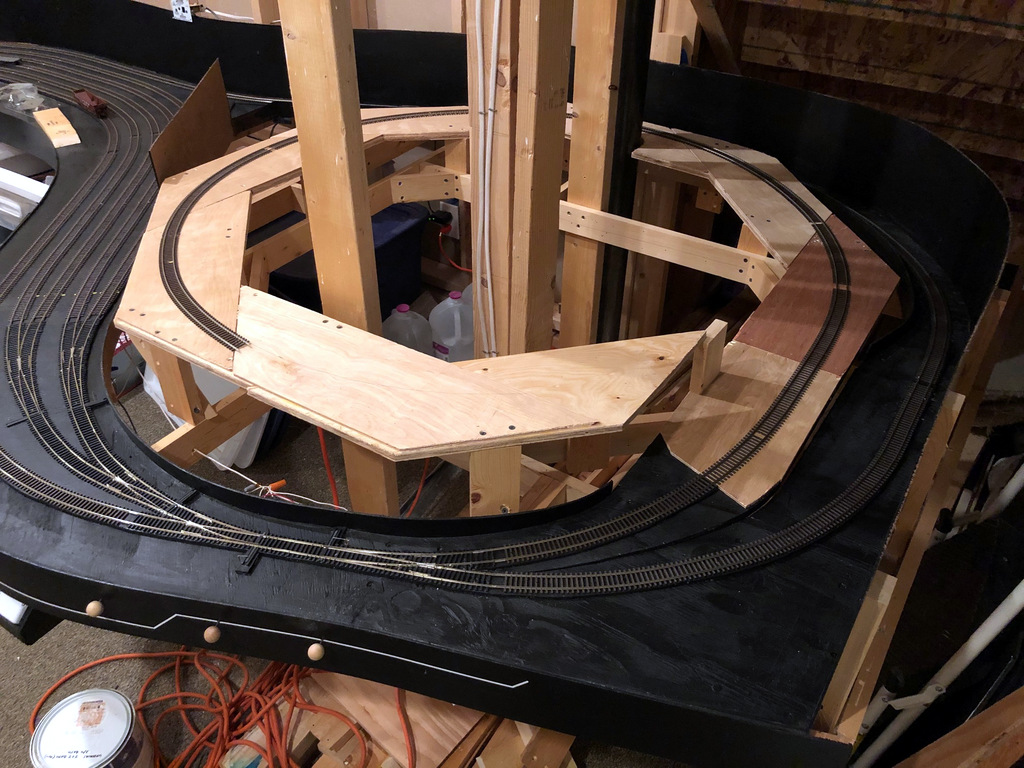
This is the second time I’ve used this method to build a helix, and I really like it. I call it the “double pinwheel”–each level is essentially two layers of 8 identical trapezoids of plywood, each put together like a pinwheel with the two layers overlapping. It’s very easy (once you do the math to figure out your trapezoid and cut a master), it’s very forgiving, and it’s very strong after the glue dries.
Some particulars on the helix. It’s a 24″ radius helix that gains 4.5″ per turn. That works out to a 3% grade which should work fine for all the trains that will use it. The track you see looping around it (in the black painted area) is the continuous running loop connection. I was able to let a short string of cars run away from the top, and they negotiated the switches without a hitch at warp speed, even the #4 with REALLY short points going into the L&N staging yard you can see in the photo above (phew).
I’ll write a full article on the double pinwheel helix soon as I don’t know of anyone else who uses this method (let me know if you do). In the meantime, here are some progress pics.
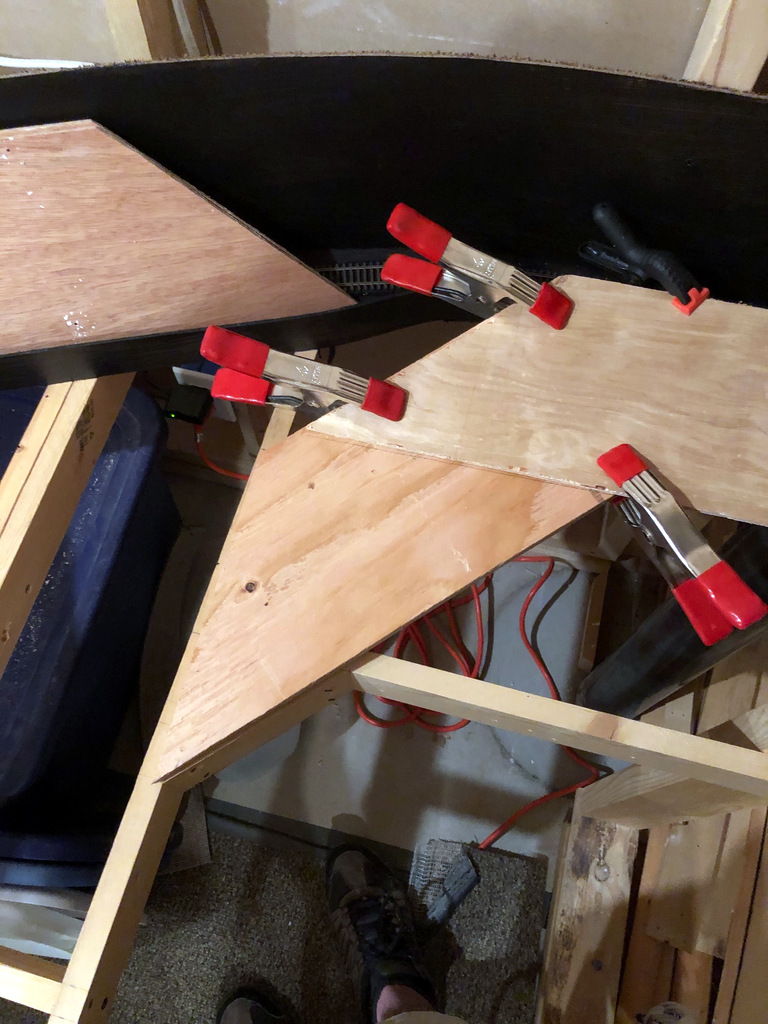
Here’s a closeup of two pieces of the helix going together–I alternate top, bottom, top, bottom, gluing and clamping as I go 
My limiting factor for how much of the helix I can build at once is clamps–it takes me about three sessions to build a level allowing about 90 minutes for glue to dry between sessions
Dan
Enjoyed the update and love to see your progress. One question with 24 inch radius what area do you need for the helix, is it like a 5 foot square?
Bill
It’s actually a decent bit smaller than that. I use a 2″ margin on the outside of the tracks at the tightest spot, so the helix is only 52″ square (2x (24″ radius + 2″ margin).
I’ll also say working around the floating wall, pole and stairs is a royal pain! It leaves enough space for access once everything’s in, but putting everything in requires a lot of contortion, and I’m not as young and limber as I used to be. Also, you’ll note that I had to cut out a notch to get around the metal pole. It doesn’t affect the track, but it definitely complicates the construction. I’m looking forward to building helix #2 (did I just say “looking forward to building a helix” out loud?) between the lower and upper decks because there aren’t any obstructions.
Thanks Dan
Bill