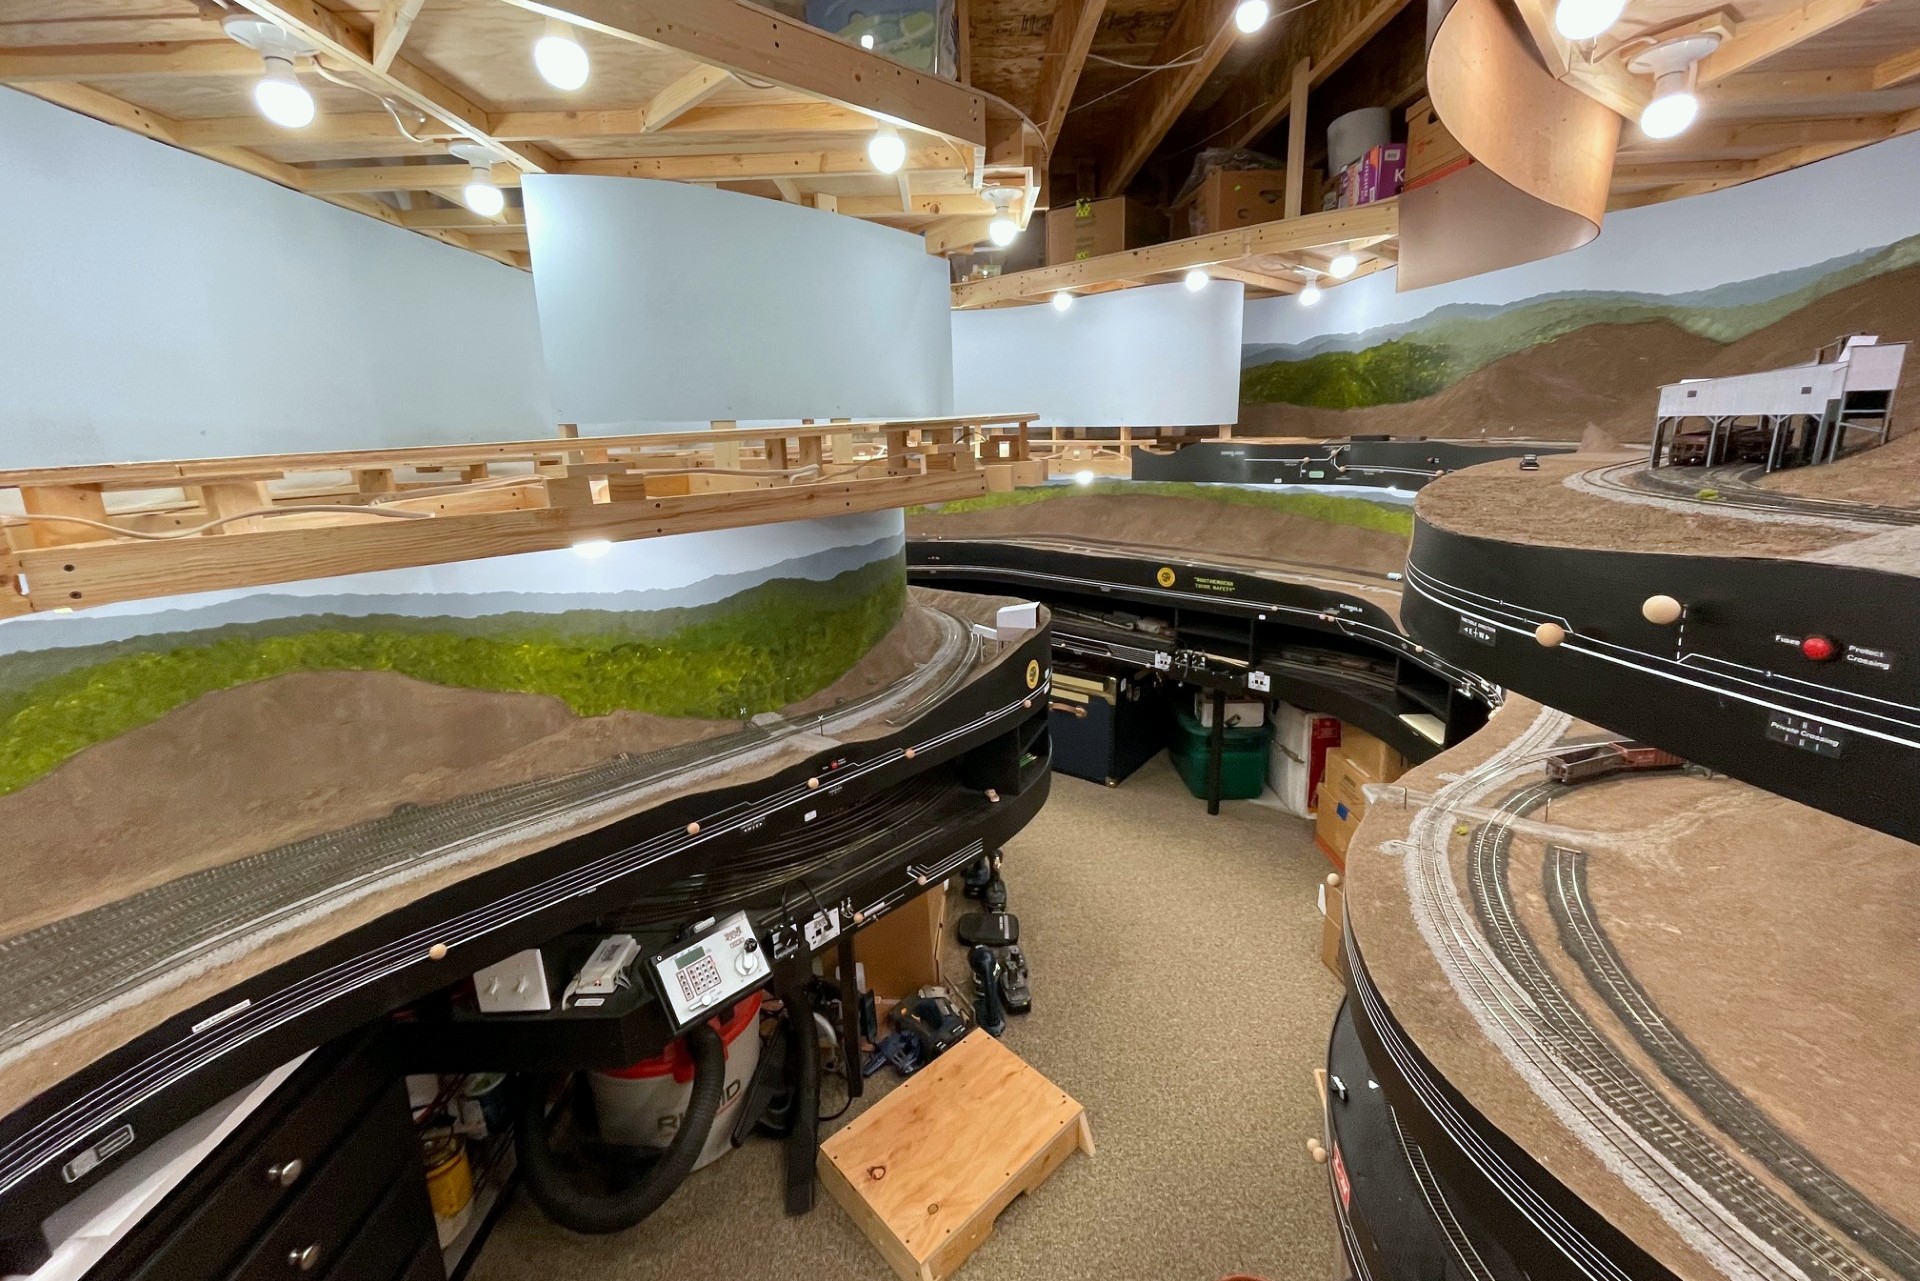
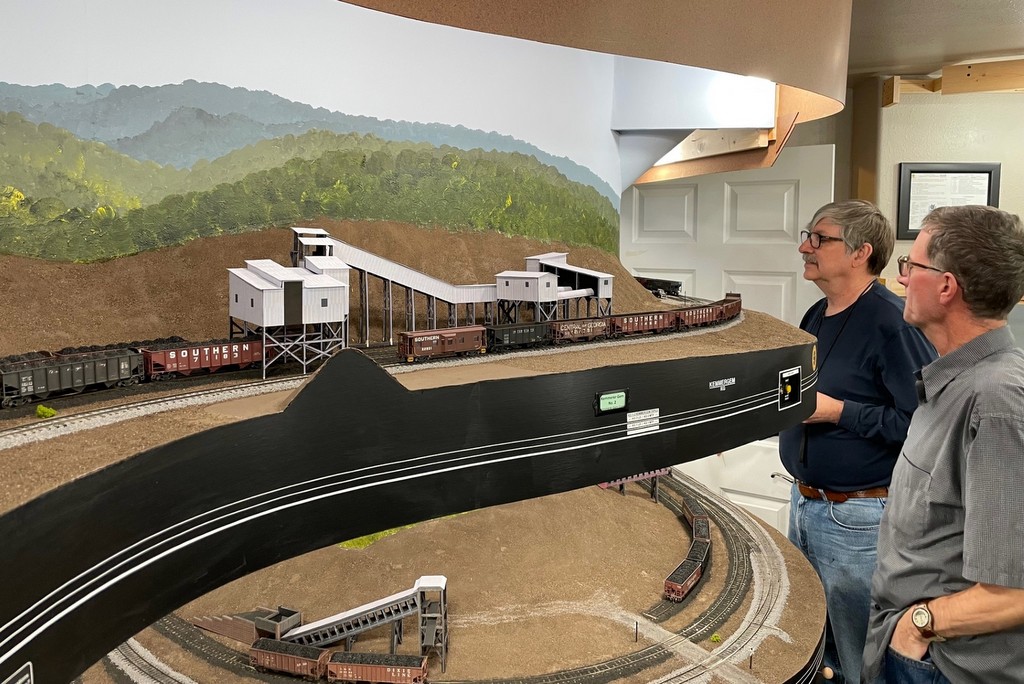
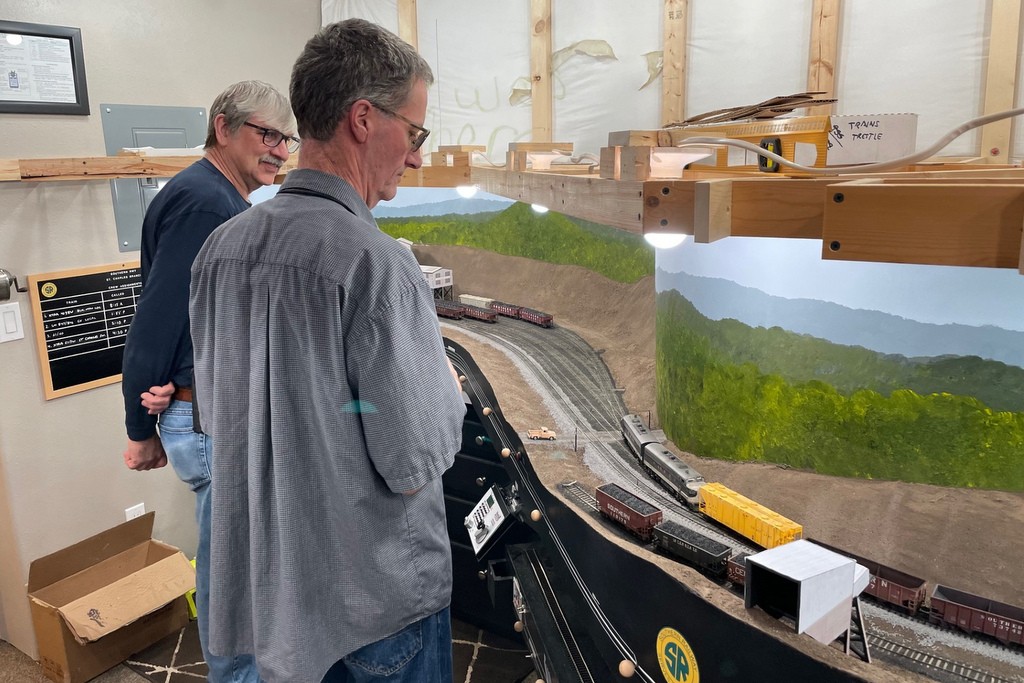
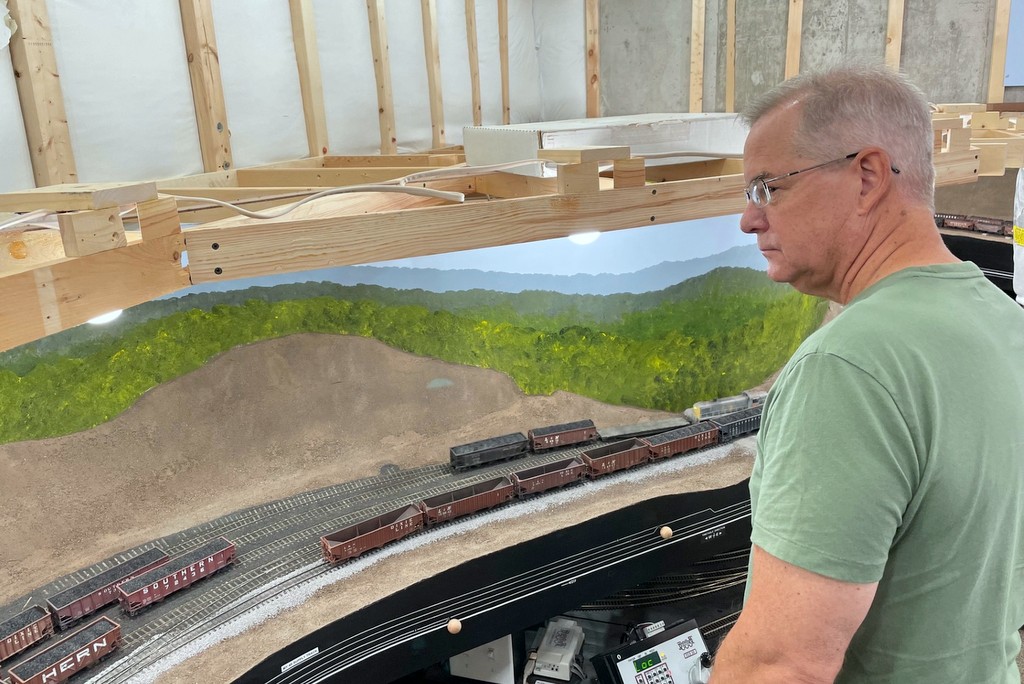
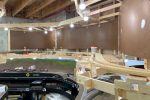
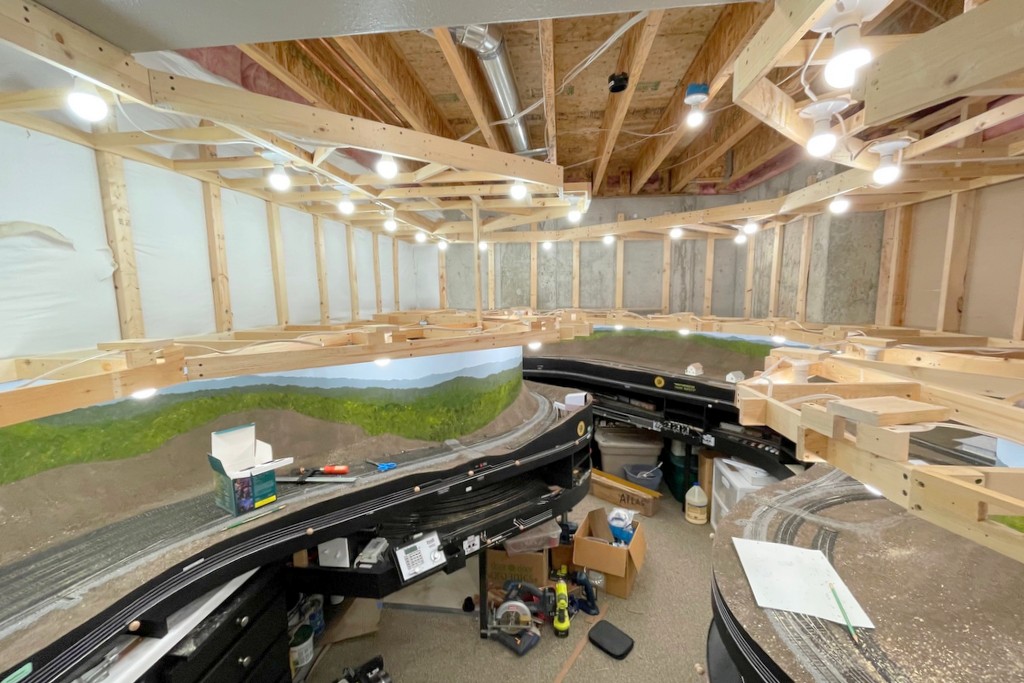
The installed and painted backdrops make the layout room look bigger because you can no longer see all of it from a single location
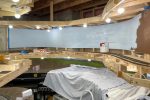
The layout room now looks very different because I’ve finally installed all the backdrops on the upper level. All unfinished areas are now covered (except the ceiling), and the sky blue paint makes the room look very bright. In addition to the backdrop around the walls, there’s a short backdrop atop the helix that forms the backdrop for the Benedict loader reached via switchback. I underestimated how much this would change the feel of the layout. Because it blocks the view across the layout, it makes the layout feel a little deeper because you can’t see it all from any one spot anymore.
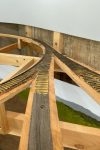
With such a tall backdrop (24″), I secured the risers for the backdrop to the lighting valance and storage shelf above the upper level
I learned a trick for hiding seams in the hardboard by accident. Like all my other seams, I covered them the best I could with lightweight spackling compound sanded smooth, but it’s nearly impossible to get everything perfectly flat and even across both boards. It just so happened that all three joints in this section were right behind lights–with a light shining directly only the seam, there’s no shadow on any of the uneven joints making the seam a lot more difficult to spot.
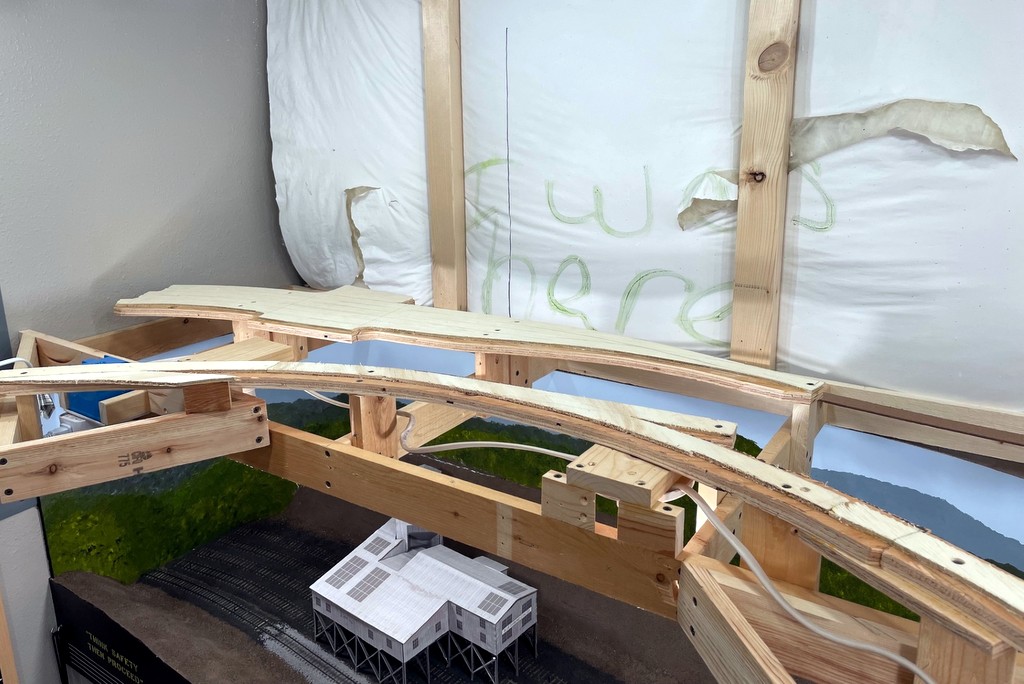
The next step is to build the last four bridge sections and put some DCC bus wires in place so I can start laying track in the final section. Exciting!
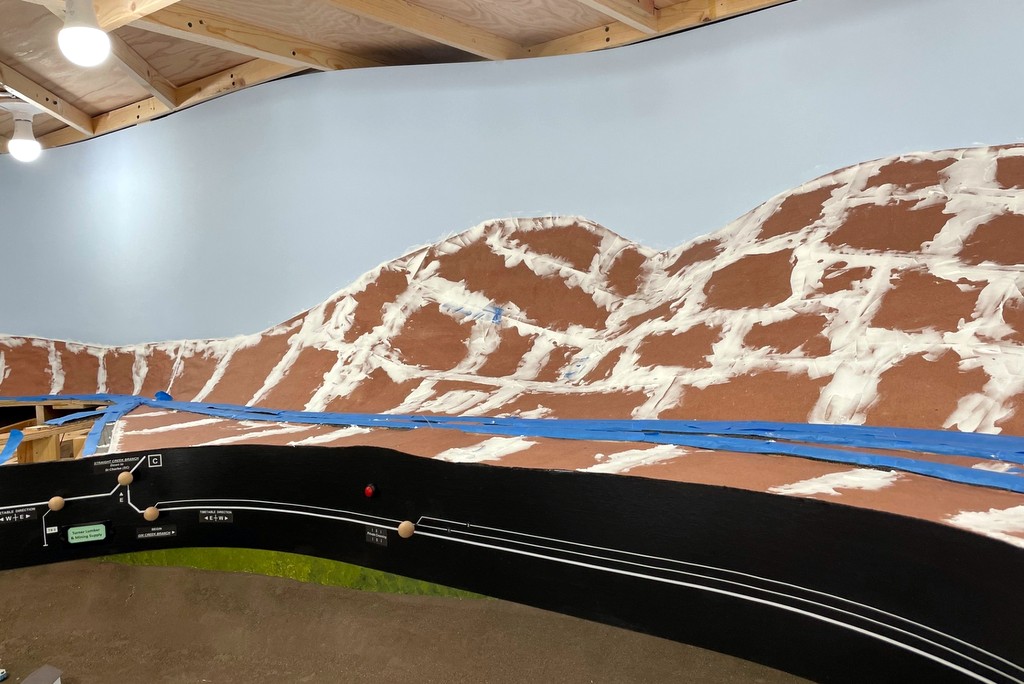
The raw backdrops of hardboard installed around the edges–all that remains in the backdrop along the peninsula
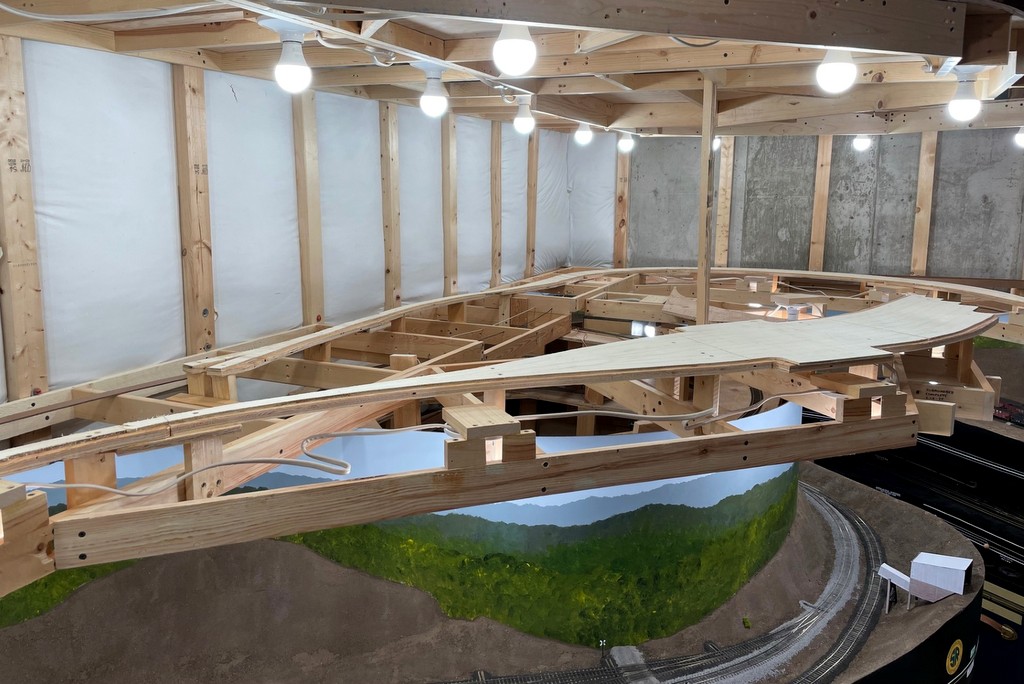
Here’s the last piece of subroadbed to be installed on the layout–it will hold the large Benedict tipple
Shortly after the last ops session I went back into layout construction mode. Today I finished the last of the subroadbed! I completed the subroadbed from Turners Siding all the way to Monarch and Benedict. Sadly, in the process I lost one of my planned tipples due to research. In a 1969 aerial photo there’s what looks like a small truck-dump loader on the tail track for the Benedict switchback–this is the end-of-the-line for the St Charles Branch. While the track in the 1969 photo is fuzzy, the loader looks like it’s along the track if you look at the track’s location in later photos, so I included a siding for it since my tail track isn’t quite long enough to do both the switchback tail track and loader. Alas, when I looked at some photos from the ’90s, it’s clear that the tail track was extended, so the original tail track in my era didn’t quite reach the structure. I could still include it, but after the last ops session, I’ve decided I have MORE than enough work for the crews to do!
This is where the Monarch tipple will go
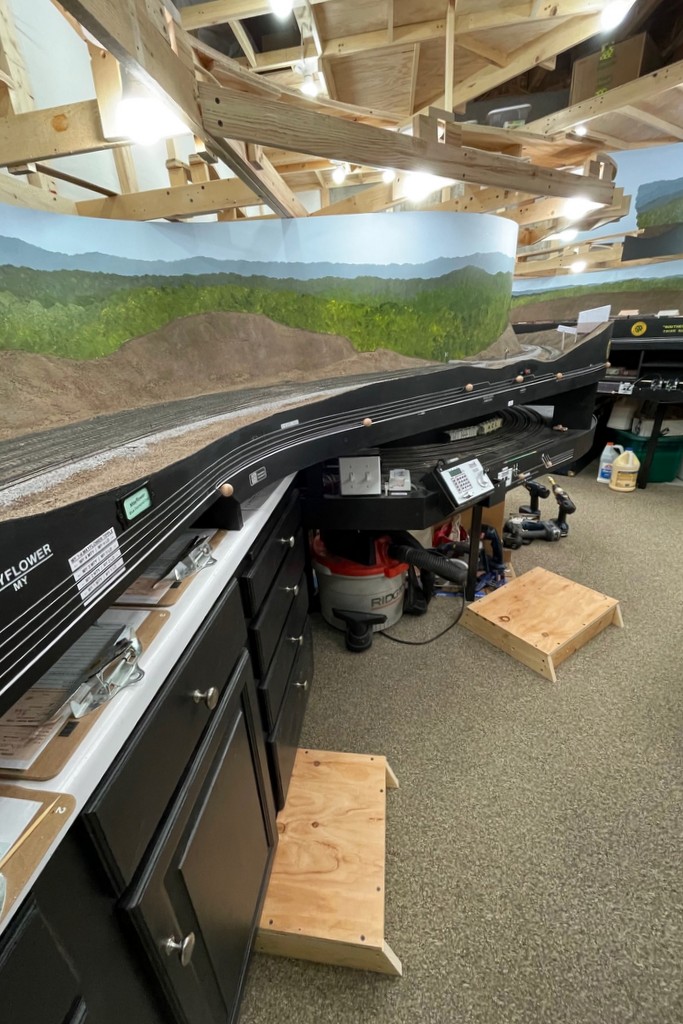
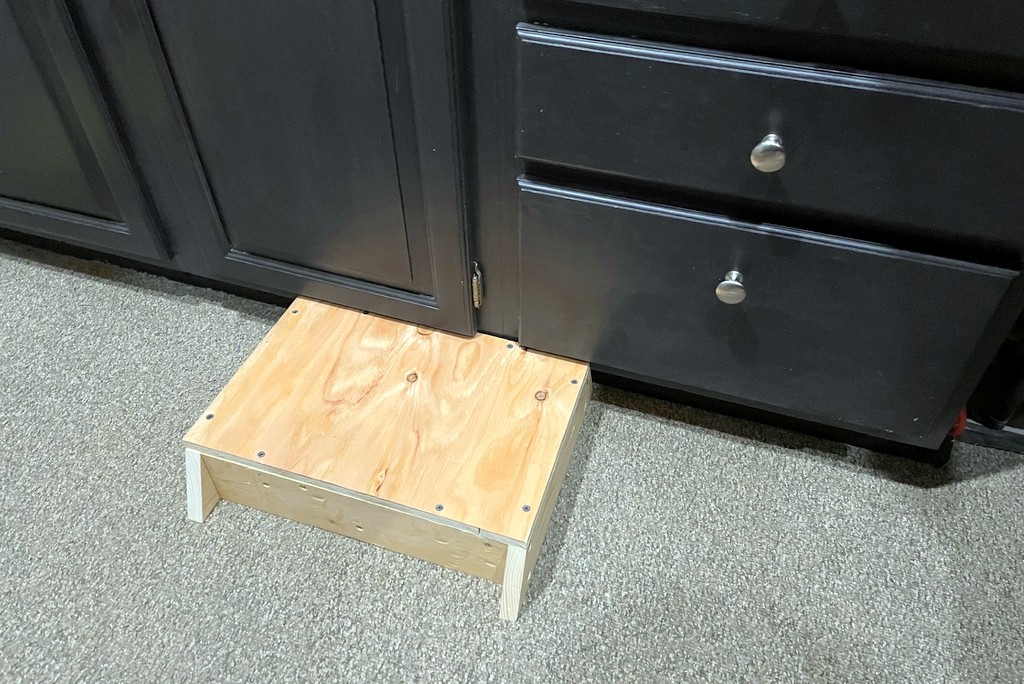
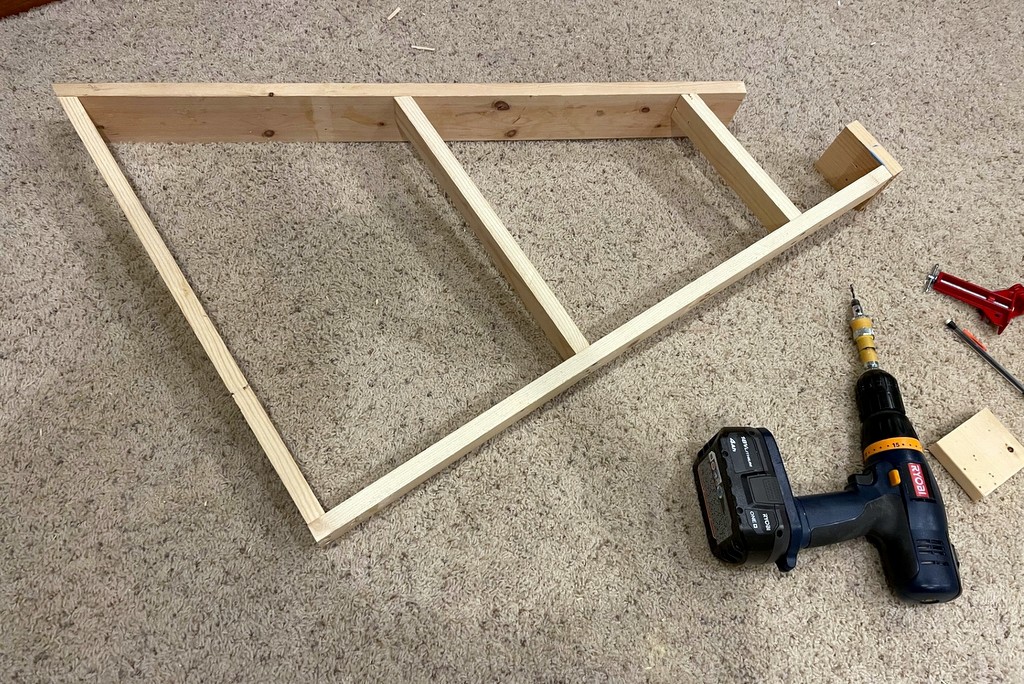
In addition to the subroadbed, I also built two movable platforms for accessing the upper deck. In the new section, some of the tracks reach 67″ high, which is at my eye level (and I’m over six feet tall). I took some lumber recycled from a friend’s old layout and built two platforms, a larger one that’s 14×20″ and a small one that’s 10.5×16″. Both are 4″ tall which is enough to see and reach all the tracks for someone a few inches shorter than me. Even though they sit pretty low, I added some angled sides to increase the stability and ensure they won’t tip when you step on them. Very simple design but plenty strong and most useful!
Both the small and larger platforms in place alongside the layout
Next step is putting in the backdrops (I can finally hide the “I was here” artwork on the insulation…). Then it’s on to laying some ties and building some bridges–I’ve got two plate girder bridges and two trestles to build before I can finish the trackwork in this last section. Getting excited, though, because I’m almost to the point of being able to operate the entire layout as it was designed!
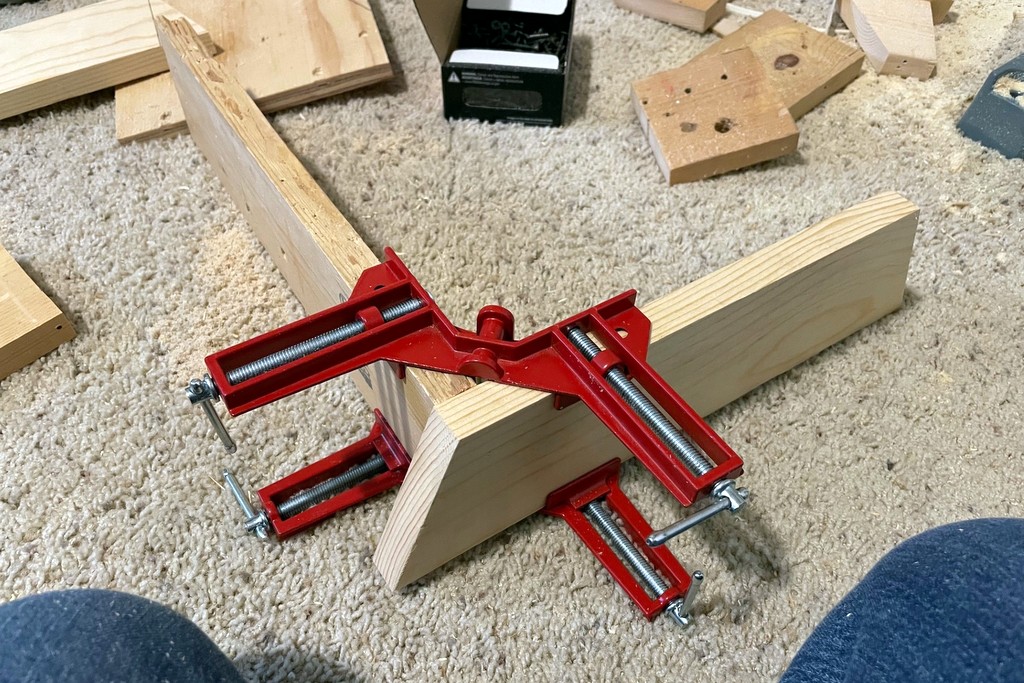
Starting to assemble the platforms. The ends are cut at 22.5 degrees to add stability
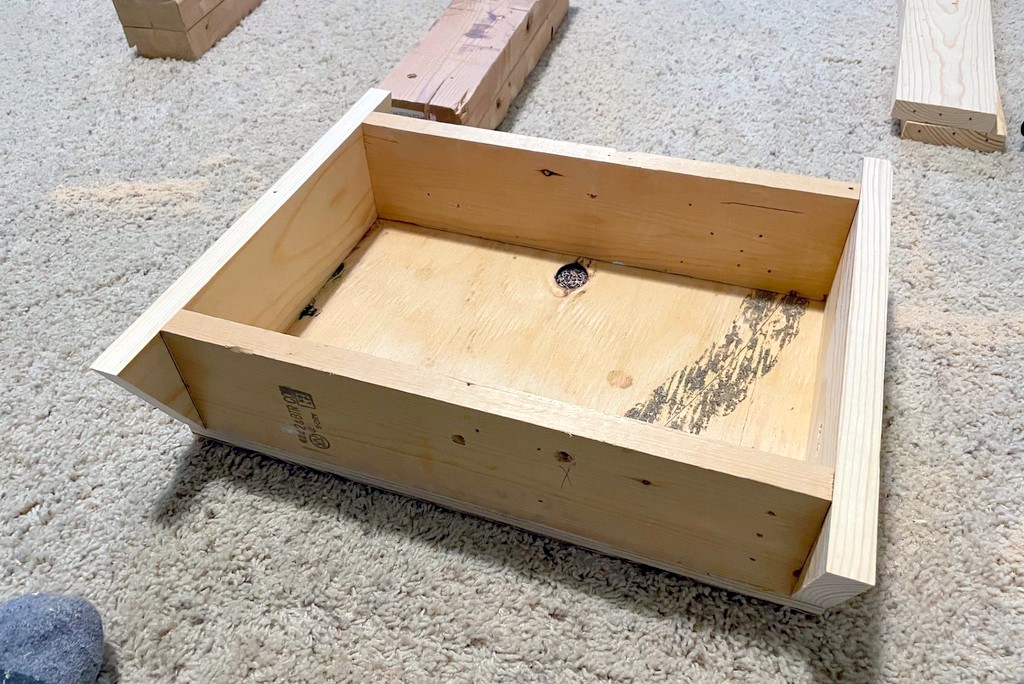
Finished platform as seen from the underside–very simple
The small platform is just the right height to allow the cabinets and drawers to open
This post is overdue, but I thought I’d give an update on the last ops session. We had three operators for this session, me and two “rookies,” Rich and Jeff. Rich and Jeff sure aren’t rookies to ops and both have operating layouts, but this was their first time running on the St Charles Branch. As such it was a good learning experience for me because I saw a few instances where my instructions, switch lists, and fascia markings aren’t as clear as I’d thought. The one-sheet “master switch list” was new to both, but after working with it for a while, it was well received. One new addition to the master switch list was a column marked “00:00” between “orig” and “dest” that marks where the car was at midnight (start of the session). This allows operators to build switch lists from the master switch list again. Before this addition, there would be two sets of cars for each destination–the one in the yard at the start of the session, and the one in staging at the start of the session. With this new column, a conductor can quickly see which cars should be in the yard and include only those on the switch list.
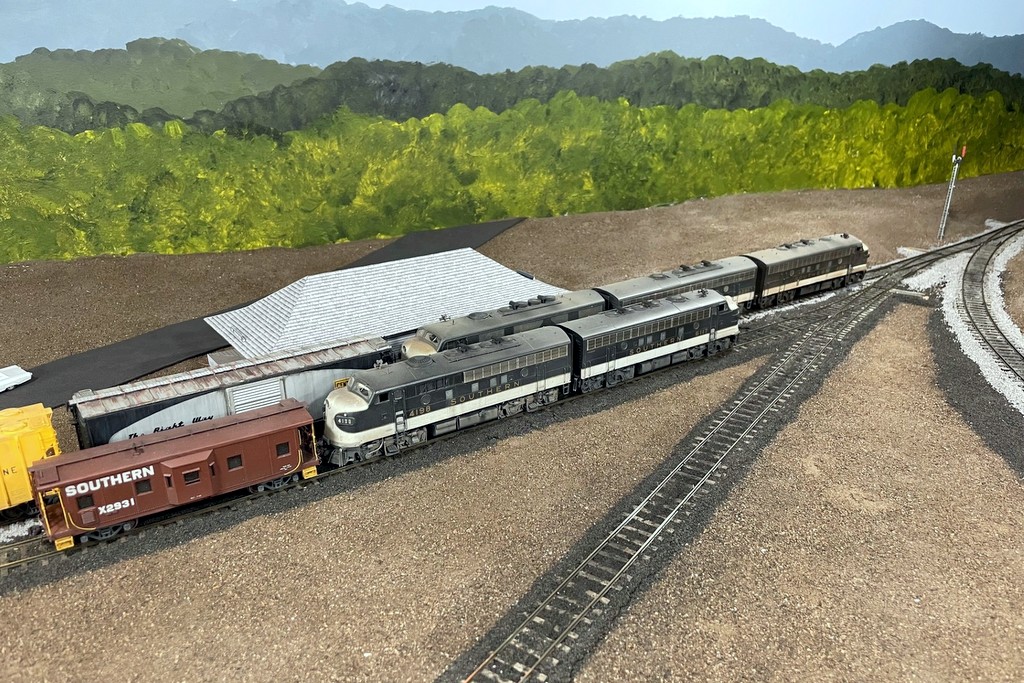
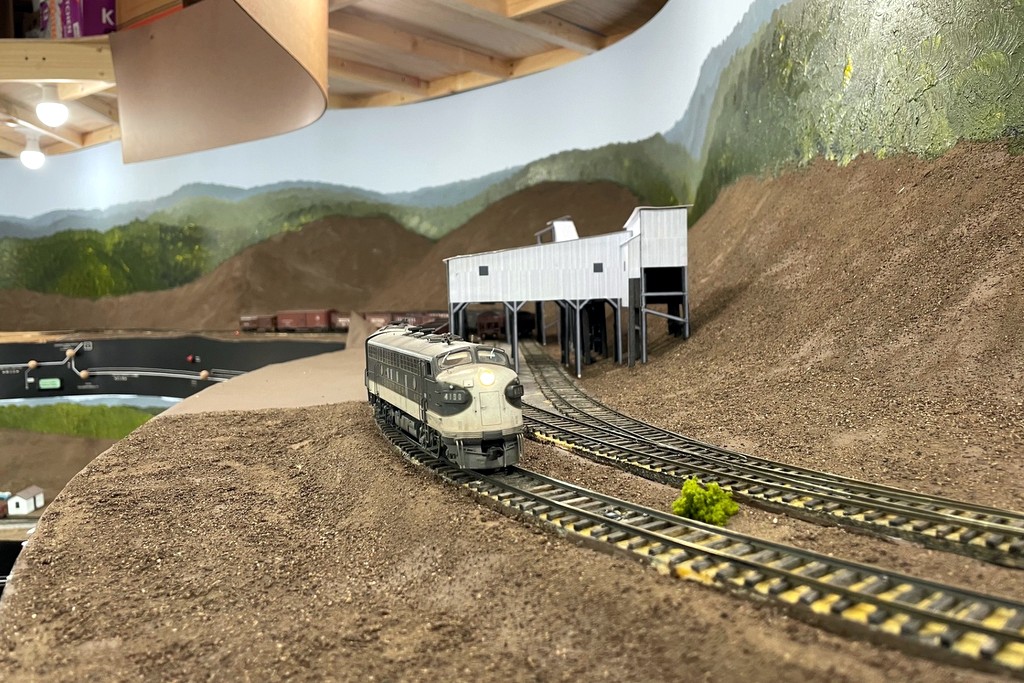
Five F-units congregate in front of the St Charles depot. Train 61 is a rare sight with two non-coal-hoppers on the front end today
I also updated my “crew training” page, and at least one of the operators read through everything beforehand. While the other caught on quick, the instructions did seem to help with some basics. By and large the railroad behaved, though an F-unit split a switch in St Charles on some of my most “mature” track, and one loco stalled in a spot on the upper deck despite having a keep-alive… grrr… still not perfect. Thanks to the latest hopper class, I had enough weathered hoppers to fully outfit all four trains we ran–just the L&N caboose was still unpainted.
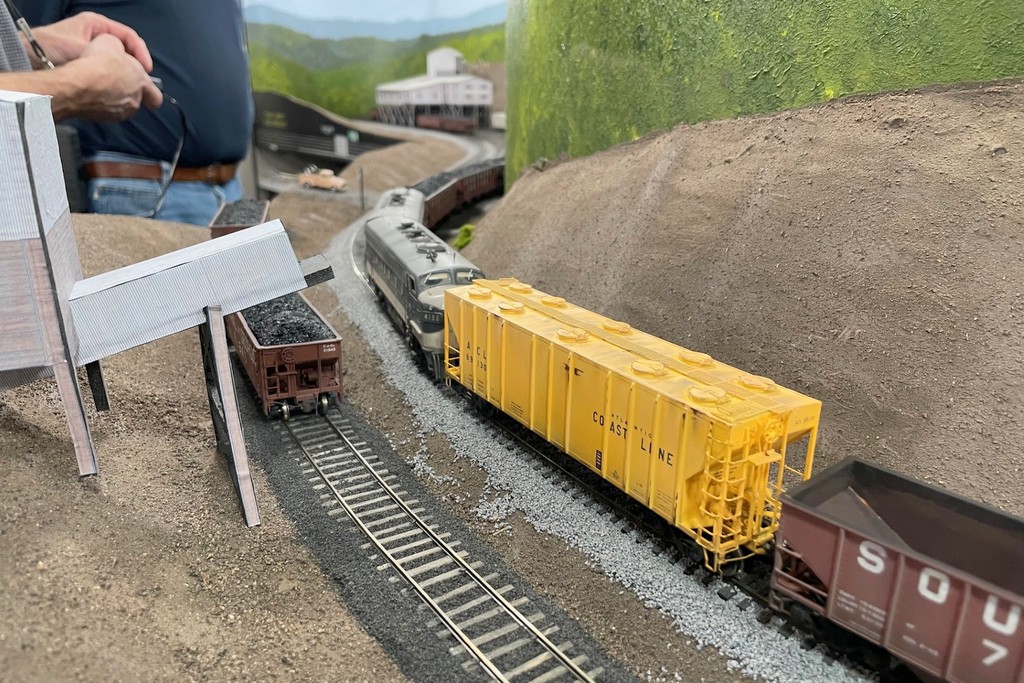
First operational run for a “rescued” PS4000 covered hopper–the most colorful car on the railroad!
I ran a full session with four trains, all tipples open, and a few non-coal cars moving to and from other sidings. I only jumped in on one train leaving Rich and Jeff to run three trains each (using two-person crews for all but one train). I think it was a little too much! Due to all the work required for each train, I think two trains is just about right for each operator. This works with four operators, but it means two operators are sitting for about an hour at the beginning, and two operators are sitting at the end… I’ve got some books and snacks, but that’s still a bit long to be sitting, I think. I’m going to at least try it, and maybe I’ll let people know beforehand if they’re “early crew” or “late crew” so they can choose not to sit around.
Notable “firsts”:
First time with a crew of two paired “rookies”–it was fun watching them mentally think through Kemmergem!
First amendment of the timetable via orders during a session–I’ve seen a few times now where the L&N CV Local is waiting on Train 61/60 to finish up in St Charles, so I made some preplanned orders amending Train 60’s return schedule to after the CV Local and found this session was a perfect opportunity to play “St Charles Operator” and give them to both crews
First use of a Digitrax LNWI allowing Rich to use his own wi-fi throttle
First use of QR codes on the fascia to allow operators to quickly access the crew training if needed (I don’t think they were used)
Learning points and observations:
The crew instructions handed to the crews seemed to help considerably with newer operators to the layout
I think operators appreciate that each section of the railroad offers very different switching moves and challenges
High momentum settings worked well and kept the crew engaged–only a few missed spots and hard couples, but no disasters
My numbering conventions for some of the tracks are counter-intuitive (Mayflower goes track 0-4, but spot 5 is on the end of track 0, then it goes 1-4… confusing), so I’ll need to come up with a few new designators to fix this
Most people are used to looking at the paperwork first, then looking at the cars in front of them–the “master switch list” makes this a bit overwhelming–my instructions now includes “work the cars in front of you using the switch list as an aid, not vice-versa”
Rich directing the movements with Jeff at the throttle working Mayflower
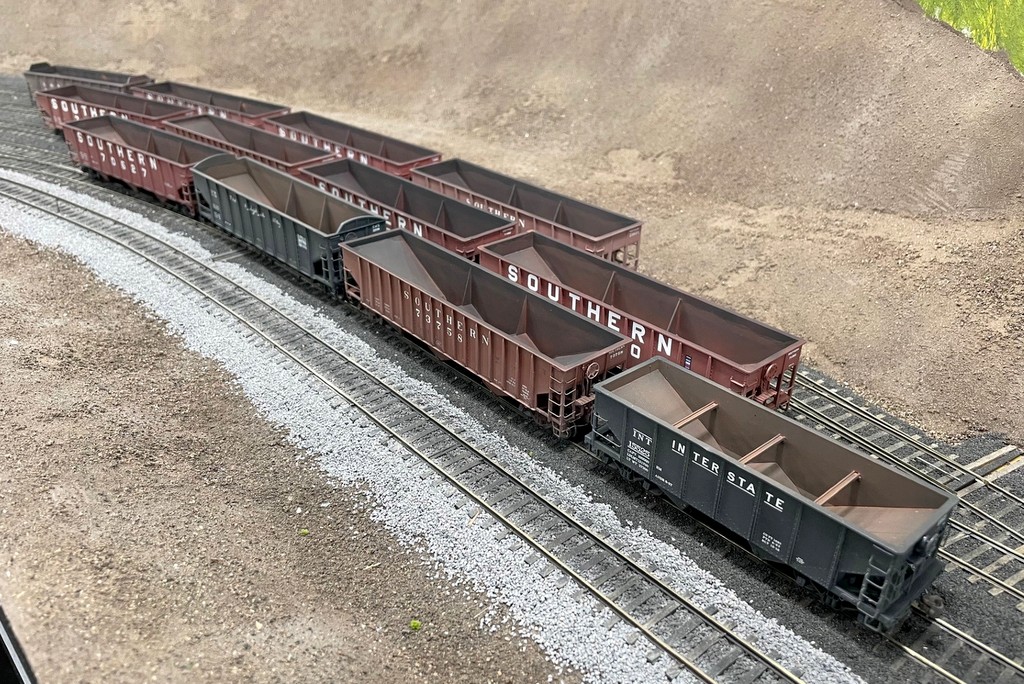
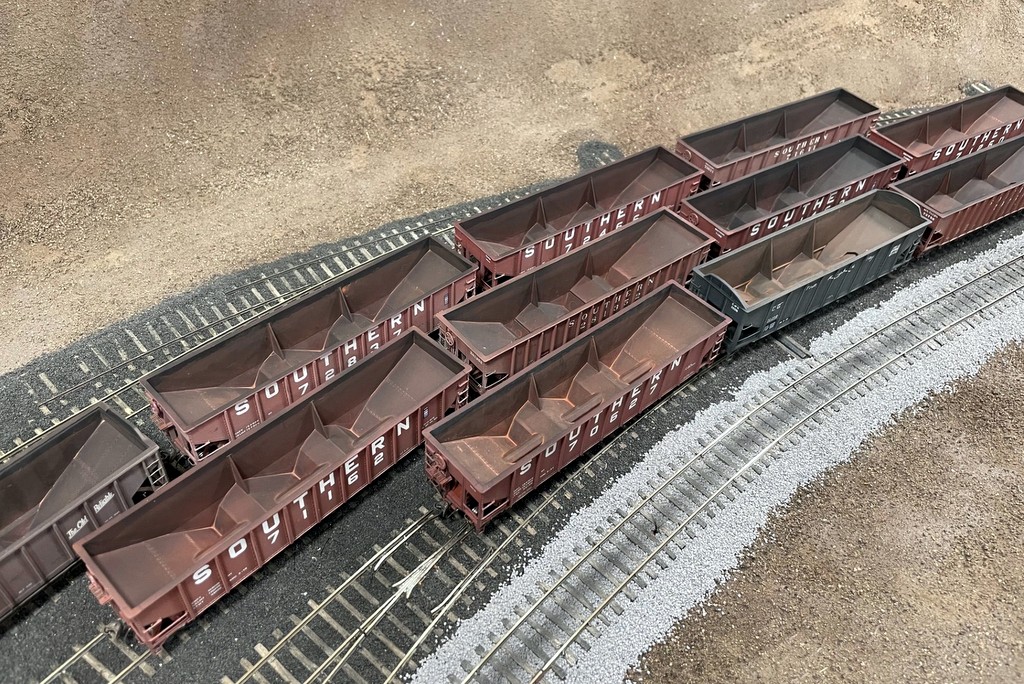
Happy New Year! A new class of hoppers has graduated from the workbench onto the layout–here’s the hopper class of January 2025! Work on this group commenced with the completion of the Gin Creek Branch and the realization I didn’t have enough weathered hoppers to complete an operating session. This group increases my number of “mainline hoppers” (70 and 100T cars) by about 40%. All these cars are factory painted, but most sport new numbers made by a combination of scraping off unwanted numbers (or portions of numbers… some of the “4s” became “1s” this way) and circular “Os” in the “SOUTHERN” and adding new numbers with K4 decal sets. Many of the Southern hoppers in the more modern lettering started as 74100 class Atlas Trainman cars with heap shields–these cars are too long to accurately represent the ex-Central of Georgia cars of this class, but they’re really close to the 70300-73749 class and have the more accurate squarish “O”. These had their heap shields removed, grabs narrowed, and details added such as tow loops, homemade coupler cut bars, homemade trainline hoses, and etched metal brake platforms.
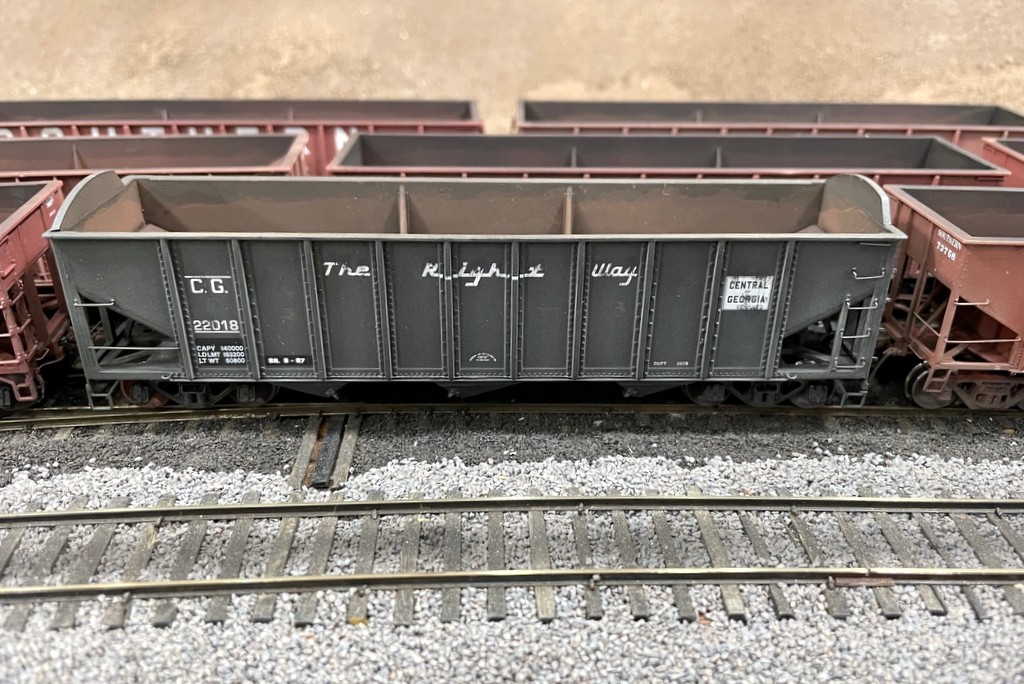
This CofGa 70T is modified from one of the new Athearn models based on the old MDC kit
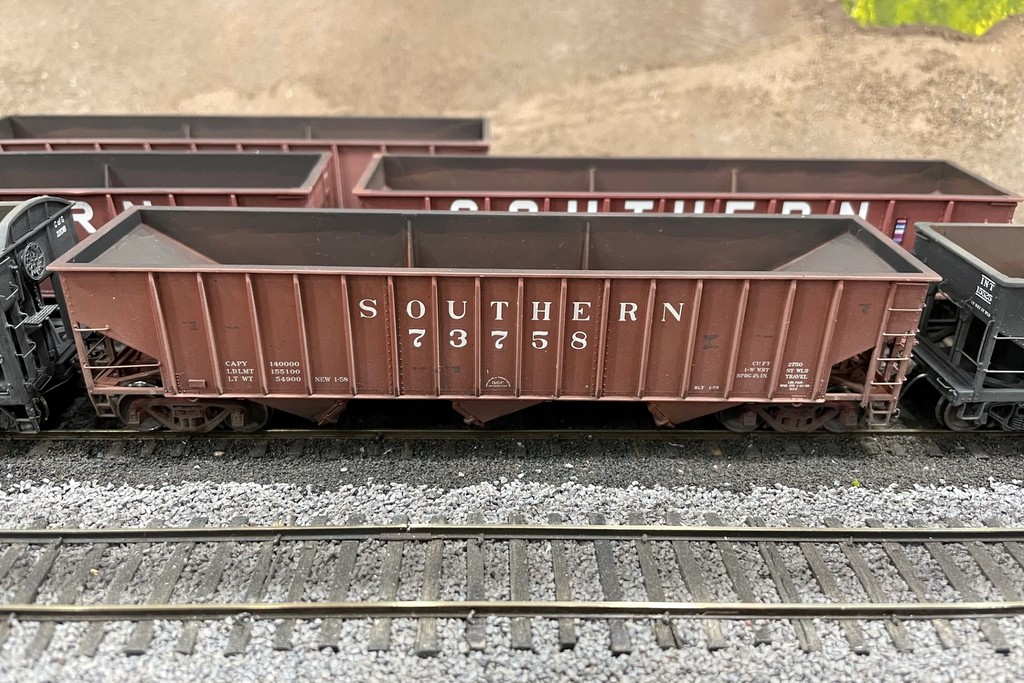
Speaking of ex-CofGa hoppers, I picked up one of Athearn’s newer-release triple hoppers painted in CofGa. This car has pretty accurate dimensions, and it has been upgraded with wire grabs, metal wheels, and more weight. It’s still got some of the chunky MDC detail (e.g., huge rivets), but it is a good improvement. I added some heap shields from the scraps I cut from the Trainman cars to get this essential detail. The remaining two Southern hoppers are some Tangent models I picked up on eBay. Both were factory numbered for the CNO&TP class 281300-281599, but the Southern had an identical class of cars numbered 73750-73949, so I renumbered one.
This is a factory-painted Tangent car that’s been renumbered to a different group
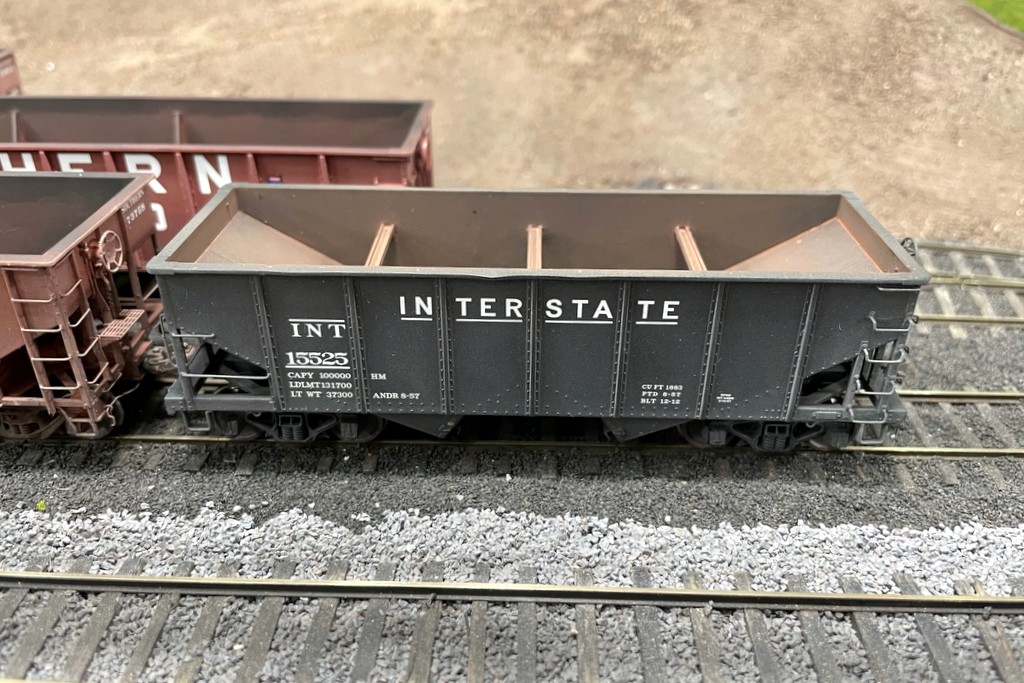
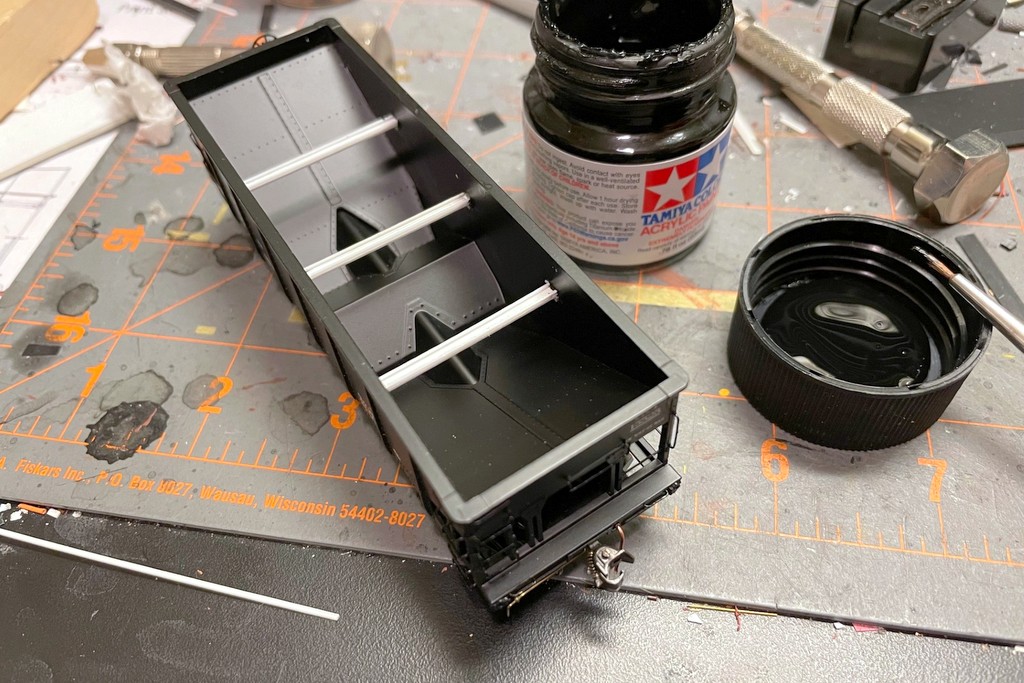
The Interstate hopper represents a class of second-hand cars purchased in 1956 from the Berwind-White Mining Company to ease the Interstate’s car shortages. It’s very similar to a Pennsylvania RR GLa hopper, so I modified a factory-painted Bowser GLa hopper with wire grabs and some of the distinctive GLa interior braces made from bits of styrene. On my layout, this car is serving out its very last years in “yellow ball” captive service between tipples and the Westmoreland Coal transloader in Appalachia, VA. Rounding out the class is a single L&N car, a factory painted Walthers Trainline PS3 hopper that got new ladders and heap shields.
Interstate Ex-Berwind hopper from a Bowser model
An in-progress shot of the Interstate GLa with bracing added
All these cars got a decent bit of weathering including drybrushed rust chips, airbrushed tan grime/fading and flat black, a flat black wash, and multiple layers of rust washes in the interior. Unlike previous classes where I’ve built cars to represent different portions of the eras I’m modeling, these cars were purpose built and weathered to represent the late ’60s, the era I’m starting with. Looking forward to employing these cars on a mine run soon!
All hoppers received a similar “old rust” treatment for their interior
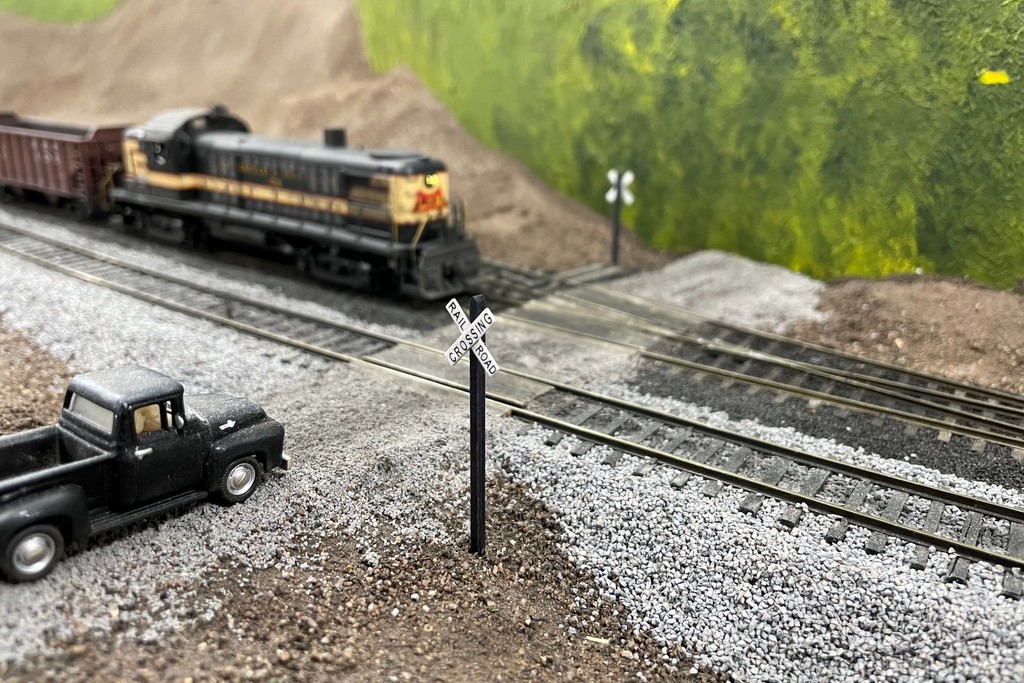
Added some more details to the layout. I’ve put in most of the grade crossings, but the only one that had any signs until now was the one with flashing grade crossing signals. The rest of the grade crossings represent private crossings or low-traffic roads that didn’t warrant flashing signals. For these, I made some simple RR crossing signs.
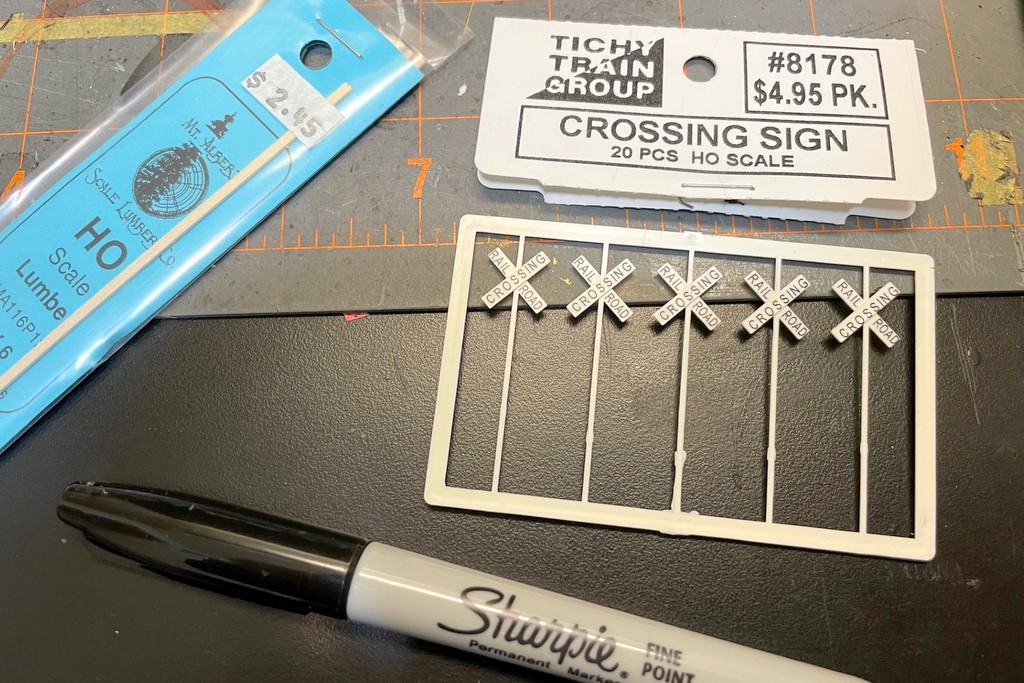
I had picked up some Tichy #8178 crossing signs probably 15 years ago for my previous layout but never got far enough into scenery to install them. They’re pretty basic, but the signs look similar to the Southern Railway signs I could find pictures of. The plastic posts, however, are way undersized as the Southern’s appear to be mounted to 6×6″ wooden posts. I didn’t have any 6×6″ scale lumber, but I did have some 3×6″, so I just glued two pieces together and let it dry. The Southern’s posts look nearly black – very similar to ties – so to save time, I used a Sharpie to color the wood posts black. I cut them to about 1 3/4-2″ lengths, used an X-Acto blade to cut a 45-degree point into the top of the post, as several of the pictures I found had this feature. To finish up the posts, I went over them lightly with some fine sandpaper to allow a little bit of the wood to show through–this helped them look a little more weathered.
Basic materials for this project – Tichy RR crossing signs, scale lumber, and a Sharpie
For the signs, I simply cut the Tichy signs off their plastic posts and used an X-Acto No. 17 chisel blade to clean the remnants of the post off the back of the sign. Next I used a drop of CA to secure the sign to the post and set them aside to dry. The final step was to go over the signs twice with a dark gray-brown wash I made with water, flat black paint, and dark tan paint. At least on my signs, the “RAILROAD CROSSING” print was centered on 3 of the 5 signs and a little off on the outside two on each sprue. No worries, I just used the ones that were a little off on the far side of the tracks where they’re pointed toward the backdrop.
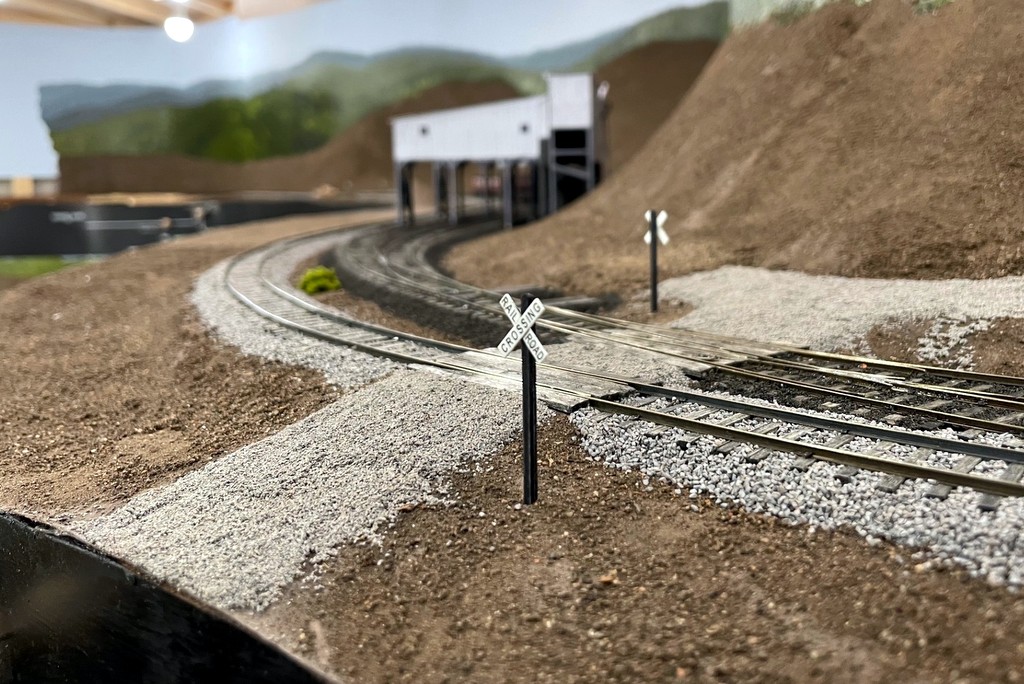
On the layout, my red-rosin paper isn’t quite thick enough to hold a sign, so I hot-glued a small square of corrugated cardboard under the scenery shell where the signs would go. To mount them, I just drilled a vertical hole slightly smaller than the post diameter. The placement of these signs seems to vary a bit, but I found that 6 scale feet from the road and 10 scale feet from the track looks about right. Finally, I pressed the signs into the cardboard until they stuck up about 10 scale feet from the road height which seems to be about where the Southern put them based on photos. Simple enough project, but they really do add a lot visually to the developing scenes.
RR crossing signs for the truck dump road behind Kemmergem
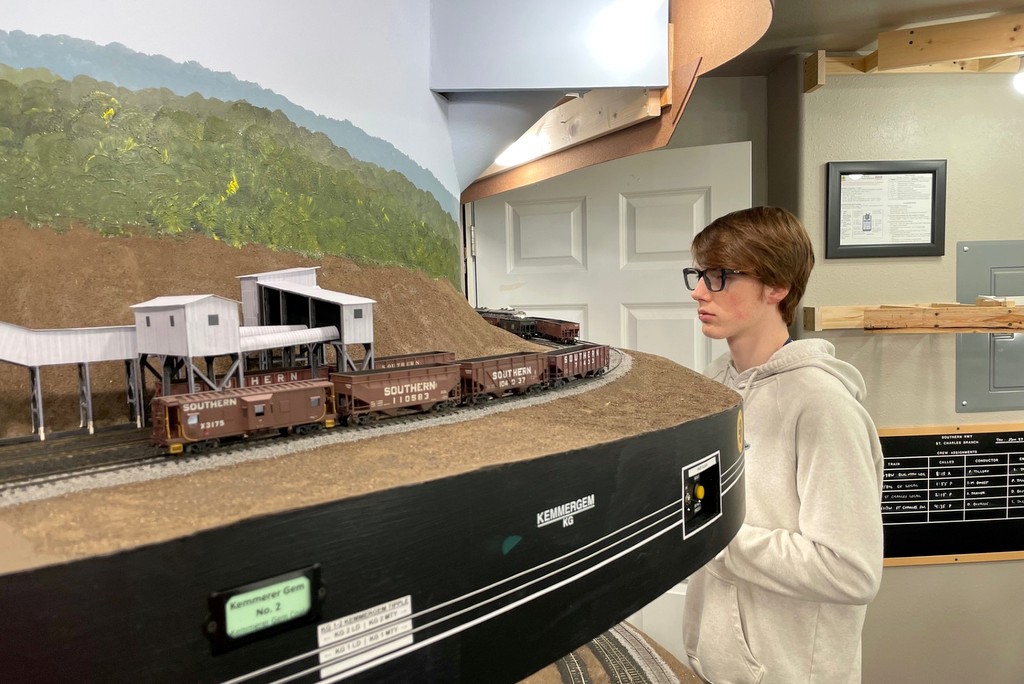
My youngest, Drew, running the Black Mountain Local at Kemmergem
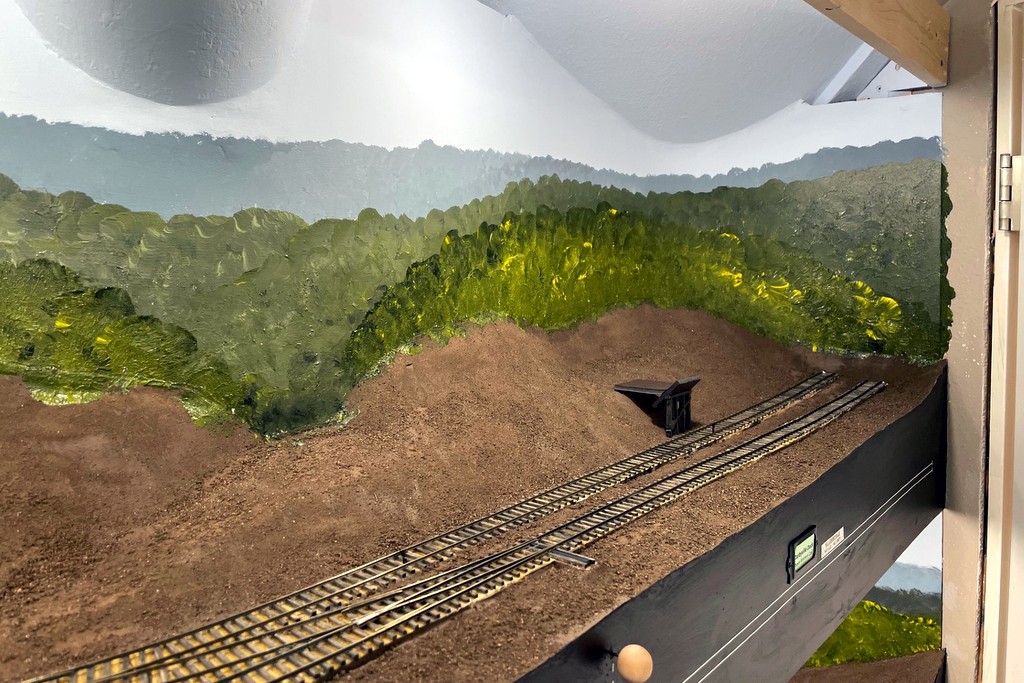
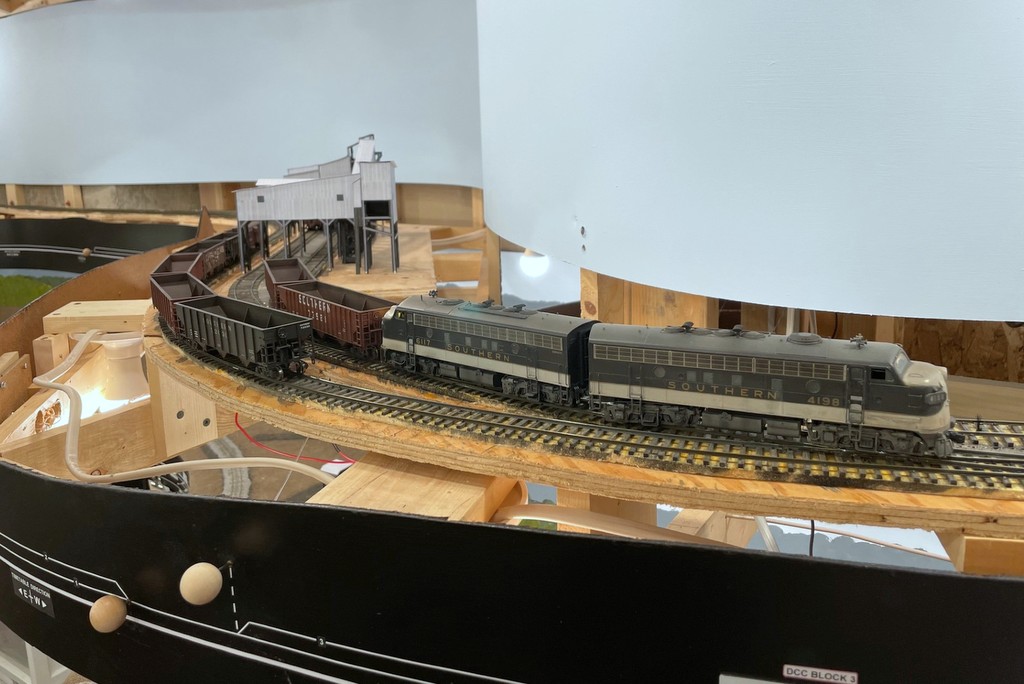
It’s been a little while since a progress update, and there’s been a lot of progress. As you can see from the picture above, a portion of the upper deck is now finished to essentially the same state as the lower level with the basic scenery (covered in dirt), painted backdrop, fusee circuits for unprotected road crossings, and ballast. I also installed a few more ISE “Squealers”… five more to be exact, including two on the Gin Creek Branch (finished portion of the upper deck). Its’ so cool running a long train that crosses multiple Squealers and hearing the sounds from multiple spots in the train!
I’ve also had a couple mini operating sessions to work out the kinks on the Gin Creek Branch. The first was with regular operator Patrick, and the second was a treat with my youngest son, Drew. Drew did a great job running the Black Mountain Local and figured out a few different moves than the ones I’ve been using. When he was done, he paid me a great compliment: “that was fun… you’re such a nerd.” Guilty as charged!
Here are some pics of the progress.
Kemmergem mock-up on top of basic red rosin paper scenery
The scene between Turners Siding and Kemmergem getting some spackling compound to hide the paper seams
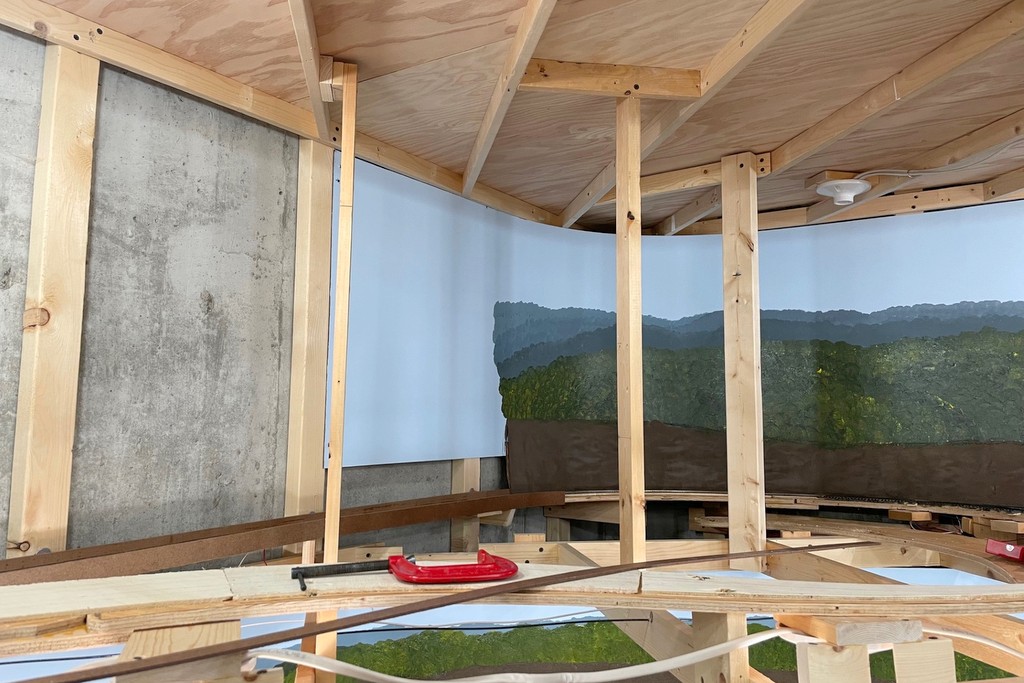
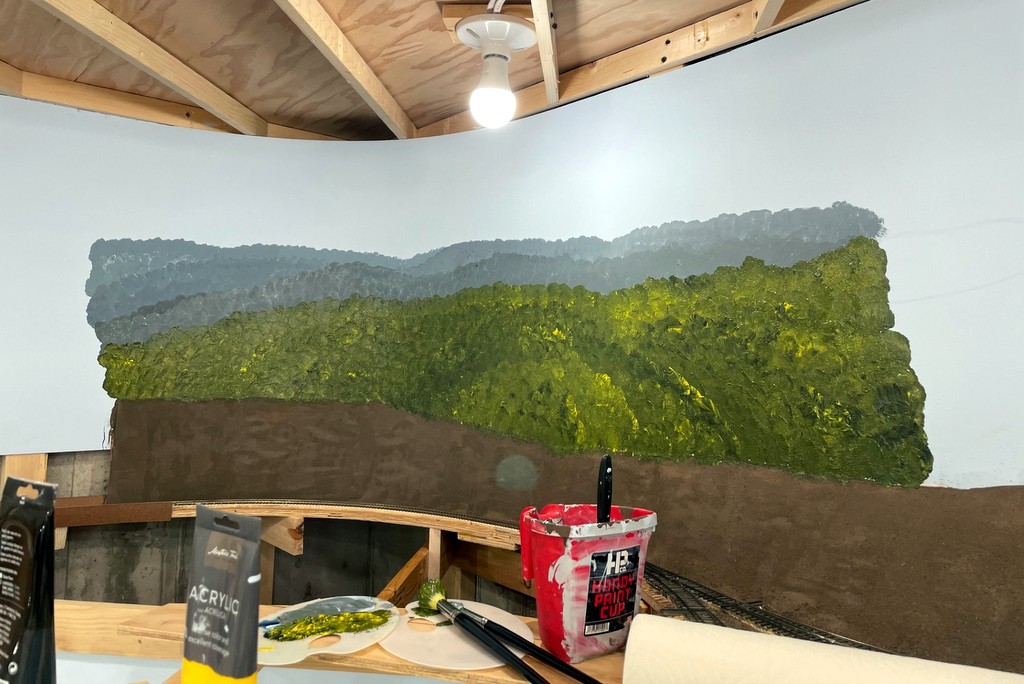
First section of backdrop painting on the upper deck
Basic scenery is finished at the end of the Gin Creek Branch
A pair of Fs, run by Patrick, is bringing empties up the Gin Creek Branch past Kemmergem tipple
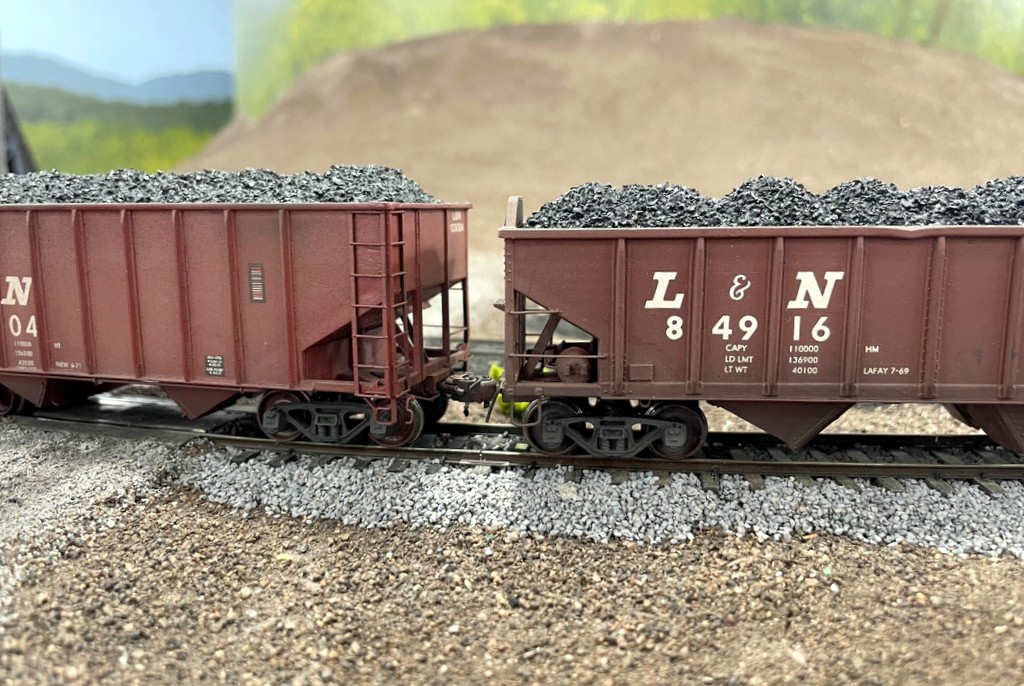
A pair of L&N hoppers cross the ISE Squealer sensor
Last week I picked up a “Squealer” from Iowa Scaled Engineering at the Colorado RPM meet. I’ve been eyeing one of these for a while, and I’m so glad I finally took the plunge! If you’re not familiar with it, the Squealer is a static system installed at a curve on the track that detects the motion of a passing train and emanates recordings of high-pitched flange squeal sounds. While this may strike some like the torture of nails-on-a-chalkboard, I find the sound to be very prototypical and not annoying at all. In fact, now that I can hear my train going over a Squealer, when it’s not going over it, things sound a little empty which tells me this is a GREAT product!
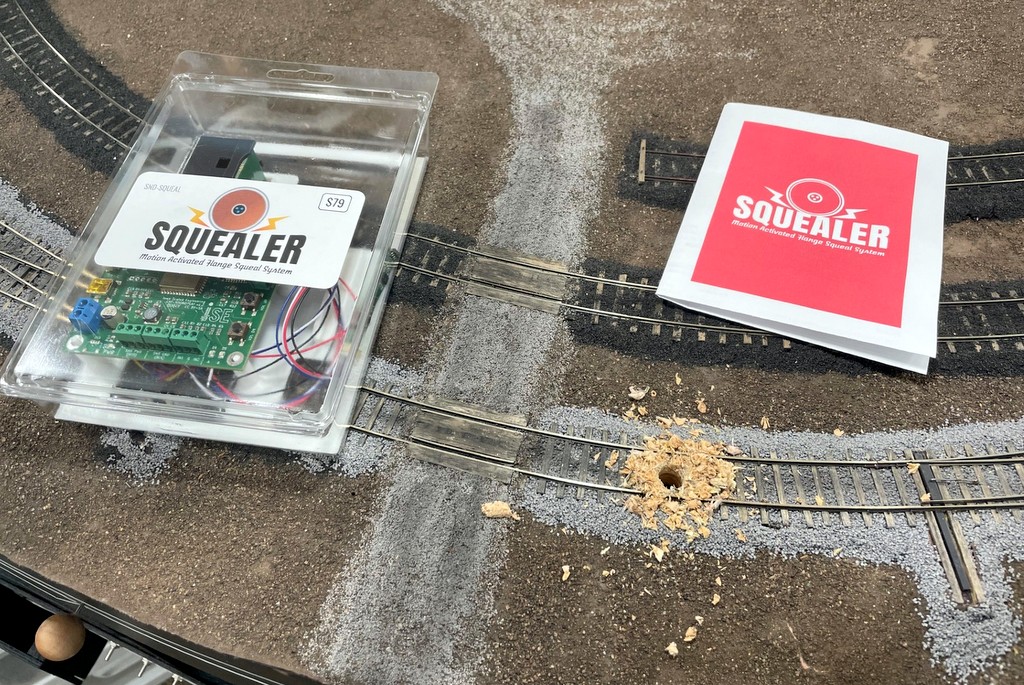
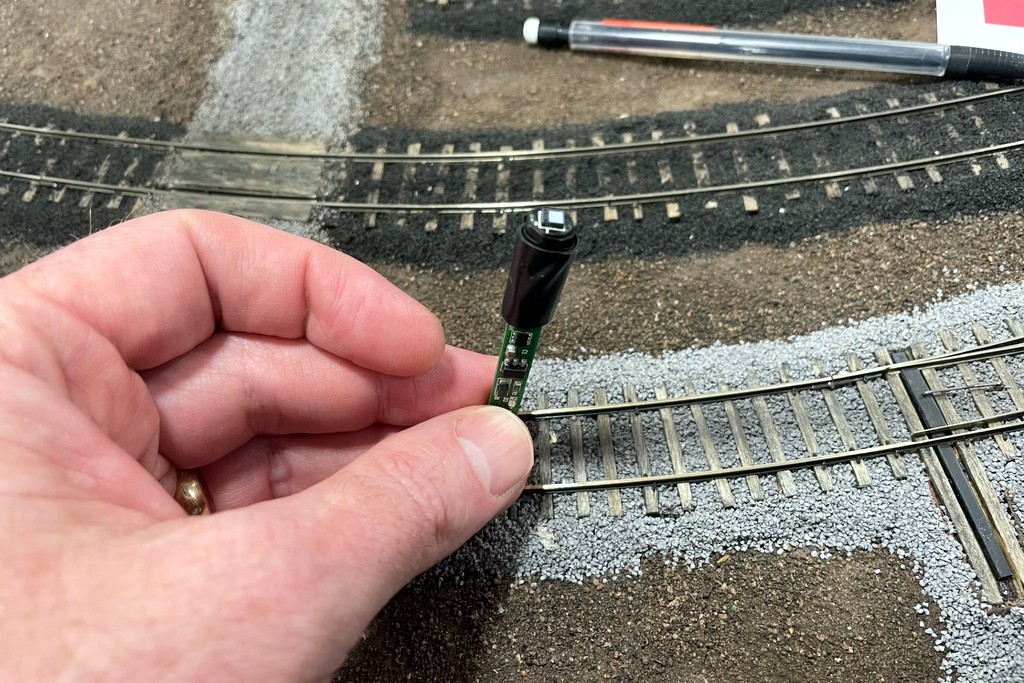
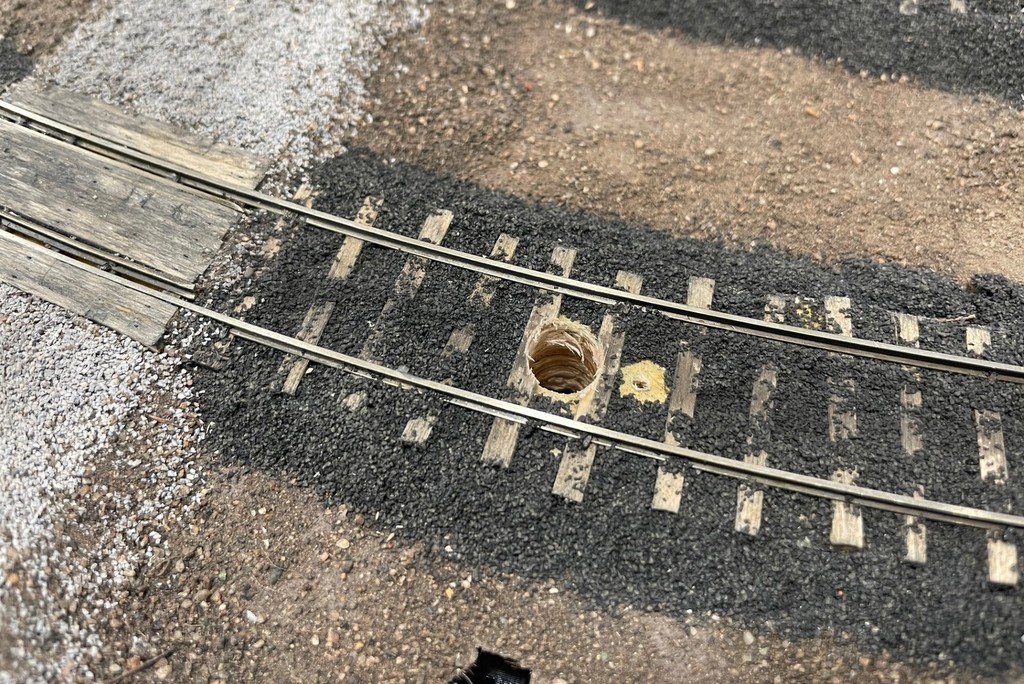
Installation was very simple and took me about an hour from start to finish, to include testing. The basic Squealer consists of a sensor (about the diameter of a pencil and around 2″ long), a speaker with a ~1″ cubed souknd enclosure, and a circuit board with terminals for connecting power and sensors, a spot for a micro SD card (in case you want to load your own sounds… I find the built-in sounds to be great), and two buttons for volume control. It supports multiple sensors, so I also picked-up an extra “TrainSpotter – Motion Detector” for an adjacent track. The trickiest thing about my installation is it was into finished track with no way to drill a hole from underneath as the instructions recommend. Instead, I had to drill downward through the ties. The instructions recommend a 3/8″ drill bit–I used this on my first sensor install and found it to be overly large. For the second sensor install, I used an 11/32″ bit and found it to be just right. I wrapped my sensors in a couple layers of electrical tape to help them fit snugly and to mitigate moisture from ballasting getting to the circuit board. Per the instructions, I lined the sensor up in the correct orientation and set it about even with the ties.
The Squealer box and the first over-sized hole… it was a little painful to drill through finished trackwork
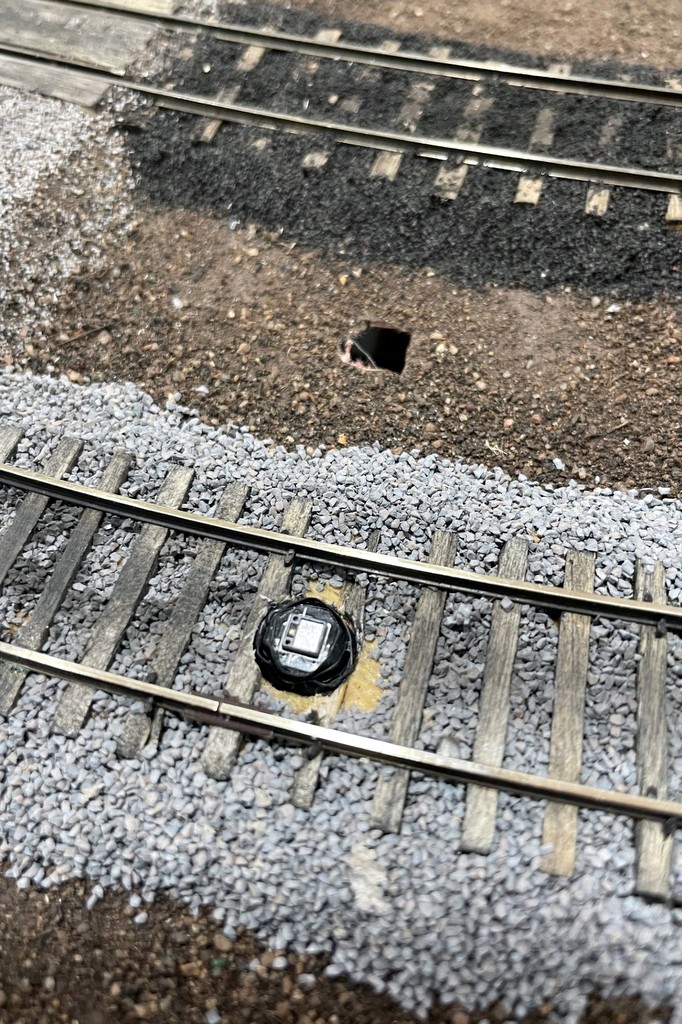
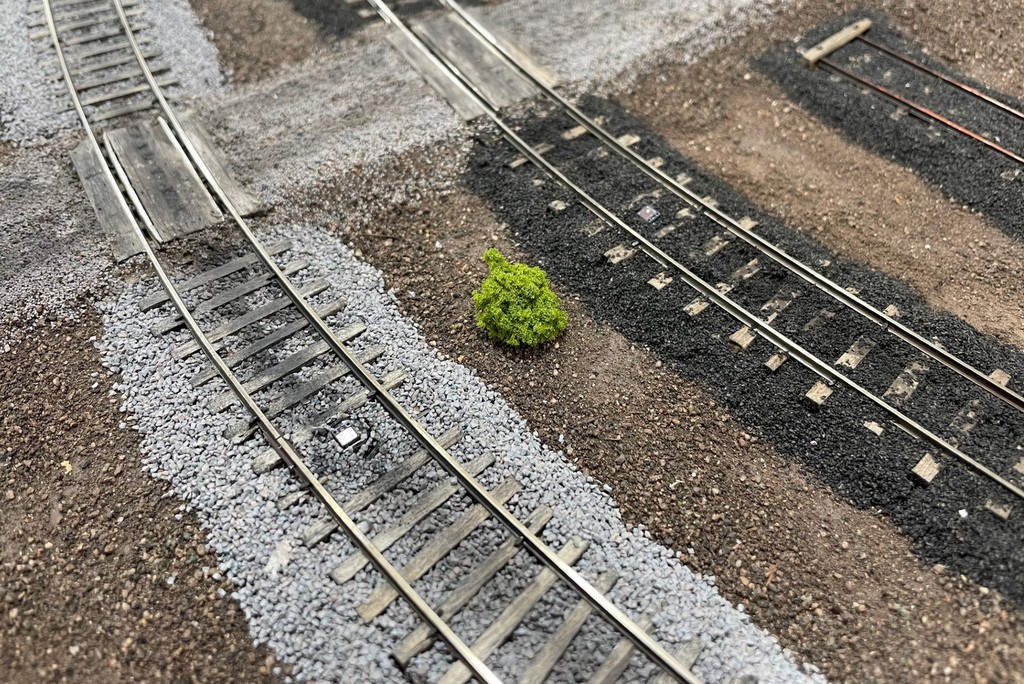
I hooked up the sensors per the instructions. Since the white and blue wires each go to a common terminal on the board for all sensors, I found soldering the two white wires together and blues together made it much easier to install them (and keep them) in their respective slots. ISE recommends cutting a 3/8″ hole into the scenery for the speaker sound to escape. It was easy to cut a hole into my red-rosin-paper scenery and install the speaker to the adjacent sub-roadbed using a piece of 3M double-sided foam tape. I covered the speaker hole with a little piece of green clump foliage. For power, the Squealer can take a wide range of DC, so I hooked it up to my 14V DC accessory bus which works just fine. That was it for installation, and it worked as advertised right off the bat. The only adjustment I made were dropping the volume to a level that sounded right in comparison to my locomotives. I was able to carefully add and glue some ballast over the top plate of the sensor to hide all but the silver portion on top, and I noticed no decrease in performance.
I wrapped my sensors in electrical tape to make them fit snug and water resistant for the re-ballastingThe speaker hole can be pretty small, but it helps and should be close to the sensors
My only complaints (a very strong word for it) are very minor regarding the sensors: 1) they’re pretty big, so if you can’t drill the hole from underneath, you’re tearing up some ties, and 2) the sensors are very reflective and create a bright glint when viewed from certain angles. It’s a pretty complicated sensor for its size, so I don’t anticipate this can be easily fixed at a reasonable price point, and the benefit is far greater than these drawbacks.
Here’s the second sensor hole drilled with an 11/32″ bit which fit more snugly
If you haven’t already, you should check out the video to hear what it sounds like with a train. To me, it now makes it sound like all my cars have sound decoders… at least in that one spot. That means I’m now plotting to put a series of Squealers all around the layout on all major curves (probably 3-5 per deck) so you can enjoy the extra ambiance no matter where you’re working. It’s not cheap, but now that I’ve experienced, I am a huge fan, and it would sound flat to go back, just like I could never go back to locomotives without sound. Install these at your own risk… if you install one, you’re likely to want several!
A small clump of foliage covers the speaker hole nicely
The Black Mountain Local spots a pair of empties at the Kemmerer Gem No.2 tipple
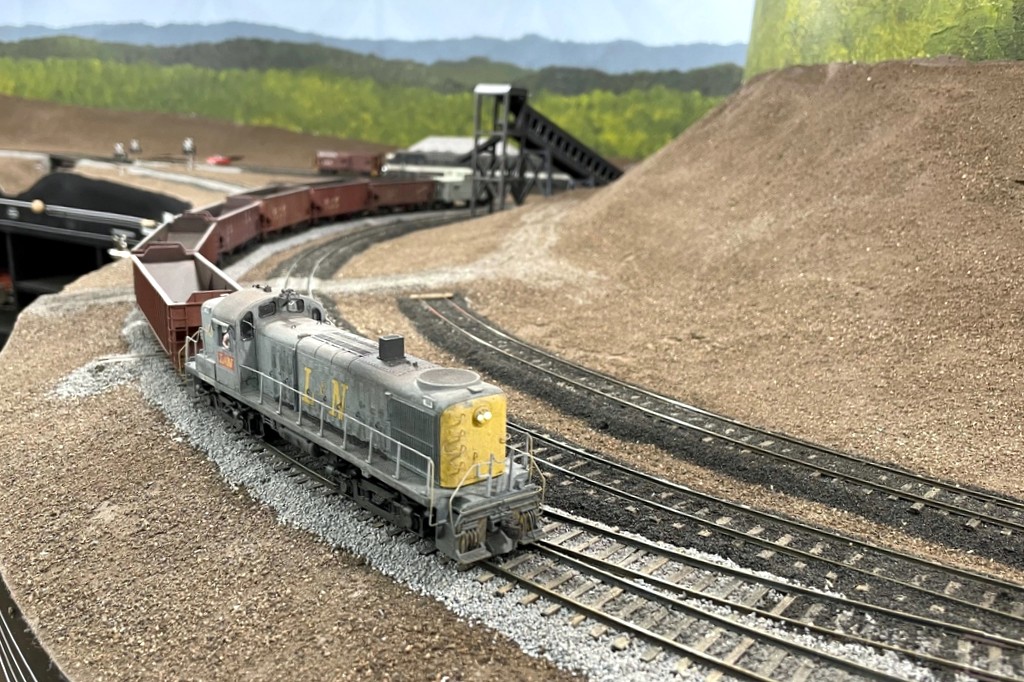
Yesterday was a great operating session on the St Charles Branch full of old friends and some new milestones! First, my good friend Stuart was in town, so he and local good friend Patrick came over for a 3-person ops session. We ran three of four scheduled trains, including the Black Mountain Local which made a run to the new Gin Creek Branch and Kemmerer Gem No.2 tipple on the upper deck–this was the first use of the upper deck in an ops session which is exciting. The branch is a blast to switch because the only run-around is the tipple track at Kemmergem, the tail track is short (but not annoying short… it’ll hold 2 locos and 2 hoppers), and there’s a small loader on a facing-point stub switch at the end of the branch. It means placing the caboose and cars for the small loader behind the empties on the tipple track, moving the locos to the other end, and using the string of loads and empties to work the stub tracks and push the caboose and small tipple loads onto the main where the train has to back up the branch to get them. Takes some thinking. It’s also awesome to work the tracks at eye level where you really get a railfan’s perspective! I also finally have enough tipples to justify two Southern mine runs plus the L&N’s mine run which means there’s really no “bad job” on the layout–you’re doing switching no matter what, and you’re either working the tipples or handling long cuts of hoppers around S-curves and wyes with a trio of units and too few yard tracks (also challenging).
Stuart has just backed up the Gin Creek Branch to collect a couple loads and his caboose and is now passing the Kemmerer Gem No.2 tipple on the way back to St Charles.
The sounds of an Alco 244 prime mover fill the air as Patrick and the L&N CV Local work the Mayflower tipple at the end of the Baileys Trace Branch
We cut the ops session short to head over to an open house for Bob Bandy who lives nearby and has an enormous and beautifully done western-themed layout. While there, I ran into a couple more old friends who used to operate on my previous layout, Nathan and Seth. They came over after we were done at Bob’s and ran the last train (St. Charles Switcher to Mayflower). I think a good time was had by all.
Seth and Nathan worked the last train of the session, the St Charles Local to Baker and Mayflower
Notable “firsts”:
First use of the upper deck!
First official use of “yard limits” to control movements in St Charles–the rule on the fascia simply says “yard limit: proceed at restricted speed–coordinate movements with other train crews”
First “meet” of two trains during an ops session. The schedule is designed to avoid having two trains in the same area at the same time. However, the yard limit came in handy when Train 61 (St Charles Local) was a little long working St Charles. Using one of the yard tracks as an impromptu passing siding, 61 cleared the main and enabled the L&N’s CV Local to get back to Pennington without too much delay after completing its work at Mayflower
First use of a Digitrax UT6 during an ops session. It’s got some great features that make it more capable than a UT4 (my normal throttle), but having no “stop” point on the knob is tricky with so much momentum built into the decoders–not a show stopper, but it will take some getting used to
Learning points and observations:
The 3:1 fast clock continues to work well and keeps crews from rushing
I tried to give the St Charles Local a single tipple to switch to keep things more interesting, but there really isn’t time in the timetable (based on the real-world timetable)–I’ll probably stick with just drop offs and pick ups for future runs which still makes for an interesting train due to the wye and limited yard tracks available
The Gin Creek Branch on the upper deck still needs some refinement of the trackwork. One switch was causing one locomotive to consistently derail–this was remedied with the installation of a guard rail mid-session, but there was still a bit more “clicking” over certain sections of track that I want fixed before installing scenery
This session left me super motivated to keep extending the tracks on the upper deck, though I may pause to rough in the scenery around Kemmergem first. But first, I’ll be off to the Colorado Railroad Prototype Modeler’s meet (RPM meet) in Greely, CO next week where I look forward to taking over at least a chunk of the modeling area with Appalachian coal field models… I hope Patrick brings some of his Chessie and early CSX hoppers so we can complete the infiltration.
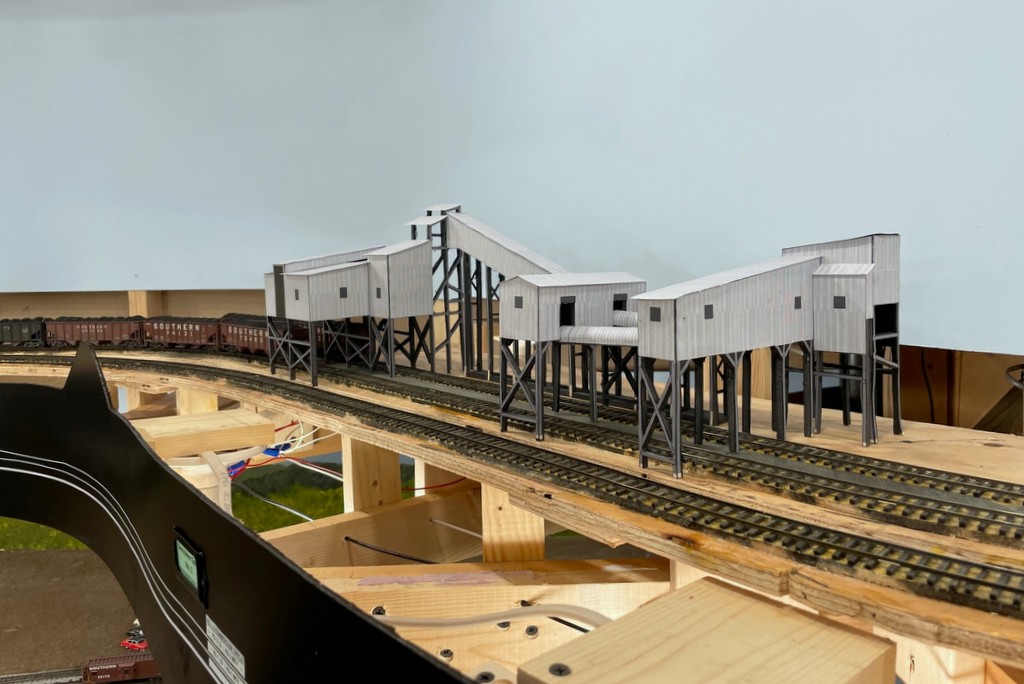
Newly completed Kemmerer Gem No.2 tipple mock-up on the Gin Creek Branch
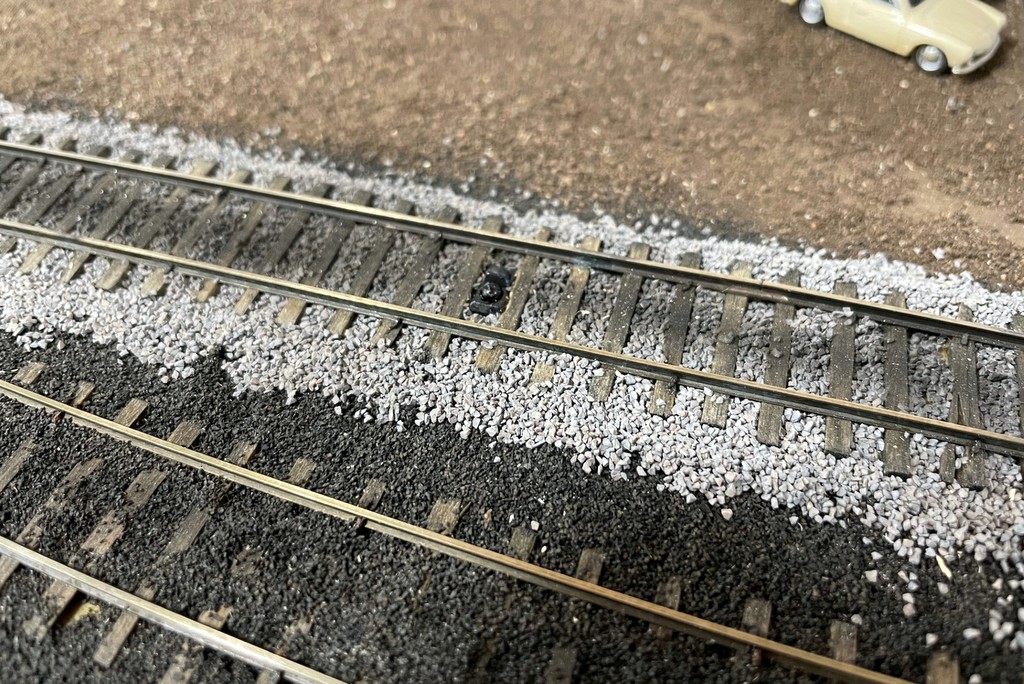
I’ve been working feverishly on the Gin Creek Branch which served the distinctive two-track loader at Kemmergem, VA. This branch occupies about 1/3 of my upper deck and is the first piece of the upper deck to be operational. I went out of my way to make the trackwork look like a well-used and minimally maintained branch with some crooked ties and rail. This branch is also laid out on an S-curve where you can look all the way down the straight portion where the loader will lie between the curves, and because of this curve, I think this might become the “signature scene” for the layout.
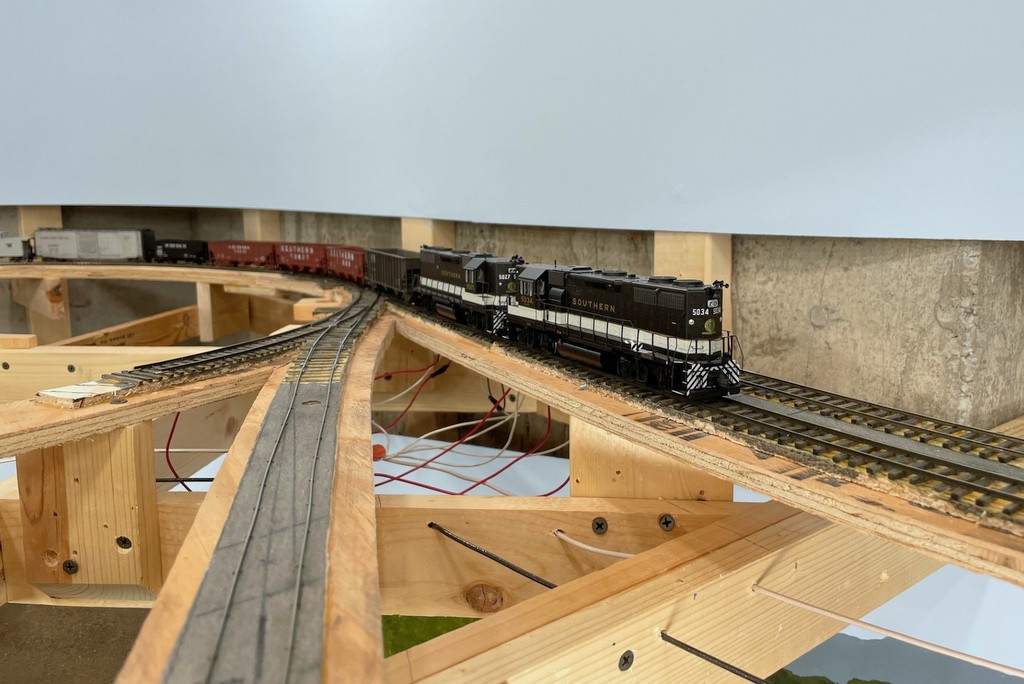
Here’s the first train on the upper deck rolling through the junction onto the Gin Creek Branch at Turners Siding
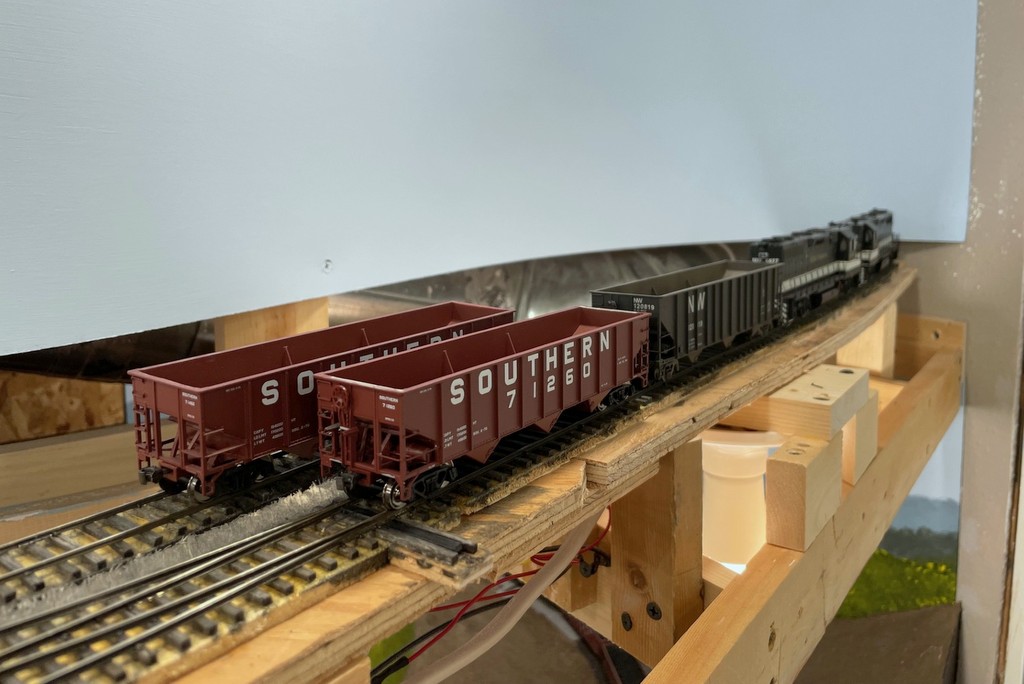
The tail track just barely holds two GP38s and two triple hoppers
To get things operational, I had to run the DCC bus wires and install manual switch mechanisms. At this point, I was able to run the first train to the upper deck and make sure everything worked. It’s a cool arrangement with double-ended loader tracks but a short tail track that barely holds two GP38s and two triple hoppers. I’ve also installed a stub track alongside the tail track for the Ralph Baker coal company that built a truck dump here in the late ’70s / early ’80s. Since I’m currently running the ’60s, I decided to use the track to house a small ramp-style loader (which will be replaced by Ralph Baker in late ’70s ops sessions). Switching the track arrangement is a lot of fun and requires some extra thinking since the spur to Ralph Baker is a facing-point stub track, and the only run-around is under the Kemmerer Gem No.2 tipple. You’ve got to place the cars for Ralph Baker and the cab behind the empties for the big tipple and then push them into the right tracks using the loads and empties under the big tipple.
View of the south end of the loader at Kemmergem
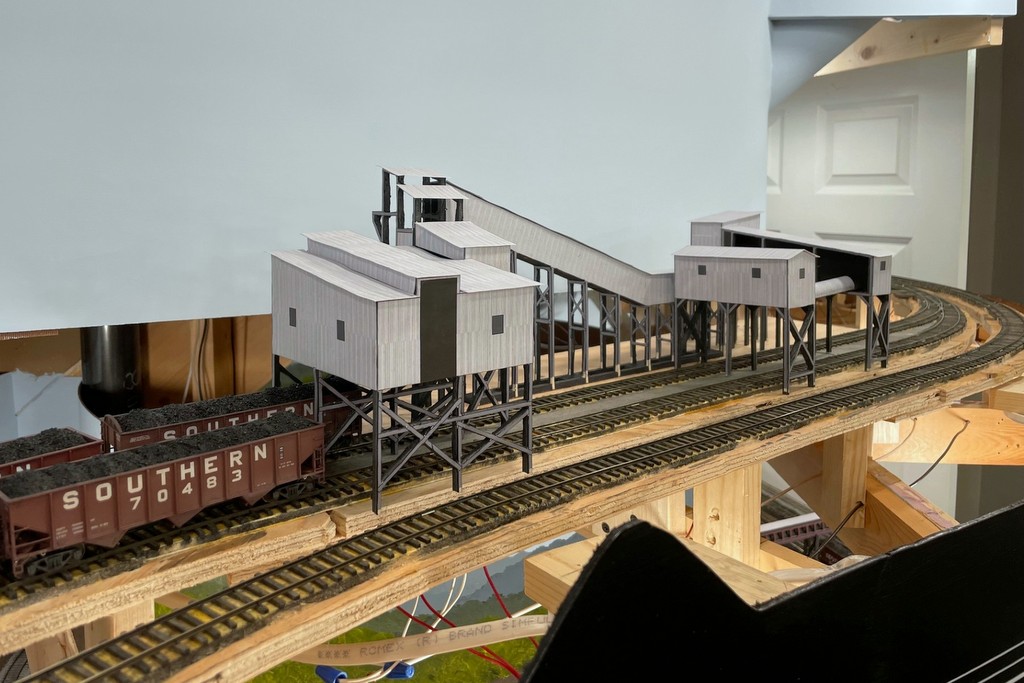
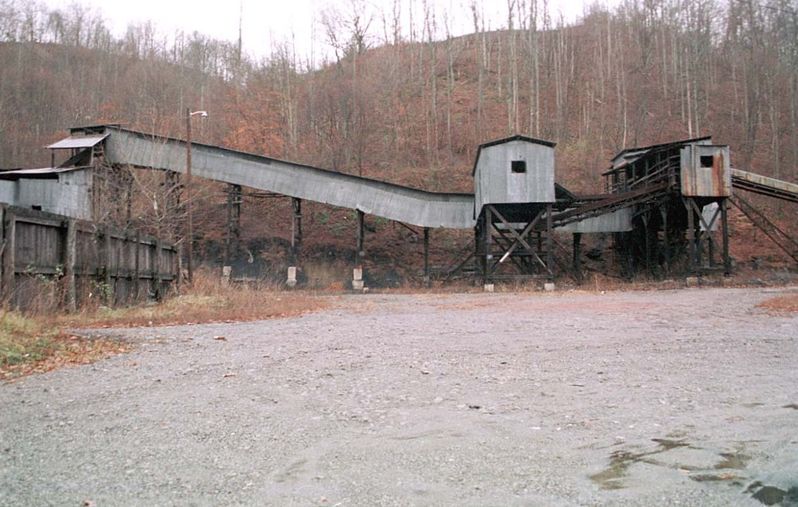
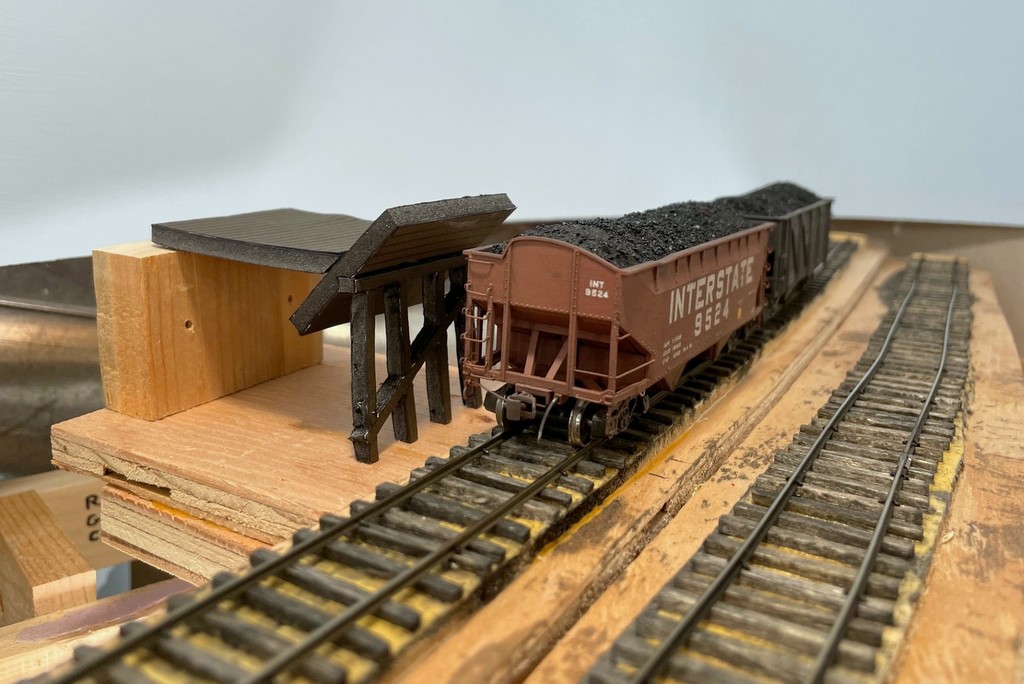
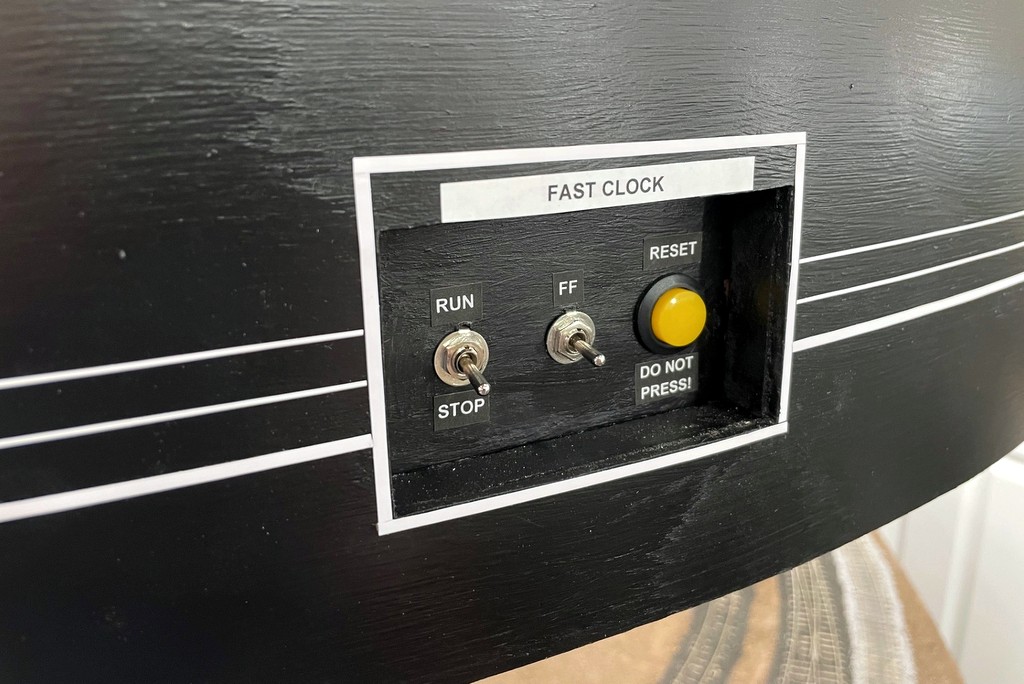
While it was “operational,” there was still no tipple, and the switches had to be thrown by reaching far under the layout. With an upcoming ops session, I was motivated to give it a bit more finish, so I cut and painted the fascia and put in the switch controls. I also took the opportunity to install my fast-clock controls in their permanent place, a little cut-out in the fascia. What’s a mine run without a loader, so I created another temporary “paper doll” mock-up from cardstock prints and foamcore for the Kemmerer Gem No.2 tipple. This is a really cool looking loader that has two loading points with a long covered conveyor between them making the thing look a bit like a corrugated diplodocus dinosaur. I created some drawings of a slightly compressed version based on a series of photos from the ’50s-’90s (it didn’t change too much) including some great detail shots by Robby Vaughn. While I was at it, I created a little temporary dock for the Ralph Baker spur (which I’m calling “Darbyville Dock” for the ’60s sessions). A couple of paint brush handbrakes on the steeper spotting locations, and the branch was ready for an ops session!
The prototype Kemmergem tipple shot by Robby Vaughn in the late ’90s
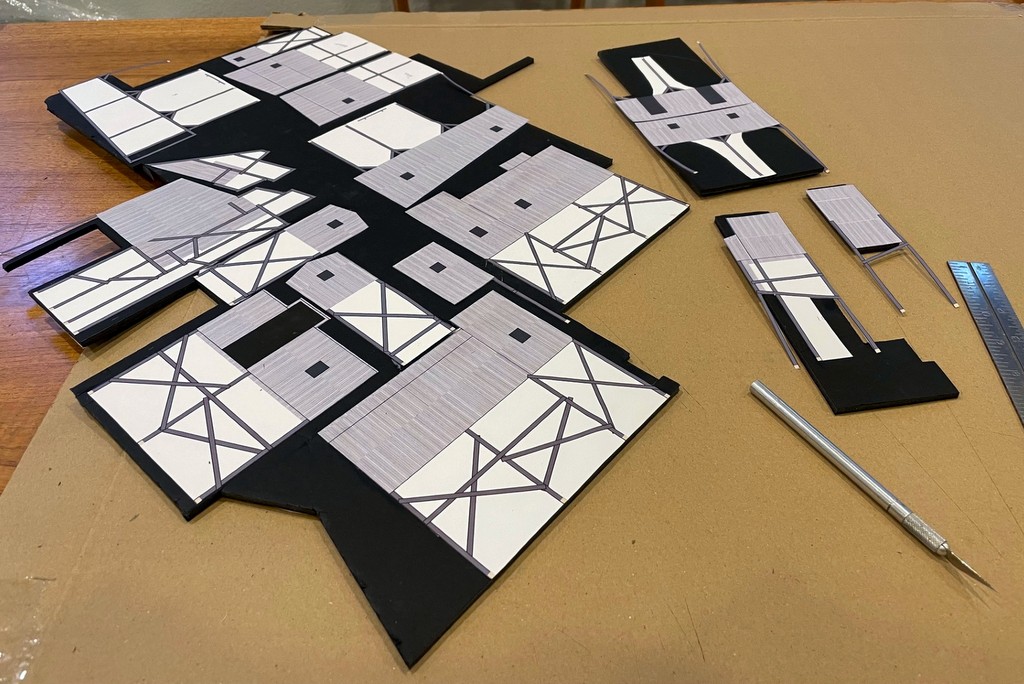
Gluing the prints onto foamcore for the tipple
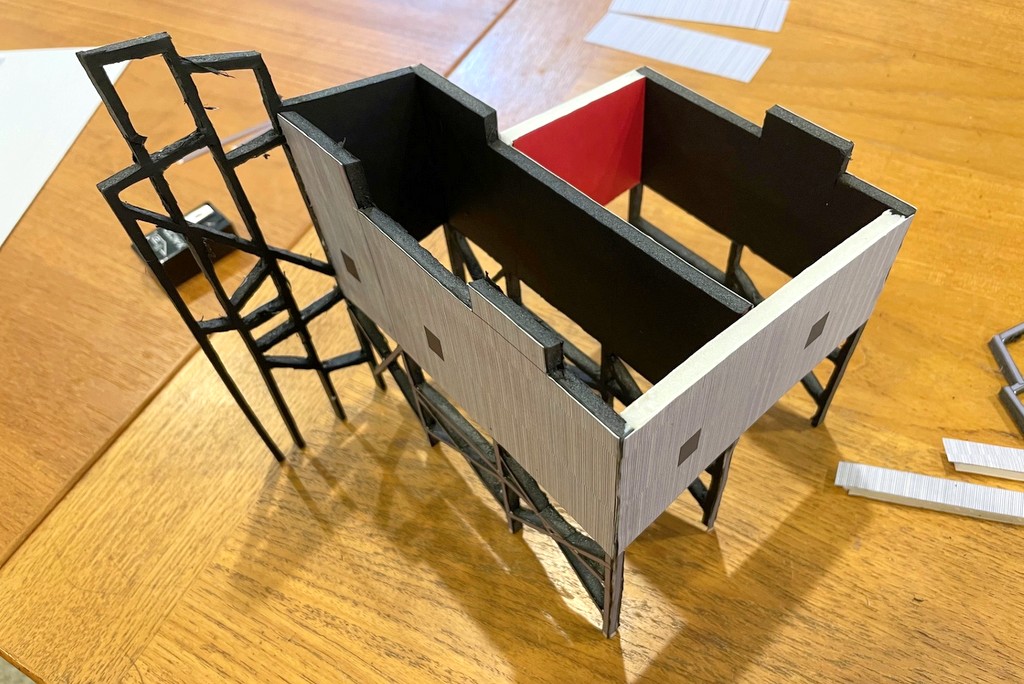
Mock-up for one of the two loading points waiting for a paper roof
Mock-up of “Darbyville Dock” at the end of the Gin Creek Branch–note the gnarly trackwork on the tail track to the right
Here’s the finished fast-clock control panel recessed into the upper deck fascia.
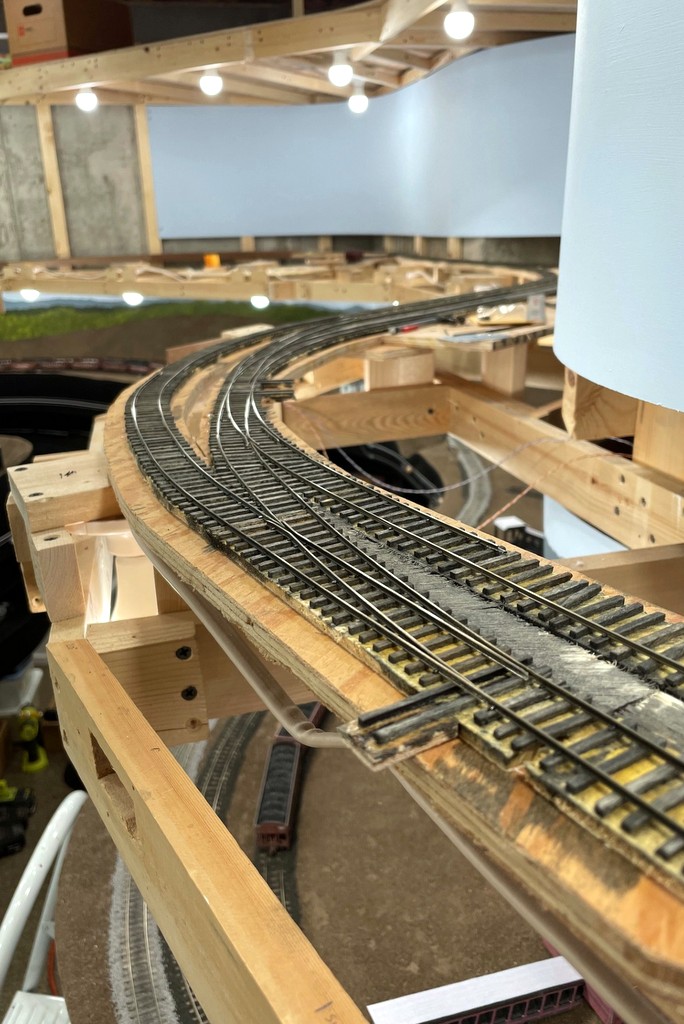
Rails for the Kemmergem Loader are almost complete
Progress on the upper deck is now in full swing! I’ve got the ties, some of the rail, and the backdrop for the Gin Creek Branch (Kemmergem) in place. This is the first rail I’ve laid on the upper deck, so it’s been good to knock the rust off. It’s been a good reminder that I really enjoy hand-laying track and find it relaxing. I’ve also finally followed through on a promise I made to my wife nearly 5 years ago to add some storage above the layout. It is nice being able to get some things off the floor and out of the way. Next step is finishing the rails and adding the wiring for the track.
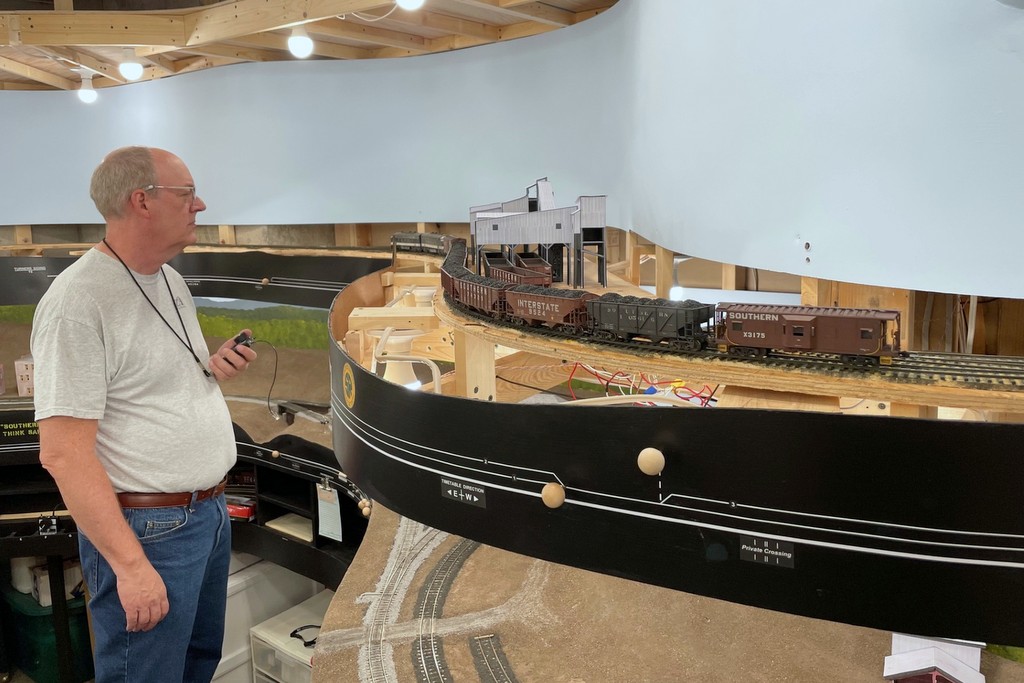
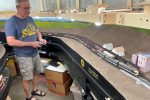
My son recently got married, and his wife’s father came over to run some trains
On another note, my oldest son got married this month! His wife’s dad likes model trains, so it was fun having him over for a little impromptu ops session running the mine run to Mayflower.
Ties in for the Kemmergem loader
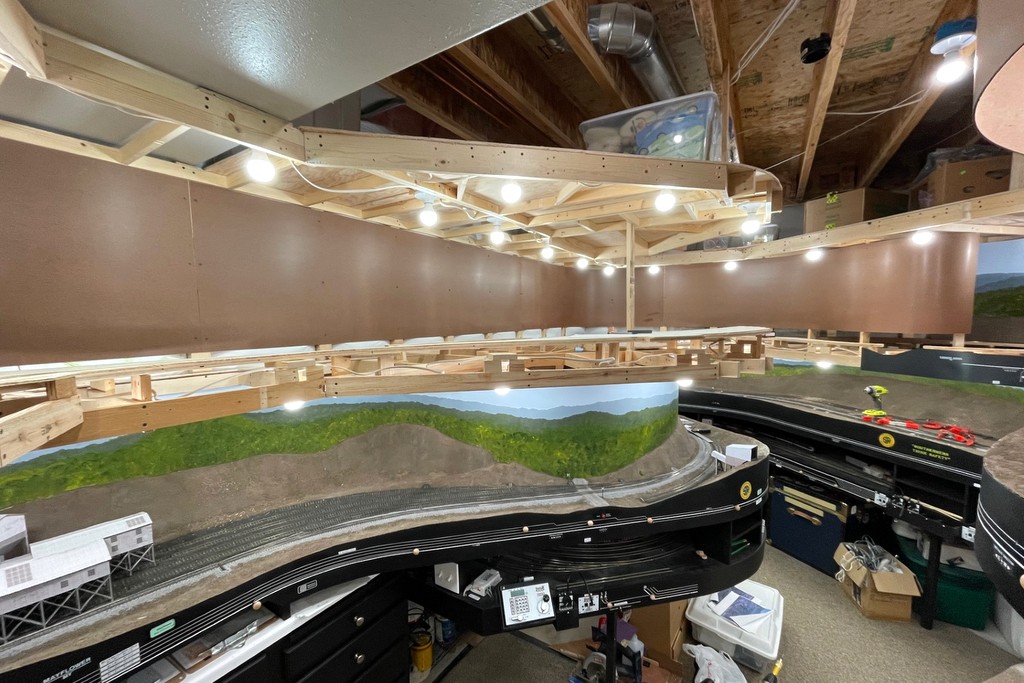
The upper deck backdrop is 24″ tall to create some distance from the lighting valance benchwork
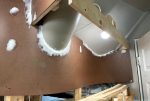
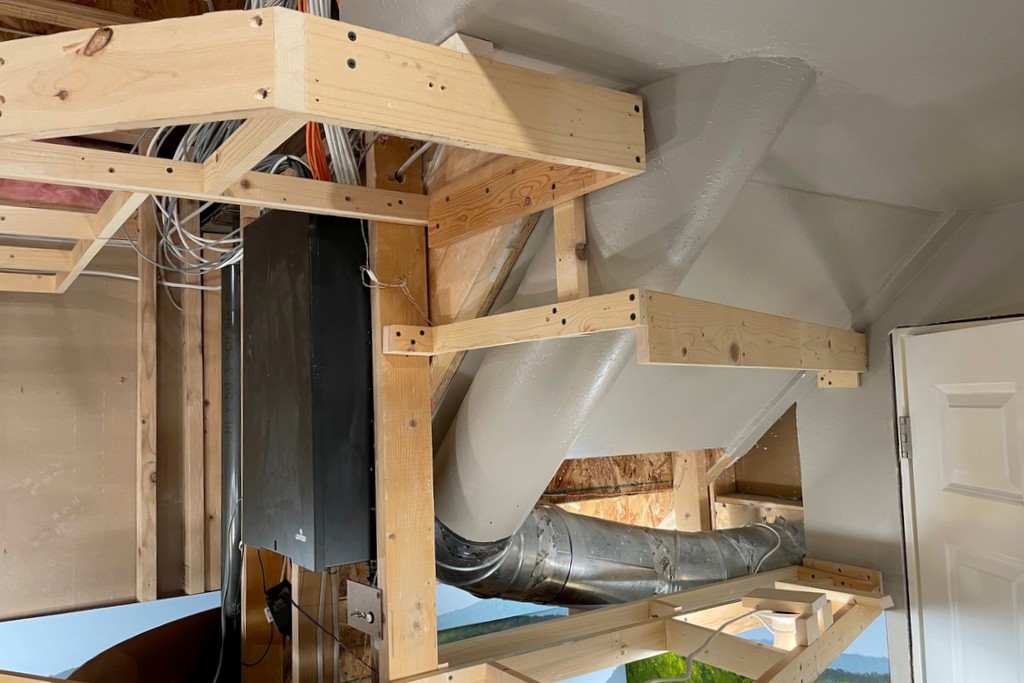
The end of the Gin Creek Branch goes under the stairs and an air duct–this was by far the most challenging piece of backdrop to install!
Amazing what a lick of paint will do!
First rail laid on the upper deck! This is the junction of the Black Mountain main (left) and the Gin Creek Branch to Kemmergem (right)
The grungy, little used spur for the lumber yard and mining supply at Turners Siding–this is the only piece of code 55 rail so far, and I plan to bury it in dirt, so why bother with ties
My wife is very happy that after nearly 5 years I’ve delivered on the promise of adding some storage above the layout
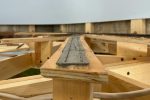
Aluminum foil IR reflector installed on the coupler of an Intermountain F7A
When I installed my automatic detection circuit for crossing signals using infrared (IR) sensors from the WeHonest company, I installed them between the ties. They were initially a bit too sensitive, but after a while of running and changing out lighting to LEDs, the sensors weren’t quite sensitive enough. They would often miss a passing train which is annoying and not up to my standard for how I want things to run on the layout. After reading up online about how this type of sensor works, I tried a super simple and cheap solution that now has them detecting every time!
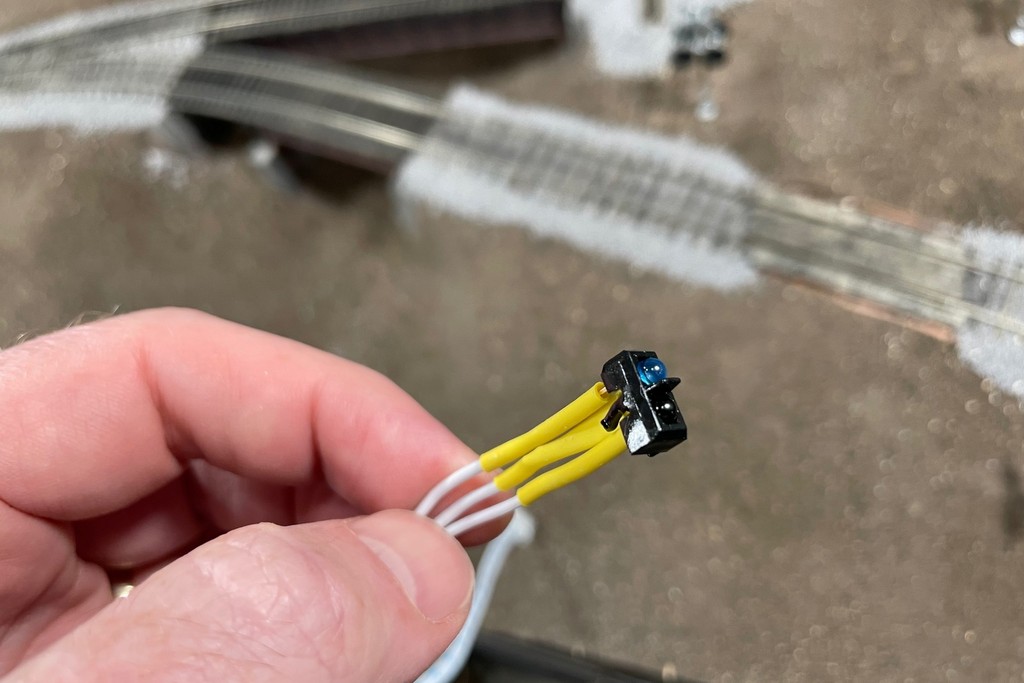
The WeHonest IR sensor uses an IR transmitter (blue dome) and an IR detector (black dome)Here’s a WeHonest IR sensor in place between the rails
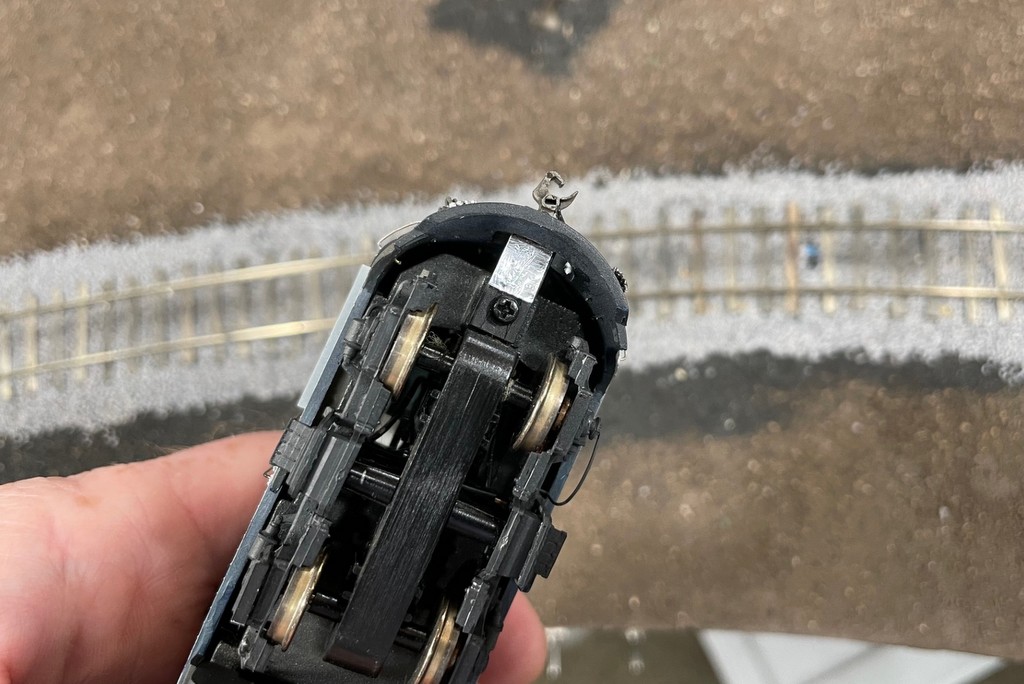
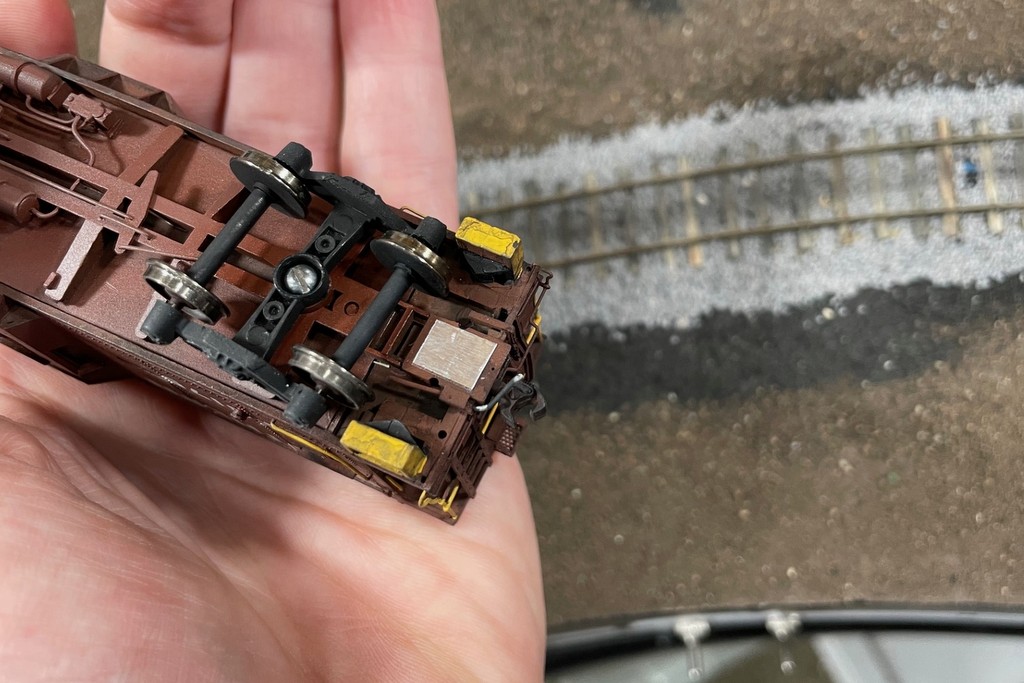
The WeHonest IR sensors are a single unit. unlike paired sensors that detect a break in the IR beam, the single units use a paired IR LED (bluish dome) and IR detector (black dome) and rely on reflected IR energy to close the circuit. Since the bottoms of most of my locomotives and freight cars are flat black, I wondered if they weren’t reflecting enough energy to trip the sensor. To improve the reflection, I stuck a piece of double-sided Scotch tape to a piece of aluminum foil and cut small reflector squares to attach to the bottom of locos and cabooses. I attached them under the coupler, behind the coupler, and even on the bottom of the truck–wherever I could get some good adhesion along the centerline (where my sensors are mounted). It doesn’t have to be perfectly flat because the IR transmitter and detector seem to have reasonably wide beams, so they’ll work with IR reflected at an angle. With just this tiny and simple modification which is invisible from trackside, the IR sensors now work every time without fail!
Reflector installed at an angle behind the coupler on an Athearn RS3
IR reflector installed on the bottom of an Intermountain F7A truck
Aluminum foil IR reflector installed on a caboose
One concern I have is a piece of conductive material coming loose on the tracks. To mitigate the chance of a short, I cut the rectangles small enough that they can’t bridge the rails in case they accidentally detach in a spot of hidden trackage. They could cause a short if they come loose on a switch, but all my switches are easily reached, so the reflectors would be easy to spot and clear. Thought I’d pass this trick along in case anyone else is struggling with the same issue.
***UPDATE***
This technique worked so well I added tiny rectangles of aluminum to the underside of every car on the layout. It’s easy to find a spot on a coupler pocket or on the center sill that can’t be seen while it’s running. Now there’s almost zero drop out for the signals while a train is crossing.
The CV Local heads up the Baileys Trace Branch to work Mayflower
Yesterday marked a small (two people) but fun operating session with Patrick Tillery. We ran four trains including three mine runs (two Southern and one L&N) and the St Charles Local which delivered a fresh set of empty hoppers in exchange for the loads waiting in St Charles. There were a few notable “firsts” in this ops session:
First use of 3:1 for the fast clock–it was previously at 4:1, and 3:1 works much better with all the switching
First video recorded! Managed to catch the last 1/3 of the last mine run, so enjoy!
Learning points and observations:
We were able to stick pretty closely to the crew call and timetable times without rushing.
I’m happy with the amount of work Train 61/60 has to do. I was originally worried it would be boring because it’s role is so simple: bring up empties to set off in St Charles Yard, pick up loads in the yard and head back to Andover (staging). However, the yard is only big enough to hold the loads or the empties, not both. This leads the crew to use the wye to turn the train and start building the outbound train on the main to make room for the set outs. Add to that the semaphore that protects the branch where the L&N is working, and it means Train 61 has to make the shove into the yard in 2-3 cuts instead of all at once without messing up its blocking too bad. This adds up to a decent bit of work that took more than 2 fast-clock hours, about the amount of time this train was given in the prototype timetable.
Patrick commented that the momentum in the locos forces you to take it slow, and that’s a good thing. With two-person crews for the two biggest mine runs, there were plenty of “2 cars… 1 car… that’ll do” with enough anticipation that a throttle cut and coast would lead to a gentle couple–it really adds to the realism and challenge, in my view, and it feels a whole lot more like running a train than having no momentum.
I’m also extremely happy with the SoundTraxx Tsunami2 decoders in all 5 of the Southern F-units and single L&N RS3 that were used. Their “Dynamic Digital Exhaust” (DDE) feature works perfectly with the grade contours and switching style of operations on my layout. I don’t have to touch anything but the throttle knob (no manual notching, no “drive hold”), and the prime mover automatically notches up when it’s working hard upgrade, notches down when it’s moving downgrade, and surges briefly when I give the throttle a little “kick”. Love it!
The track worked mostly flawlessly… mostly. One switch point seemed to be sticking a bit after the ballast work, and it picked a couple of trucks–it’s fixed now. Still waiting for the first ops session that’s 100% trackwork trouble free, but it’s getting close.
This might be the last “single deck” ops session. I hope to start work on laying track for Kemmergem on the upper deck very soon!
Train 61, the St Charles Local, has the yard full dropping off empties and picking up loads
The Black Mountain Local runs around cars for Baker at Mayflower–this is the maiden ops session for the new “Brosnan Brown” caboose
The Black Mountain Local eases down to Baker to swap out three “yellow ball” empties for three loads
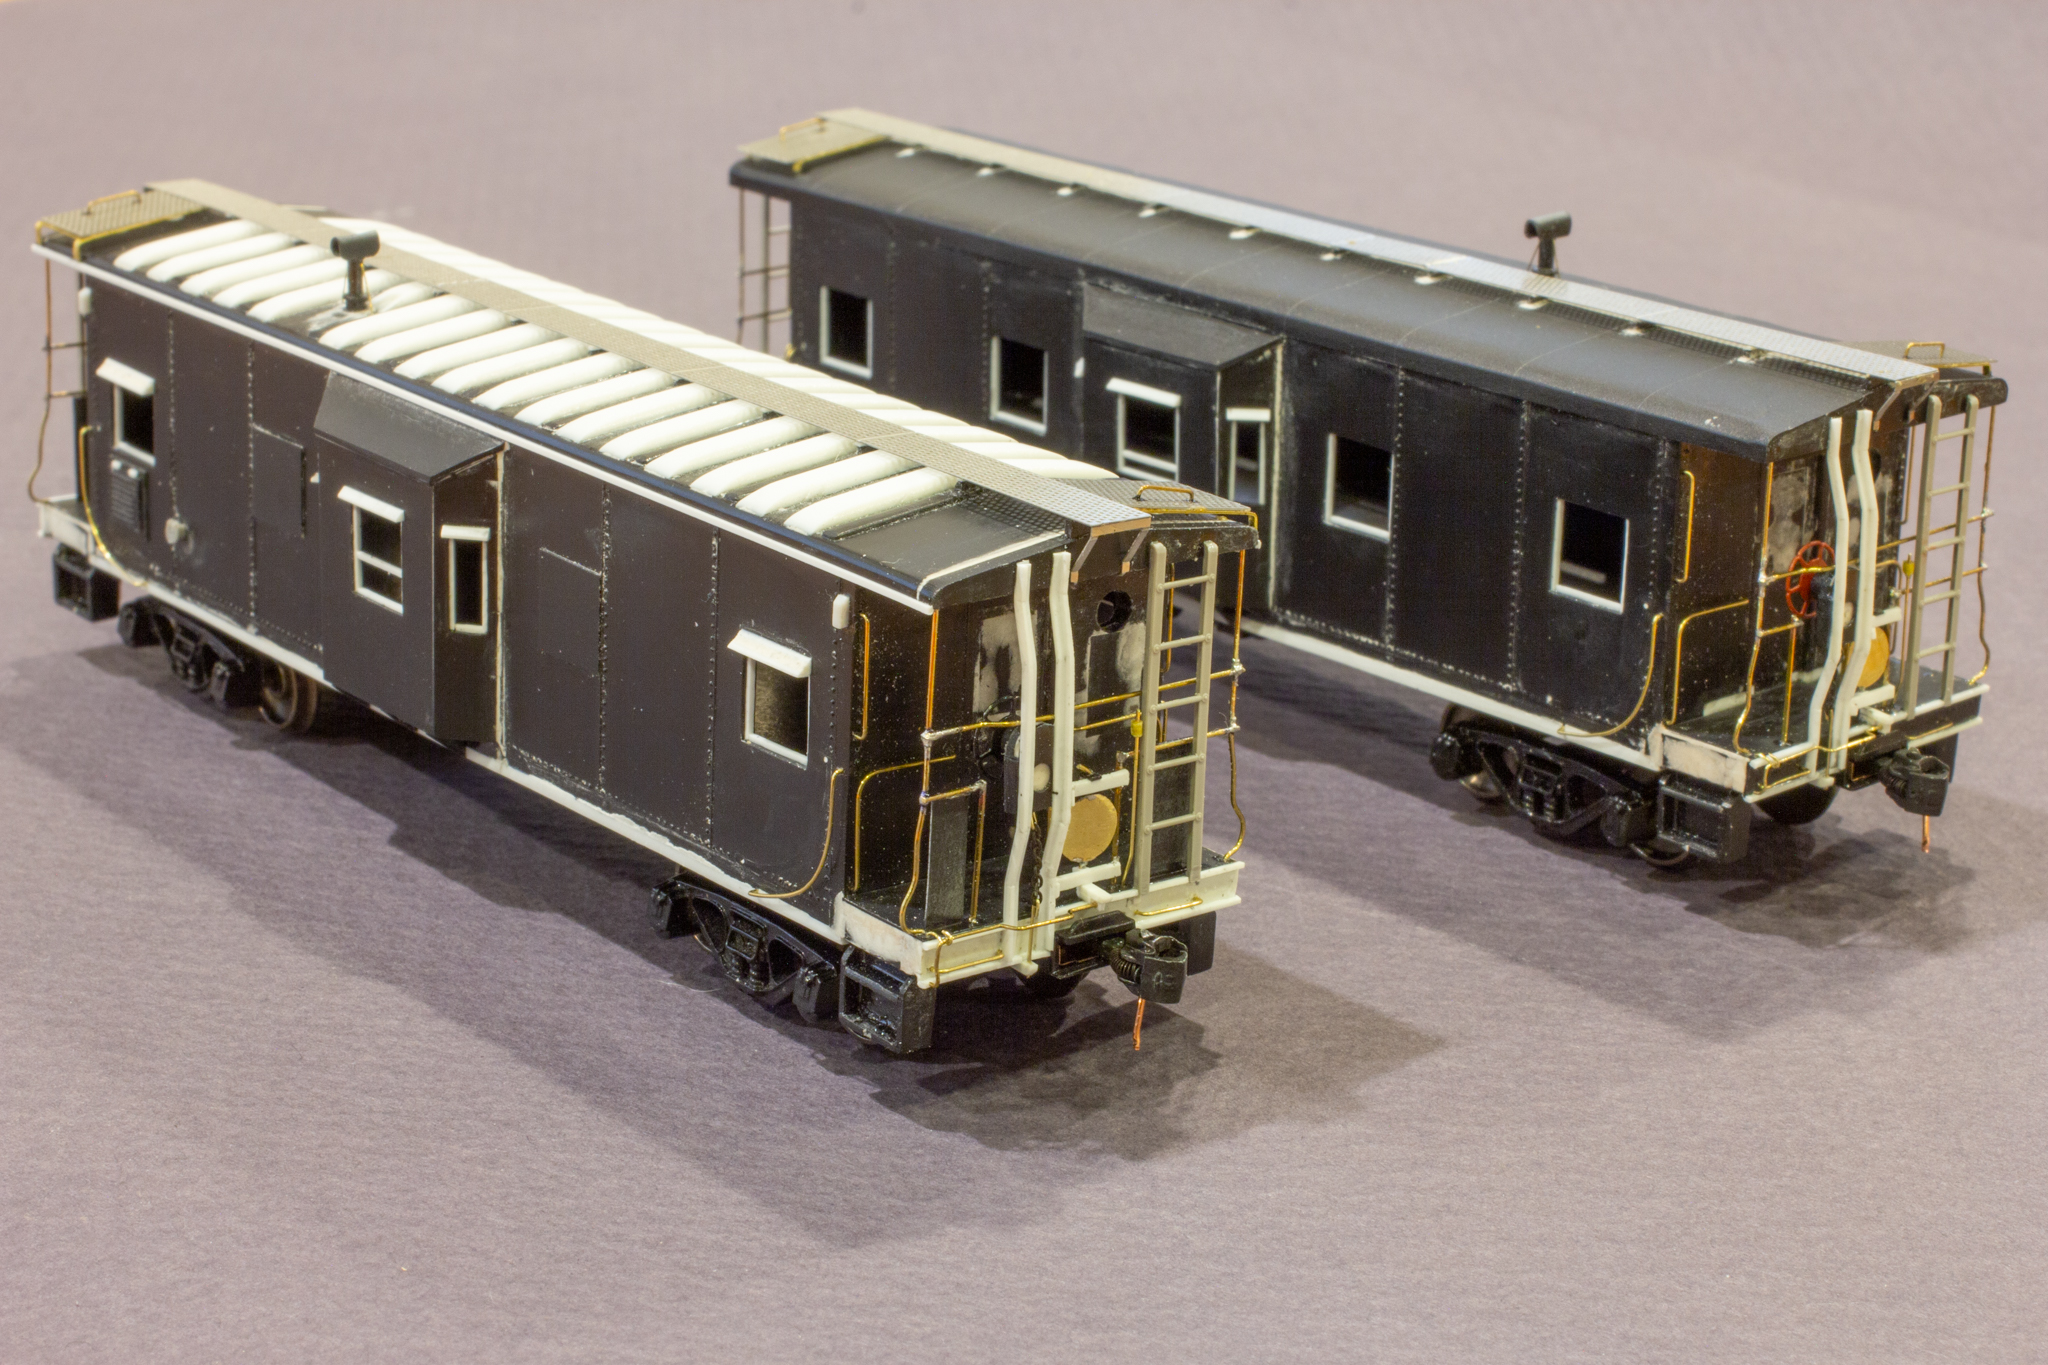
HO-scale Southern Railway modelers all know that it’s tough to model a Southern bay-window caboose! There are some resin kits that are pretty complicated, some brass models, and kitbashing an Athearn (or other) incorrect bay window model into something credible. I’ve been avoiding this project for years (both on this layout and my last) because I knew how much work it was going to be, and I had to be in the right mood. I’ve been working on this pair of Athearn kitbashes for about six months, and I will tell you it’s the most challenging modeling project I’ve ever completed!
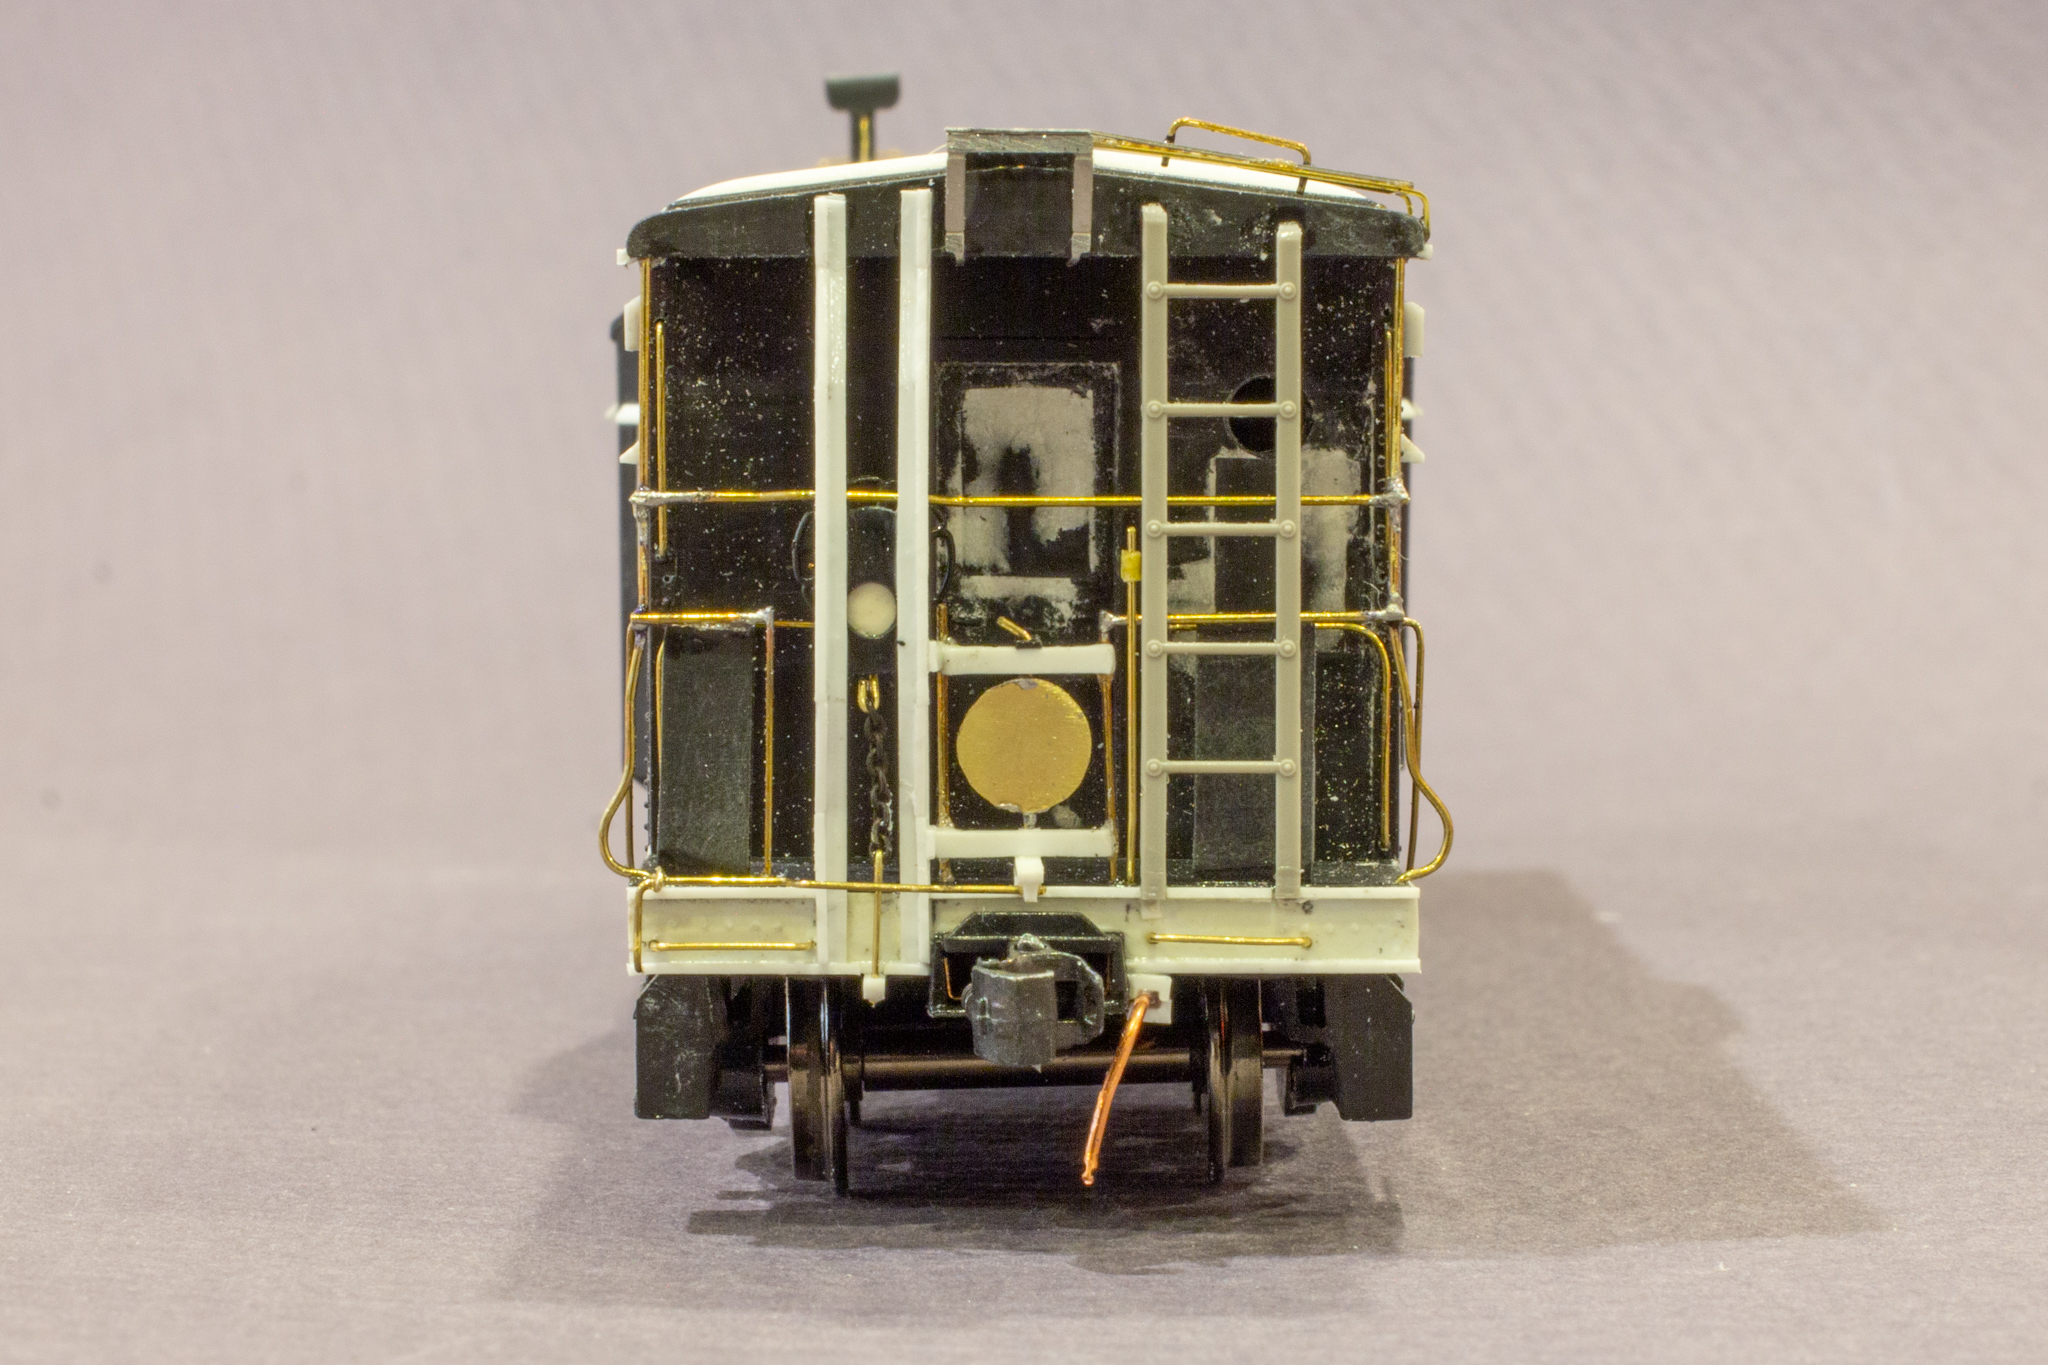
The basic Athearn body, modeled on a Southern Pacific caboose, is within 6″ of the prototype in length, and the body is the right height, but that’s about where the similarities end. It needs windows to be added an enlarged, a completely new bay window, roof extension, porch reduction, truck lowering, and step recreation. In the case of these ’60s era cabs, it also needs a new roof. Once you’ve got all these modifications made, you’re about halfway done because the ends are crazy with complicated bar arrangements, a unique brakewheel bracket, ladders, and circular marker panels. When complete, this kitbash still has windows and length that are slightly off, and the truck spacing is a bit narrow, but it’s a pretty credible representation.
Pictures of the completed kitbashing just prior to painting–the main materials are white and black styrene and brass wire
View of a finished end prior to painting–there are upwards of 50 different pieces that make up each end!
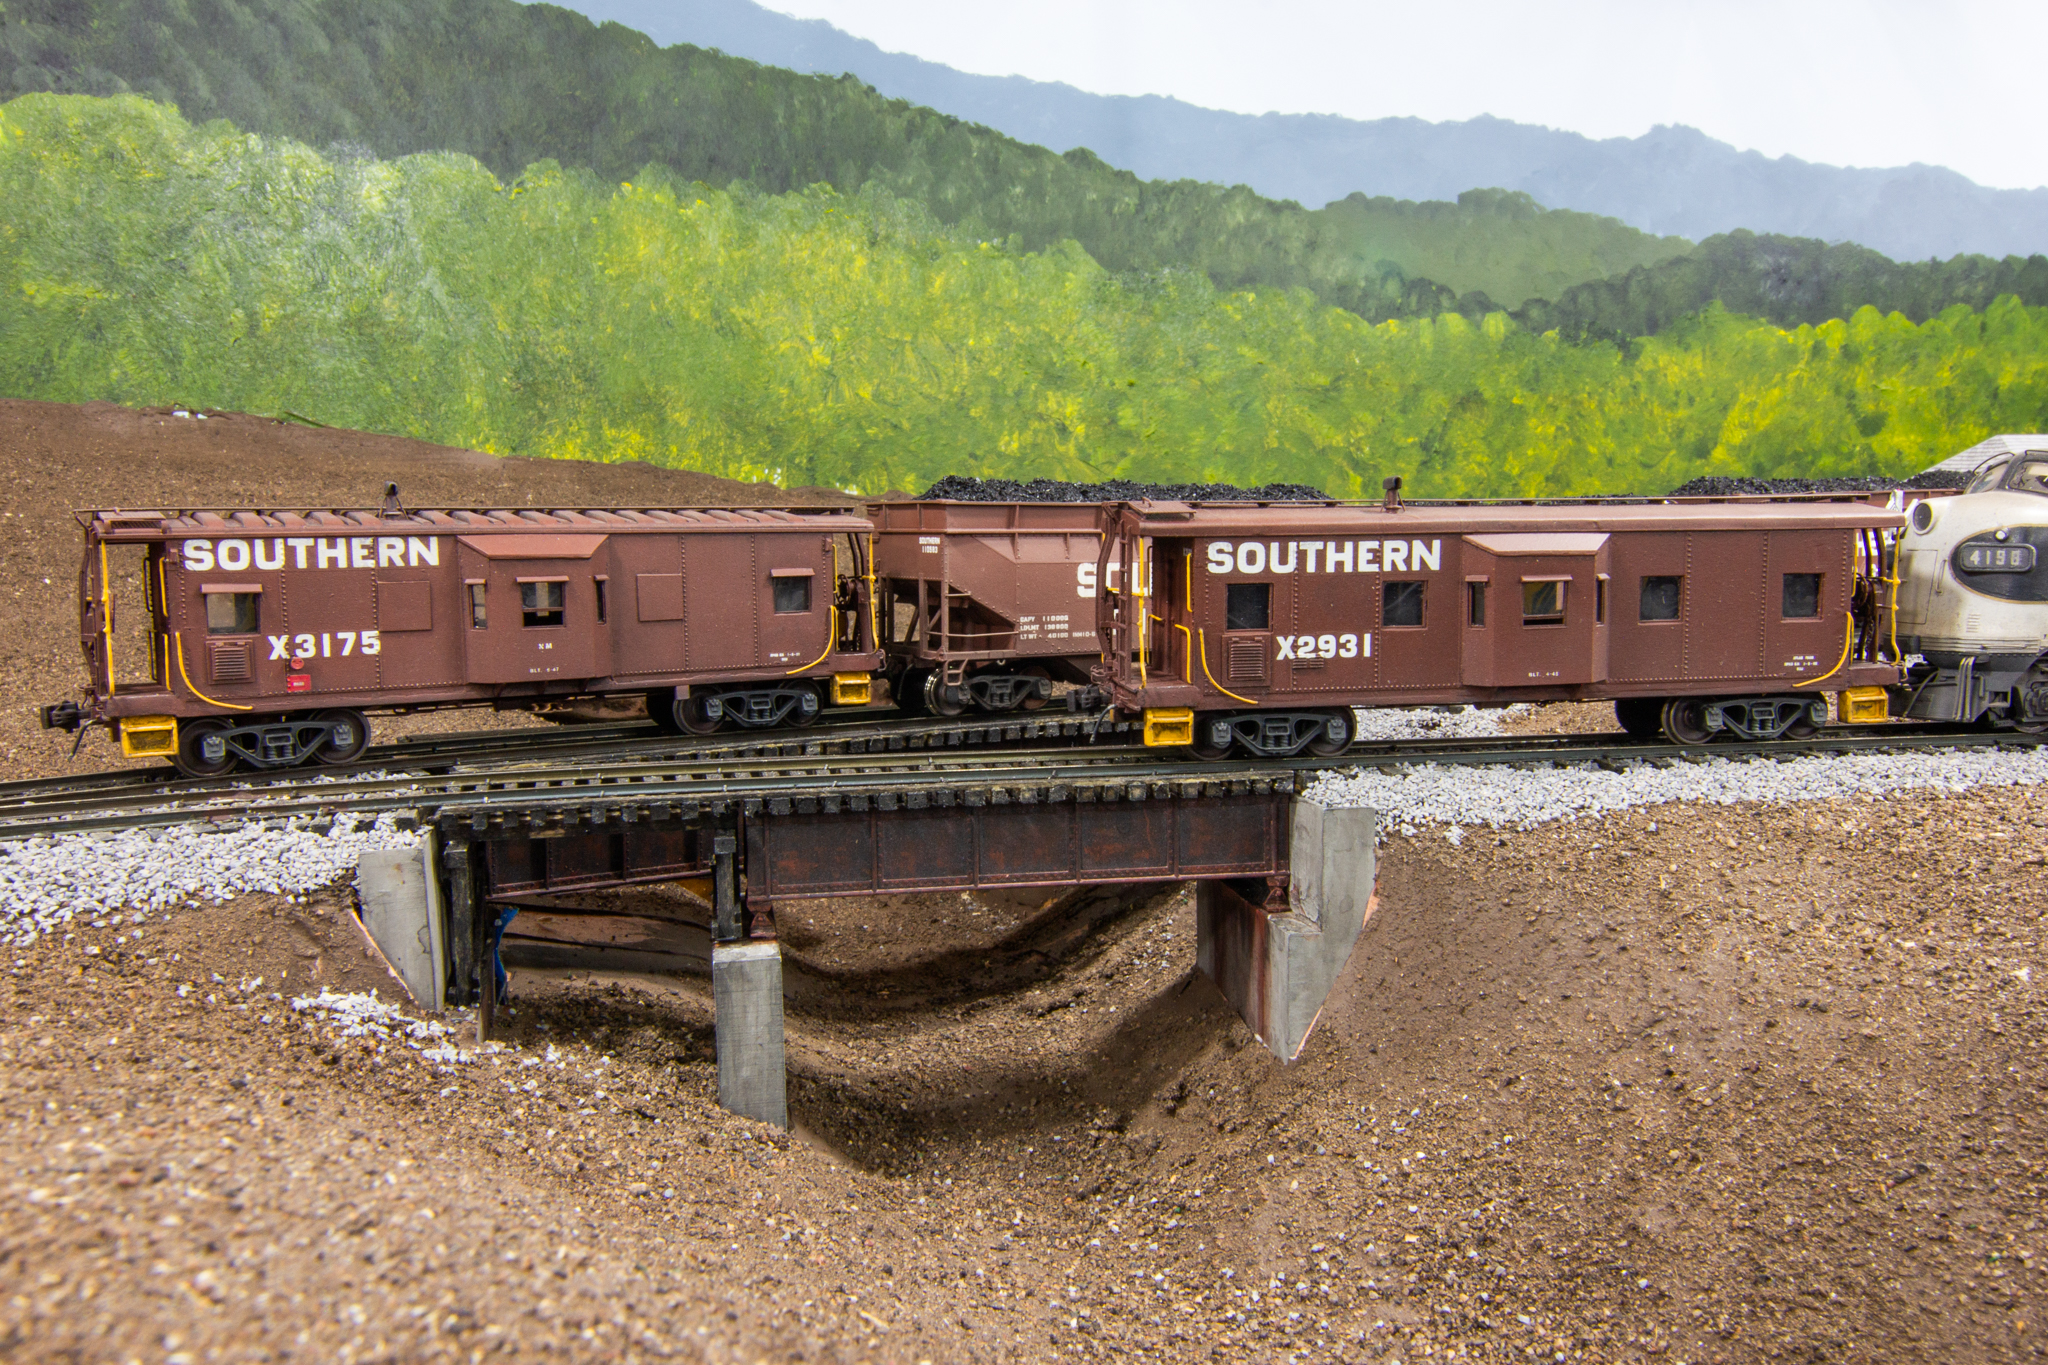
Most Southern fans are familiar with red cabooses, either the original red and gold scheme or the more modern red and block lettering scheme that made it to the NS merger. In the middle, during the Brosnan presidency of the Southern in the 1960s, cabooses were painted the same brown color as all the other Southern cars as a cost saving measure… the red paint wasn’t any more expensive, but Brosnan reasoned it saved the time of having to swap out paint colors in the shops. Needless to say, one of the first changes after Brosnan left was to reinstate the familiar red. Since I model the late ’60s (at least for my initial era), I needed at least two of these brown cabs.
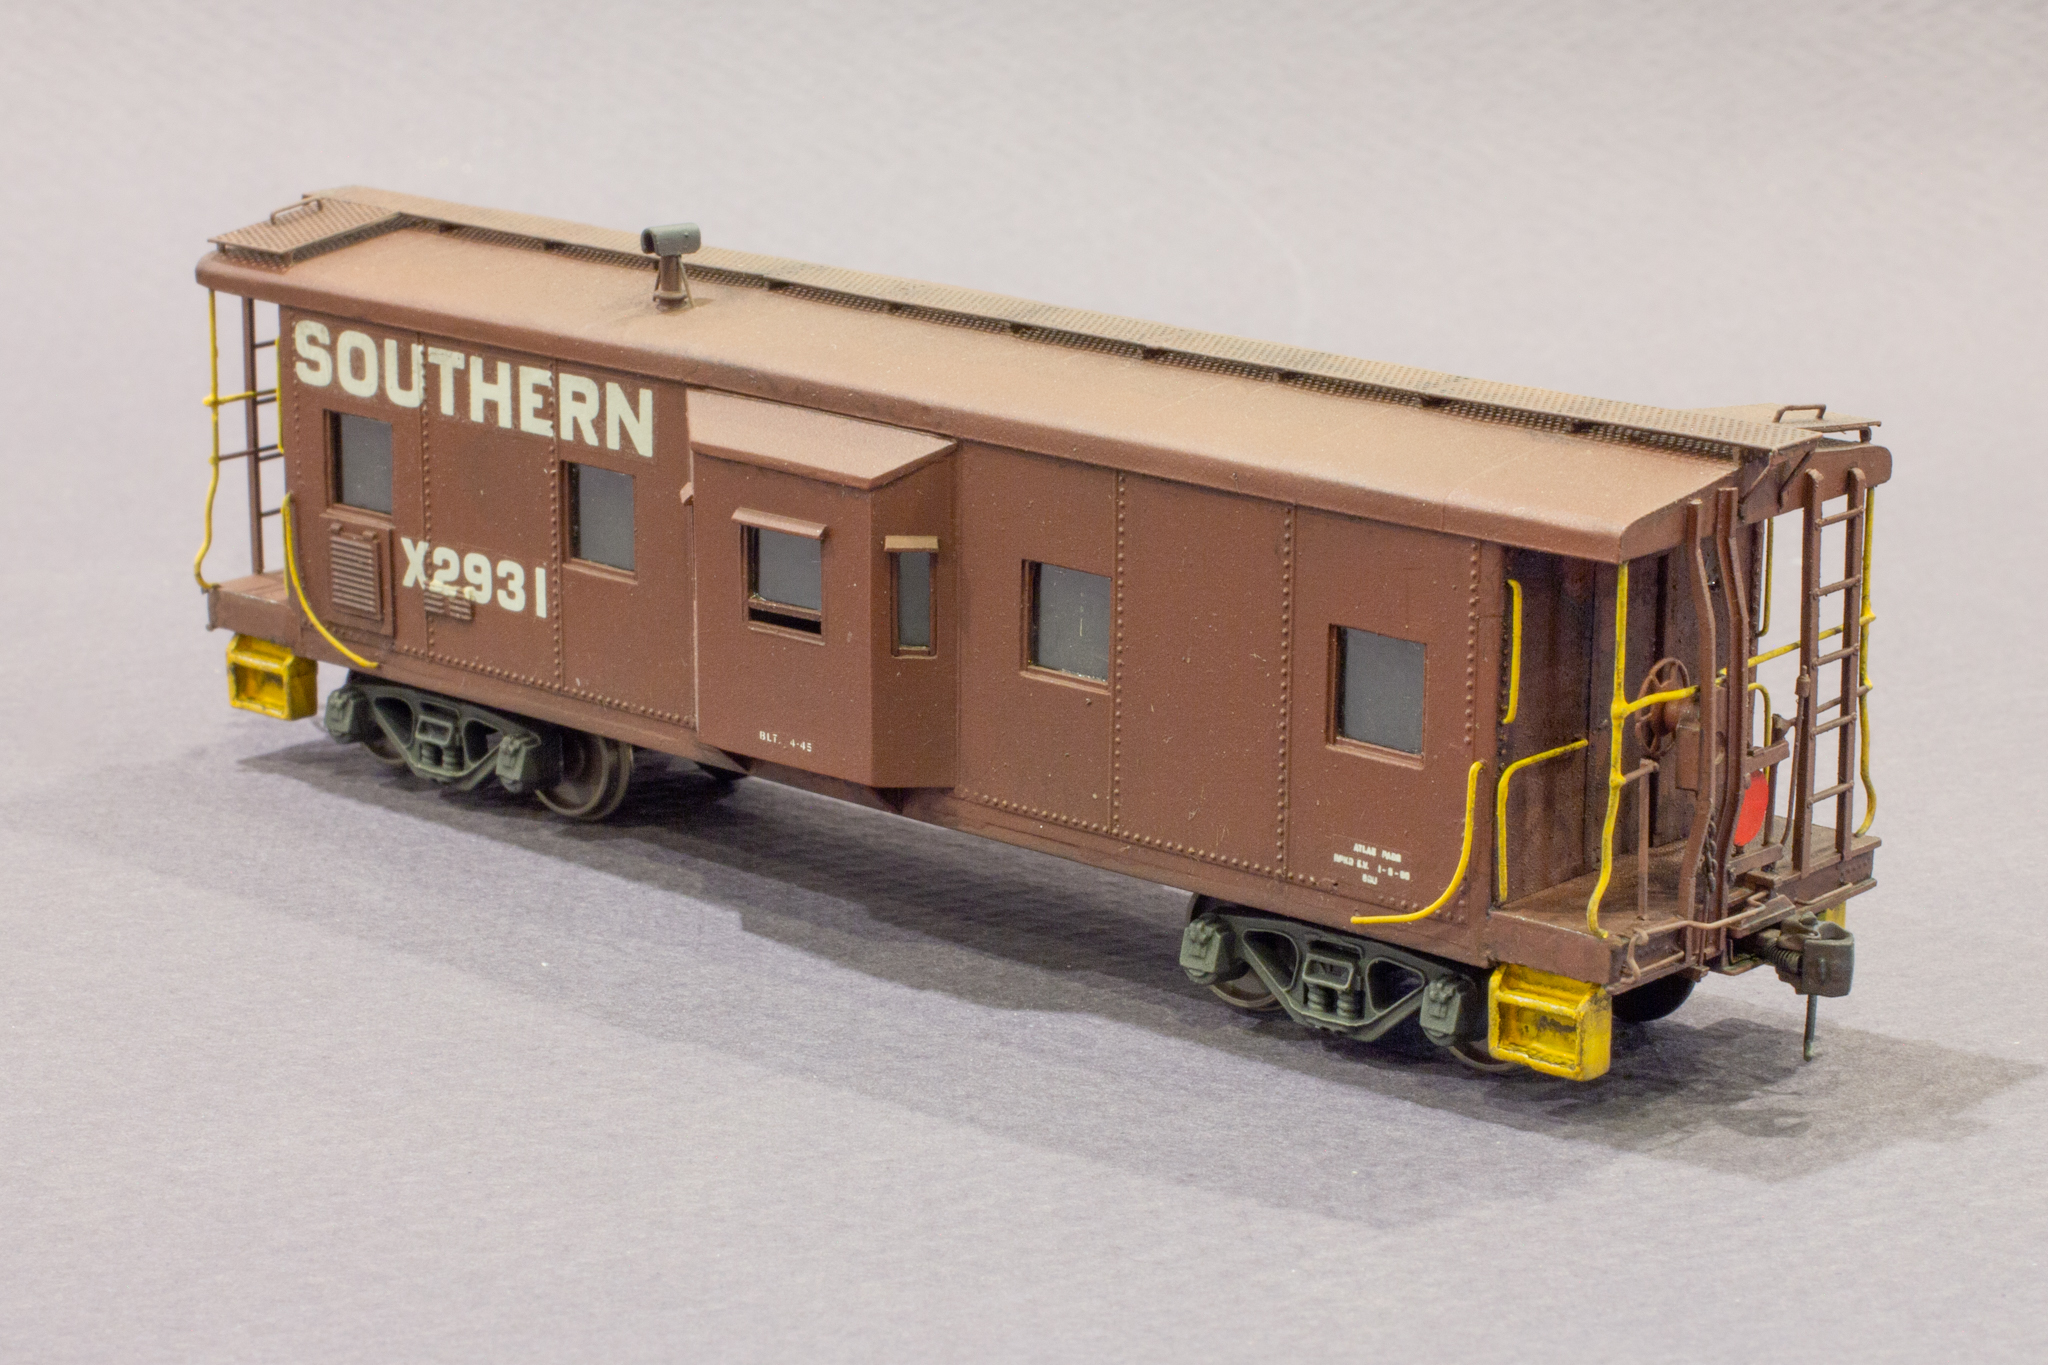
Cab X2931 is an earlier model with round roof, all windows intact, and some of the sunshades removed
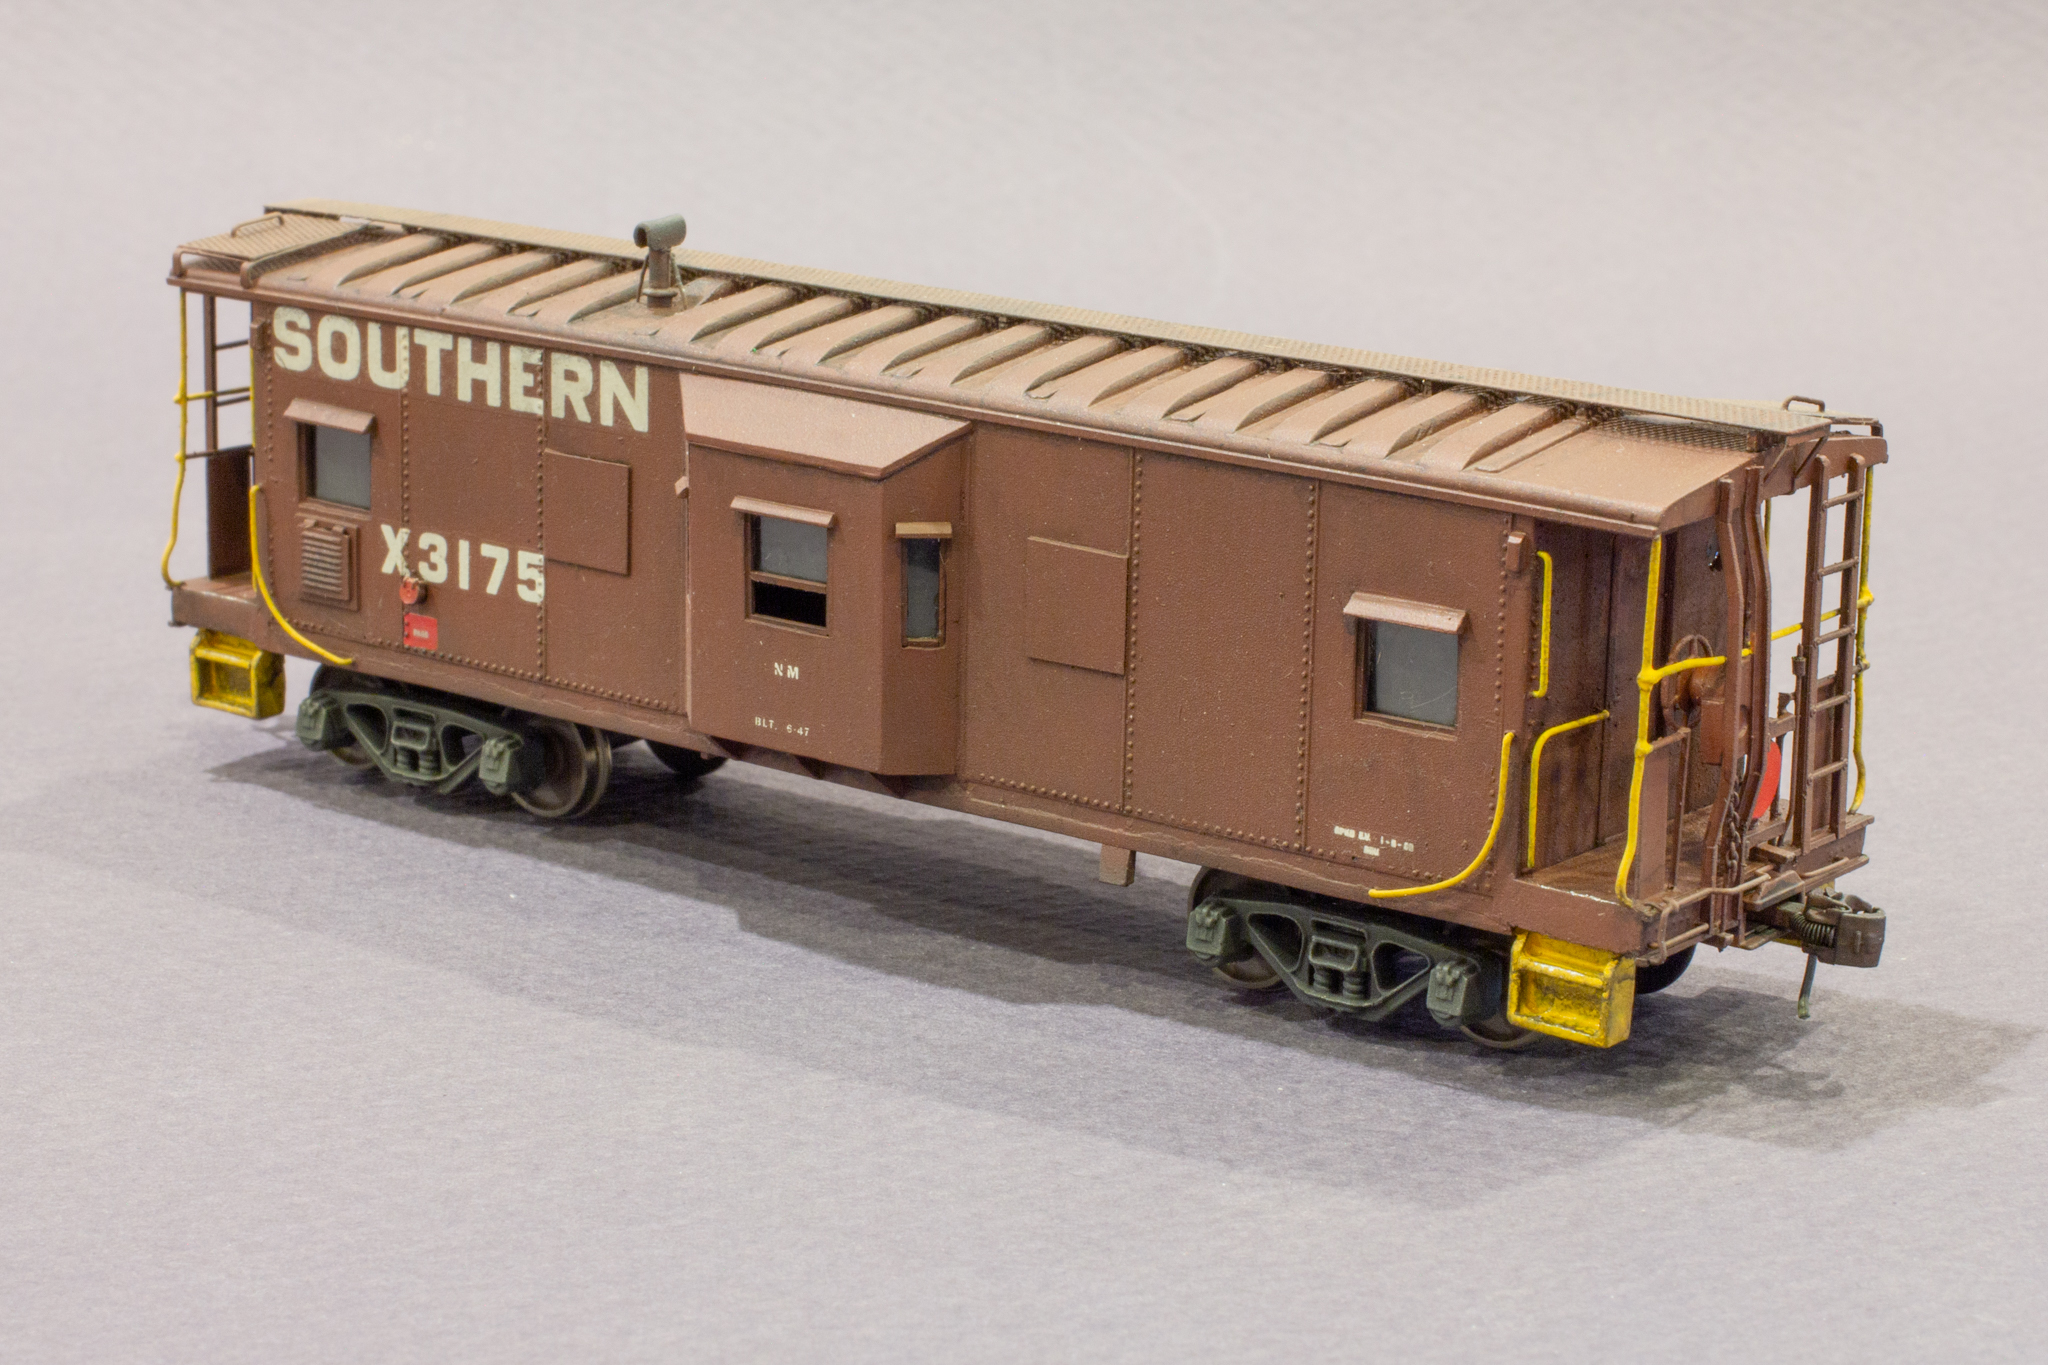
X3175 is a slightly later build and features a unique paneled roof, some windows blanked out, and sunshades intact
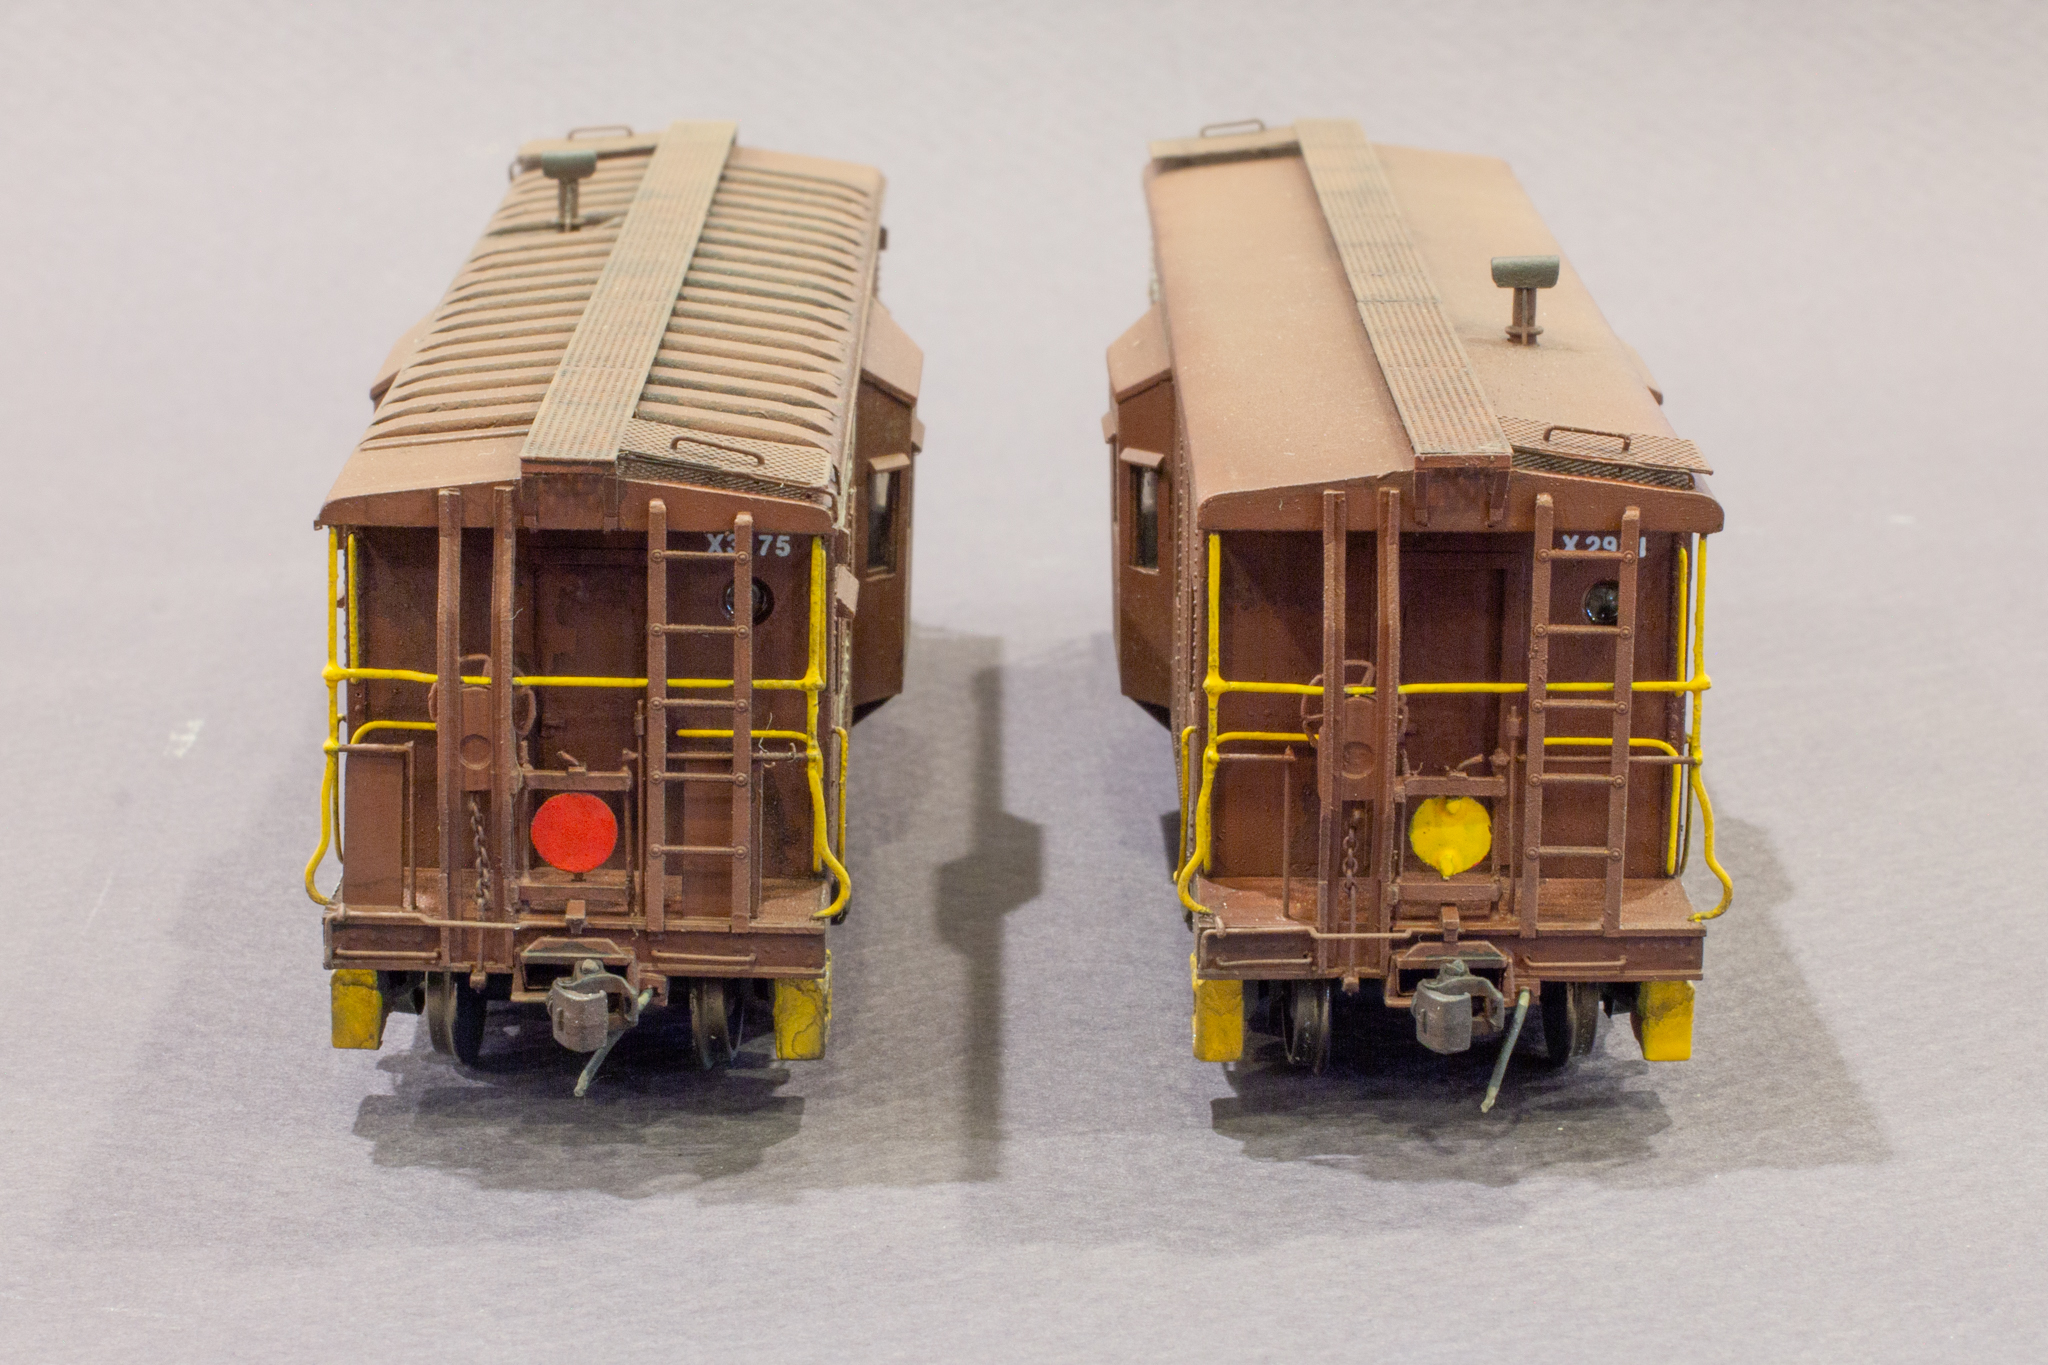
Finished ends showing the different marker panels–they can be turned with a toothpick
Despite how much work they were, I’m really happy with how this pair turned out! These represent cabooses originally built in the ’40s, and each sports slightly different variations and modifications including different roof styles, blanked out windows, and variety on window sunshade use. I’ll also point out that the marker panels on the ends are functional, and either red or yellow can be displayed, like the prototype. I’m not sure if I’ll incorporate that into operations, but I probably will. Now that these are complete, I can finally run a complete train with accurate and weathered engines, hoppers, and now cabeese.
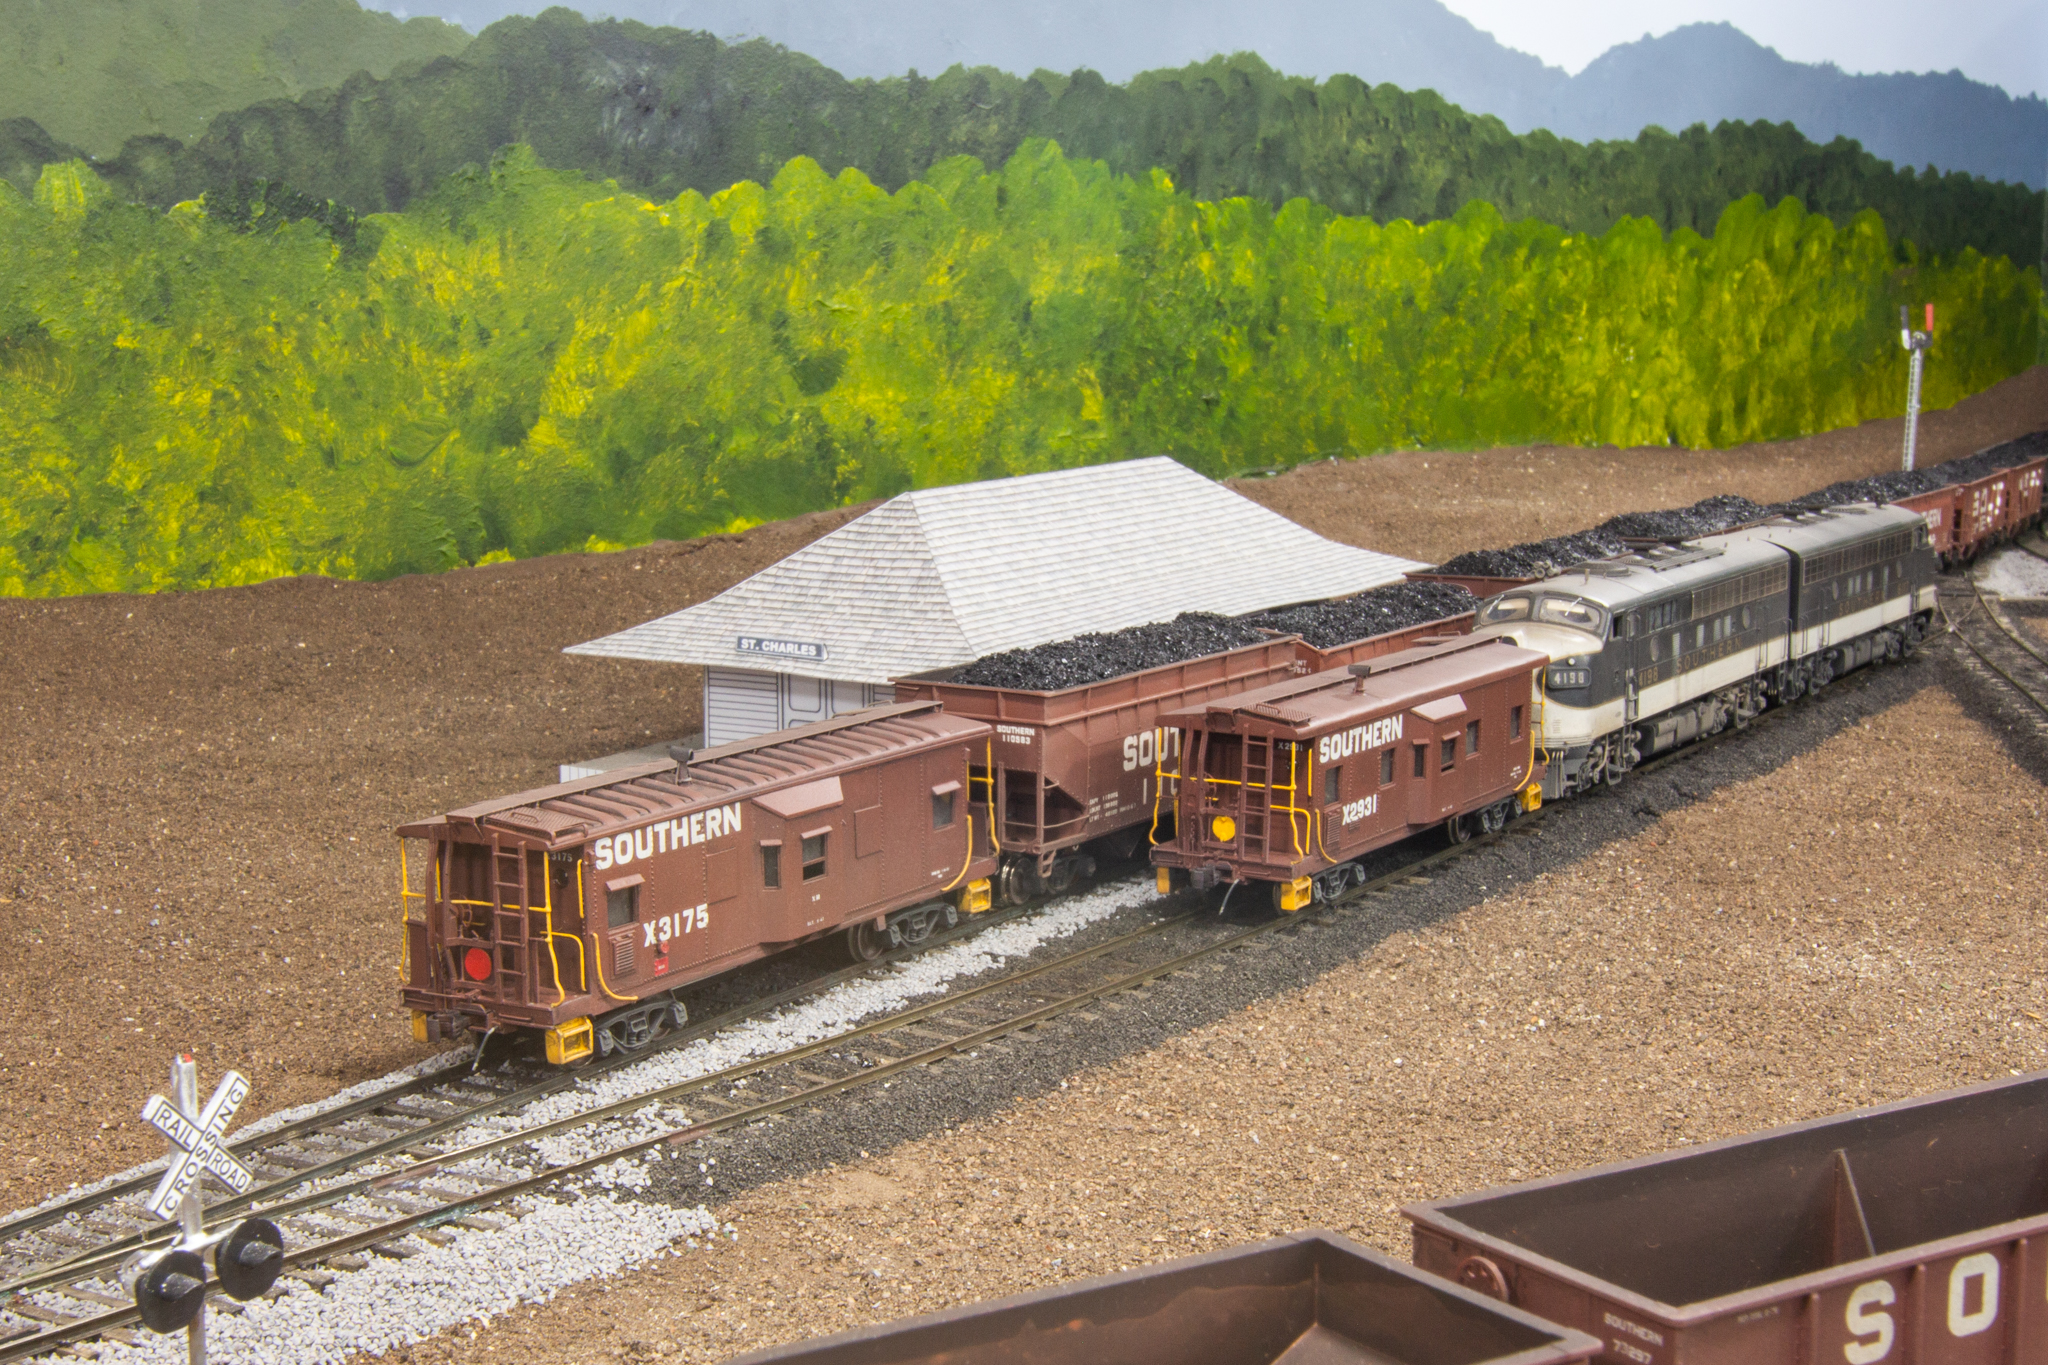
The St Charles Switcher waits in the house track while train 60 departs St Charles with a string of loaded hoppers. Note the different markers displayed on the back of the cabs
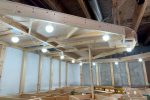
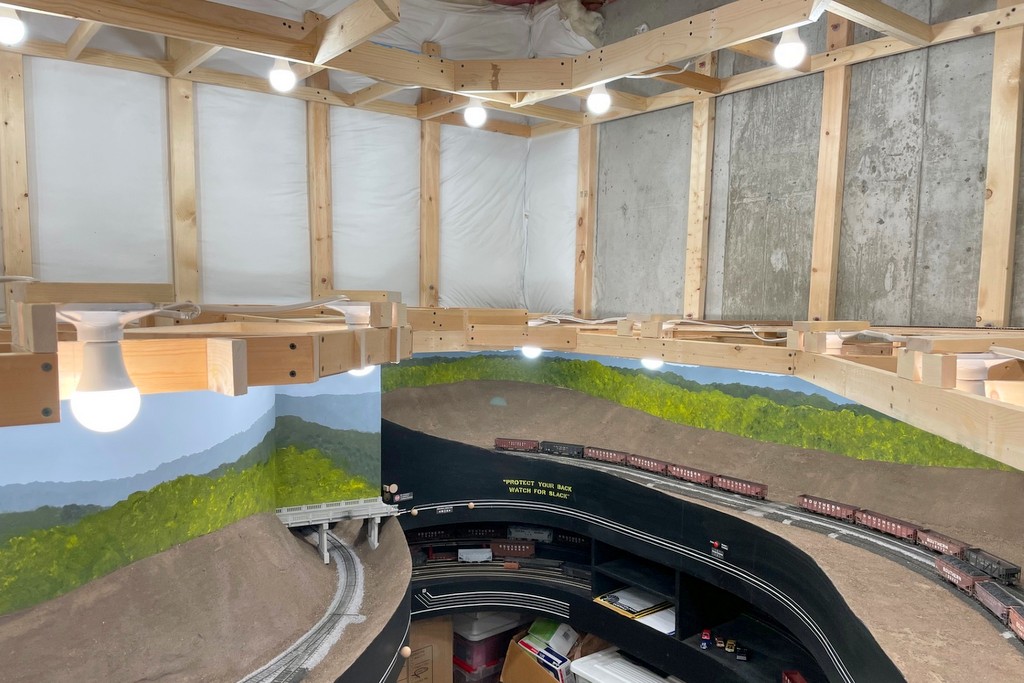
View showing the upper deck lighting and lighting benchwork. A 12″ valance will cover the lights
Passed a big milestone this last week, the completion of all benchwork! The last layer of benchwork was the lighting valance above the upper level. It was made from 1×4″ boards for the valance and 1×2″ supports ripped from 1x4s for the rest of the structure. This allowed me to place the light fixtures for the upper level, 22 total fixtures spread out about every 2 feet. Like the lower deck, the lights are multi-color, dimmable, LED smart bulbs controlled by an app on my phone. I’ve got them grouped to work as a whole either by deck or the whole layout including overheads.
Here’s the very last piece of benchwork ready to be installed
While the bulbs only draw 9W, they’re 60W equivalents… 47 60W-equivalent lightbulbs in a 12×16′ room!… Let’s just say it’s about as bright as daylight which is the idea, right? Even with all these lights, I’m still only drawing around 420W total, so I’m nowhere near the max capacity of the circuit. Technology is pretty cool! Next step, track for the upper level.
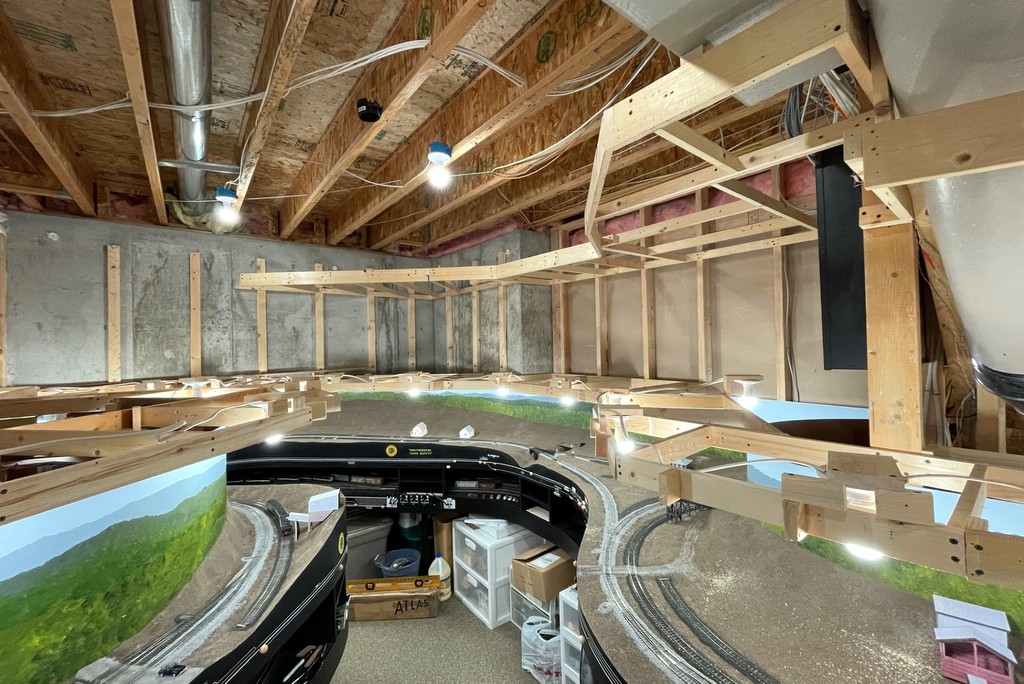
Overview of the layout room showing most of the 47 LED lightbulbs
A wide-angle view of the layout showing how the lighting benchwork follows the shape of the lower levels
No, that’s not a typo! I’m about halfway through my fourth level of benchwork for this layout. The first level is staging, the second is the lower deck, the third is the upper deck, and the fourth is for the lighting valance. I decided to go ahead and knock this out before putting any track on the upper level so I can install the lighting before I start hand-laying track (which will be most helpful). The good news is once I complete this level, it will complete my benchwork for the layout!… at least phase 1… if there are future phases.
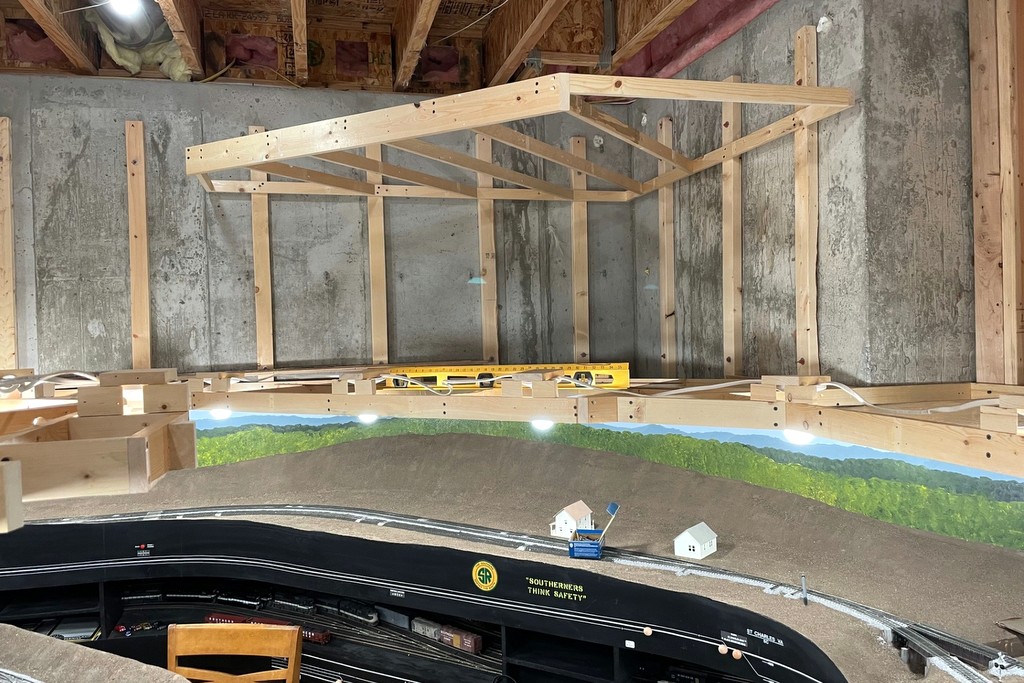
My basement ceilings are 9 feet high, so I’m putting the lighting benchwork around 7.5 feet. The backdrops for the upper deck will be a lot taller than the lower deck, but this is necessary because you’re looking up at them. There will be a 1-foot tall fascia on the front of this level to constrain the view a bit and to hide the lights. I’m making it strong enough to hold some thin plywood so I can use the top to store some lighter things–a requirement from “building management” to compensate for me taking over the storage room.
Here’s the first piece of lighting shelf benchwork–you can see the backdrop will be taller on the upper deck
Part of the layout is under the stairs, and there’s an air duct in the way requiring some creative construction