Monthly Archives: July 2025

Safety First! And other Upgrades

Safety Handle - Monarch
Second safety handle at Monarch

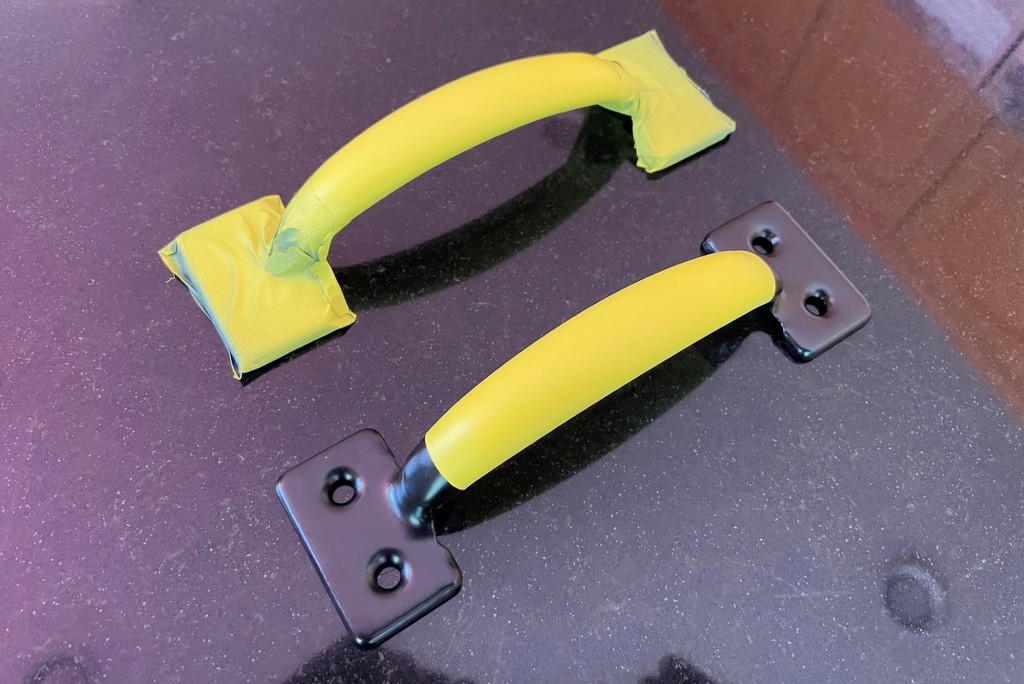
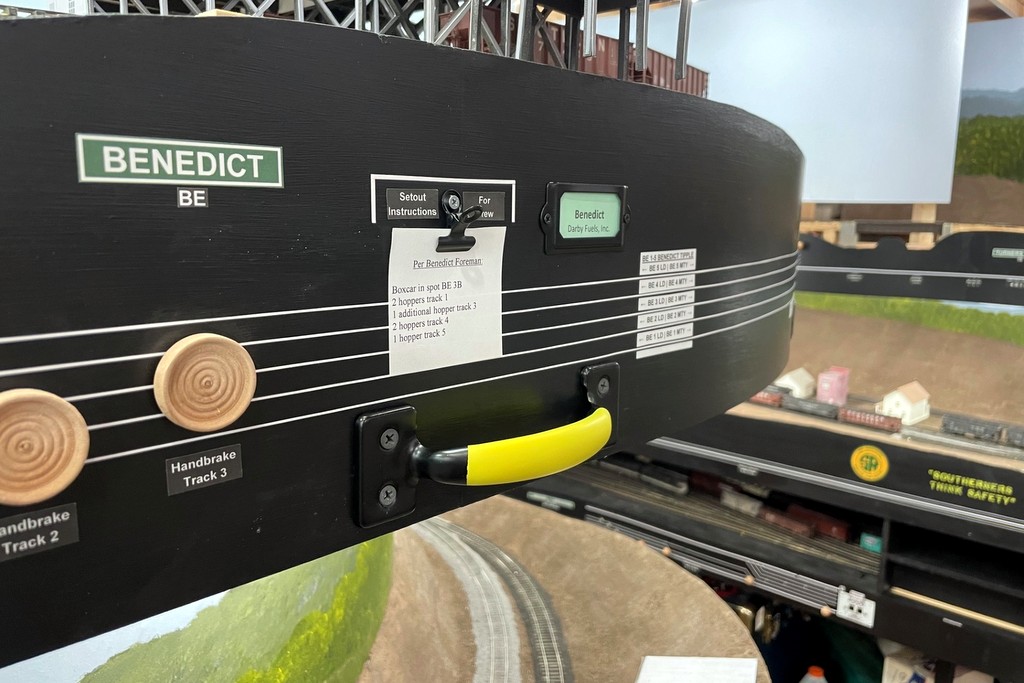
None of us are getting any younger, and at the last operating session, someone mentioned it might be a good idea to install a couple safety handles (grab irons, if you will) above the portable steps where the track height is highest. This made a lot of sense to me, and after running to the local hardware store, I decided on some smooth but strong door handles with four screw holes (most had two). I think vertical handles would have been slightly better, but the benchwork is horizontal, so it made more sense to make the handles horizontal to ensure all four screws would be in solid wood. I also picked up some satin finish yellow spray paint to make the handles more visible–the color is a bit more lemony than I wanted, but the next one was too orange (and I don’t have the patience to trek all over town or the internet looking for the perfect yellow), so I settled. I masked off the ends of the black-finished handles and sprayed the centers.

Safety Handles
I masked and sprayed the handles – simple door pulls from the local hardware store

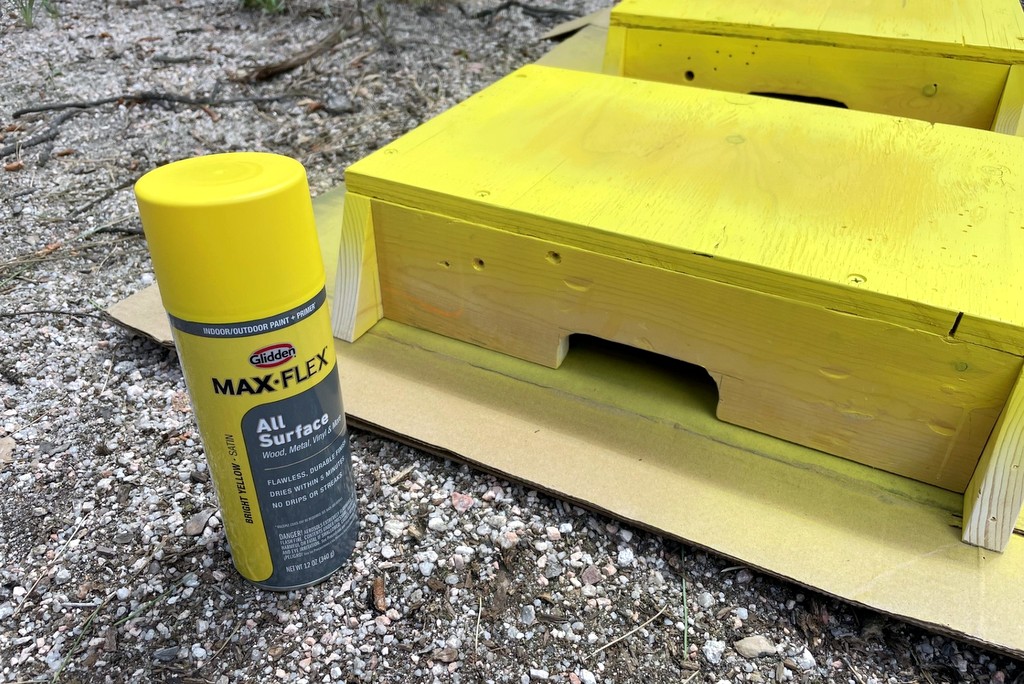
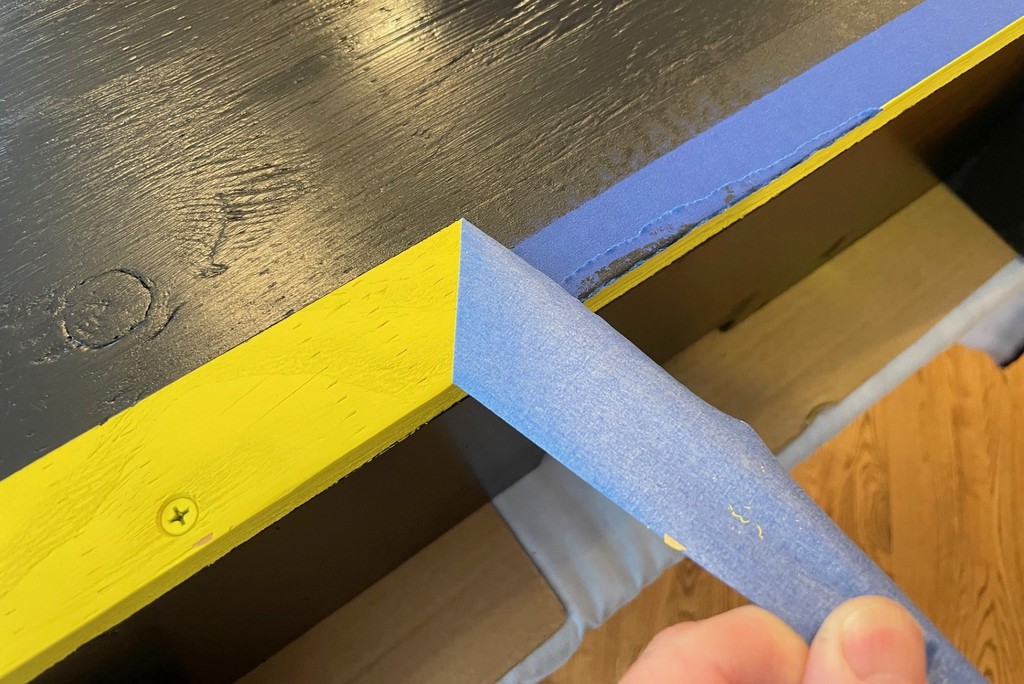
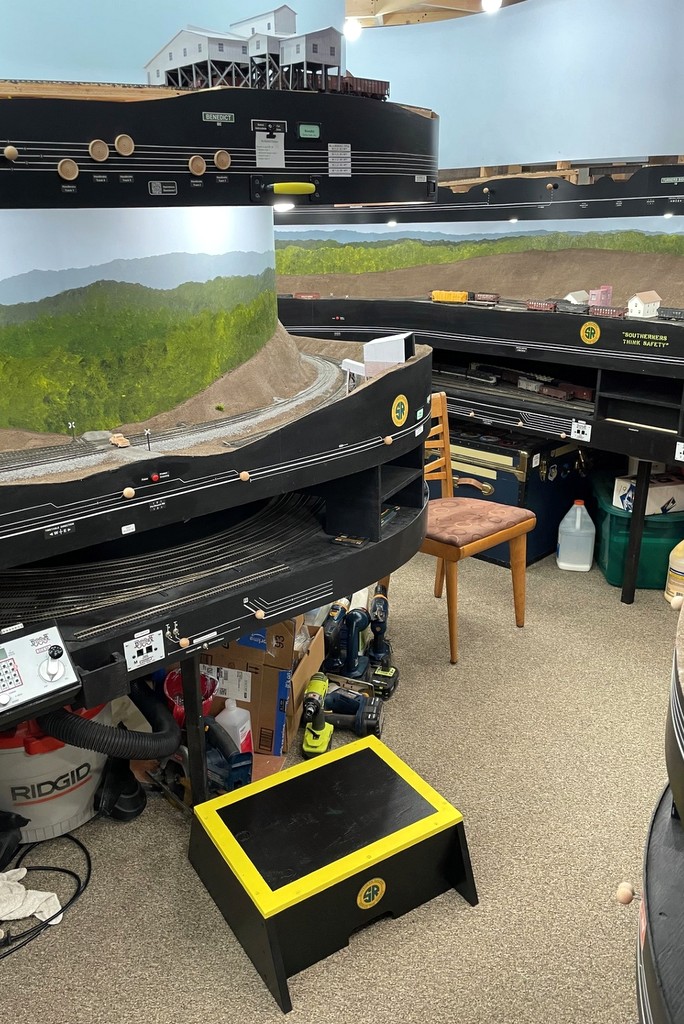
While I was at it, I decided to paint the steps I’d made a while back as well. I wanted to paint the steps with the same black paint as the fascia, but I knew I needed some color to mark the edges and make them easier to see. I sprayed the edges with several layers of the yellow first, then masked off a 1 1/2″ edge and the sides of the plywood top once it had dried. The black was hand-painted, and the resulting step looks much nicer than bare wood, especially with a Southern Railway decal added to the big step to give it a little flair.

Step Painting
I sprayed the yellow onto the wood steps first
Step Edges
Removing the masking to reveal the safety edge after painting the steps black
Completed Step
Here’s the completed step, topped off with a little Southern Railway flair

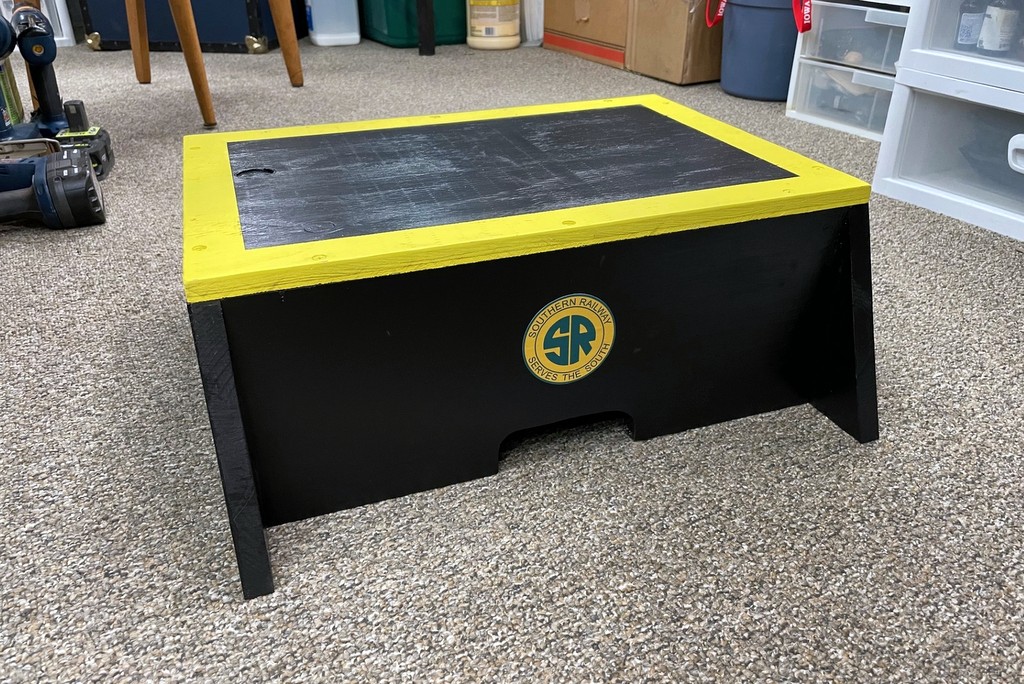
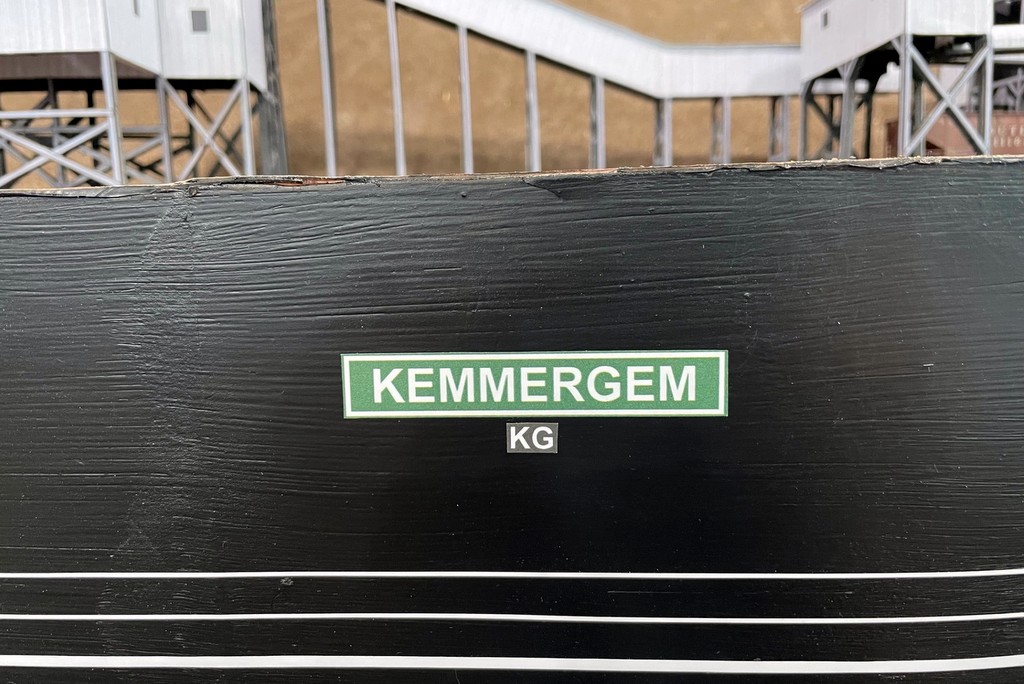
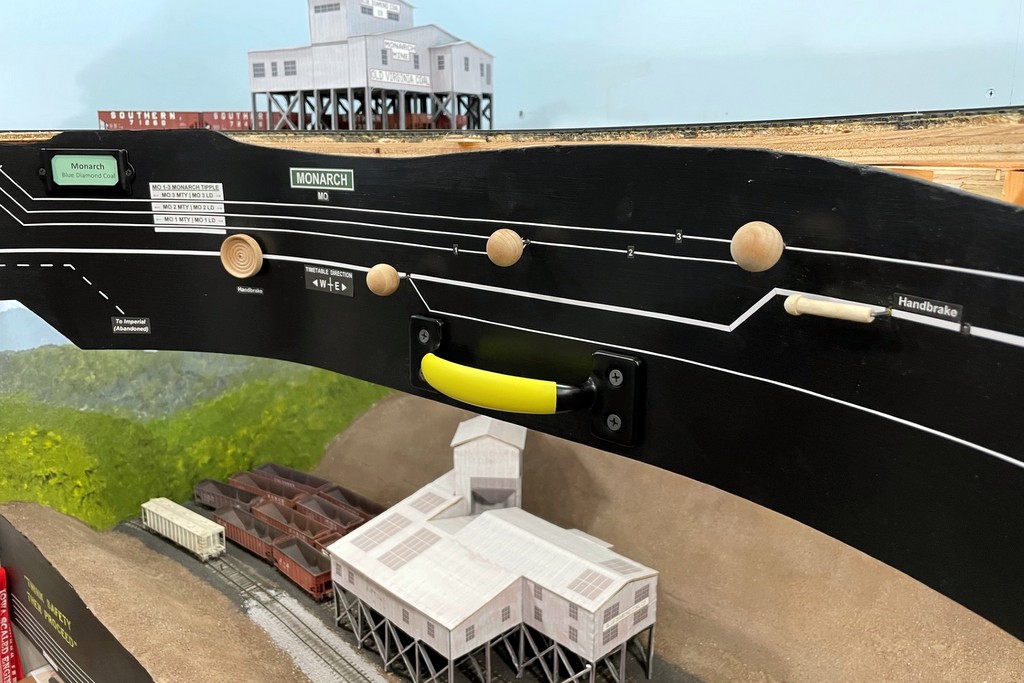
To make sure the handles would be good and secure, I glued an extra piece of 3/4″ x 3/4″ wood along the bottom of the 1×3″ benchwork behind the fascia, then I glued 4″x4″ pieces of 1×3″ board behind the benchwork where the screws would go to give them a full 1 1/2″ to bite into, and I used 1 5/8″ screws. The result is a really secure handle! I can imagine one use for these handles being an operator accidentally stepping off one of the steps and grabbing for the handle to keep from falling, so strength was key. I initially installed three handles, one for Benedict, one for Monarch, and one for Kemmergem. The ones at Benedict and Monarch are super solid, but it turns out the benchwork at Kemmergem has just a little too much play to support the weight of a person. The last thing I want is for an operator to fall, grasp the handle, then end up with a chunk of benchwork on top of them, so I removed this one–no biggie as the tracks at Kemmergem are lower and don’t really require a step like the other two do.

Safety Handle - Benedict
Here’s the installed safety handle at Benedict–it runs horizontal for maximum strength against the benchwork
Safety Yellow Step and Handle
This shows the step and handle in proximity to one another

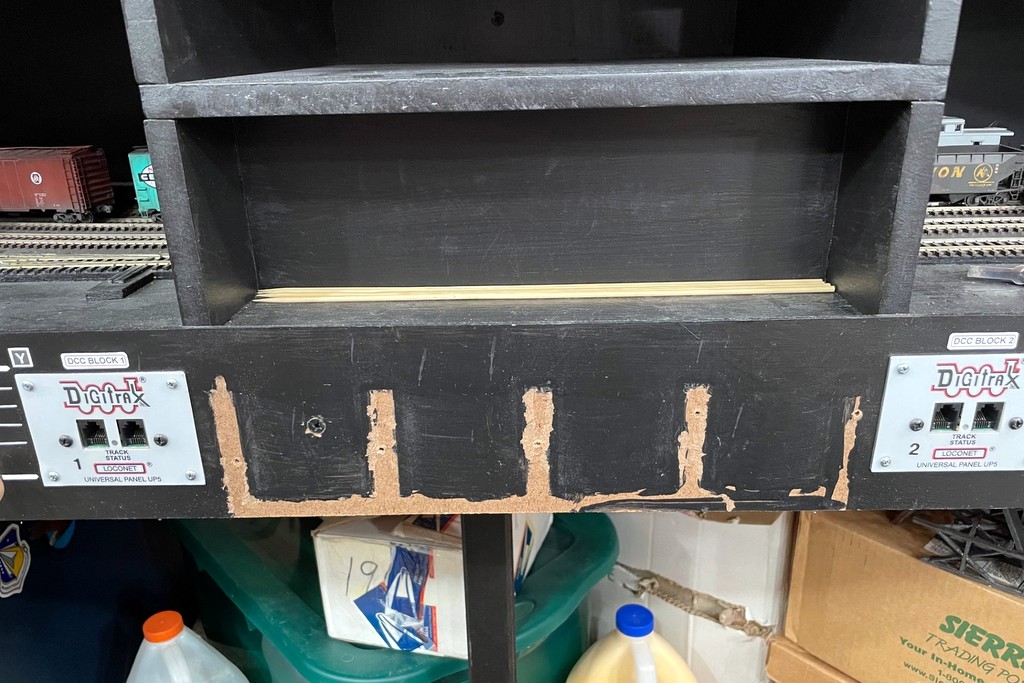
While I had the black paint out, I decided it was also time to remove some of the venerable UT4 throttle pockets along the fascia that I reclaimed from my previous layout. These things have served me well for more than 15 years, but with the introduction of the ISE Proto Throttles, the UT4s became redundant. I will still keep two around as backups, but I didn’t need the large banks of throttle pockets taking up prime real estate on the fascia. I installed the pockets before painting the fascia, so I had a little bit of work patching and sanding, but it cleaned up nice.

Removing Coupler Pockets
After switching to Proto Throttles, it was time for the old UT4 throttle pockets to go
Removing Coupler Pockets
I had a bit of a mess to clean up – nothing that some sanding and lightweight spackling compound couldn’t fix
Reclaimed Fascia
Refinished fascia where the throttle pockets once lived


Proto Throttle and an Old Friend

Dave O on the Proto Throttle
This is Dave’s first time on the layout, and he’s operating the Proto Throttle like a pro!

In my last post, I mentioned that we were unable to run all the trains in our ops session. Well enter Dave O. to the rescue! Dave is a great modeler and friend from nearly 2 decades ago when he used to live in Colorado. Dave was out here for a couple days, so he stopped by for some catching up and running of trains. Dave got to run the second half of the St Charles Switcher working Kemmergem and the Gin Creek Branch and pick up the slack from the last crew ;-). This was also an historic moment for the layout as I finally received the two Iowa Scaled Engineering “Proto Throttles” I’ve been waiting on for several weeks. These things, while not cheap, are awesome!

The Proto Throttle is laid out like an older diesel locomotive control stand with a throttle, direction lever, and brake lever along with a horn handle, light switches, and a few other programmable buttons. The good news is I didn’t really need to change many of the settings in my locomotive decoders (SoundTraxx Tsunami2s) as I’ve already been working with lots of momentum and a button for brakes. The Proto Throttle makes braking a whole lot better because it can pulse the brake command to get more or less braking as you slide the lever instead of a one-size-fits-all with a braking function button. They’ve also got some other cool features that I’ve already incorporated into my ops. For example, there’s an air pressure screen on the Proto Throttle that simulates building air in the train line before you can move the train that adds a little bit more realism.

The Proto Throttle
So happy to have a couple Proto Throttles to make operations just one step closer to reality

Here are some other things I’ve programmed into the Proto Throttle:

  • Programmed my Tsunami2s to disable auto start and programmed the RPM+ and RPM- functions into the Proto Throttle’s “engine on / engine off” screen to produce startup and shutdown sound sequences
  • Programmed the prominent “auxiliary” button on the throttle face as “emergency stop” which may save the day with all the momentum in the decoders
  • Programmed the small up/down buttons next to the screen for the “coupler” and “coupler release” sound effects for crews that want to include those
  • Reprogrammed the notching on the Proto Throttle to start slower (speed step 1) and have fewer speed steps between notches 1 and 5–this allows finer slow-speed control, and my speed curves above 15 mph are flat, so notches 5-8 are really just for increased engine RPMs rather than speed (big steps are fine)

I’m sure I’ll tweak some settings as I learn more, but they’re already a lot of fun! One thing I also learned is it’s not enough to just remap the functions in the Tsunami2 decoders. I’m using “advanced consisting,” so you also have to program these newly remapped functions to respond to the CONSIST ADDRESS and not just the unit address. This caused a little puzzlement until I finally figured out why my changes weren’t working.

One final very minor update I made since the last ops session is to change the town names on the fascia to resemble Southern-style station name boards. These stand out a lot better than the old dry transfer lettering I had before, and they give the layout a little more Southern Railway flair. Of course, the town name for Pennington (L&N staging) is done in black with yellow serif lettering after the L&N’s preference for station signs.

New Station Signs
Another smaller addition to the layout are these green station signs at each town replacing some plainer dry transfer text