Monthly Archives: July 2024

10 Cent Solution to a $50 IR Sensor Problem

IR reflector installation F7A
Aluminum foil IR reflector installed on the coupler of an Intermountain F7A

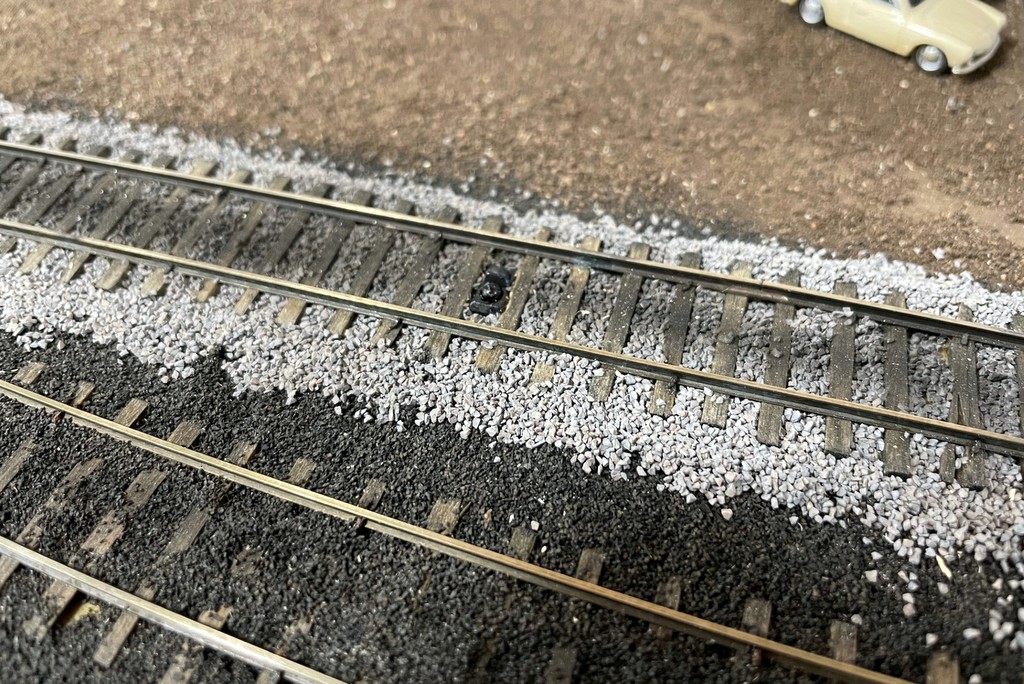
When I installed my automatic detection circuit for crossing signals using infrared (IR) sensors from the WeHonest company, I installed them between the ties. They were initially a bit too sensitive, but after a while of running and changing out lighting to LEDs, the sensors weren’t quite sensitive enough. They would often miss a passing train which is annoying and not up to my standard for how I want things to run on the layout. After reading up online about how this type of sensor works, I tried a super simple and cheap solution that now has them detecting every time!

WeHonest IR sensor
The WeHonest IR sensor uses an IR transmitter (blue dome) and an IR detector (black dome)
IR sensor between the rails
Here’s a WeHonest IR sensor in place between the rails

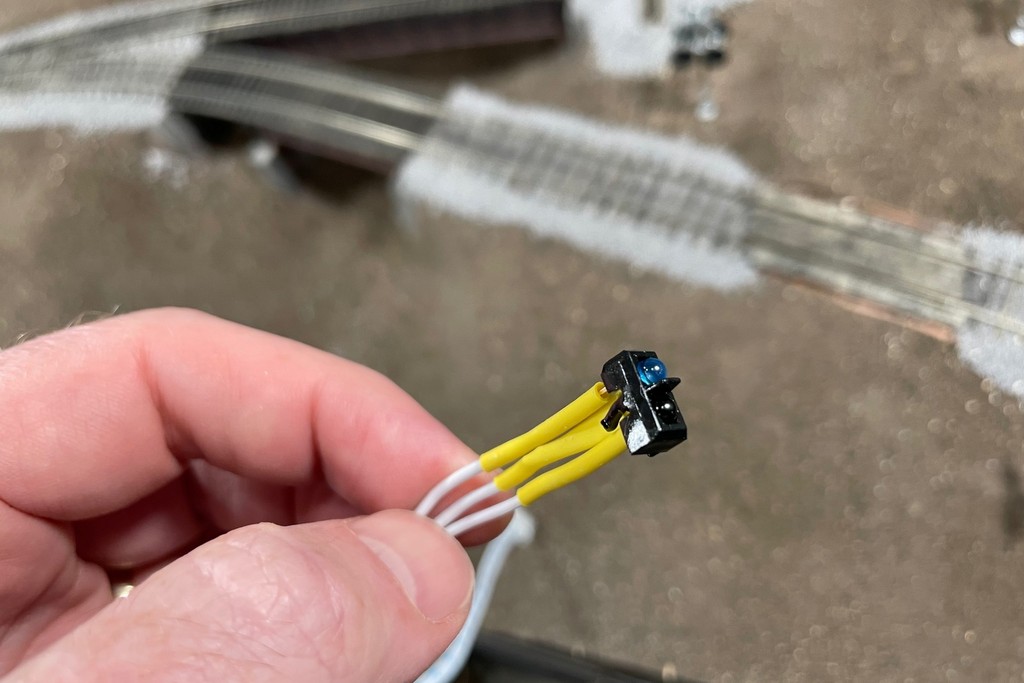
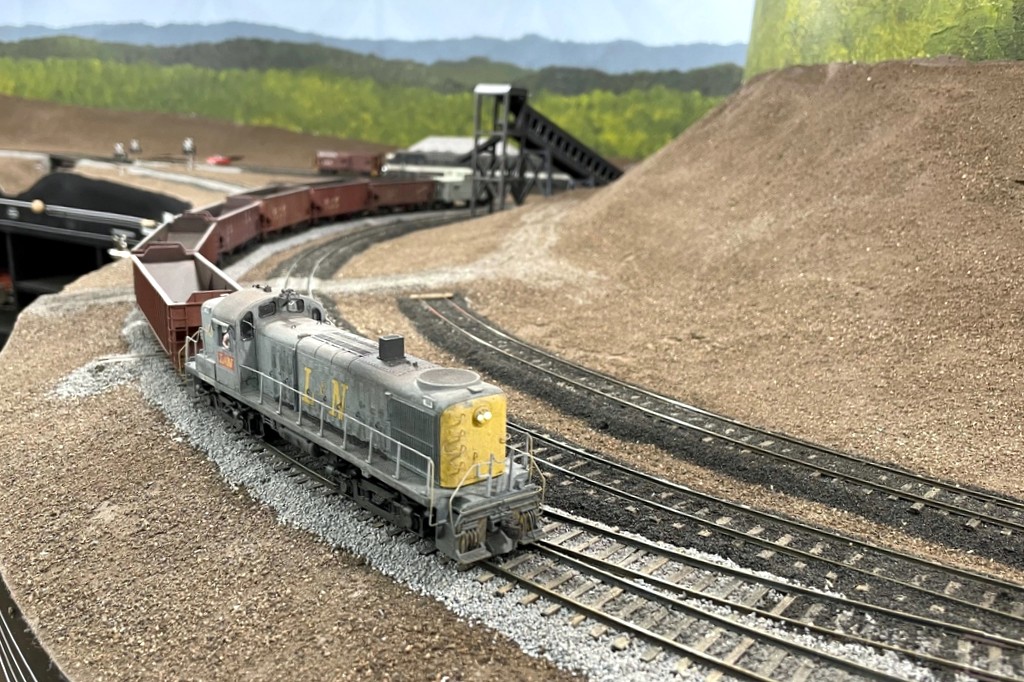
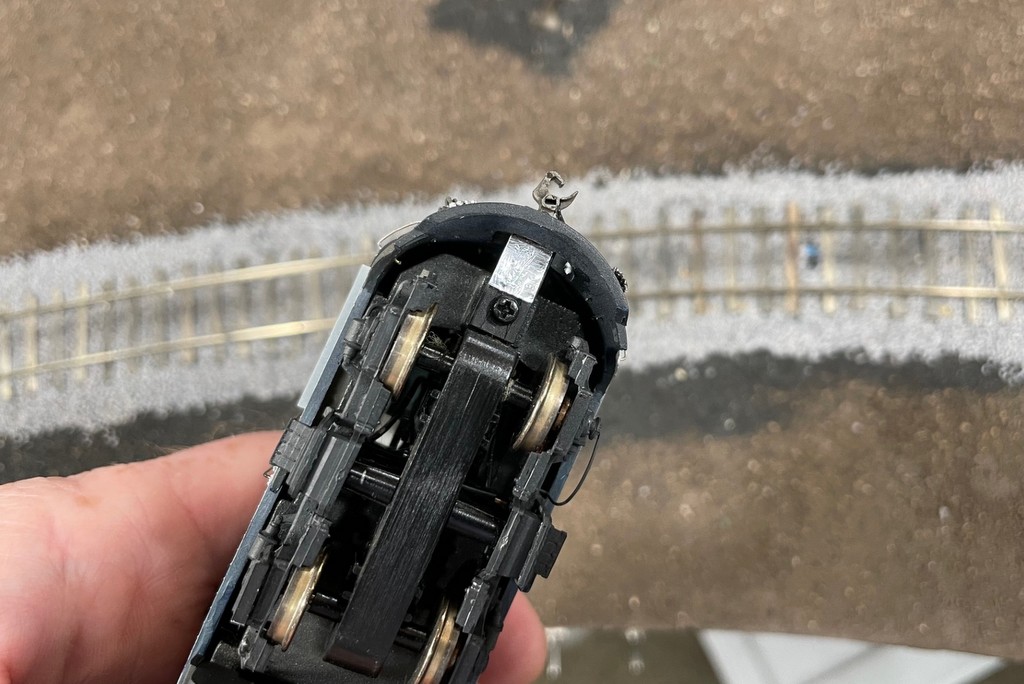
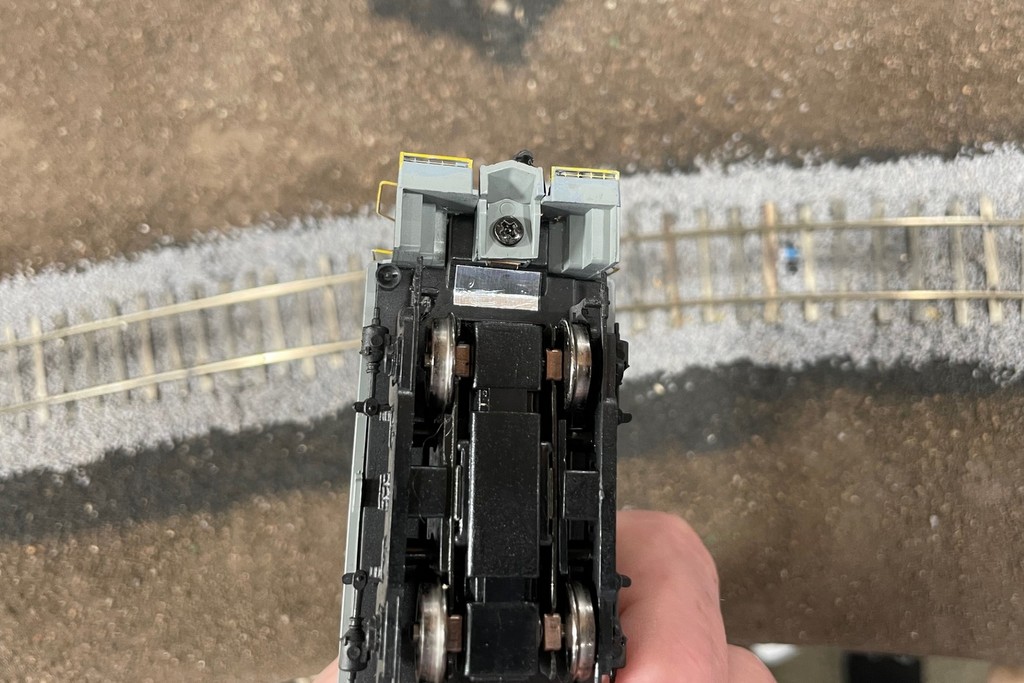
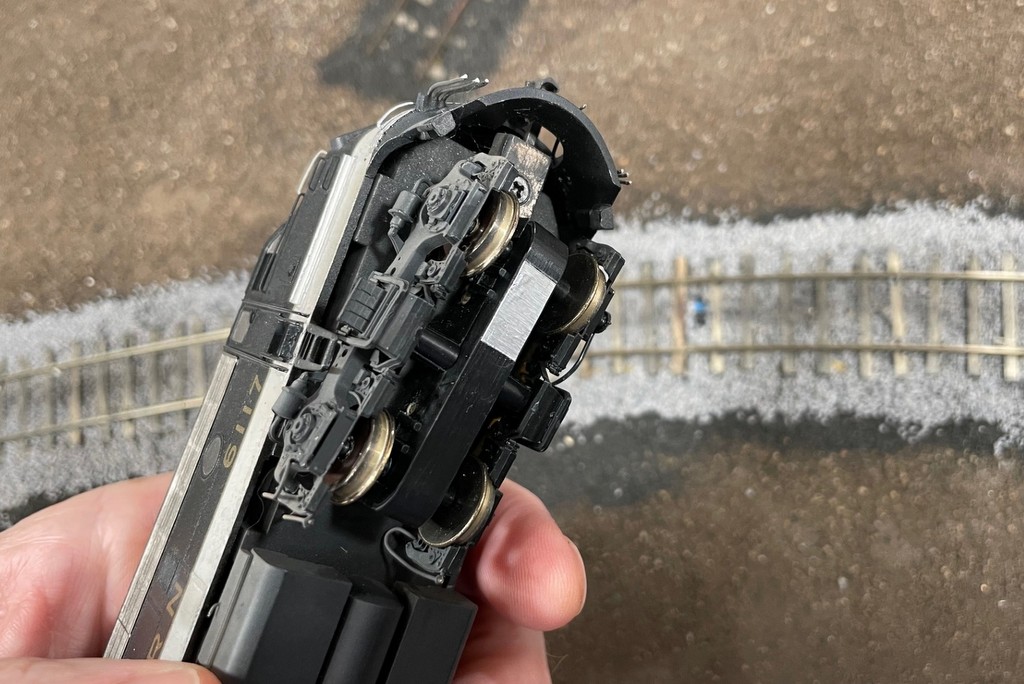
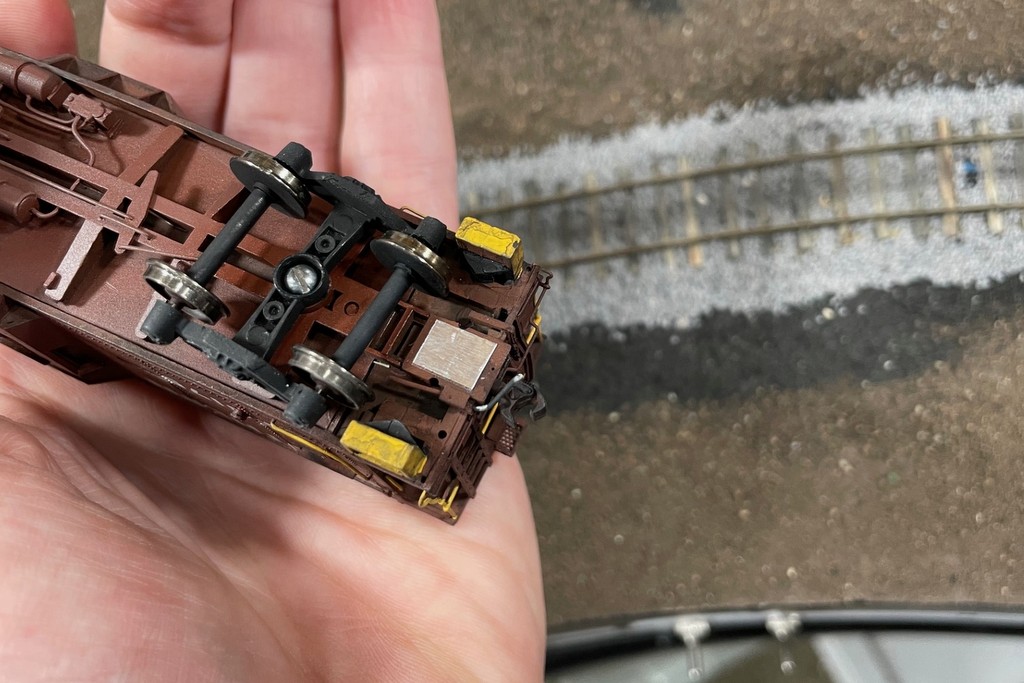
The WeHonest IR sensors are a single unit. unlike paired sensors that detect a break in the IR beam, the single units use a paired IR LED (bluish dome) and IR detector (black dome) and rely on reflected IR energy to close the circuit. Since the bottoms of most of my locomotives and freight cars are flat black, I wondered if they weren’t reflecting enough energy to trip the sensor. To improve the reflection, I stuck a piece of double-sided Scotch tape to a piece of aluminum foil and cut small reflector squares to attach to the bottom of locos and cabooses. I attached them under the coupler, behind the coupler, and even on the bottom of the truck–wherever I could get some good adhesion along the centerline (where my sensors are mounted). It doesn’t have to be perfectly flat because the IR transmitter and detector seem to have reasonably wide beams, so they’ll work with IR reflected at an angle. With just this tiny and simple modification which is invisible from trackside, the IR sensors now work every time without fail!


One concern I have is a piece of conductive material coming loose on the tracks. To mitigate the chance of a short, I cut the rectangles small enough that they can’t bridge the rails in case they accidentally detach in a spot of hidden trackage. They could cause a short if they come loose on a switch, but all my switches are easily reached, so the reflectors would be easy to spot and clear. Thought I’d pass this trick along in case anyone else is struggling with the same issue.

***UPDATE***

This technique worked so well I added tiny rectangles of aluminum to the underside of every car on the layout. It’s easy to find a spot on a coupler pocket or on the center sill that can’t be seen while it’s running. Now there’s almost zero drop out for the signals while a train is crossing.

Operating Session – Jul 13, 2024

CV Local departing St Charles
The CV Local heads up the Baileys Trace Branch to work Mayflower

Yesterday marked a small (two people) but fun operating session with Patrick Tillery. We ran four trains including three mine runs (two Southern and one L&N) and the St Charles Local which delivered a fresh set of empty hoppers in exchange for the loads waiting in St Charles. There were a few notable “firsts” in this ops session:

  • First use of the new LED lighting
  • First use of finish cabooses! My two new kitbashed “Brosnan brown” bay window cabs made their debut–only the L&N was left with a stand-in
  • First use of 3:1 for the fast clock–it was previously at 4:1, and 3:1 works much better with all the switching
  • First video recorded! Managed to catch the last 1/3 of the last mine run, so enjoy!

Learning points and observations:

  • We were able to stick pretty closely to the crew call and timetable times without rushing.
  • I’m happy with the amount of work Train 61/60 has to do. I was originally worried it would be boring because it’s role is so simple: bring up empties to set off in St Charles Yard, pick up loads in the yard and head back to Andover (staging). However, the yard is only big enough to hold the loads or the empties, not both. This leads the crew to use the wye to turn the train and start building the outbound train on the main to make room for the set outs. Add to that the semaphore that protects the branch where the L&N is working, and it means Train 61 has to make the shove into the yard in 2-3 cuts instead of all at once without messing up its blocking too bad. This adds up to a decent bit of work that took more than 2 fast-clock hours, about the amount of time this train was given in the prototype timetable.
  • Patrick commented that the momentum in the locos forces you to take it slow, and that’s a good thing. With two-person crews for the two biggest mine runs, there were plenty of “2 cars… 1 car… that’ll do” with enough anticipation that a throttle cut and coast would lead to a gentle couple–it really adds to the realism and challenge, in my view, and it feels a whole lot more like running a train than having no momentum.
  • I’m also extremely happy with the SoundTraxx Tsunami2 decoders in all 5 of the Southern F-units and single L&N RS3 that were used. Their “Dynamic Digital Exhaust” (DDE) feature works perfectly with the grade contours and switching style of operations on my layout. I don’t have to touch anything but the throttle knob (no manual notching, no “drive hold”), and the prime mover automatically notches up when it’s working hard upgrade, notches down when it’s moving downgrade, and surges briefly when I give the throttle a little “kick”. Love it!
  • The track worked mostly flawlessly… mostly. One switch point seemed to be sticking a bit after the ballast work, and it picked a couple of trucks–it’s fixed now. Still waiting for the first ops session that’s 100% trackwork trouble free, but it’s getting close.

This might be the last “single deck” ops session. I hope to start work on laying track for Kemmergem on the upper deck very soon!