Kitbashing an HO Southern 1960s Bay Window Caboose – Part 4
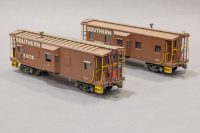
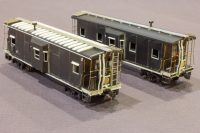
Southern '60s era HO bay window caboose


In Part 3, we completed the ends and final details, and now the models are finally ready for some paint!

Body Paint

  • Prep the pieces. I got my pieces ready for the paint booth by removing the underbody, attaching the metal weight from the Athearn kit, removing the wheels from the trucks, and attaching the truck side frames to the underbody.
  • Prime with black. I like to prime with flat black because I like the way it tends to “pre weather” the lighter colors that go on next. I find black primer prevents “toylike” color no matter what’s sprayed on top of it. For this coat, I used Tamiya flat black thinned about 1:1 with 91% isopropyl … Read more

Kitbashing an HO Southern 1960s Bay Window Caboose – Part 3

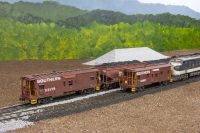
Southern '60s era HO bay window caboose in-progress

In Part 2, we finished up most of the body details, and in Part 3, we’ll tackle the toughest portion of this model: the ends. Each end contains around 60 individual pieces of styrene, wire, chain, and brass sheet. While it’s incredibly time-consuming to add all the prototypical details, these details are what the caboose really stand out and scream “Southern.” But first, the underbody needs some detail.

Underbody Details

  • Move the brake components. As these are “layout models” rather than contest models, I wanted just enough brake gear to present the right silhouette when viewed from the side–as it turns out, that’s most of the brake gear, but it’s not modeled in great detail. The brake cylinder, … Read more

Kitbashing an HO Southern 1960s Bay Window Caboose – Part 2

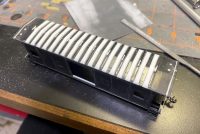
Southern bay window cab 22

In Part 1 of this 4-part series, I showed the modifications required for the body, windows, and steps. In part 2, I’ll dive into the roofs, bay windows, and underbody.

Roofs

  • Pressed panel roof (option 1). The “two-bulge” roof panel seems to have been less popular than the smooth roof, but I found at least a few examples that made me want to model it. As mentioned in part 1, this is a tough roof to find, and the only example I had from a Milwaukee Road horizontal rib boxcar kit was too wide. I decided it wouldn’t be too tough to model from styrene bits. From part 1, the roof was already smooth except for the panel … Read more

Kitbashing an HO Southern 1960s Bay Window Caboose – Part 1

Southern '60s era HO bay window caboose

Some railroads are blessed to have fairly accurate plastic caboose models, but unfortunately, the Southern Railway is not one of them. In HO scale, the choices are brass, a nice but complicated (and hard to find) resin kit, and a pretty substantial kitbash from a plastic kit. In this 4-part series, I’ll show you the steps to get a credible and fairly accurate model from an Athearn bay window kit. Warning, this project is not for the faint-of-heart! In fact, I think these are the most challenging models I’ve ever built (and I’ve scratchbuilt some cars and done major locomotive kitbashes). Even if you don’t go all-out, you can pick the steps that are most important to you, and while … Read more

Modeling a Southern Extended-Height Twin Hopper in HO Scale

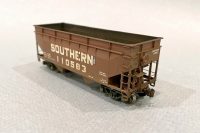
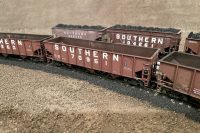
Southern Extended Height Twin Hopper - Athearn Offset Finished

One of the things I love most about modeling coal-hauling railroads is the variety of hoppers employed by all the railroads. Each line seemed to have their own unique preference for sizes and mixes of cars, and the manufacturers made them in so many varieties. The 1960s and ’70s were especially eclectic as railroads engaged in hopper rebuilding programs to extend the lives of otherwise obsolete cars, especially 50-ton twin hoppers that were the mainstay of coal hauling for most of the 20th century. This is an easy kitbashing project to bring one of the more distinctive modifications in Appalachian coal hopper history to your layout.

History of the Southern’s Extended-Height Fleet

Rebuilding programs often involved increasing the capacity of … Read more

Weathering Old Coal Hoppers

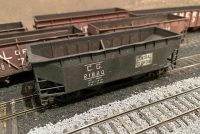
CofGa 50T Offset Hopper

It should come as no surprise that someone who runs a site called “Appalachian Railroad Modeling” loves modeling coal hoppers! While unit trains dominate the rails today, a few decades ago it was common to see coal hoppers of all different vintages running together, and the condition of cars ran from “nearly new” to “how is this thing still on the rails!” Last year I wrote a shorter article on weathering a specific hopper using some of the same techniques, but in this article, I’ll go through each technique step-by-step because modeling variety in your hopper fleet requires the combination of many weathering techniques. Not all hoppers get every technique, but most hoppers get most techniques, especially those that … Read more

Upgrading an Atlas Trainman Coal Hopper

Upgrading Atlas Trainman Hopper - Finished

These days, you can find some really nice, super-detailed, ready-to-run HO scale coal hoppers from the likes of Tangent, Kadee, ExactRail, and others. While these models are beautiful, creating an entire coal train can really break the bank, and there are just some hopper prototypes that are only modeled in a lower level of detail. In either case, it’s not too difficult to bring these cheaper plastic kits closer to the detail level of a more expensive brand, and it doesn’t have to be super time-consuming. One of my favorite starting points is the relatively cheap and readily available “Atlas Trainman” ready-to-run hoppers, especially the 9-panel, 70-ton car that’s pretty close to the Southern’s 70-ton fleet I model. There’s a … Read more

SoundTraxx Econami v. Tsunami2 Sound

SoundTraxx Econami v Tsunami2 vid clip

If you’re just dipping your toes into the world of sound, you’ve probably realized there are SO many opinions on which are the best, and you likely have lots of questions. One of the appealing options for those whose hobby budget is tight is SoundTraxx’ “Econami” series of economy decoders which replicate many useful prime mover sounds for coal-field modelers like the EMD 567 non-turbo (e.g., GP7, GP9, SD9, F-units…), the EMD 645 turbo (e.g., GP40, SD40, SD45, and their -2 versions…), and the Alco 244 (e.g., RS3, FA1 and 2…). It’s about 2/3 the price of a premium Tsunami2 decoder, and it uses the same basic sounds and features, but are the extra features of the Tsunami2 worth the … Read more

How To Make Fresh Coal Loads for Model Hoppers

Finished fresh coal loads

When most people think of “coal loads,” they probably picture the slightly mounded loads of coal perhaps barely visible above the sides of a hopper or gondola on a passing coal train, but this is far different from what these loads look like at the origin. We usually see them after they’ve settled for many miles, but at their source, coal loads are much taller, and depending on the loader type, they come in some very interesting shapes (see ARRM’s article on coal loads here). I model the ’60s and ’70s when most loaders were variations of simple “truck dumps.” Most truck dumps had a fixed chute, and they would run the car under the chute a little at … Read more

Easy Mountain Scenery for Appalachian Layouts

Easy Mountain Scenery

At some point, nearly all Appalachian railroad modelers need to deal with creating flowing hills and valleys for their layouts. I use a method I adapted from Howard Zane’s “Paper Shell” scenery he detailed in the January 2007 Railroad Model Craftsman, and I couldn’t be happier with how easy, flexible, cheap and good looking this method is for creating basic scenery forms. My layout is open grid benchwork with cookie cutter sub-roadbed which is great for this kind of scenery, but it would also work for any open benchwork method (e.g., L-girder, spline sub-roadbed, etc.) where there’s some backdrop and fascia to frame the scene.

Tools needed:

  • Scissors
  • Utility knife
  • Straightedge
  • Hot glue gun
  • Plastic putty knife
  • Old washcloth
  • Read more