


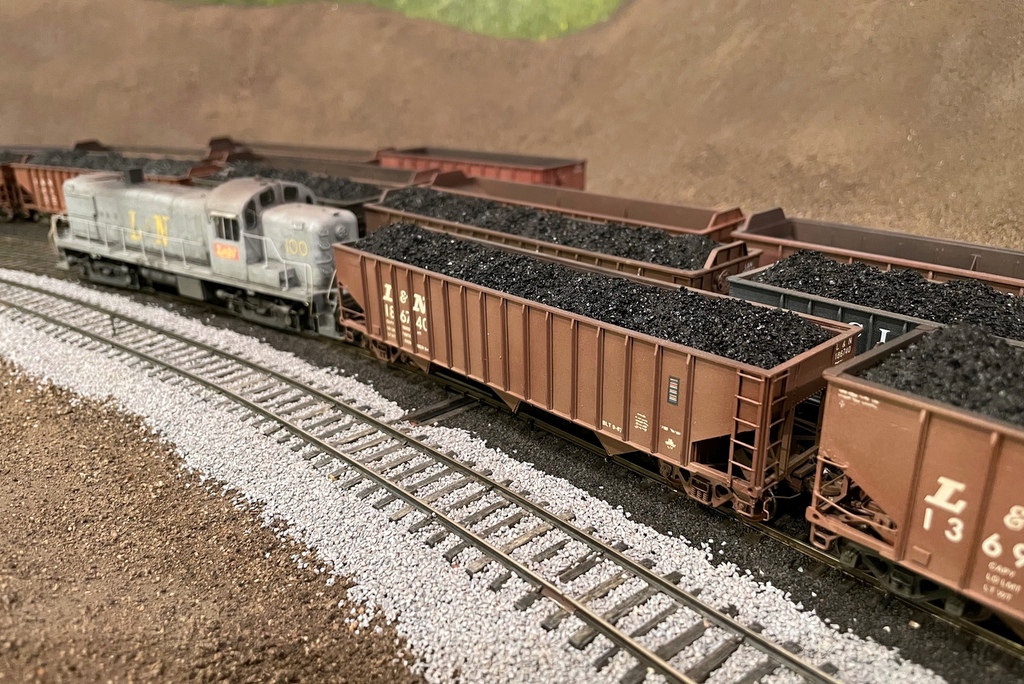
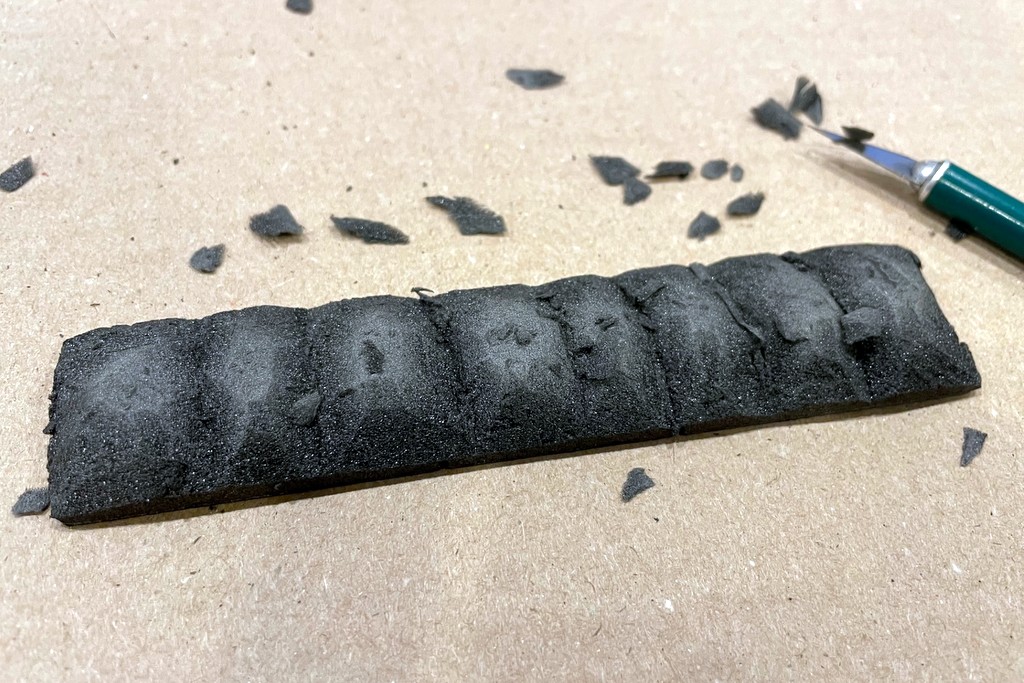
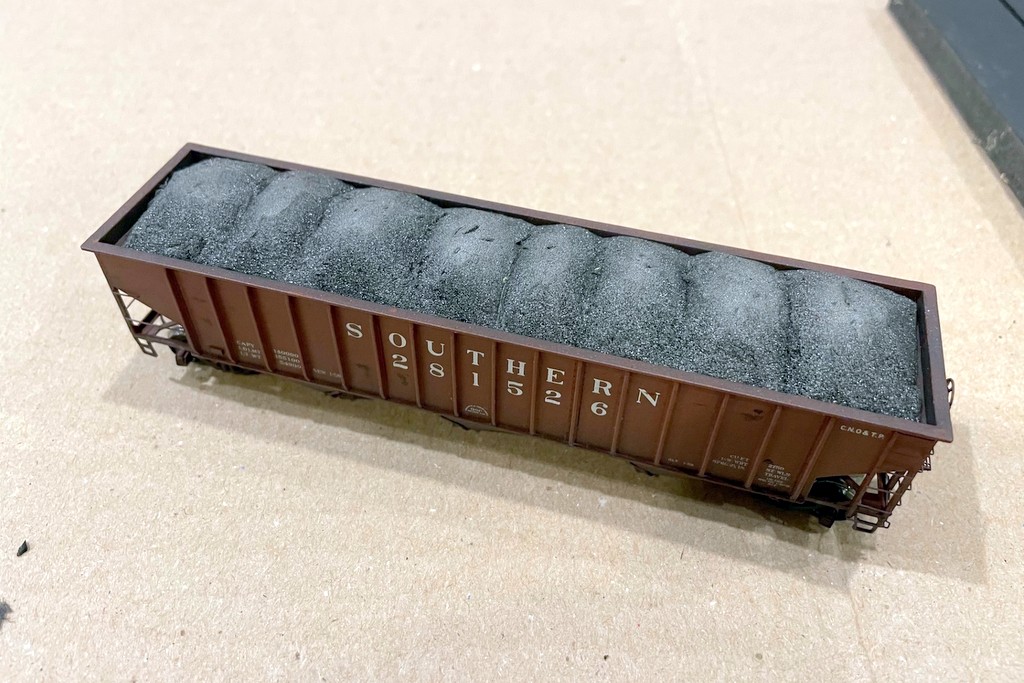
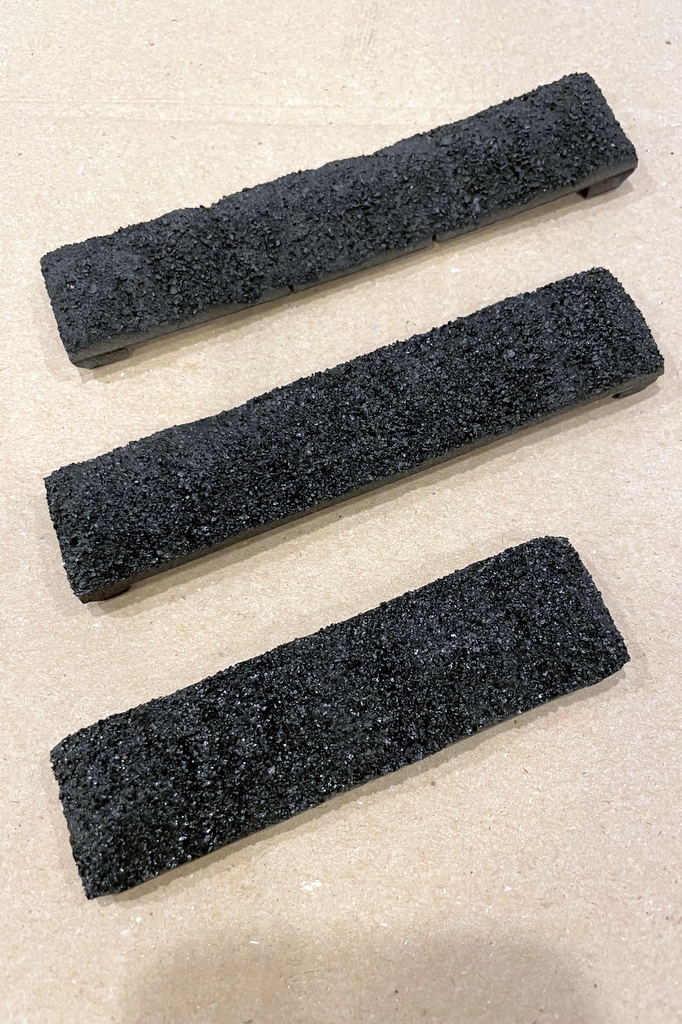
Here are the finished fresh coal loads on my layout–no two are exactly alike
When most people think of “coal loads,” they probably picture the slightly mounded loads of coal perhaps barely visible above the sides of a hopper or gondola on a passing coal train, but this is far different from what these loads look like at the origin. We usually see them after they’ve settled for many miles, but at their source, coal loads are much taller, and depending on the loader type, they come in some very interesting shapes (see ARRM’s article on coal loads here). I model the ’60s and ’70s when most loaders were variations of simple “truck dumps.” Most truck dumps had a fixed chute, and they would run the car under the chute a little at a time via gravity or a winch. This left a series of steep, high piles, perhaps a dozen or more, along the length of the car.
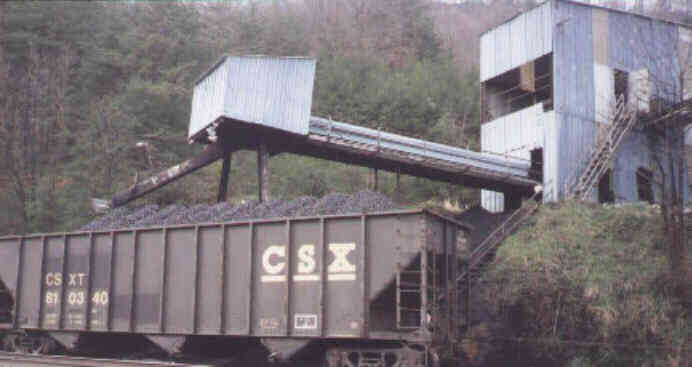
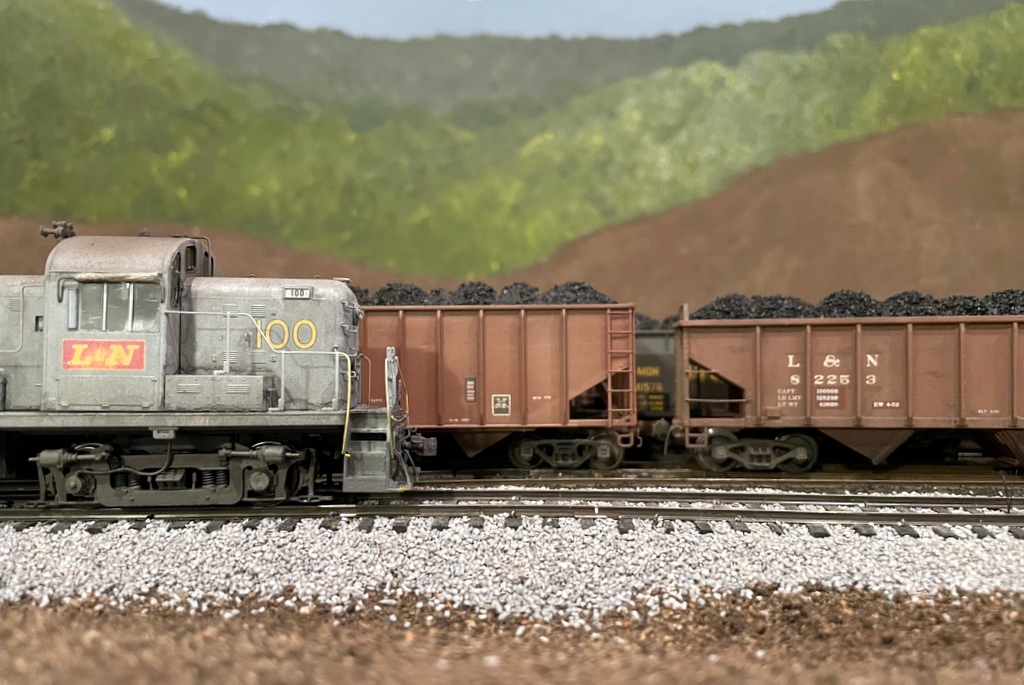
Large lumps of fresh coal seen at Triangle Dock on CSX at Elkhorn City, VA -Bob Helm
For those of us who model coal from these loaders at the source, there simply aren’t any suitable commercial options for getting this look. Some commercially available loads may have three or four distinct lumps, but they’re still a far cry from the unique shapes seen in the coal fields. I resorted to making my own, and it’s a very simple and effective process. The end result are coal loads that are cheap, fit well, look great, are virtually indestructible, and capture these unique piled shapes where no two are alike. When you make them in bulk, each coal load takes 10-15 minutes, so it’s easy to crank out enough for a complete train or two with just a few hours of simple work. While geared toward creating a “truck dump” load, this technique can be easily adapted to any load shape that can be carved from foam core and any load material that sticks to glue, and while my loads are HO scale, this technique should be easily adaptable to any scale.
Materials:
- 1/2″ black foam core sheet
- 1/4″ black foam core sheet
- White glue
- Coal (or whatever you want to use to represent coal)
- Parchment paper or wax paper
- Clear satin finish spray
- Stick-on weights (if desired)
Tools:
- X-Acto knife
- No. 11 blades (lots)
- Ruler
- Long metal straight edge
- Container (for holding coal)
- Butter knife (or other blunt force instrument for crushing coal)
- Kitchen strainer
- Old paint brush
- Spoon
- Spray bottle
- Silver Sharpie (if desired)
The essential process is to cut a piece of foam core to fit the hopper, carve the load shape, glue on crushed coal, and seal the load with spray lacquer. It’s a little more complicated than that, so I’ll share my techniques in the images and captions below.
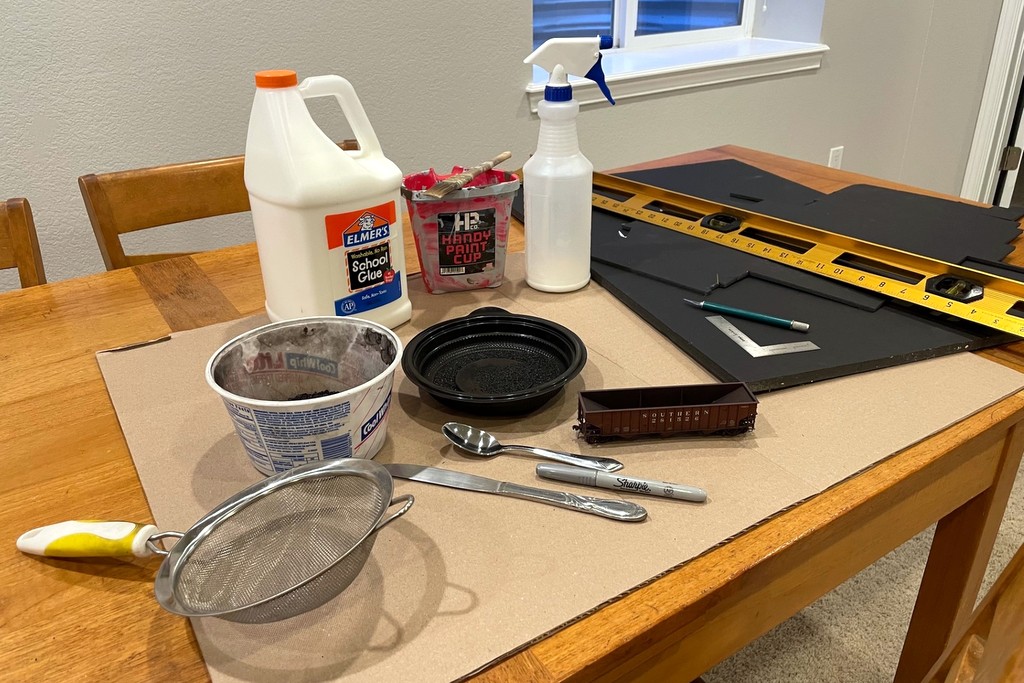
Step 1. Gather all the materials, tools, and the hopper type you’re making the loads for.
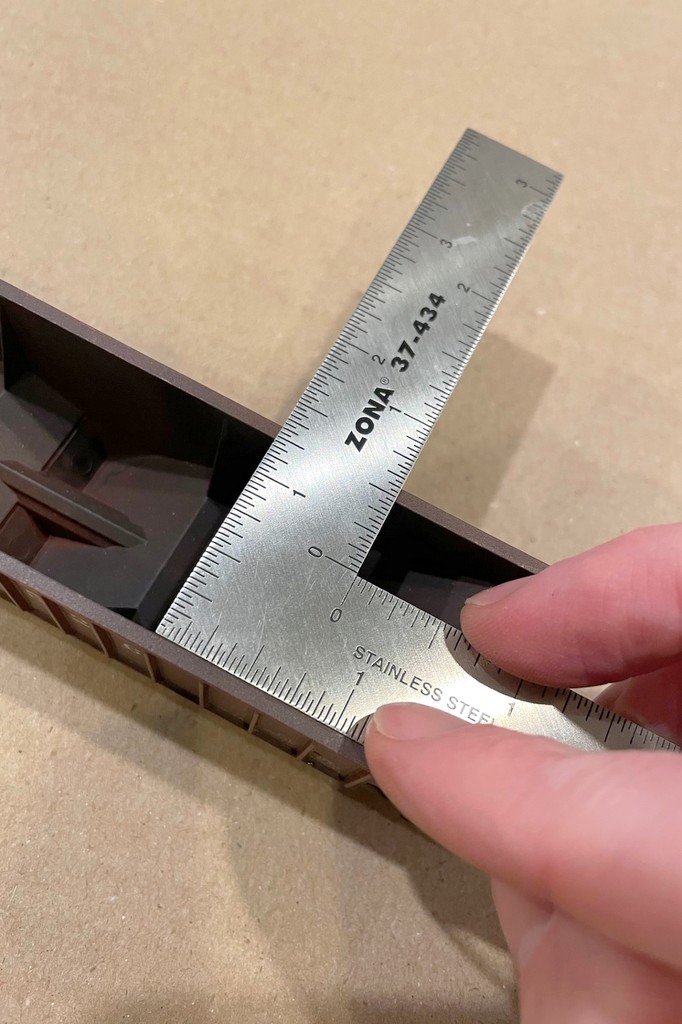
Step 2. Measure the hopper’s interior width.
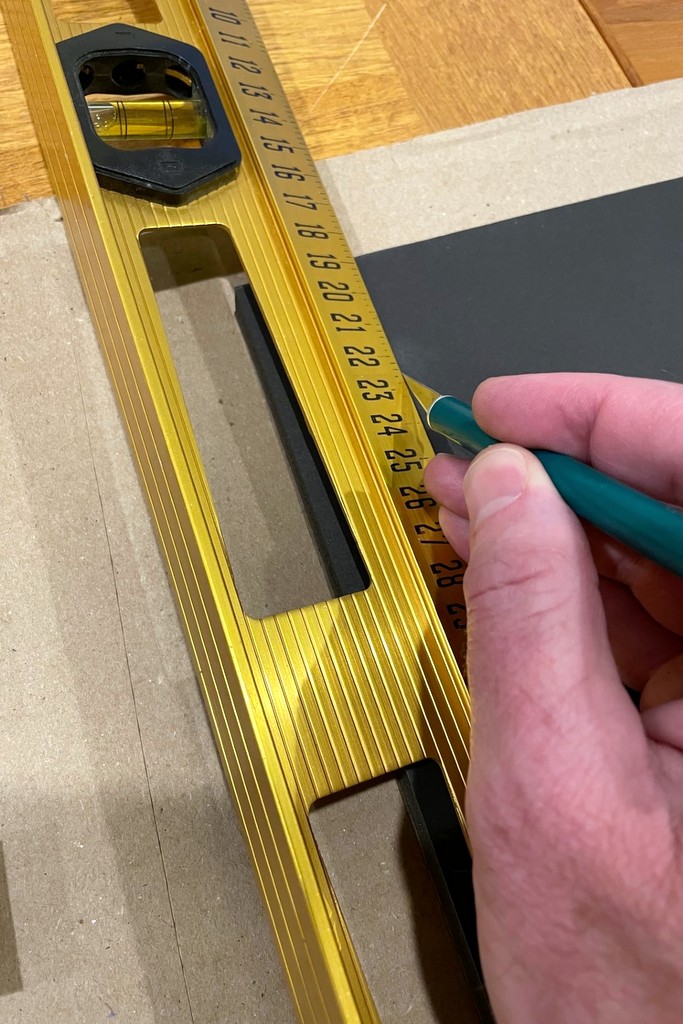
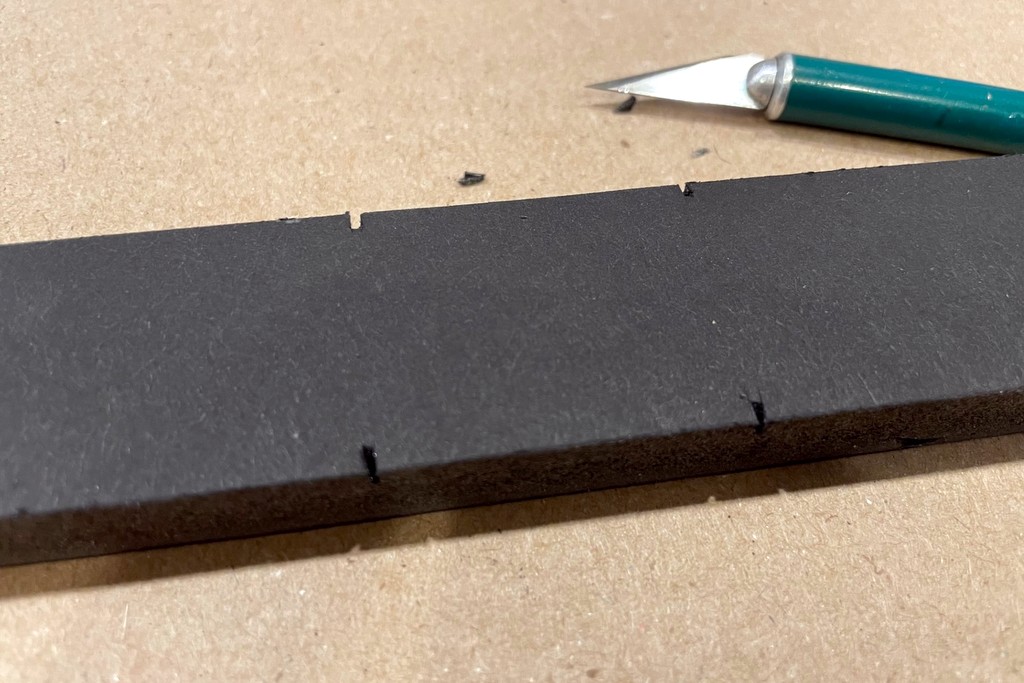
Step 3. Cut a long strip of 1/2″ foam core 1/16″ narrower than the interior measurement.
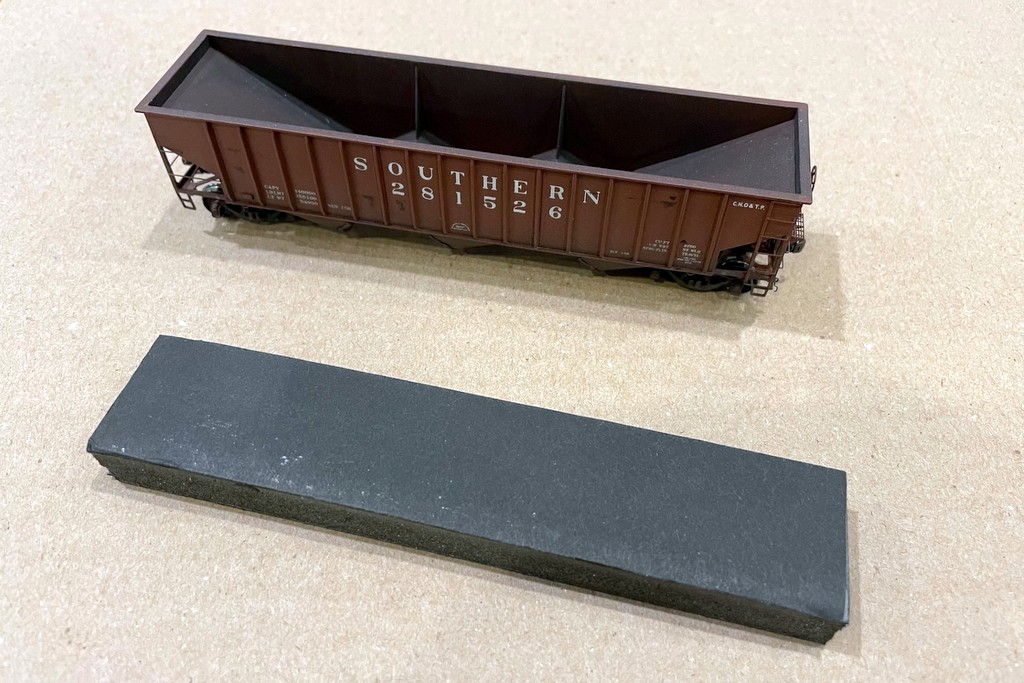
Step 4. Cut the foam core strip to length, about 1/16″ shorter than the hopper.
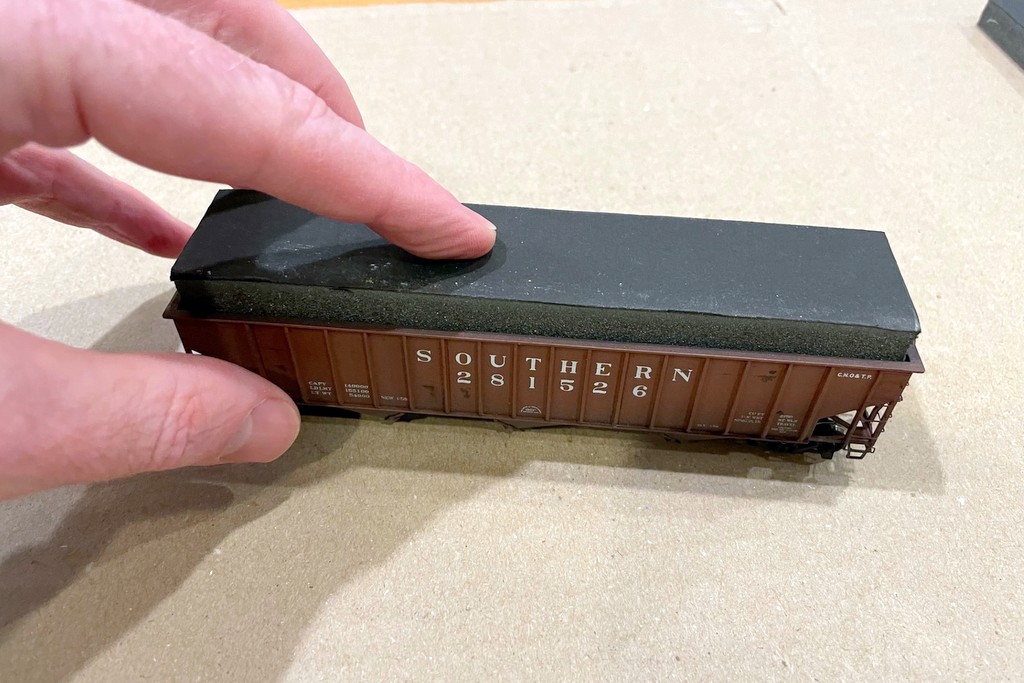
Step 5. Test fit the foam core–it should remove without getting stuck. Trim as necessary with the X-Acto blade until it easily fits.
Step 6A. Once the load fits nicely, press it gently down into the hopper to make an indentation of any interior bracing.
Step 6B. Using the X-Acto knife, cut out little wedges of foam core to make room for the bracing. For some cars, this might entail cutting out strips across the foam core to get the load to fit lower in the car.
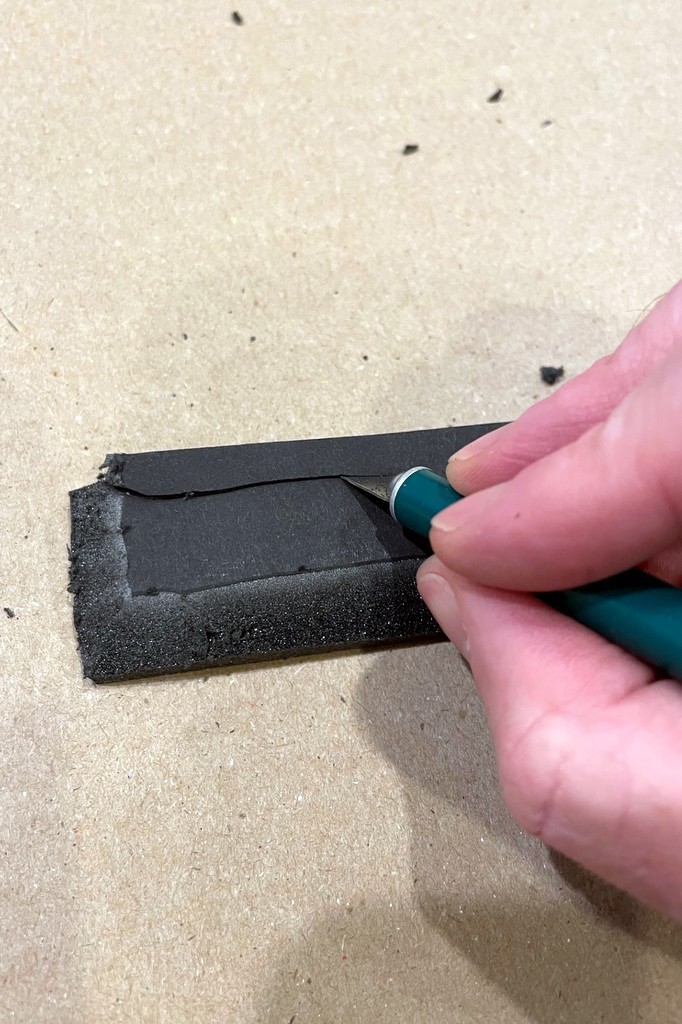
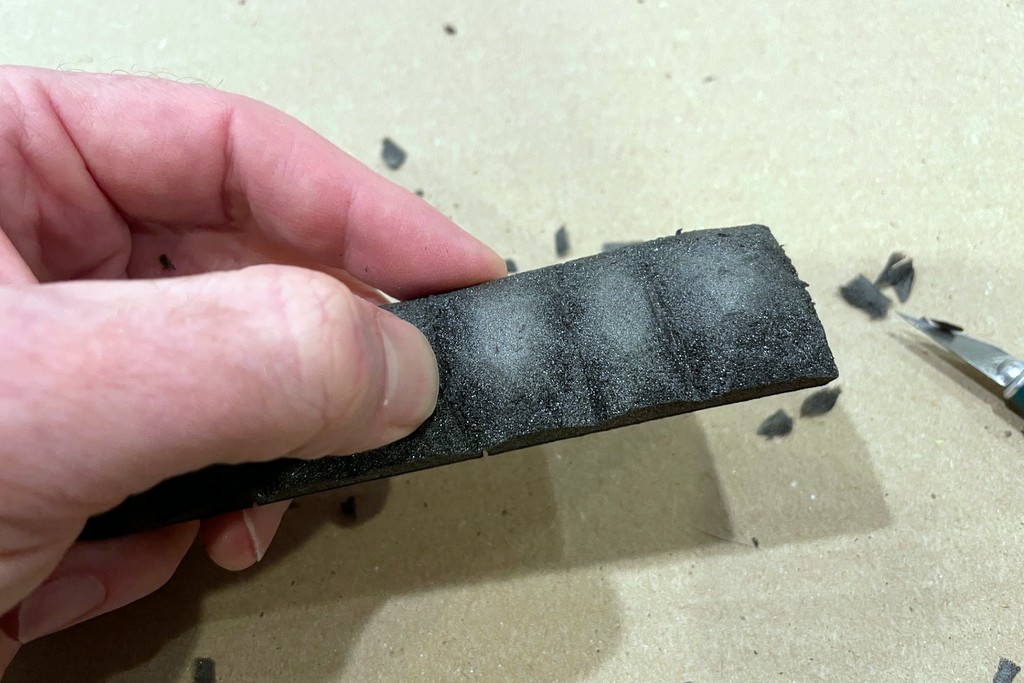
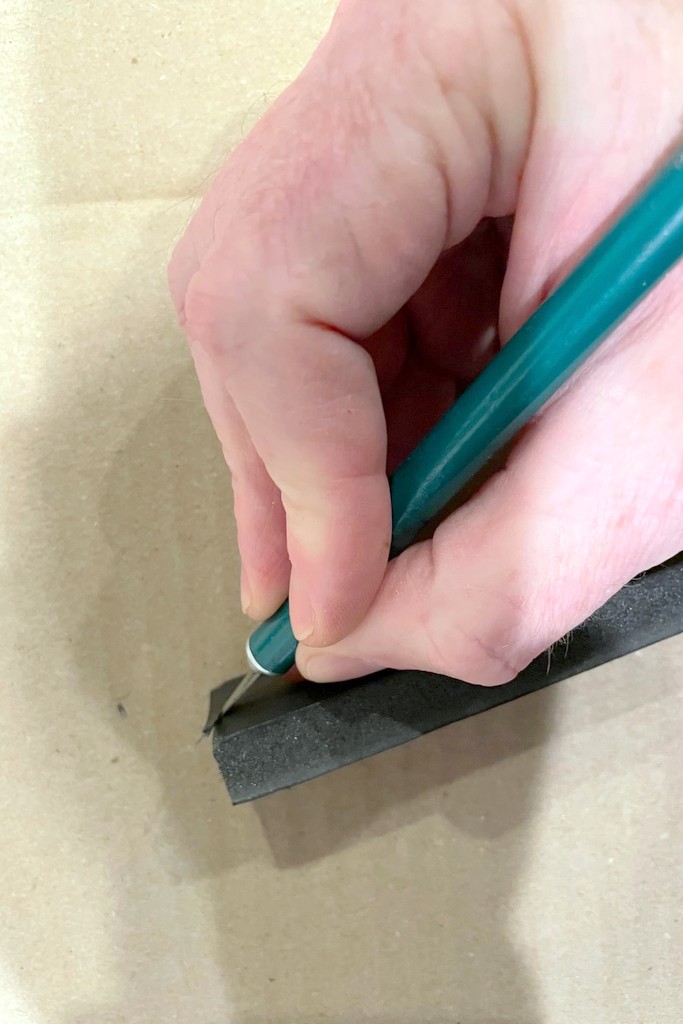
Step 7A. Carve the load. Start by carving the top edges to give the load sloped sides somewhere around 45 degrees. If the knife continually snags, it’s time for a new blade.
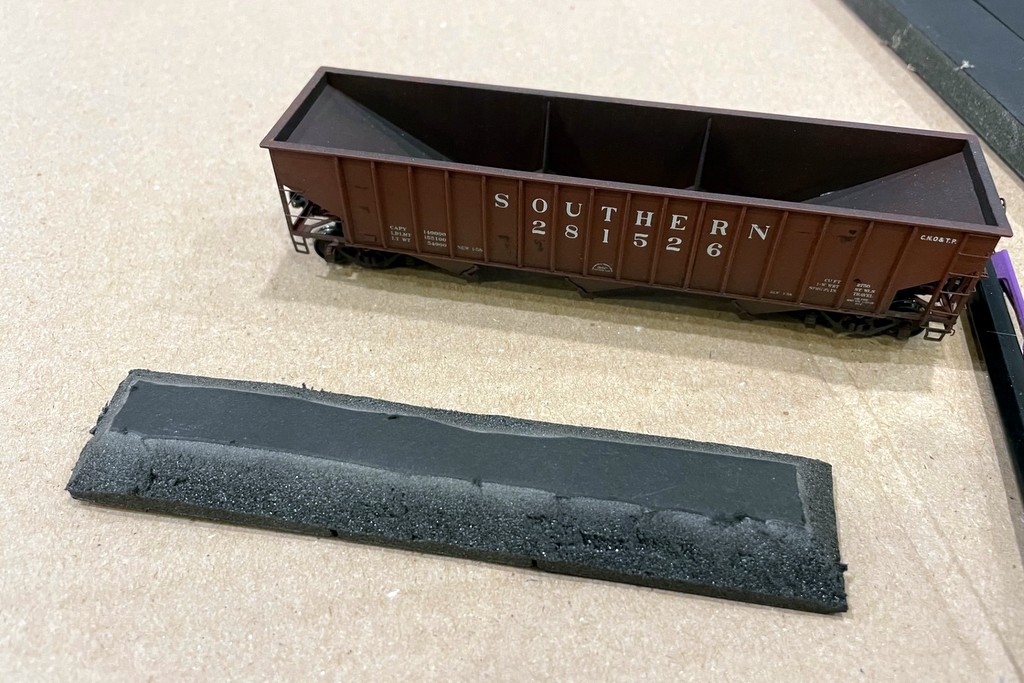
Step 7B. There should be about 1/8″ vertical section left on the sides and ends of the bottom of the foam core when you’re done. If you’re modeling a flood load, this may an appropriate final shape.
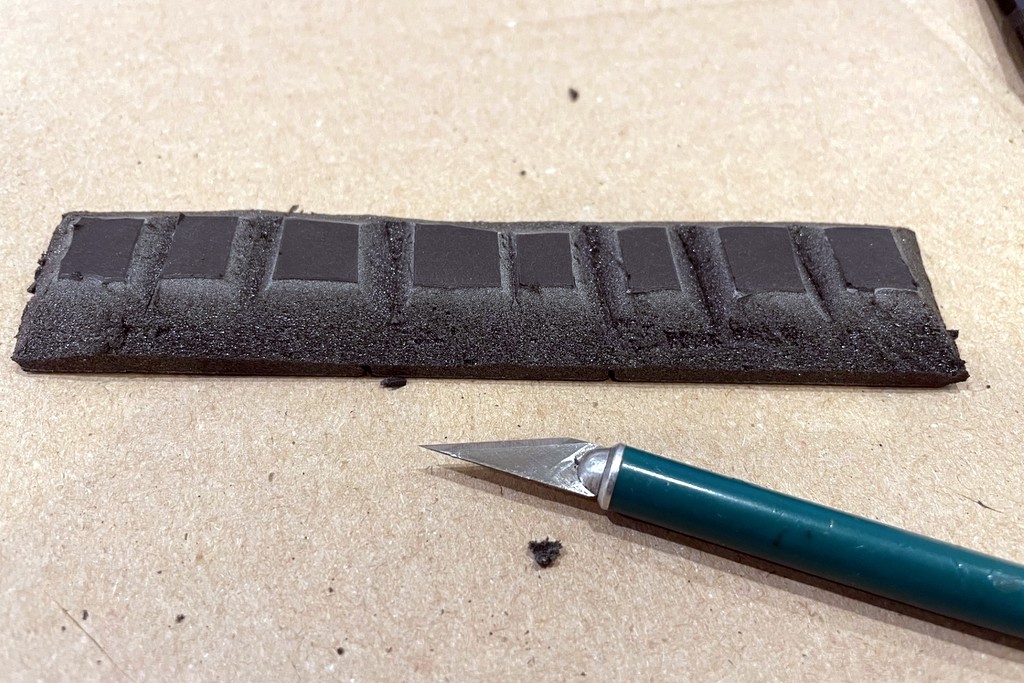
Step 7C. For a truck dump or simple tipple load, carve a series of V-shaped grooves into the top of the foam core. The width and depth should be somewhat random as should the number of piles.
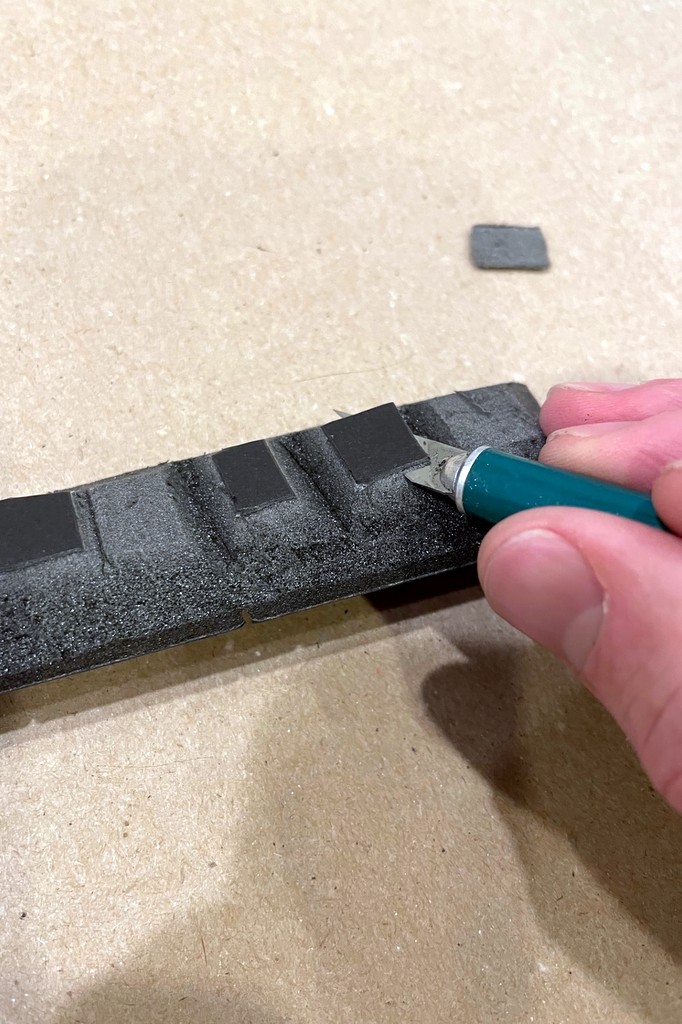
Step 7D. Carve any remaining poster-board off the top of the load.
Step 7E. The piles are now ready for carving.
Step 7F. Using a sharp X-Acto blade, carve a V-shape into the edges of the earlier slots between the piles.
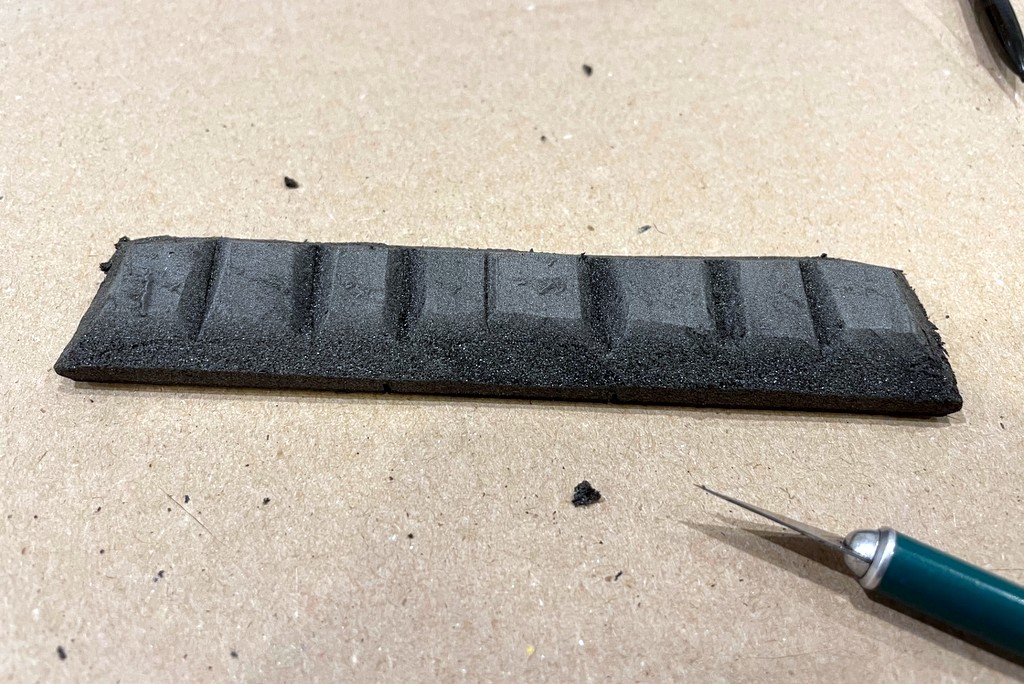
Step 7G. The piles still look blocky at this point, but they’re starting to take shape. If desired, use the knife to lower the peaks and sides of some of the piles.
Step 7H. Make fine cuts to refine the shape and eliminate any sharp lines on the piles.
Step 7I. Using your fingers, crush down any remaining sharp edges and round off the tops and sides of the piles.
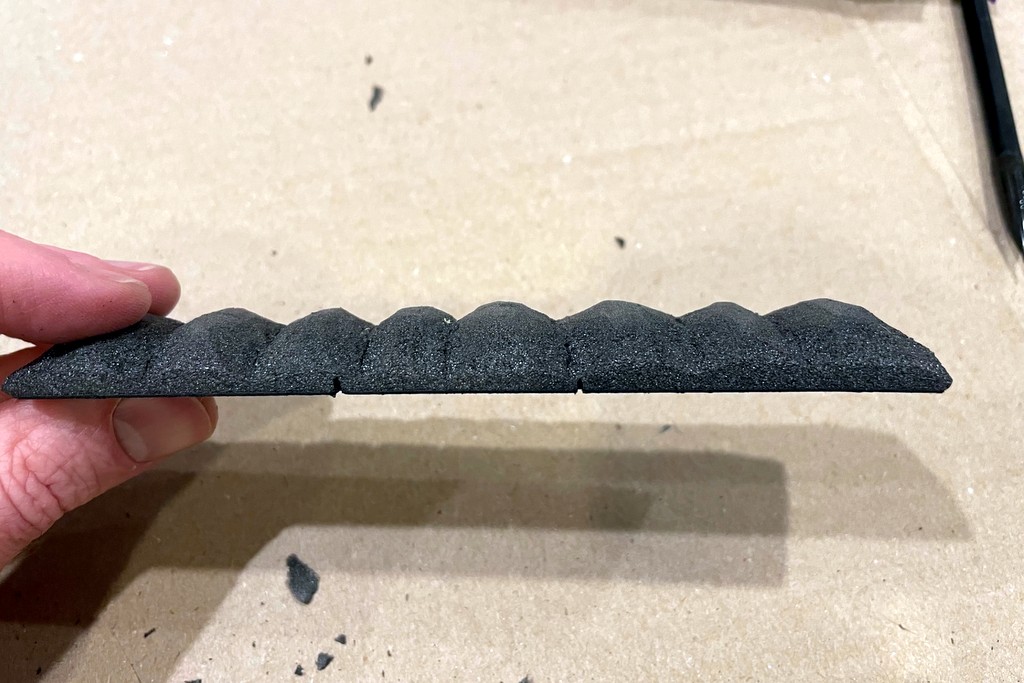
Step 7J. Make sure you check the side profile to eliminate undesired flat tops.
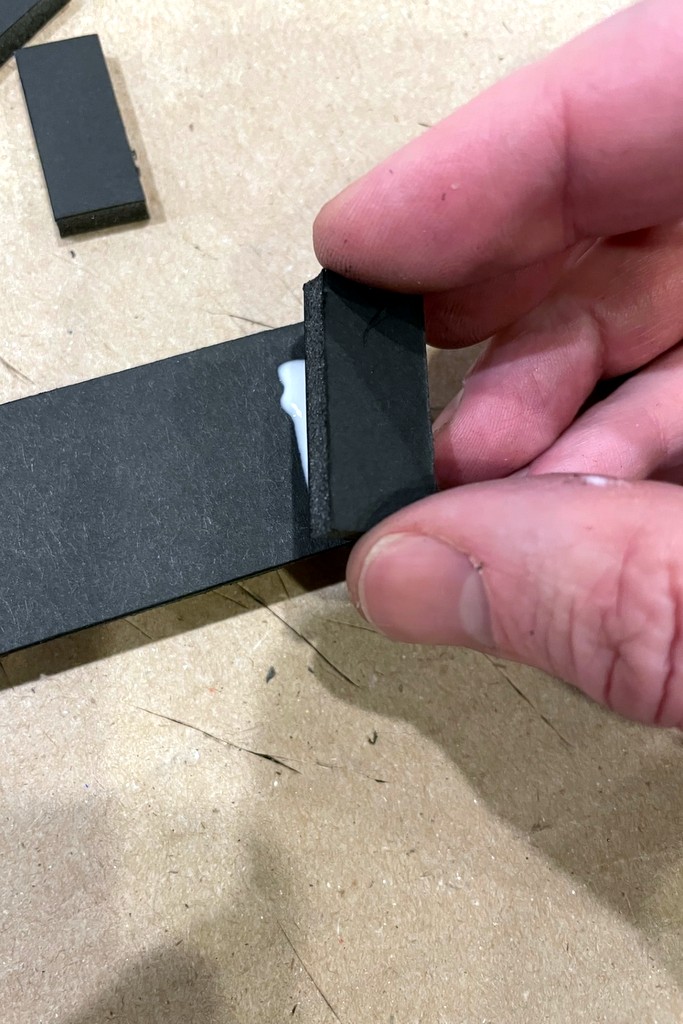
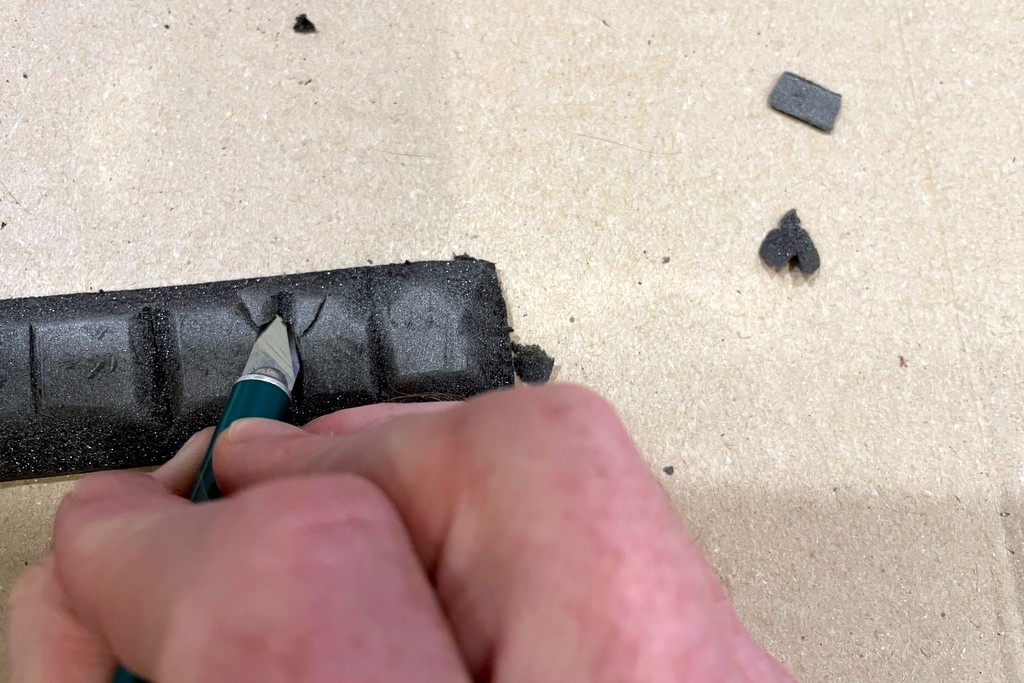
Step 8A. If the load doesn’t touch the slope sheets (most cars), create spacers by cutting a piece of 1/4″ foam core and gluing it to the underside of both ends of the load.
Step 8B. When the glue dries, test fit the load. If it sits too high (i.e., if you can see the vertical sides of the load above the hopper sides), carve an angle onto the end of the spacers to allow it to sit lower–start small, test, and carve bigger as needed.
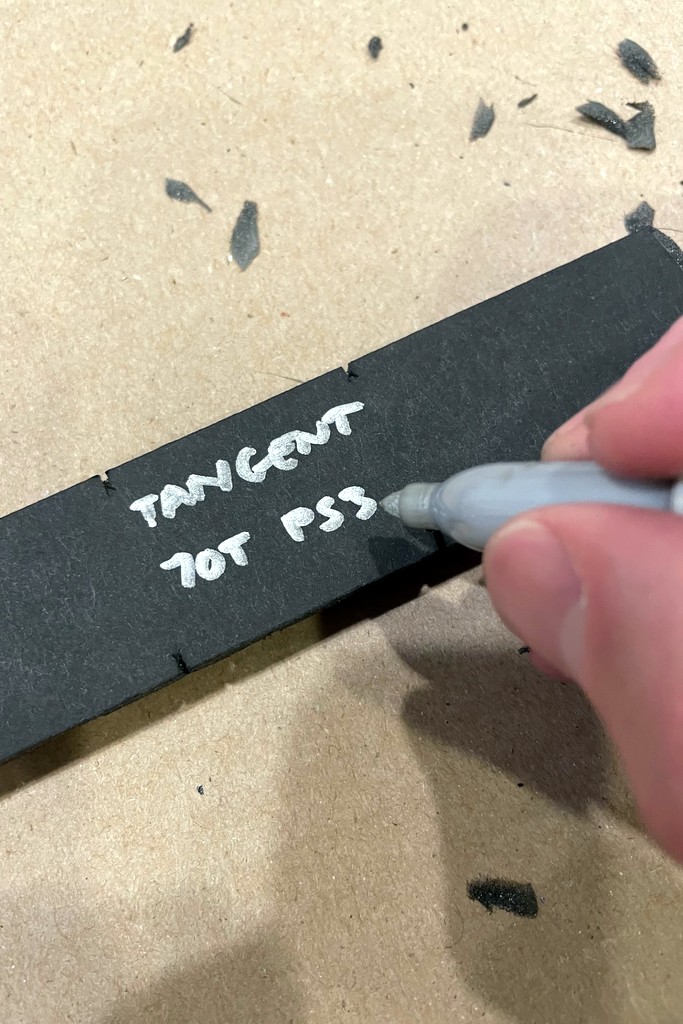
Step 9 (optional). Now is a good time to label the load if you will have multiple hopper types and sizes–a silver Sharpie works well.
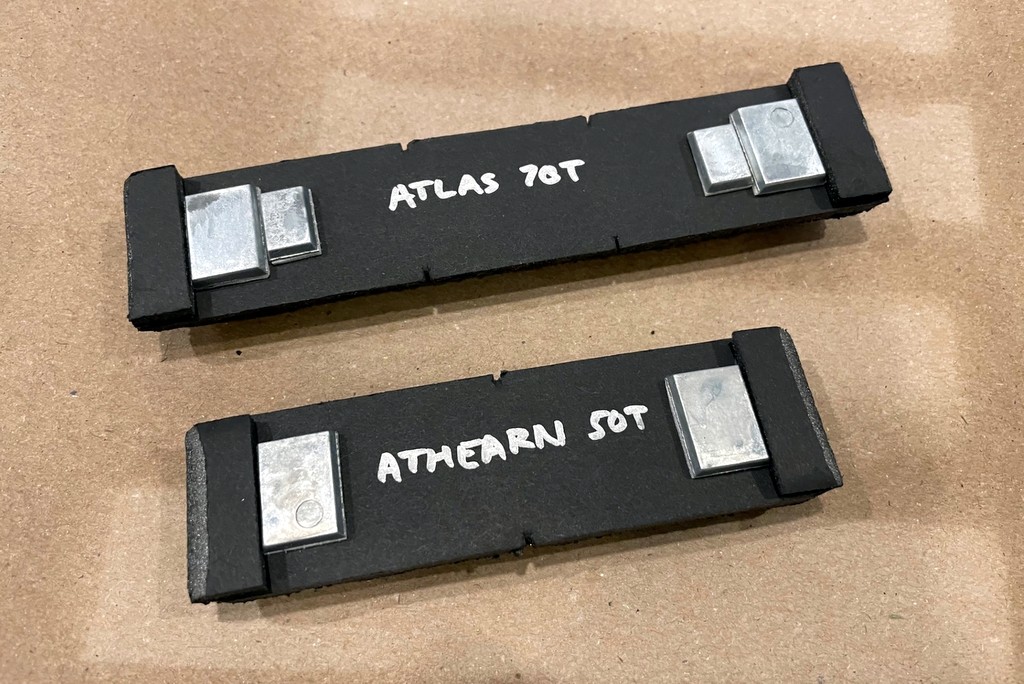
Step 10 (optional). I like to add stick-on weights to the underside of each load. I use weights for pine wood derby cars, and I use two large weights for a 50 ton load, two large and two small weights for a 70 ton load, and four large weights for a 100 ton load.
Step 11. Test fit everything and make any final adjustments–the load is now ready for coal!
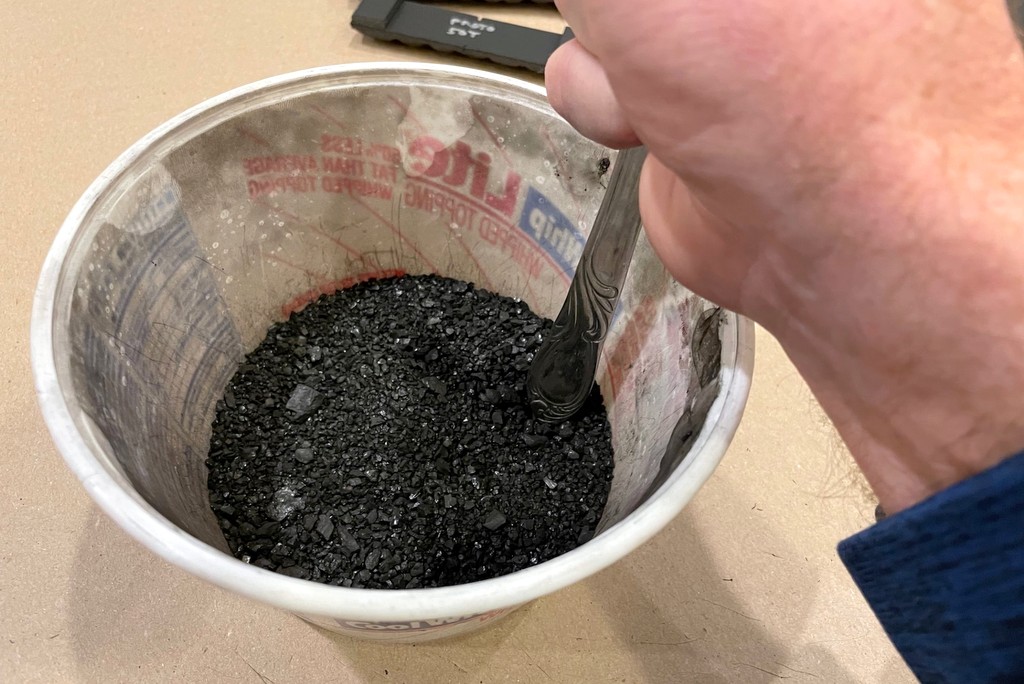
Step 12. Grind the coal, if necessary. I found this piece of coal, and I was able to break it up “mashing” it repeatedly with the handle of a large butter knife. I used a kitchen strainer to sift out the smaller pieces into a separate container.
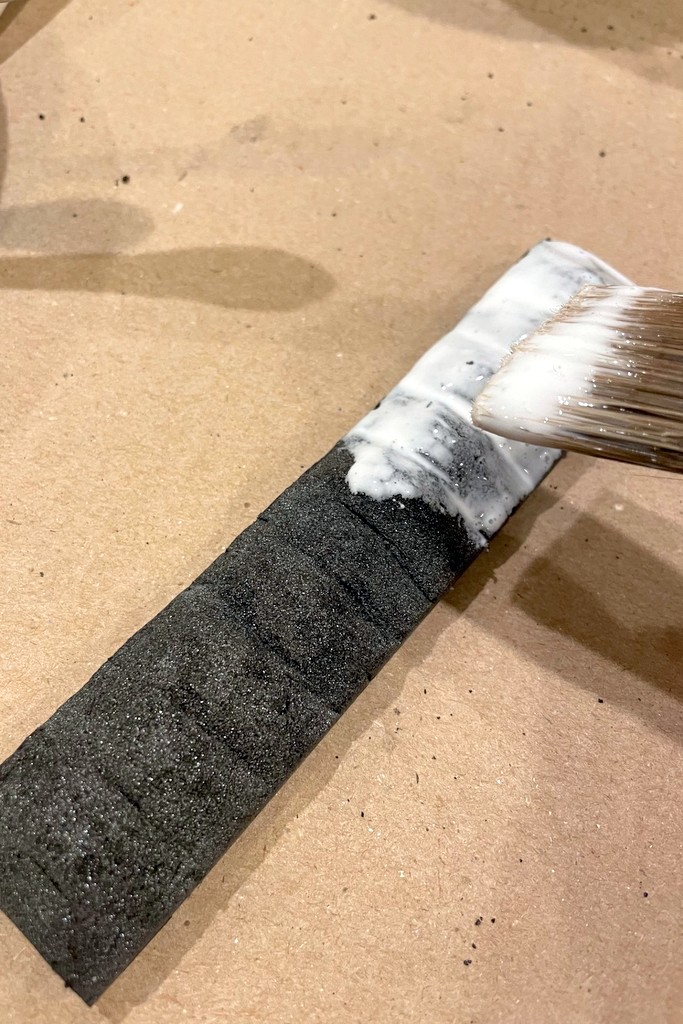
Step 13. Using an old paintbrush, coat the top of the load with full-strength white glue.
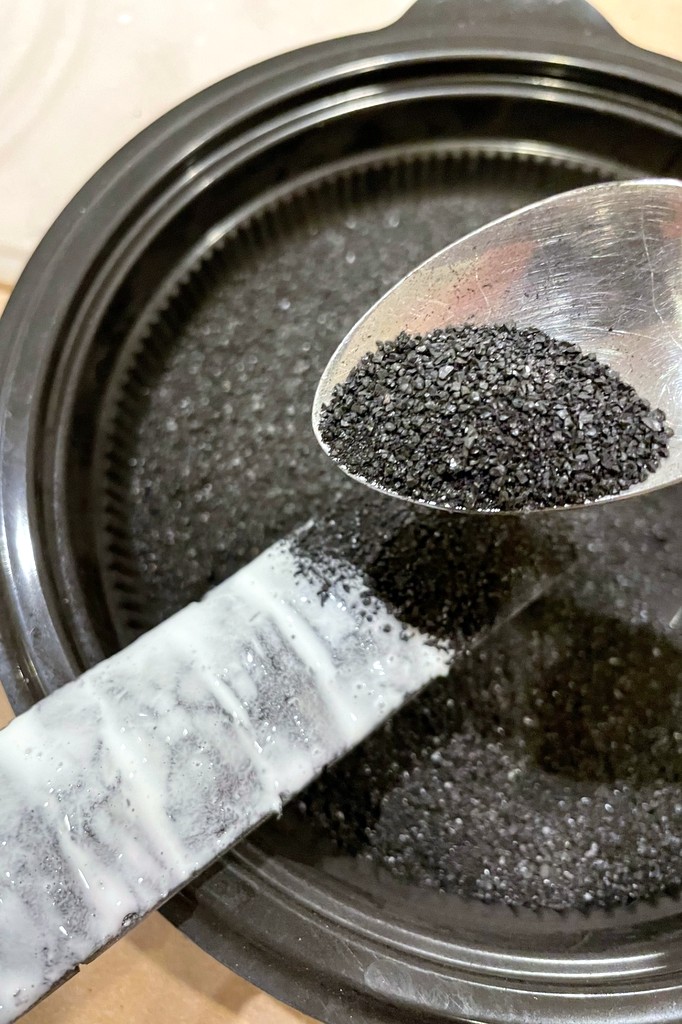
Step 14. While the glue is still wet, use a spoon to sprinkle a thick layer of coal on top of the glue. Shake the load off over the coal container to preserve any coal that doesn’t stick.
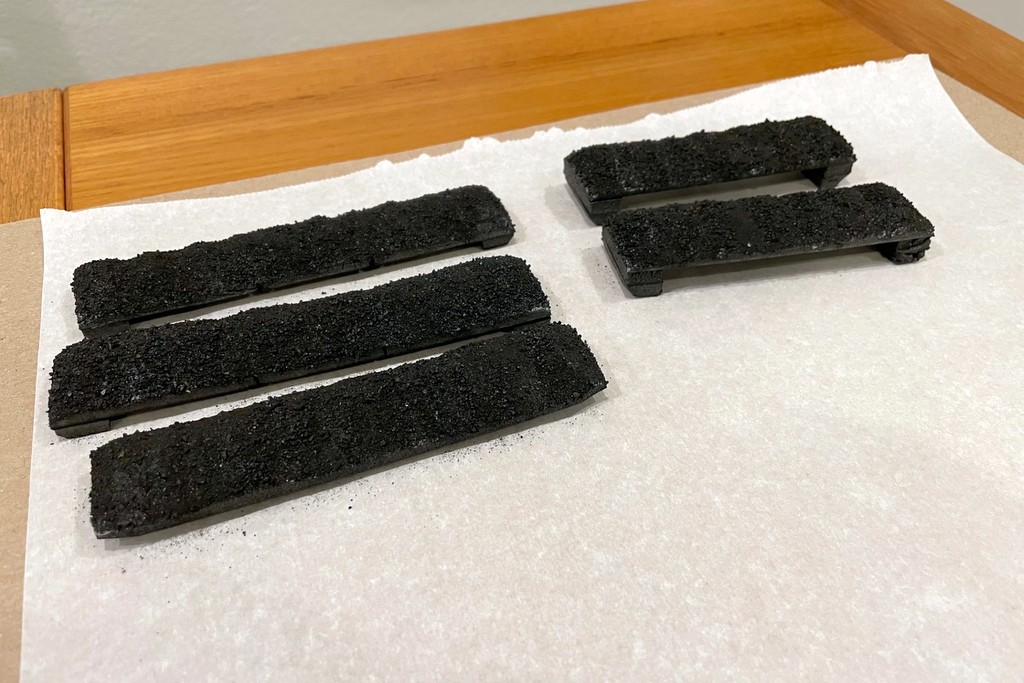
Step 15. Set the coal load aside to dry. I use parchment paper underneath the loads to keep them from sticking too bad.
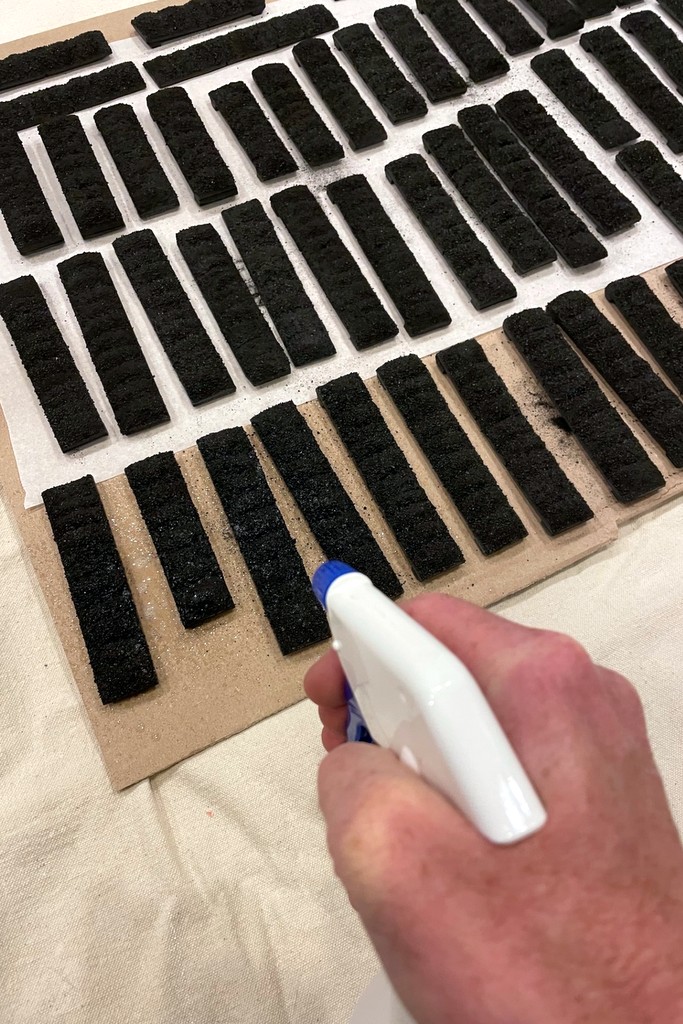
Step 16A. After the glue has dried for a couple hours, use a spray bottle to soak the loads in “wet glue” (about 8:1 water:glue and a couple drops of dishwashing soap.
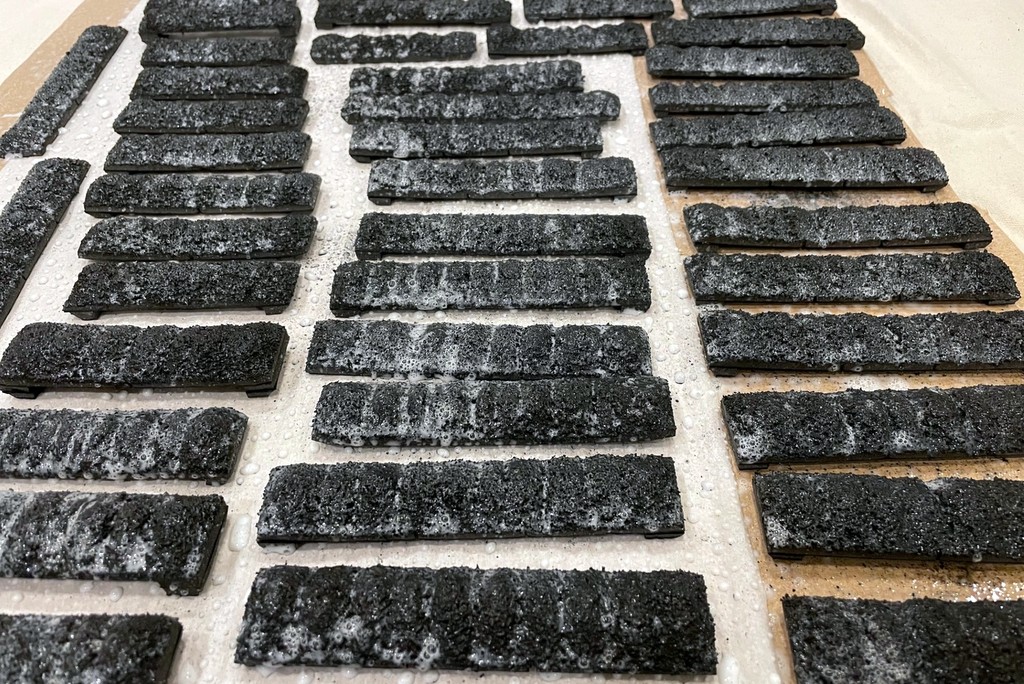
Step 16B. Let the glue dry overnight–this will set the load and keep the coal from leaving dust.
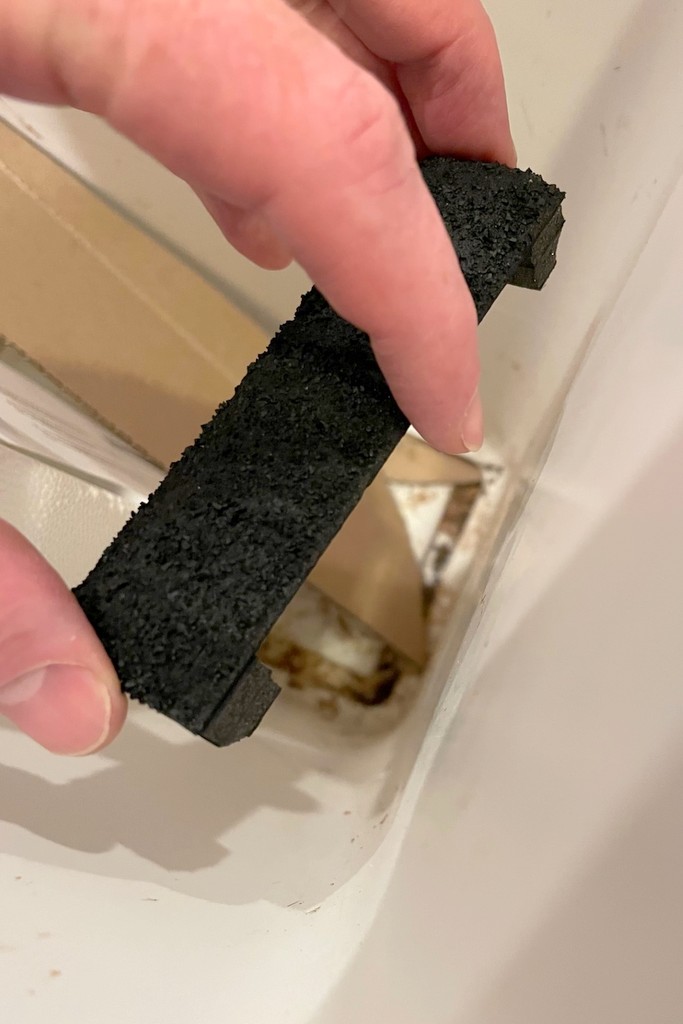
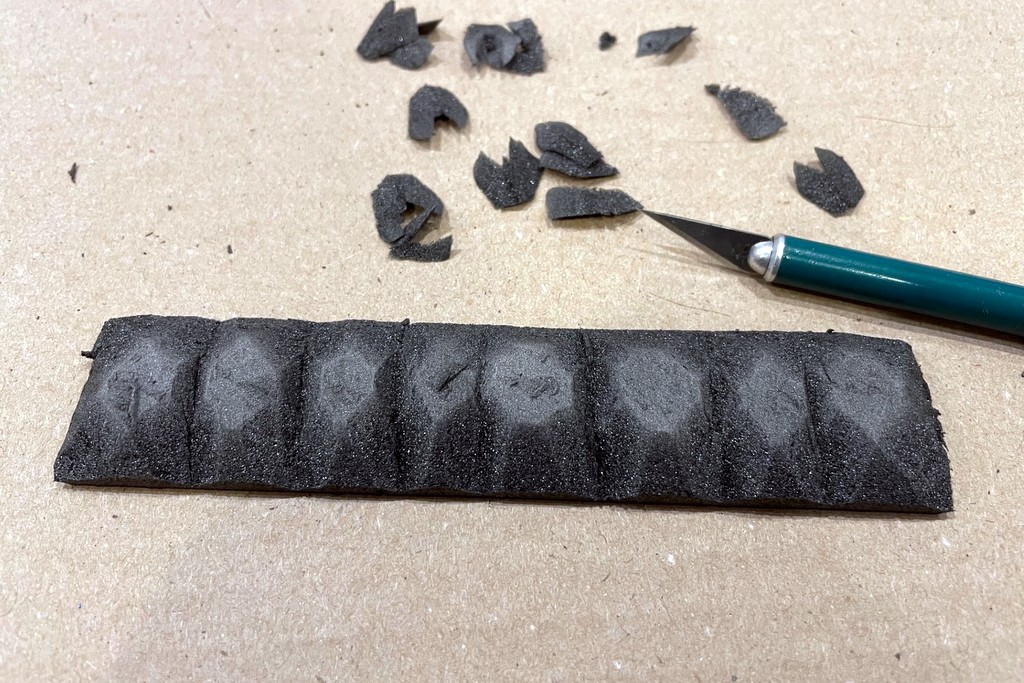
Step 17A. Once the glue is completely dry, use fingers to remove any coal pieces that stick up awkwardly from the piles.
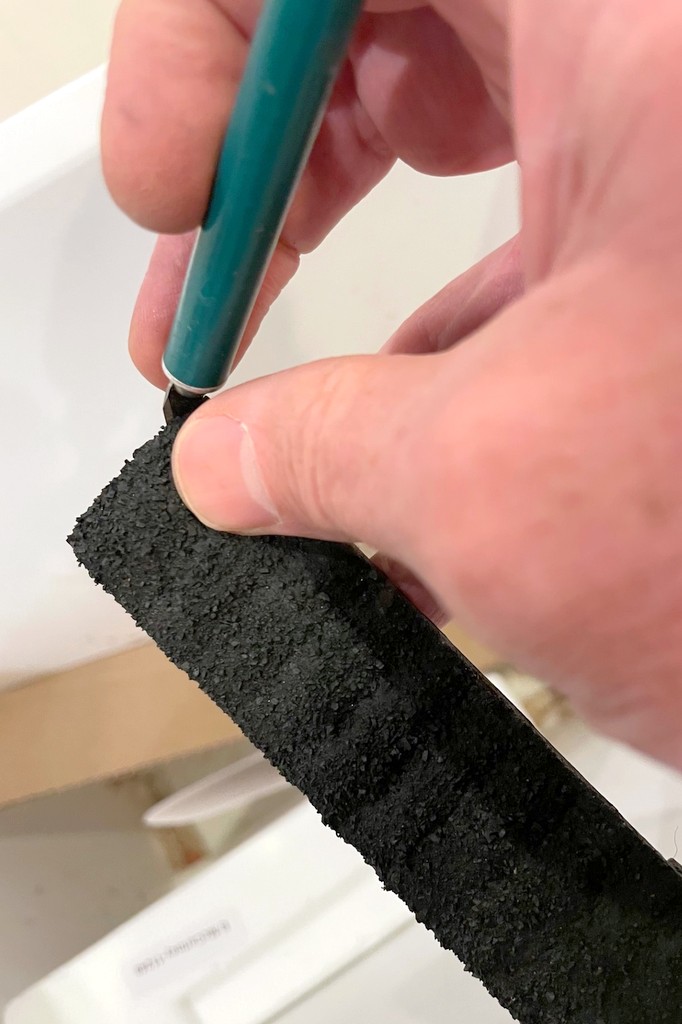
Step 17B. Using an X-Acto blade, finishing cleaning the load by gently removing any bits of coal and glue from the sides and ends. Test the load in a car to make sure it can still be easily removed.
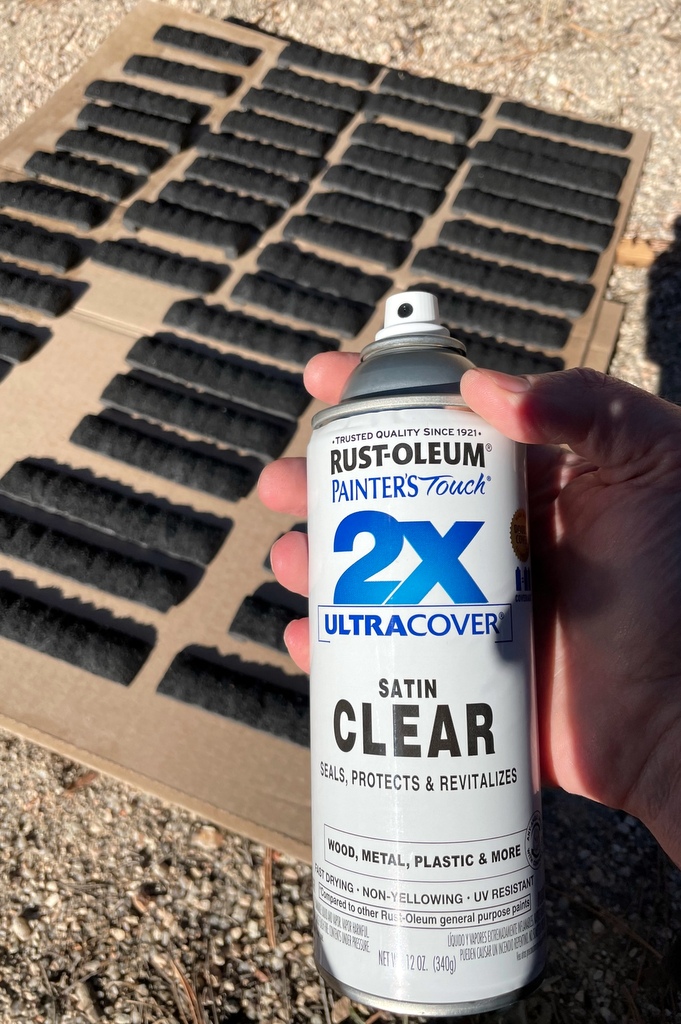
Step 18. The final step is to seal the loads with a clear lacquer spray. The glue dulls the coal a bit, so I use a “satin” finish to restore it to its original luster. Once dry, the load is finished!
Step 18B. Here’s a comparison of lusters. At the bottom is a load sprayed with “gloss” finish. In the middle is the “satin” finish, and at the top is no finish, just the matte luster of the glue.
Some lessons and tips:
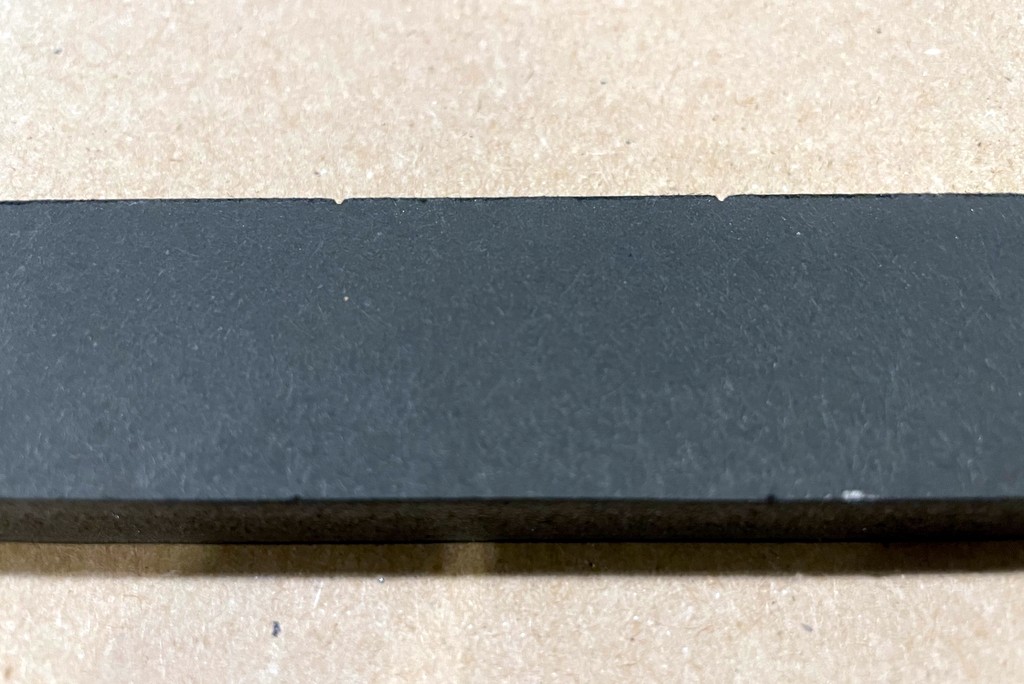
- Always use black foam core if you can find it–it makes the load very resilient to pieces of coal falling off via handling
- If making a lower “in-transit” load, use 1/4″ foam core for the load and carve shallower angles
- If you can’t find 1/2″ black foam core, try laminating two 1/4″ strips–it’s tougher to cut, but it does work
- Some hoppers (e.g., offset hoppers) may require you to angle the ends of the load a bit to get it to fit well
- If the load bows too much, you can gently “break” the back of the foam core in a couple places between the piles to flatten it again–you might need to add some more white glue to shore things up if the break is deep
- If you model the ’60s or earlier, you can use different sized screens to create different coal sizes for your loads which were common at most medium and large tipples
- A bamboo skewer works well to remove the load and won’t damage a hopper as easily as something metal
I have now mass produced more than 60 coal loads, and I will be using this method from here on out. The loads look great to my eye, and they cost pennies apiece. If you have any other tips or techniques that help you model coal loads, please leave a comment on this article. Happy coal load making!
The high and distinct piles of a fresh “truck dump” load can be easily seen from the sides
Thank you, Dan. Wish I thought of this technique sooner, but it’s so useful I think I will redo my coal loads.
I just re-read this article and remembered in either “C&O Power” or one of the other books on the C&O that they did indeed, in steam days at least, haul various sizes of coal from tipples in the same train. There was one picture, I recall, that showed some lumps as big as a football but others that were a lot smaller. That may have just been the business of those days when more businesses and more people burned coal than these days.
This is one of the easier, great looking, and cheaper ways to do a coal load. Thank for publishing this. The only thing I change (as I ama trying it) is I leave off the weights for now, but add a drywall screw before I glue and cover it with coal. This allows me to use a mechanics fishing magnet to easily remove the coal load. I eventually plan to make a magnet just for this purpose and cover the end of it with some padding so as not to damage the load.
Good idea with the magnet! Let us know how it works when you’ve got it operational.
So to follow up-
Screw worked better than I thought. With all my hoppers in line I can simply use a magnet on a pole (I am using a mechanics fishing magnet but eventually will have to return it to my shop) and pull them out. Gives extra reach between scenery, to the back of the layout, and is super quick to use.
I made a template to use to cut the foam. This kept me from having to measure every load repeatedly for the same car. I labeled it for future use as I am sure it will be needed as I get better and want to improve my loads.
My initial test load warped bad when I glued the coal on. My second test I applied glue to the bottom side of the load at the same time as I glued the coal load. Kept the foam nice and straight. The key to this was having the screw. I left mine protruding from the bottom of the foam to hold onto. It also acted like a kick stand tilting the load holding the bottom up. I still had one long side touching, but on the wax paper as you mentioned it doesn’t stick bad. The glue also helped to secure the screw very firmly.
I set the loads on a large sprue I had left over from a building kit for the final spaying of glue so the screw could protrude through leaving the load flat. I did have to add extra coal on a few of the screws as you could see their impression after the initial glueing.
Last I used the smoother side of a rasp to clean the edges of my loads. I found it to work fast and made it easy to go little more as needed to fit. I found the coal hopper that had the tightest fit and used that one to fit my coal cars to. It has internal bracing so not sure why it’s a little tighter, but that keeps it from being a special case or needing a specific load.
Thanks for your article!
Thanks for sharing your extra tips and techniques!