


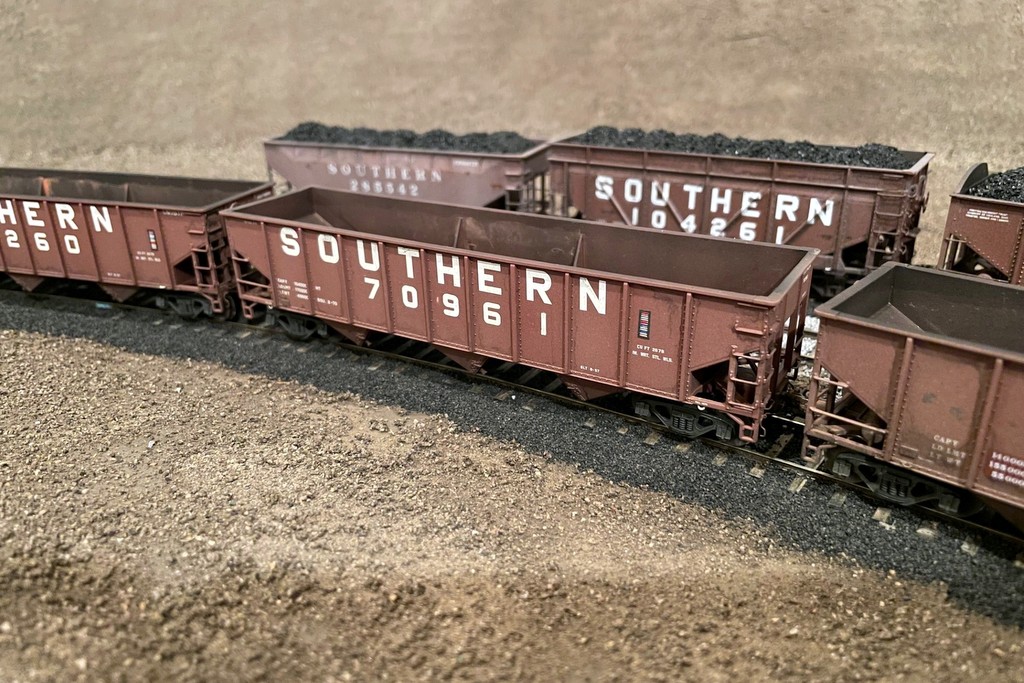
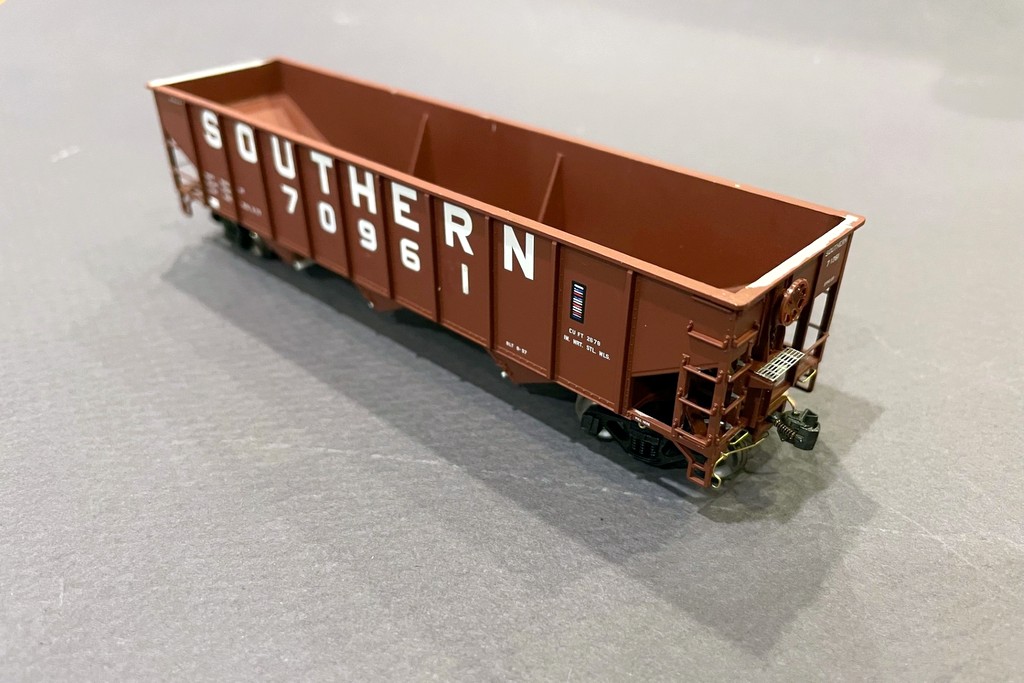
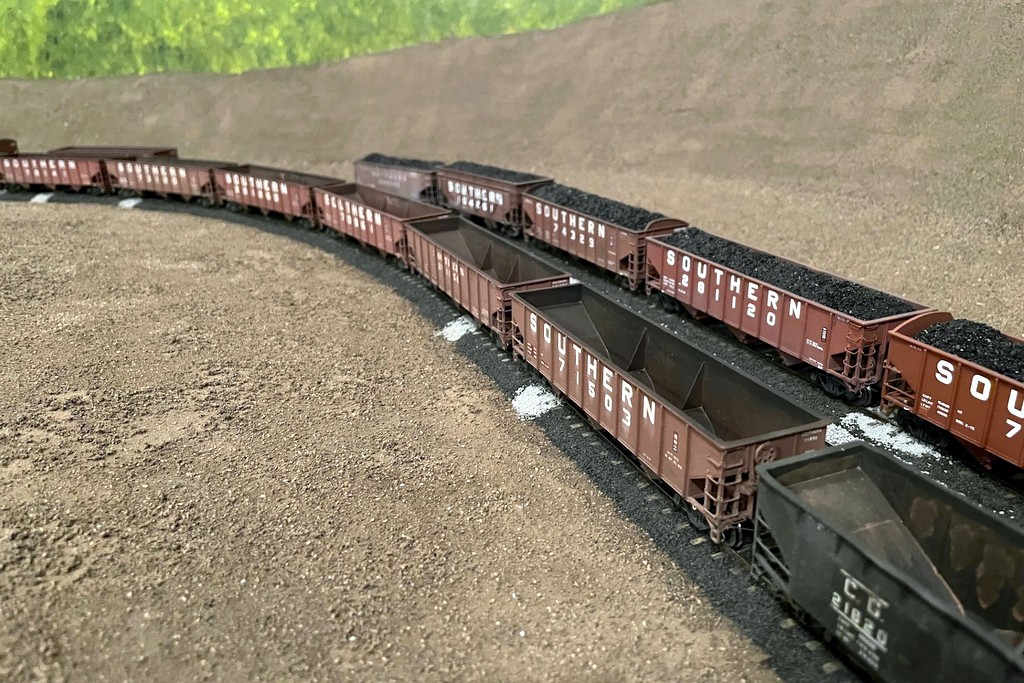
A close up shot of one of the finished Atlas Trainman hoppers in action
These days, you can find some really nice, super-detailed, ready-to-run HO scale coal hoppers from the likes of Tangent, Kadee, ExactRail, and others. While these models are beautiful, creating an entire coal train can really break the bank, and there are just some hopper prototypes that are only modeled in a lower level of detail. In either case, it’s not too difficult to bring these cheaper plastic kits closer to the detail level of a more expensive brand, and it doesn’t have to be super time-consuming. One of my favorite starting points is the relatively cheap and readily available “Atlas Trainman” ready-to-run hoppers, especially the 9-panel, 70-ton car that’s pretty close to the Southern’s 70-ton fleet I model. There’s a lot to love about these cars, but there’s also a big difference in detail.
Positives of the Atlas Trainman hopper
- Relatively inexpensive (about 1/3 the cost of a high-end car)
- Sharp paint and lettering
- Metal wheels and free-rolling trucks
- Decent rivet detail
- Nice brake wheel and slope sheep bracing
Drawbacks of the Atlas Trainman hopper
- Limited road number options
- Molded-on grab irons and brake platform
- Missing some details
Here’s my method for upgrading these hoppers without spending an inordinate amount of time or money. They’re not as good as a Tangent, but that’s not the goal here. The idea is for these to be “fleet hoppers” that stand up to use and don’t look out-of-place coupled to their more expensive counterparts. These simple techniques and detail upgrades (along with some weathering… I’ll save that for a future article) won’t win any contests, but they run well, look good from 18″ away (the normal distance for viewing when they’re on the layout), and they won’t break the bank!
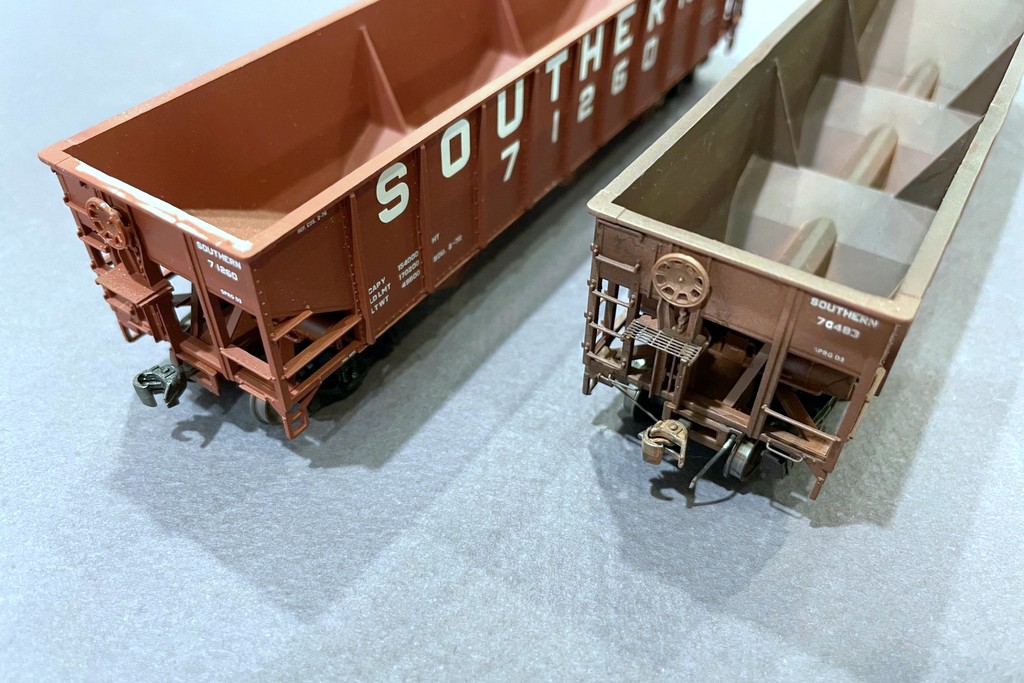
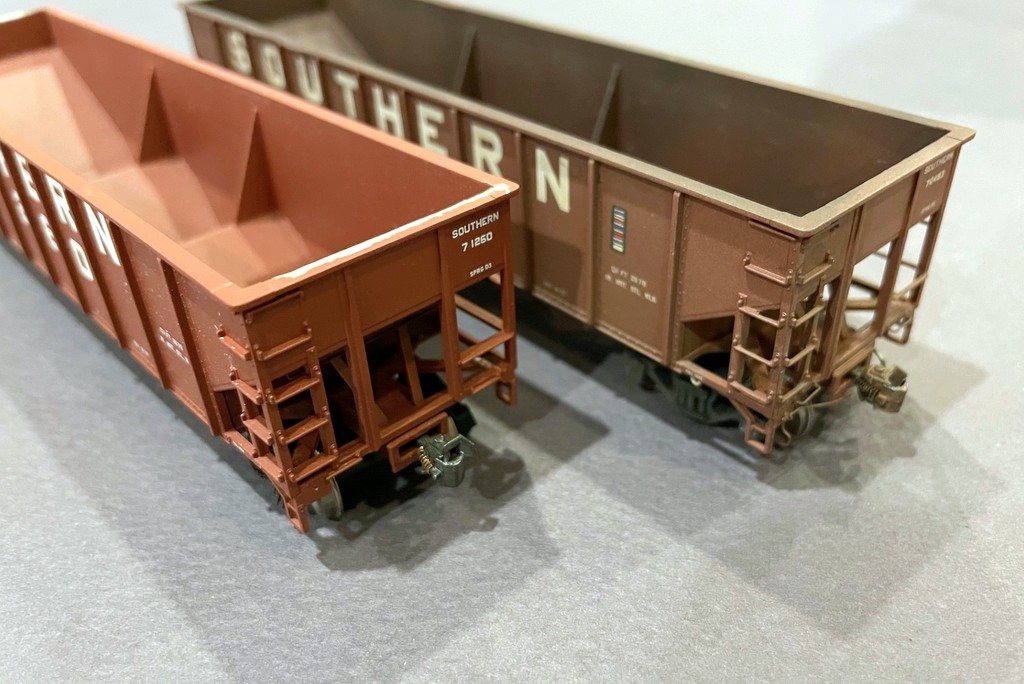
Here’s one of the completed Atlas Tranman hoppers (left) next to a Tangent hopper (right); I think it holds its own from a foot away
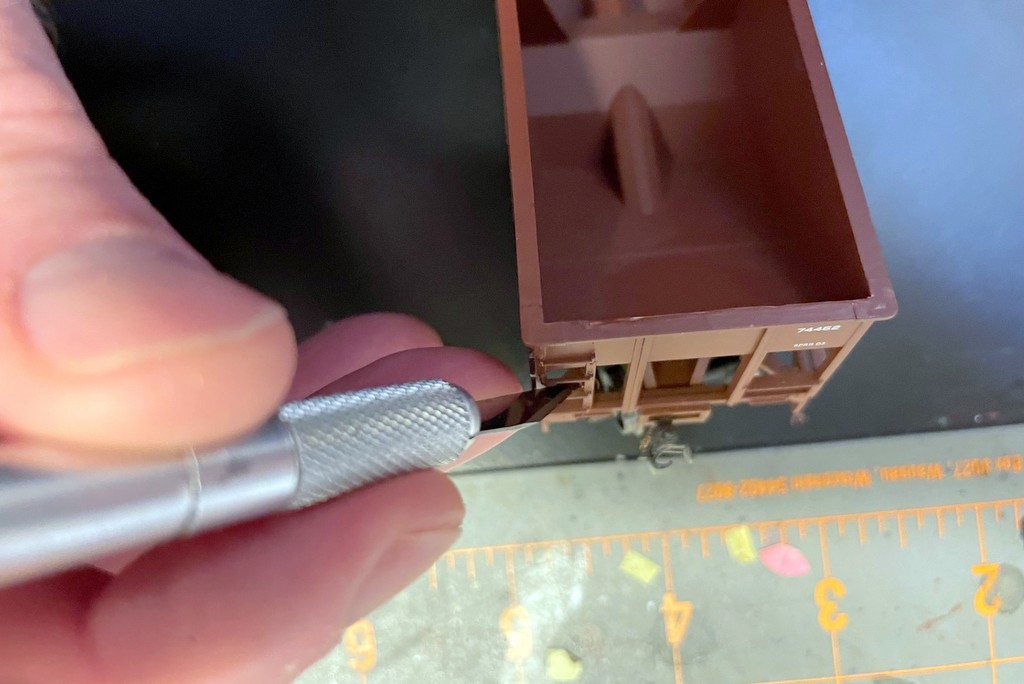
The best way to save time in building a hopper fleet is to use factory painted cars. Thankfully, Atlas offers hoppers in a couple schemes for my favorite railroad, the Southern. Unfortunately, one of the schemes is too modern (round “O” instead of the squared-off version), and the more correct scheme is only offered with heap shields (a much less common variant and number series of ex-Central of Georgia hoppers). Additionally, there are only a dozen numbers or so, and I need several dozen cars for my layout. Not to worry, the Atlas lettering is pretty easy to remove. My favorite fast technique for this is to use an X-Acto chisel blade which I scrape backward (blade facing away from the direction of scraping) repeatedly over the lettering until it’s gone. This leaves a shiny spot, but it’s nothing that can’t be hidden with a little weathering. In some cases, I even salvage parts of the existing numbers. For instance, I only scrape away a portion of a “4” to leave a “1”–this makes it very easy create new numbers without even decaling. For other numbers, I use a mix of Microscale and K4 decals to replace the scraped-off numbers on the sides with new ones, and I use a little white paint and a thumbtack to carefully paint in the impression of the correct numbers on the ends.
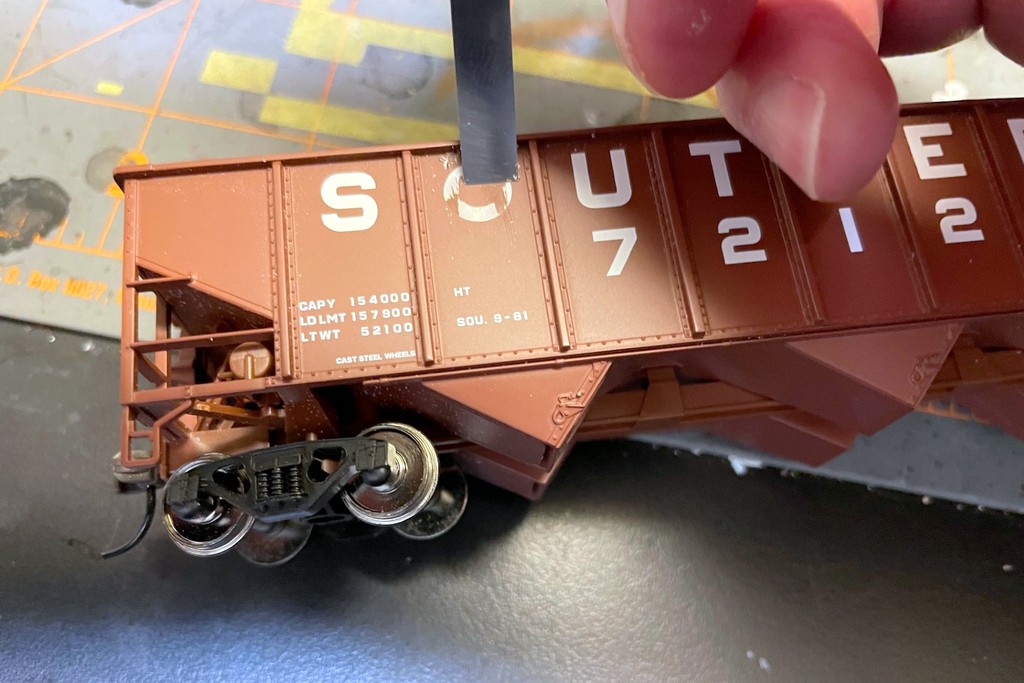
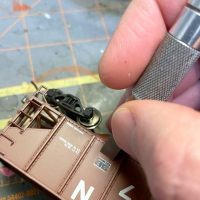
The lettering and numbering on an Atlas hopper can be removed by scraping it with the back side of an X-Acto chisel blade
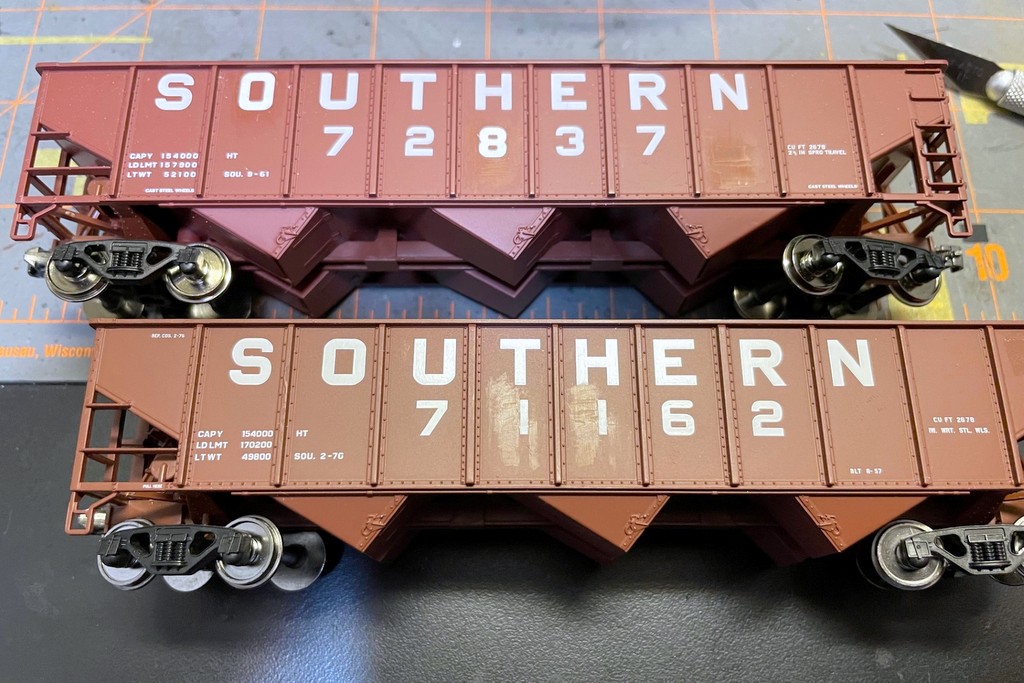
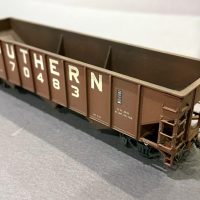
This angle shows the shiny spots from the replacement of the “O” and “8” with decals on the upper hopper. The lower hopper shows how the scraping method has been used to turn “74462” into “71162” by just removing part of the 4s
Next comes the toughest part–improving the molded-on grabs and wire braces. Molded-on grabs look particularly bad on hoppers because the ladders are mostly open, and the grabs are as thick as the plastic body which is grossly out-of-scale. It’s not difficult to remove the molded grabs and replace them with wire grabs, but it’s very time consuming. Instead, I like to “whittle” the plastic grabs to a more prototypical thickness. It takes some finesse, but the basic technique is to use a very sharp (fresh) X-Acto No 11 blade and carve small bits of the grab off the back side. I’ll work from the top in one direction, making several shallow cuts and removing the excess, then switch to the other direction and repeat, then do the same thing working from the bottom. I keep making thinner and thinner cuts until the grab is as deep as it is wide, then move on to the next grab. Same thing with the wire bracing opposite the ladders. Don’t worry if you cut through one, you can just replace it with wire. For most models, I don’t mess with the remaining grabs on the hopper body. This is one area where the molded-on detail will be visible, but with the improvement to the open part of the ladders, the eye tends to skip right over the molded-on grabs, especially from 18″ away. While I’ve got the X-Acto blade out, I’ll remove the heap shields (things that stick up from the ends) from the models where it’s appropriate for the prototype. I keep these for future projects (mostly MDC cars I turn into Central of Georgia hoppers using similar techniques to these).
The open grabs on an Atlas Trainman hopper can be thinned to look more round and prototypical through repeated small cuts of an X-Acto No 11 blade on the back sides of each grab
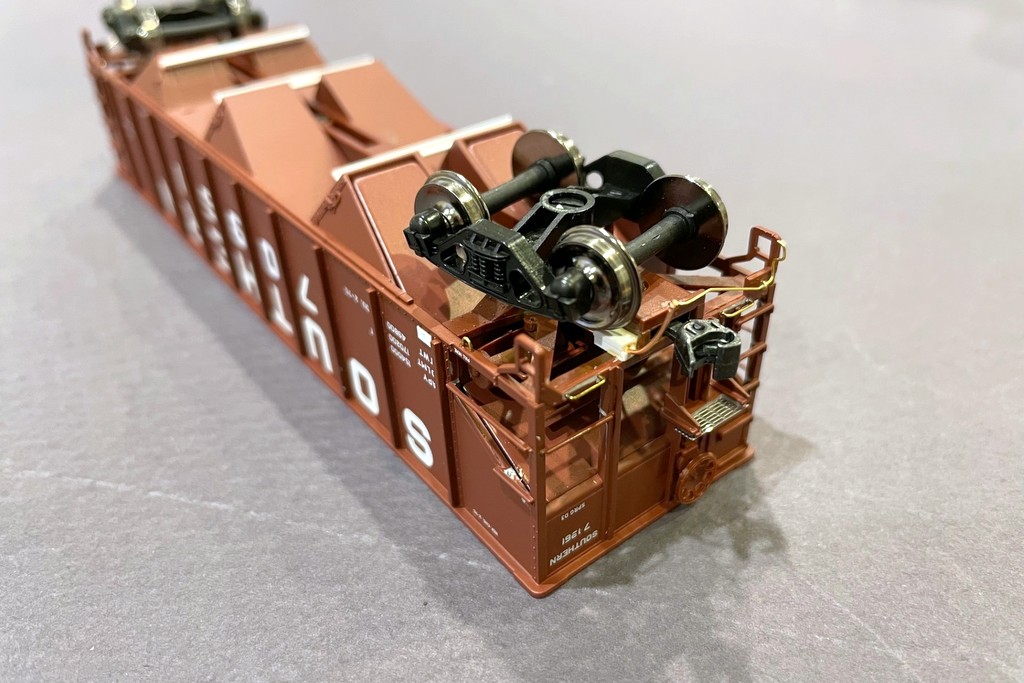
The only grabs I remove completely are the pair than flank the coupler. To my eye, replacing these grabs with wire makes a big difference in the perceived detail of the model, while replacing the grabs on the body does not (try it yourself and see what looks right to you). The Atlas grabs flanking the coupler are narrower than 18″, so you’ll either need to drill the holes wider or bend your own narrower grabs from .012″ brass wire (my favorite). I also remove the coupler covers at this point and replace the couplers with Kadee #5s or #148s–I use the full-size coupler rather than the scale couplers because they couple a lot better on curves which is important to operations on my layout. I don’t use magnets for uncoupling, so I cut off the trip pins with stout wire cutters. I also use this opportunity to drill a small hole (~#78) for the coupler lift bar through the coupler pocket cover just to the lift-bar side (left side as you’re looking at the end of the car) of center and just behind the front lip. I also carve out a groove in the lip in front of the hole then replace everything.
This shot shows details such as the heap shield removal, coupler cut bars, and wire grabs adjacent to the coupler
To complete the coupler lift bar, I drill a #78 hole in the center of the plate adjacent to the steps and install a wire eye bolt for the lift bar. The only modification for the cut bar itself is I bend a tip up 90-degrees on the part that goes under the coupler. This tip installs into the hole in the coupler pocket cover and makes the cut bar much sturdier and resilient to handling once secured with CA. Just make sure the wire doesn’t stick up into the coupler pocket and interfere with the coupler movement. I bend my own coupler cut bars on a homemade jig from .012″ brass wire, but the Detail Associates coupler lift bars work great too. While I’ve got the .012″ brass wire out, I bend some tow loops. Not every coal hopper has tow loops, and they can be in different locations, so check your prototype. For most of my cars, I drill a single hole where one of the two loop ends should go. Then I bend the wire around a thumbtack tip to get something that looks like the right radius. Then I cut it into a “J” and insert the long end into the hole and secure it with CA (the short end just makes contact but doesn’t need a hole to look right). This is easier to do with the trucks removed.
This shot shows some added details including the tack board, tow loops, train line, and door latch bars
Next comes the train line. You’ve probably already got a favorite train line, but after years of watching nicely detailed train lines break or fall off of cars, I finally settled on making my own from copper wire. I use the inner copper from old Cat 5 ethernet cable which you can probably find at a thrift shop or surplus store. I bend it to shape with pliers and then crimp the end to look like a glad hand. I cut the other end about where it will hit the truck bolster. There’s no valve detail, but a little silver paint does the trick from 18″ away. To secure them to the body, I use Plastruct styrene channel. I scrape off the paint and glue a short section (about 3/16″… I don’t measure) in the angle between the coupler pocket and end sill and let it dry thoroughly. Then I add the train line with CA, cover it with another piece of channel on top of the first, and secure it with plastic cement. I often have to prop the train line on something for a few minutes for it to dry at the correct angle.
While I didn’t bother with the brake platform on earlier models, I’ve started to upgrade these as well. I carefully cut the plastic platform out from between the braces using a similar X-Acto technique as the grab irons. Then I cut a new platform from a sheet of Plano stainless roofwalk material using scissors. A little CA, and the platform is ready.
Here’s a look at the B ends before (left) and after (right) detailing
Final details include tack boards and door latch bars. I cut the tack boards from .010″ styrene strips or sheet (whatever I have laying around) and secure them with plastic cement–again, I don’t really measure here, just what looks right based on photos. I cut the latch bars from the same styrene channel I use for the train line. I scrape a little paint from the hopper doors and secure the channel with plastic cement. With the details complete, I do some touch-up painting of the wire and styrene details using the closest color I can find to the hopper body. For these, I used some Vallejo “hull red” (a little too red) and some Tamiya “NATO brown” (a little too brown). If you weather your hoppers like I do, the color just needs to be close, not exact. Finally, I paint the train line black and use a silver Sharpie to create the appearance of a glad hand at the end and the valve at the elbow.
Before and after of the A ends; note the difference in the grabs and wire bracing
Now the hopper upgrades are complete, and it’s only missing some weathering to blend in the upgrades and improve the appearance. I’ll cover my hopper weathering techniques in a future article, but I hope you can tell from the descriptions that these upgrades are simple and cheap, and I hope you can tell from the pics that these cheap cars stand up pretty well next to their more detailed counterparts. Give it a shot, and you might be pleasantly surprised at how happy you are with an inexpensive “fleet hopper” to fill out your roster.
Materials and parts needed
- Kadee #5 or #148 couplers
- Detail Associates DS 6215 Coupler Lift Bars
- .012″ brass wire
- .020″ copper wire (I use old Cat 5 ethernet cables)
- .010″ styrene sheet
- Plastruct 90531 1/16″ styrene channel
- Plano slotted roofwalk material
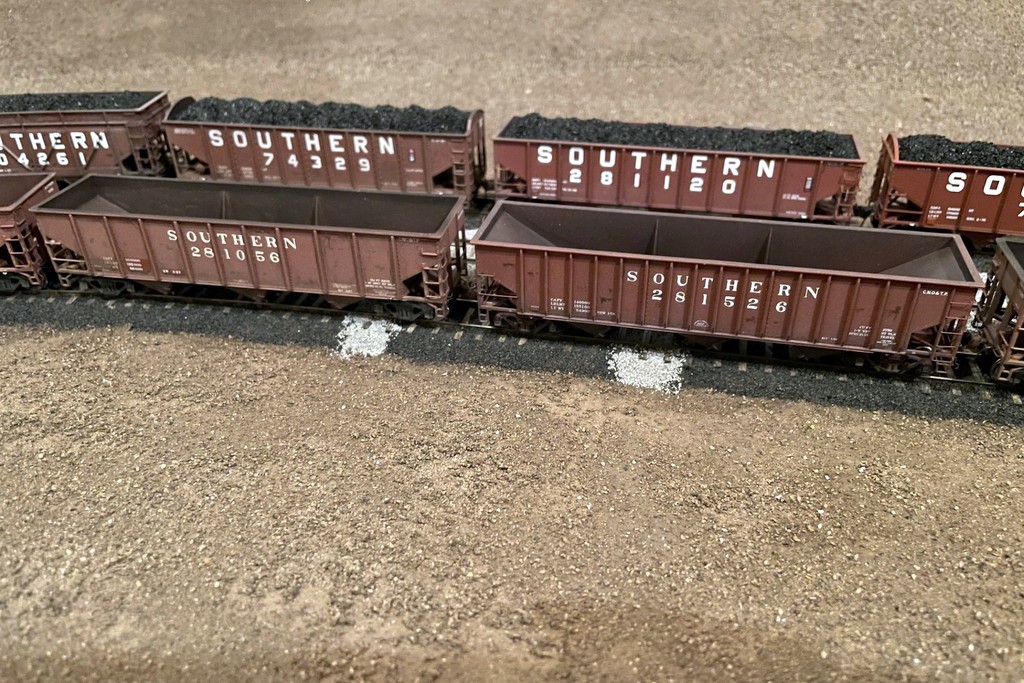
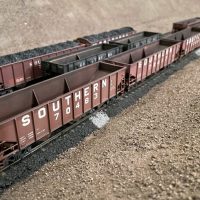
Here’s a string of Atlas Trainman hoppers in the foreground; the background includes an Atlas hopper where all grabs have been replaced with wire and an MDC hopper with similar treatment
-
- The scraping method can also be used to remove unwanted lettering like the modern lube plate on this hopper
-
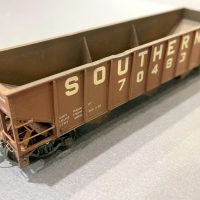
- Here’s the B end of finished Southern hopper 70483
-
- The “A” end of a finished hopper, note the molded on grabs on the upper body, but they’re far less noticeable with the rest of the ladder whittled down
-
- A string of upgraded Atlas Trainman hoppers in the yard