


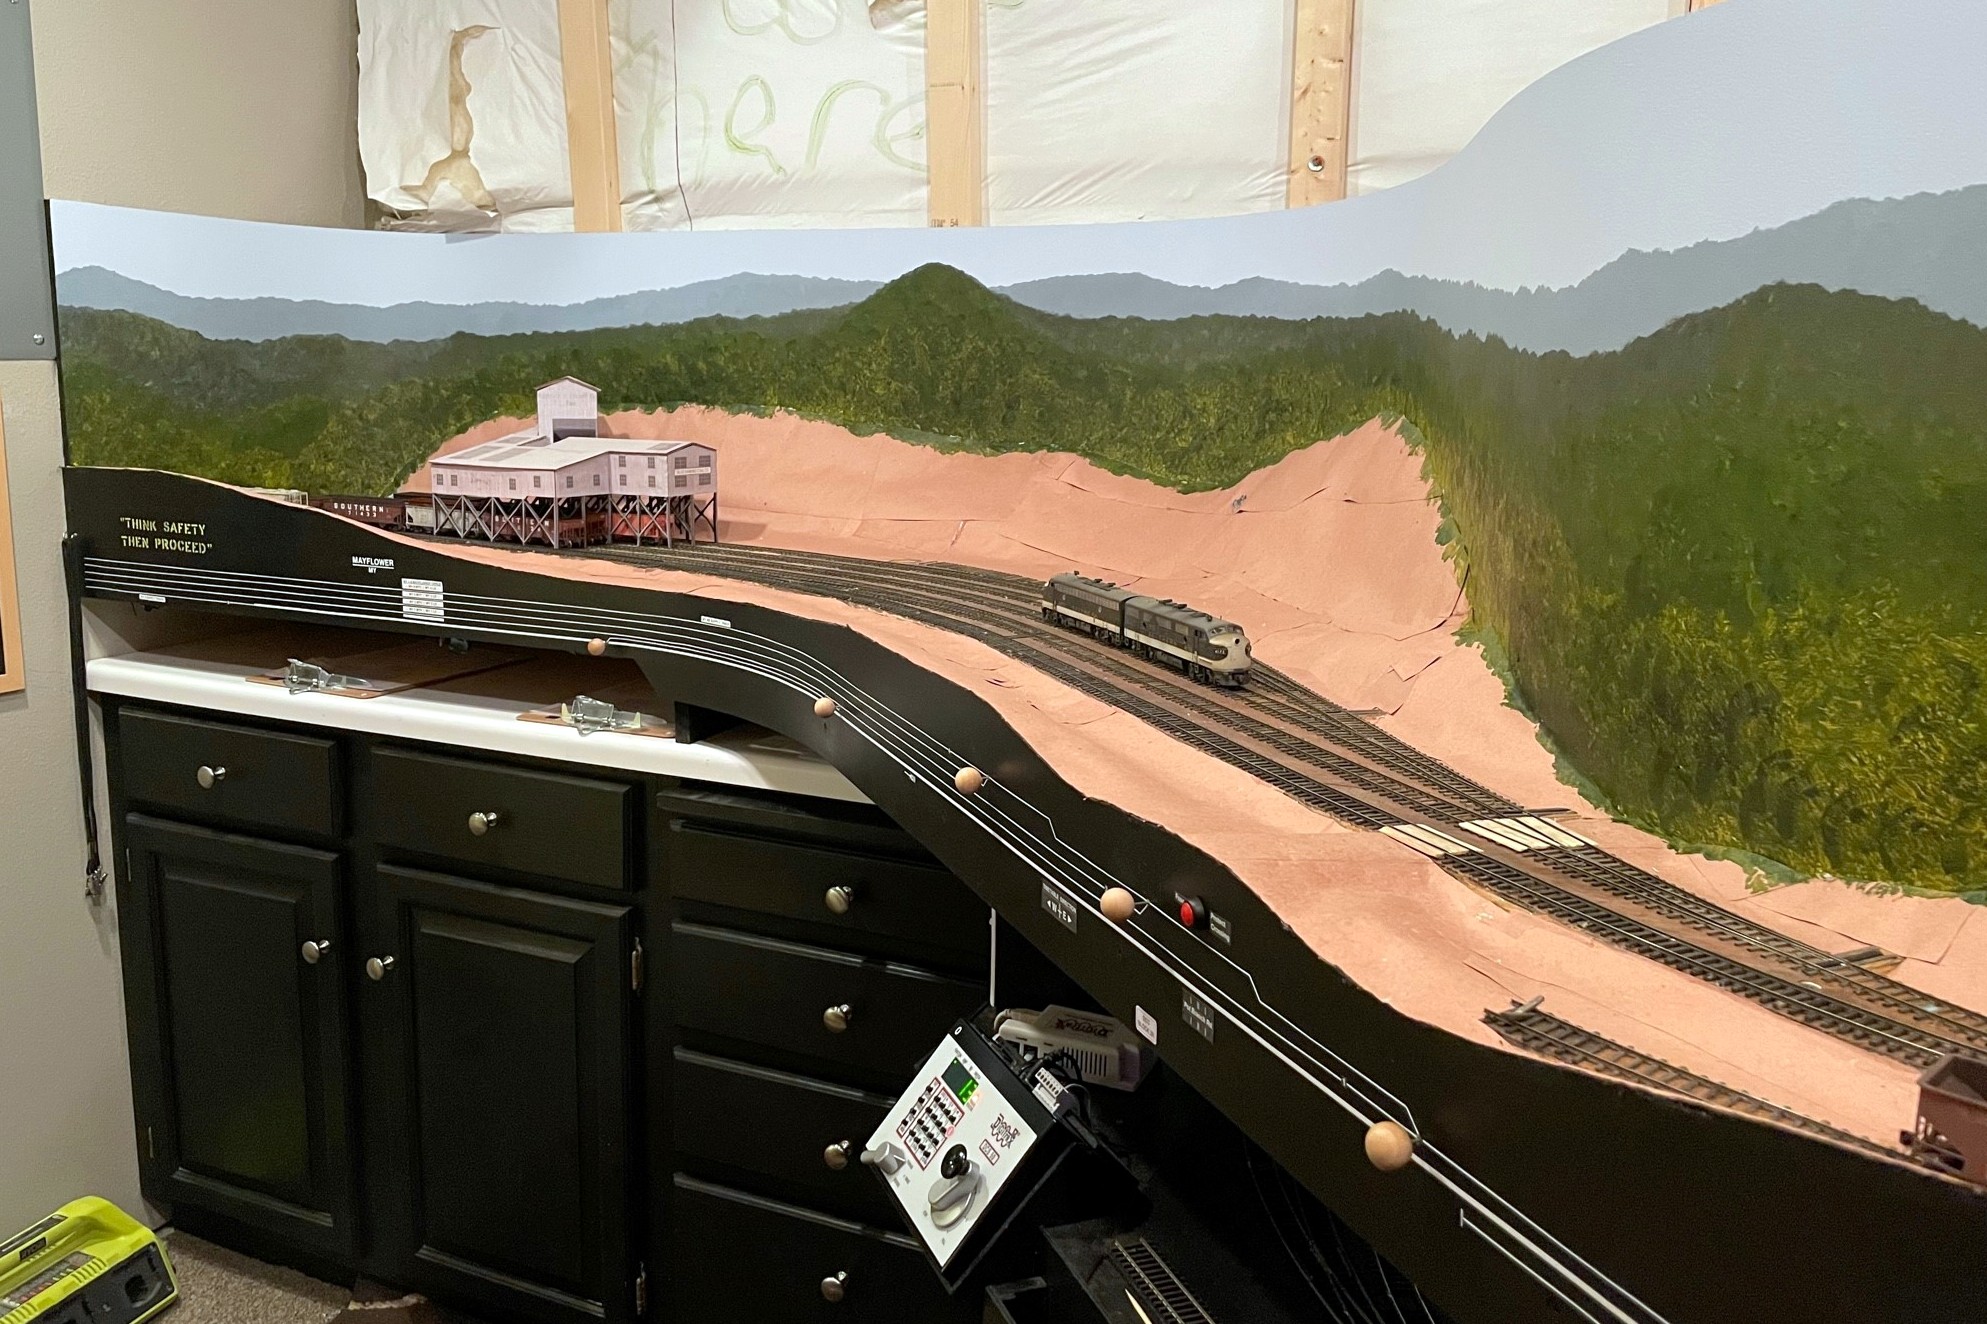
Here’s the completed scenery base using my version of Howard Zane’s “paper shell” method with ballast and roads–all it needs is some trees and grass, and it’ll really start looking like the Appalachians!
At some point, nearly all Appalachian railroad modelers need to deal with creating flowing hills and valleys for their layouts. I use a method I adapted from Howard Zane’s “Paper Shell” scenery he detailed in the January 2007 Railroad Model Craftsman, and I couldn’t be happier with how easy, flexible, cheap and good looking this method is for creating basic scenery forms. My layout is open grid benchwork with cookie cutter sub-roadbed which is great for this kind of scenery, but it would also work for any open benchwork method (e.g., L-girder, spline sub-roadbed, etc.) where there’s some backdrop and fascia to frame the scene.
Tools needed:
- Scissors
- Utility knife
- Straightedge
- Hot glue gun
- Plastic putty knife
- Old washcloth
- Paintbrush
- Spoon
- Spray bottle
Supplies needed:
- Large cardboard boxes
- Red rosin paper (available in large rolls at hardware stores as a floor protector for projects)
- Hot glue sticks (lots and lots of hot glue sticks)
- White glue (like a gallon or two)
- Lightweight spackling compound
- Dirt-colored flat paint
- Dirt (or fine, dirt-colored scenery material)
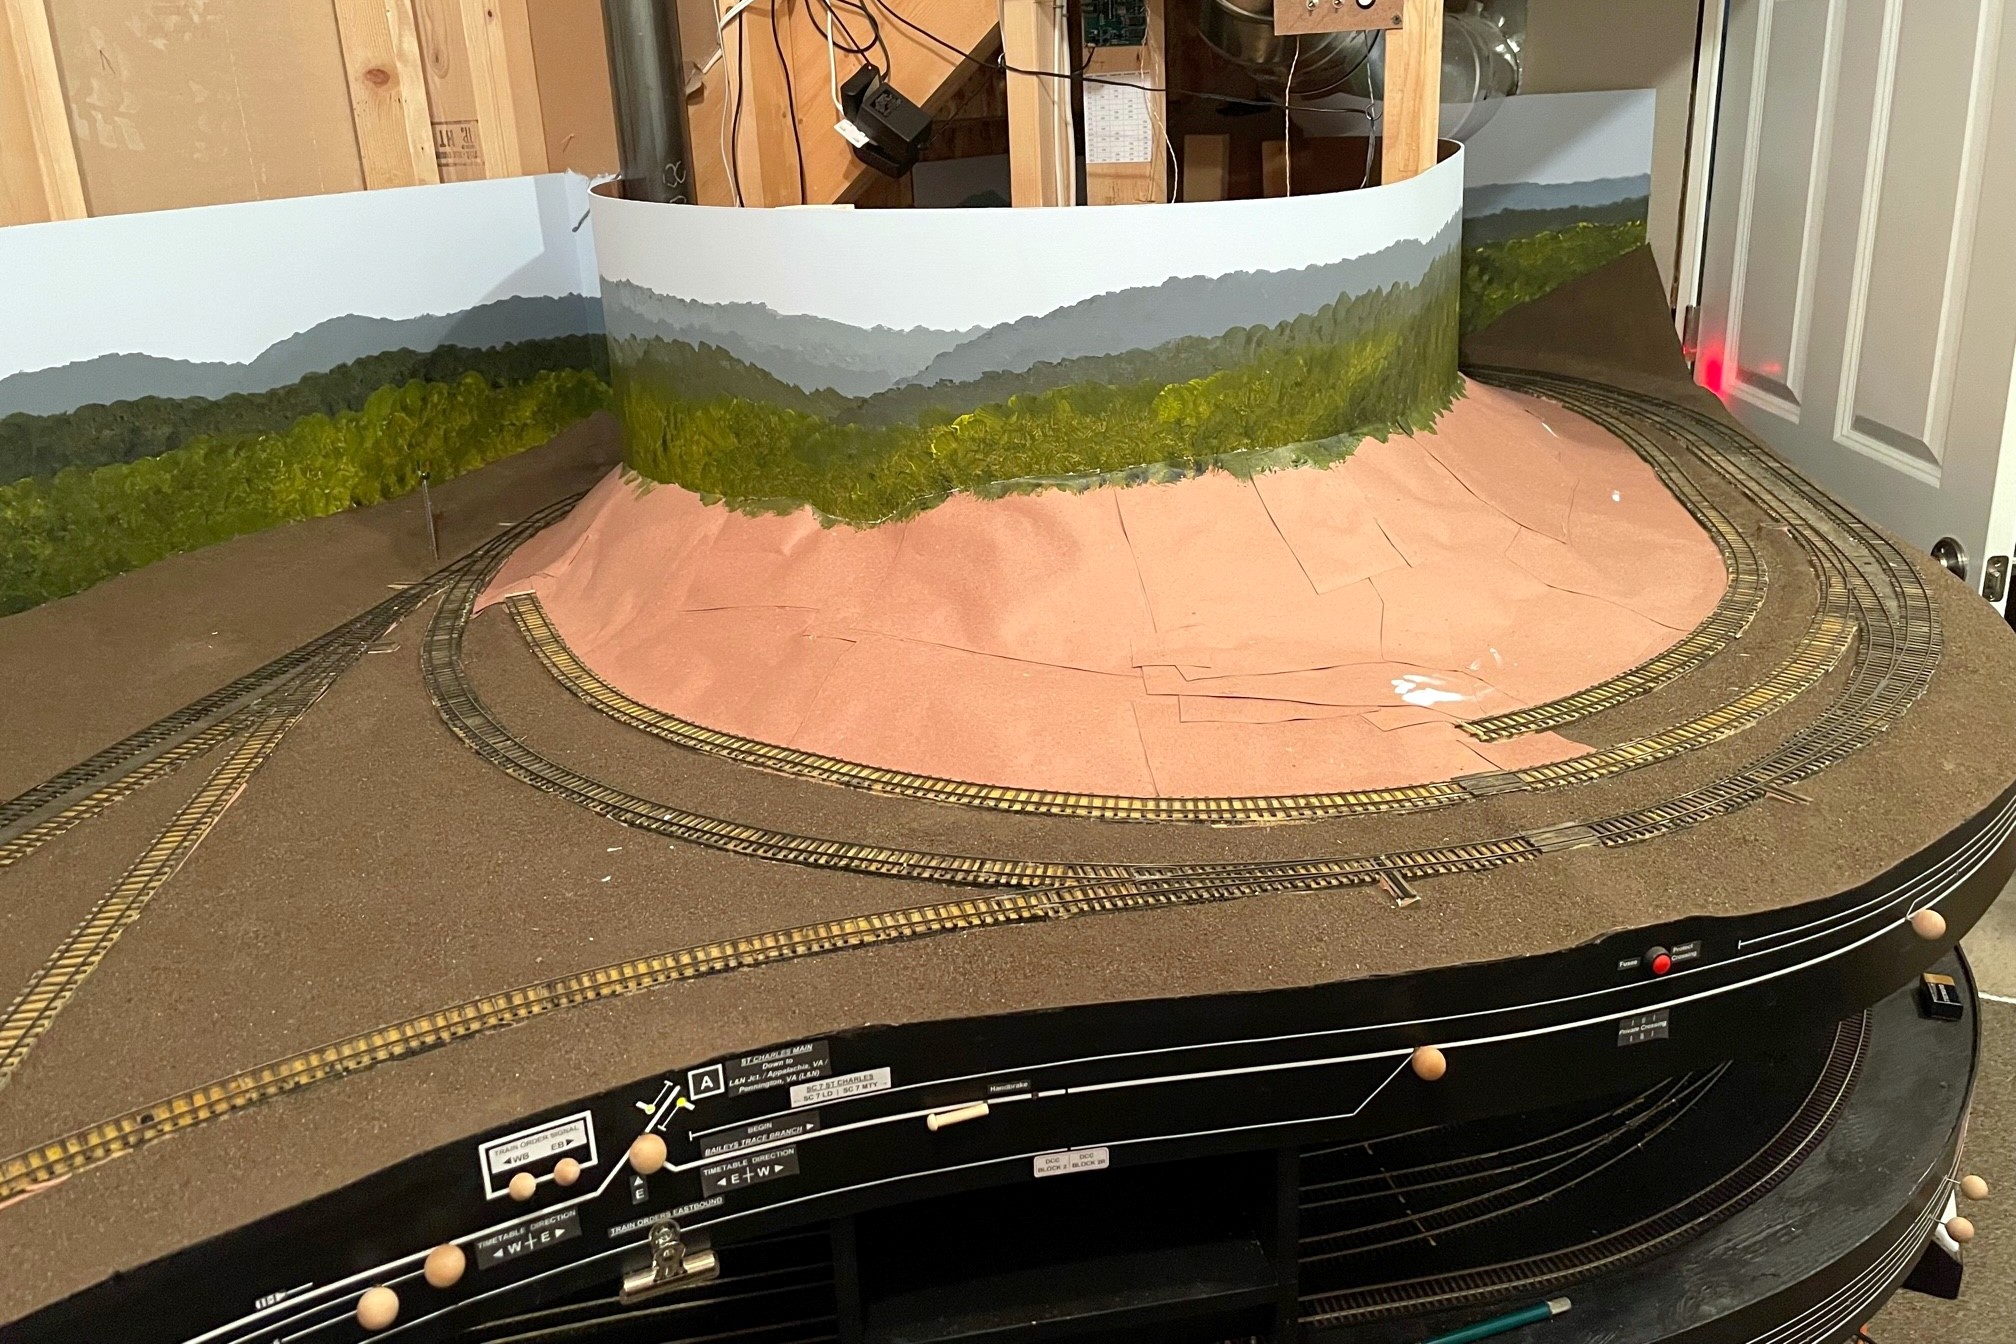
The basic concept is to create a web of cardboard mesh over which you glue patches of red rosin paper. To make the paper into a nice scenery shell, it gets coated with white glue and then lightweight spackling compound to smooth out the seams. Finally, a coat of paint and some dirt finish out the raw scenery form which is ready for rocks, grass, trees, and whatever else you need. This article covers the techniques, but the actual shape of the hills is more of an art form. I’d just recommend studying a lot of pictures to see the range of what looks natural for your area, and try not to make the foreground hills too steep–the real Appalachians are probably an average 30 degree slope. If you don’t like the look, it’s super easy to make some cuts and try again, especially before you put the paper down.
Here’s the process in pictures and captions:
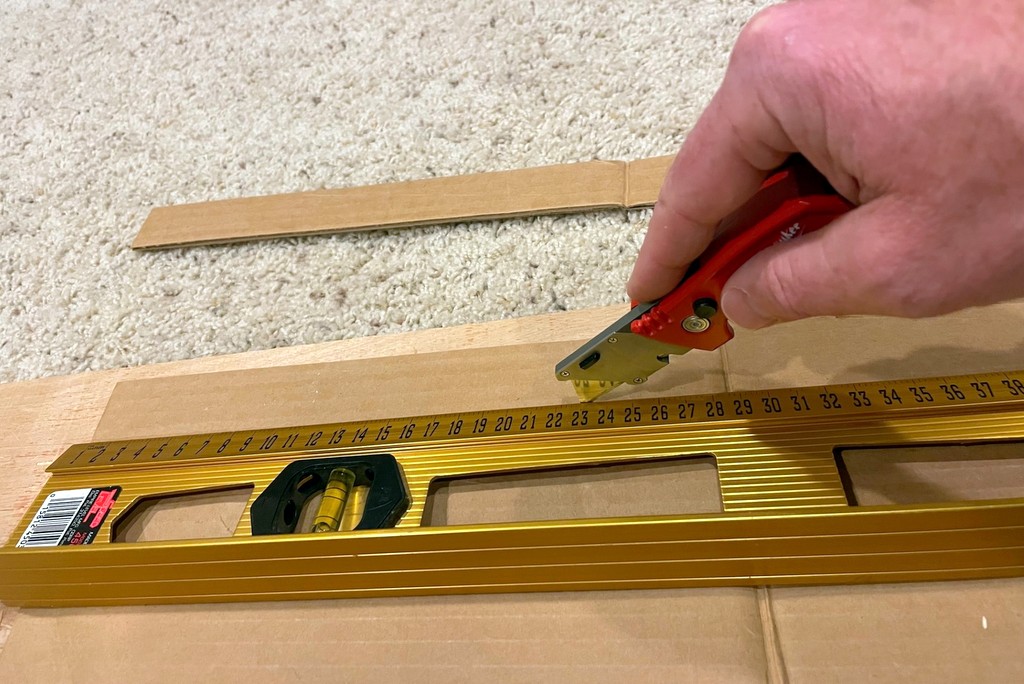
Step 1. Using a utility knife and straightedge, cut a few dozen strips of cardboard about 1-1/4″ wide.
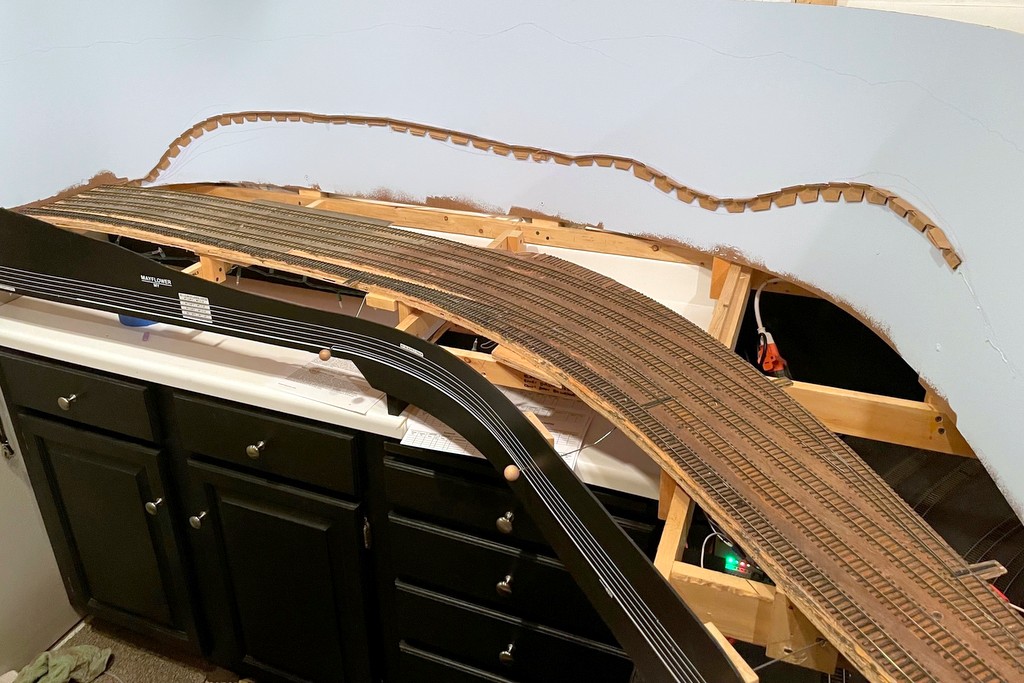
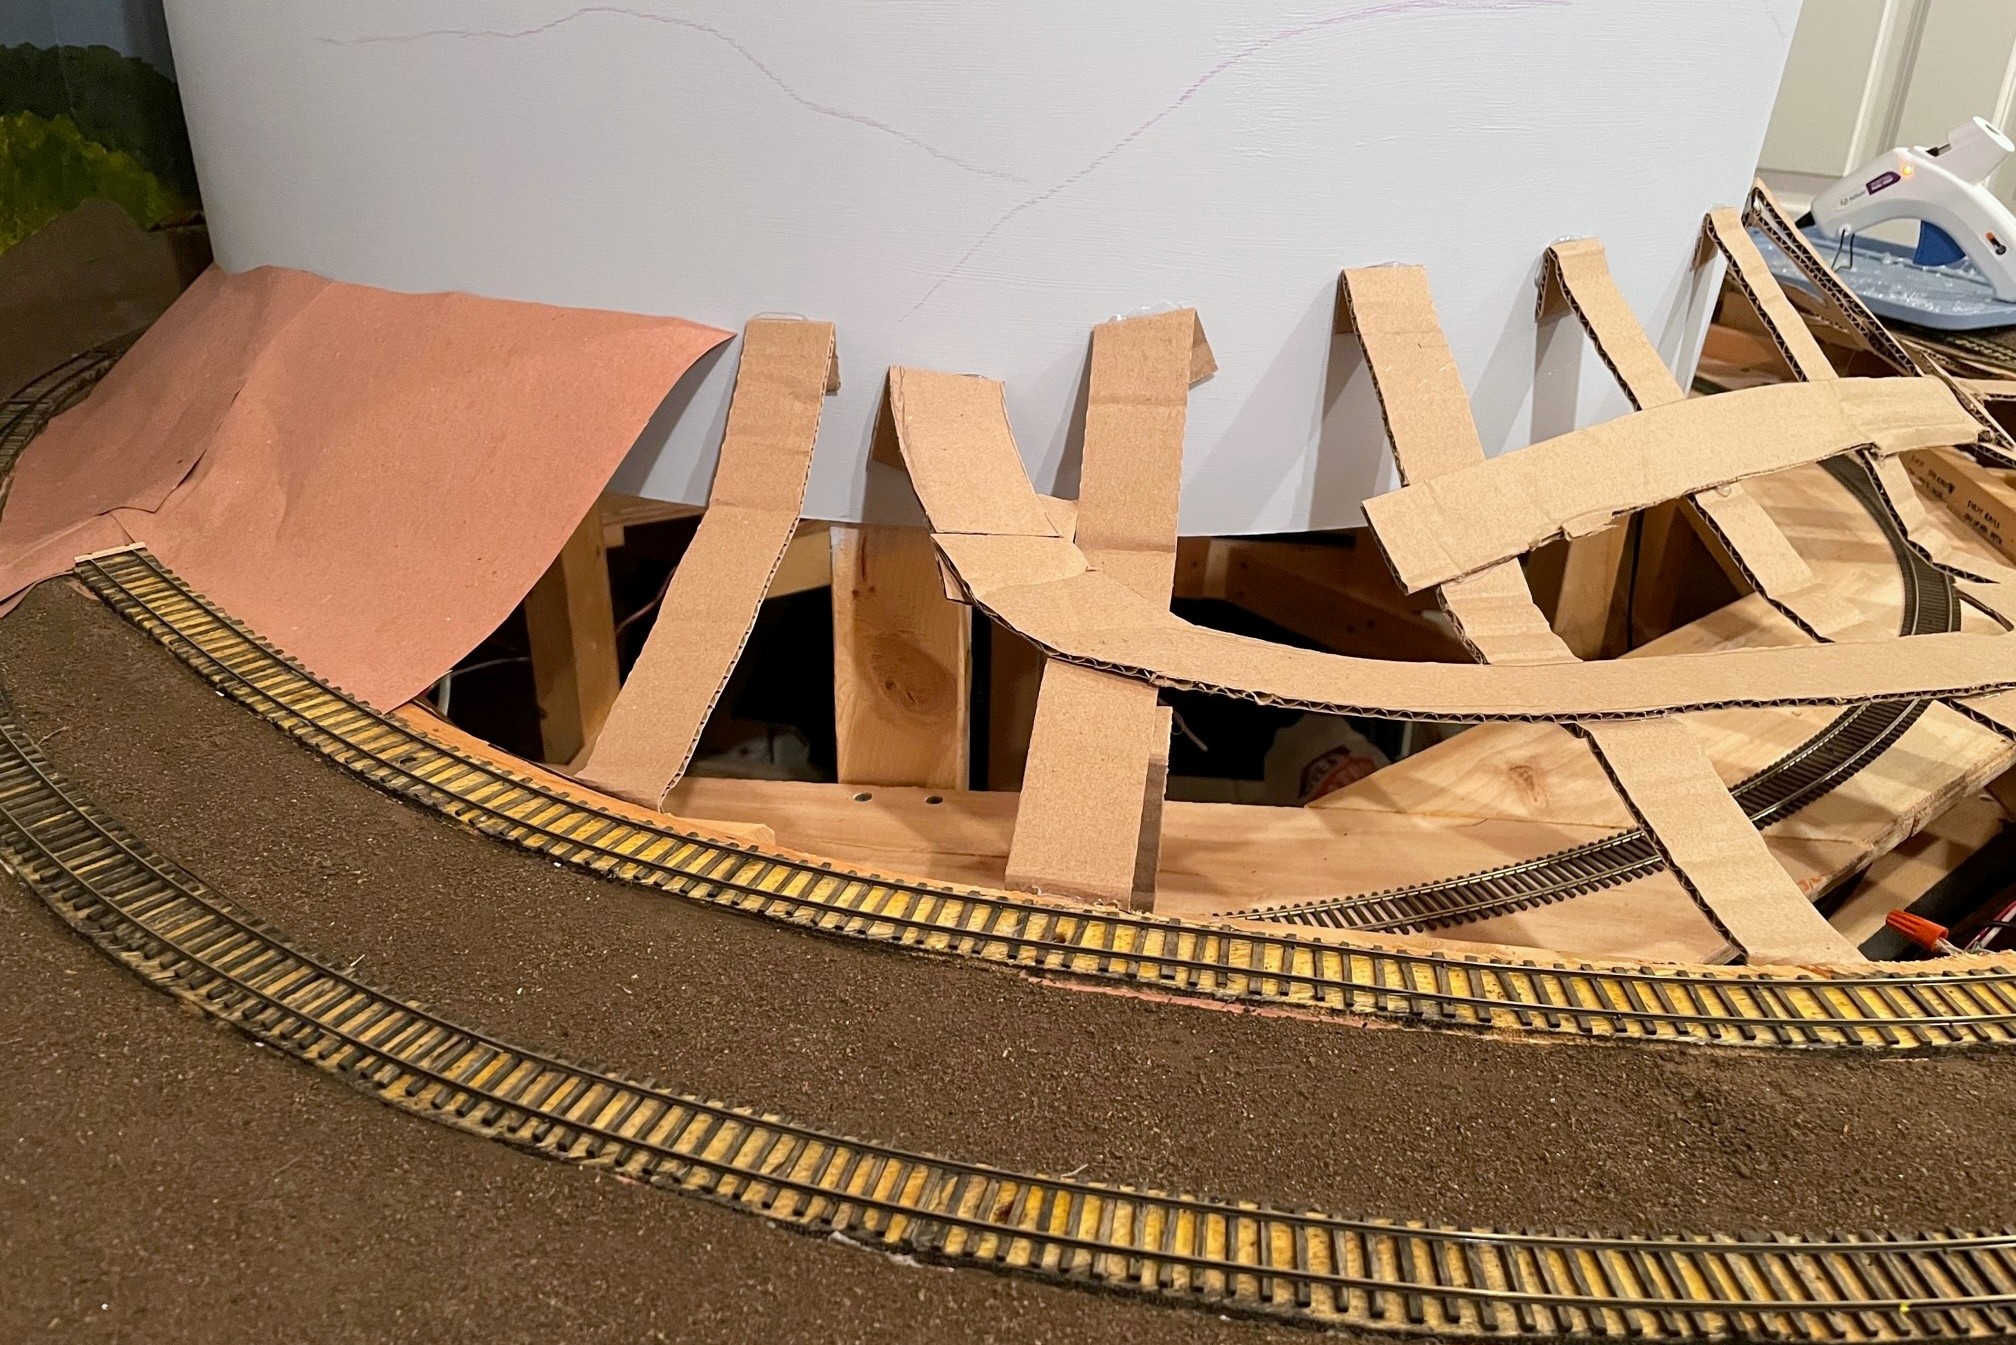
Step 2. Draw a line for your scenery on the backdrop and glue a piece of cardboard along the line using hot glue–it helps to fold the cardboard and cut slices out of each side to make it flexible. This step isn’t essential as you can glue the scenery strips directly to the backdrop, but it does give a visual cue from which to work until you’re comfortable eyeballing things.
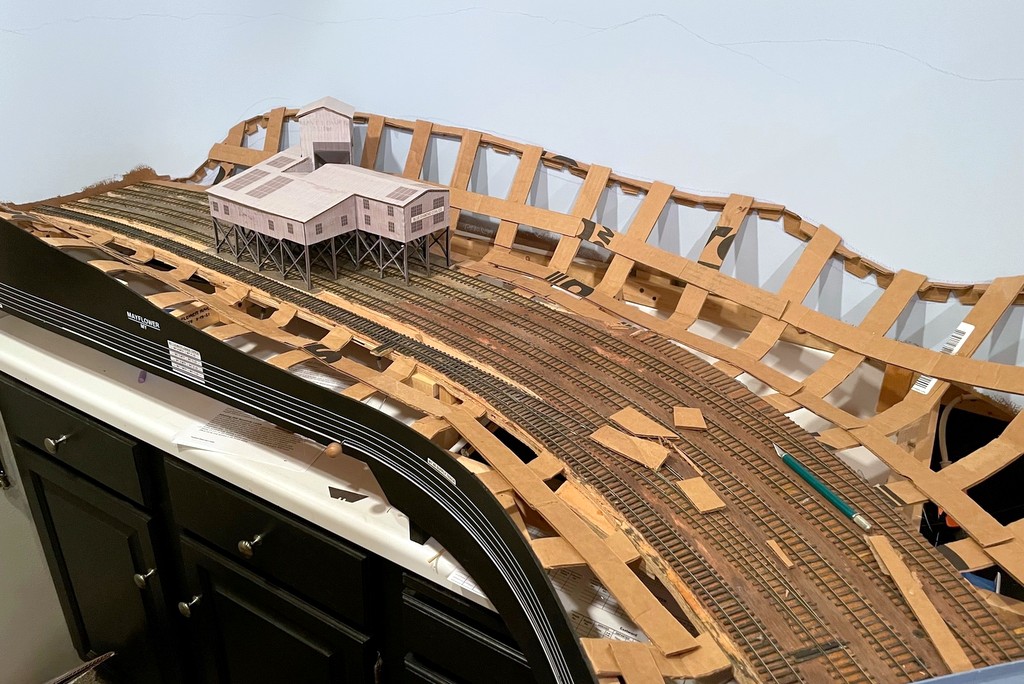
Step 3. Using strips of cardboard cut to size with scissors, hot glue strips of carboard to form the hillside between the backdrop/fasica and sub-roadbed. I like to bend and soften the cardboard first so it’s easy to work with and flexible enough to form curves instead of only straight lines. Add them about 4-6″ apart. Once you have a line of vertical pieces, add some horizontal stiffeners as well.
Step 4. If you know where your roads will go, cut cardboard pieces to form a sub-road and glue it to the scenery web using hot glue.
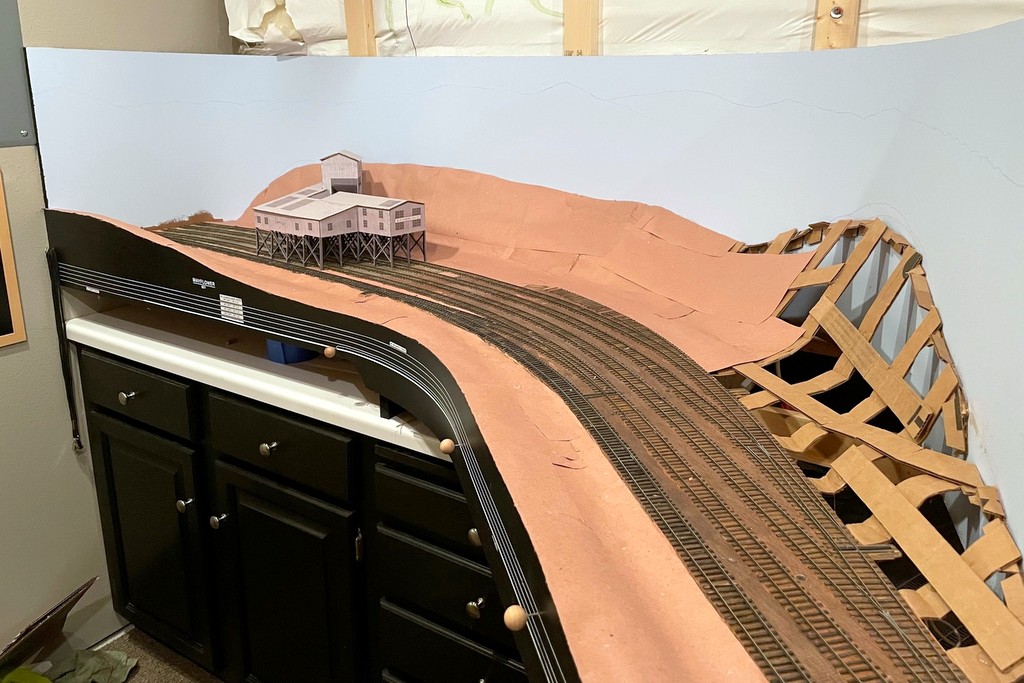
Step 5. Cut patches of red rosin paper around 8″ x 8″ and glue them onto the webbing. I recommend starting lower and working up, leaving at least 1″ of overlap. For the fascia, I overlap and then use an X-Acto blade to trim the paper to the edge.
Step 6. I find this stage is a good time to paint backdrops and add some features like grade crossings. This is also probably the best time to add any rock outcroppings.
Step 7. Once a large section is covered, use a brush to spread a thick layer of full-strength white glue over all the paper. It will wrinkle a bit, but most of the wrinkles will subside when it dries.
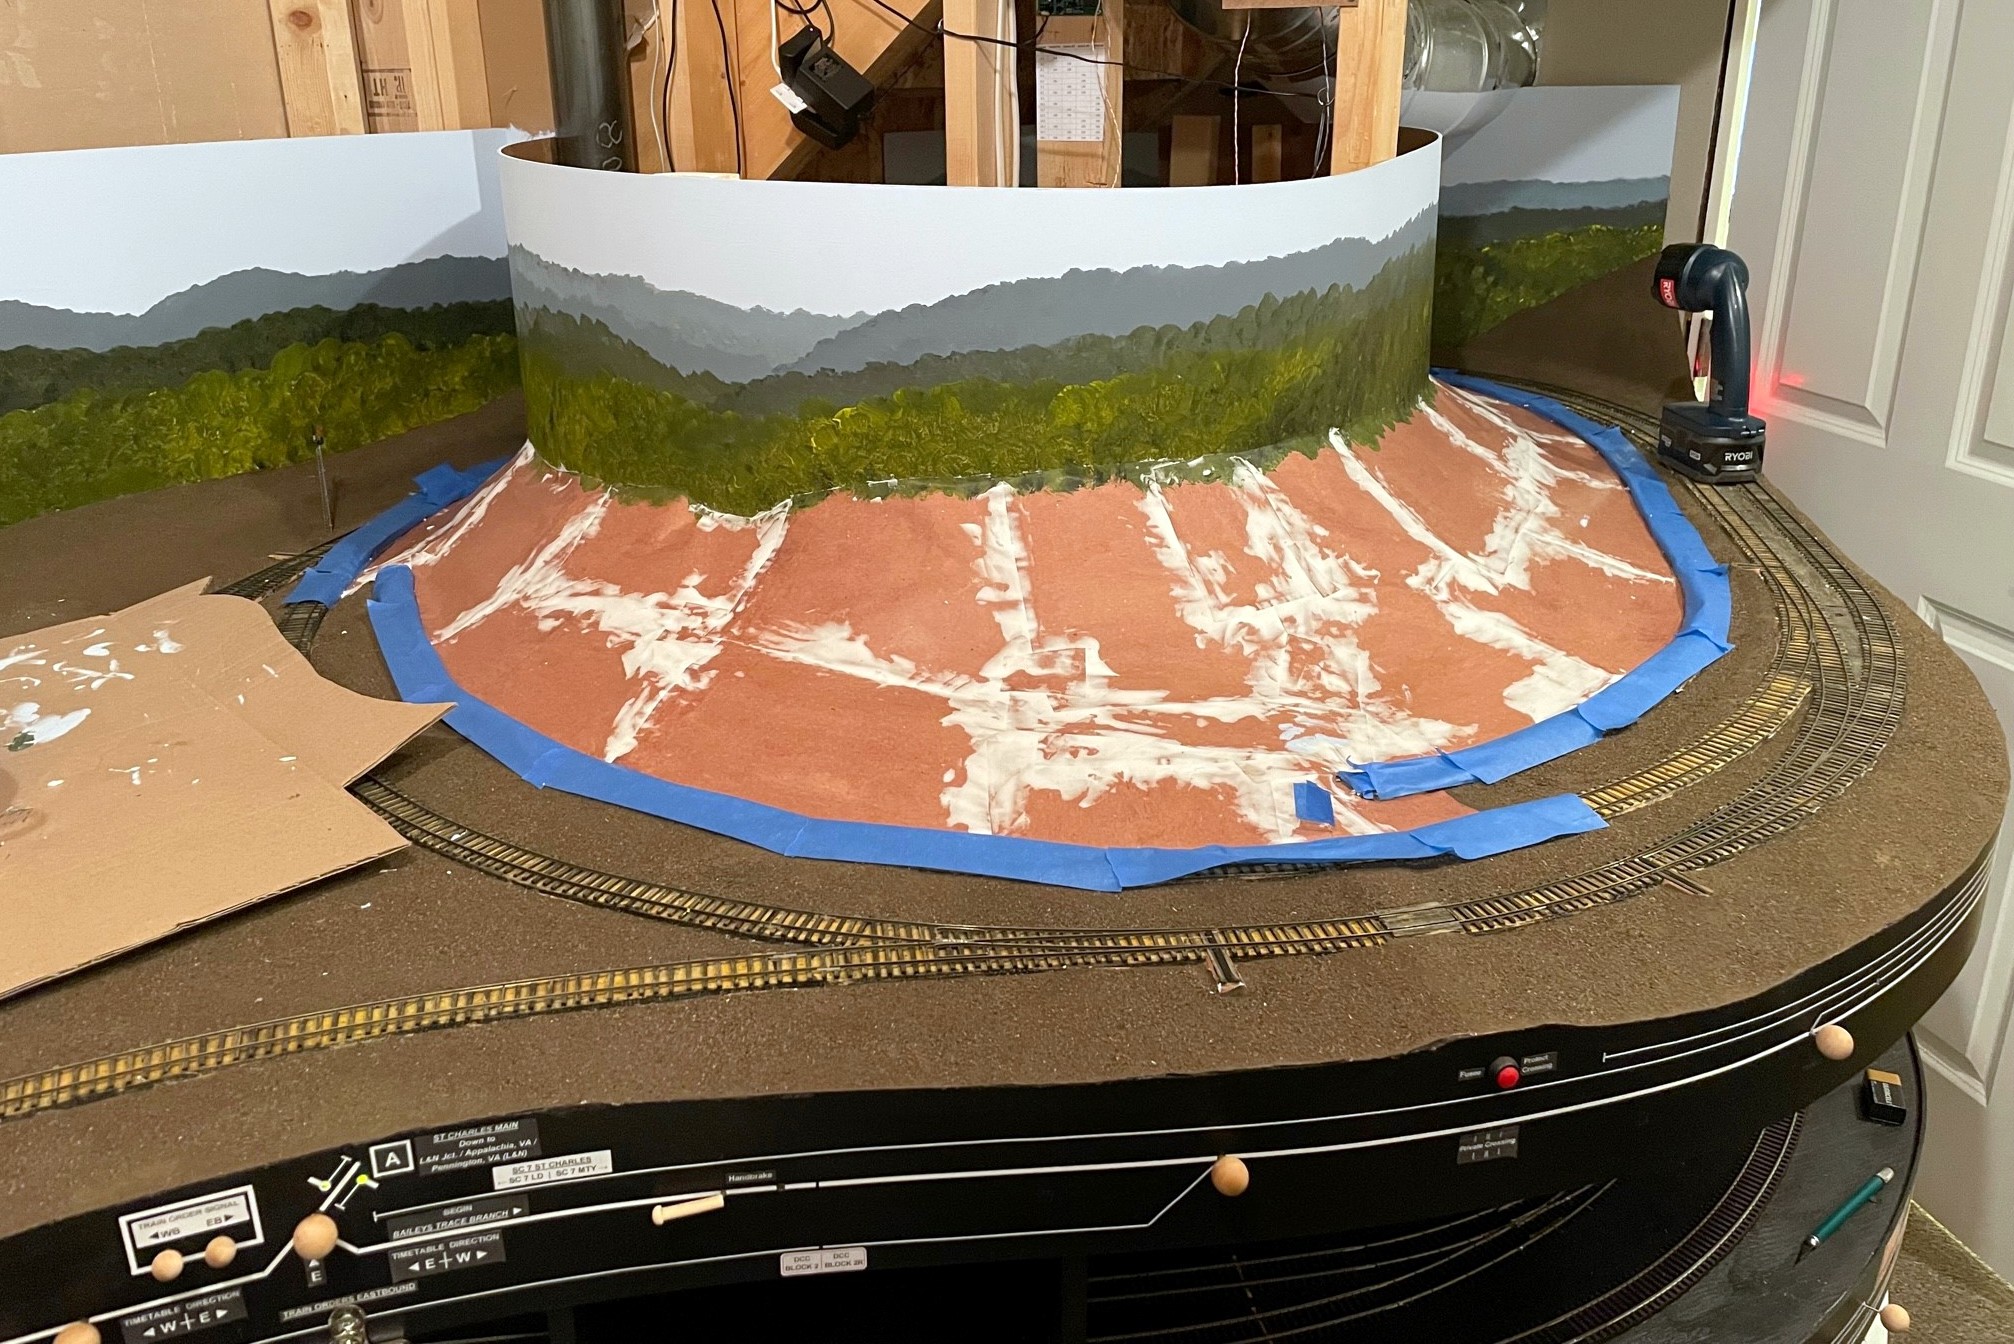
Step 8. Once the glue is dry, use a putty knife to spread lightweight spackling compound across the paper edges and any wrinkles or dips that need to be smoothed out.
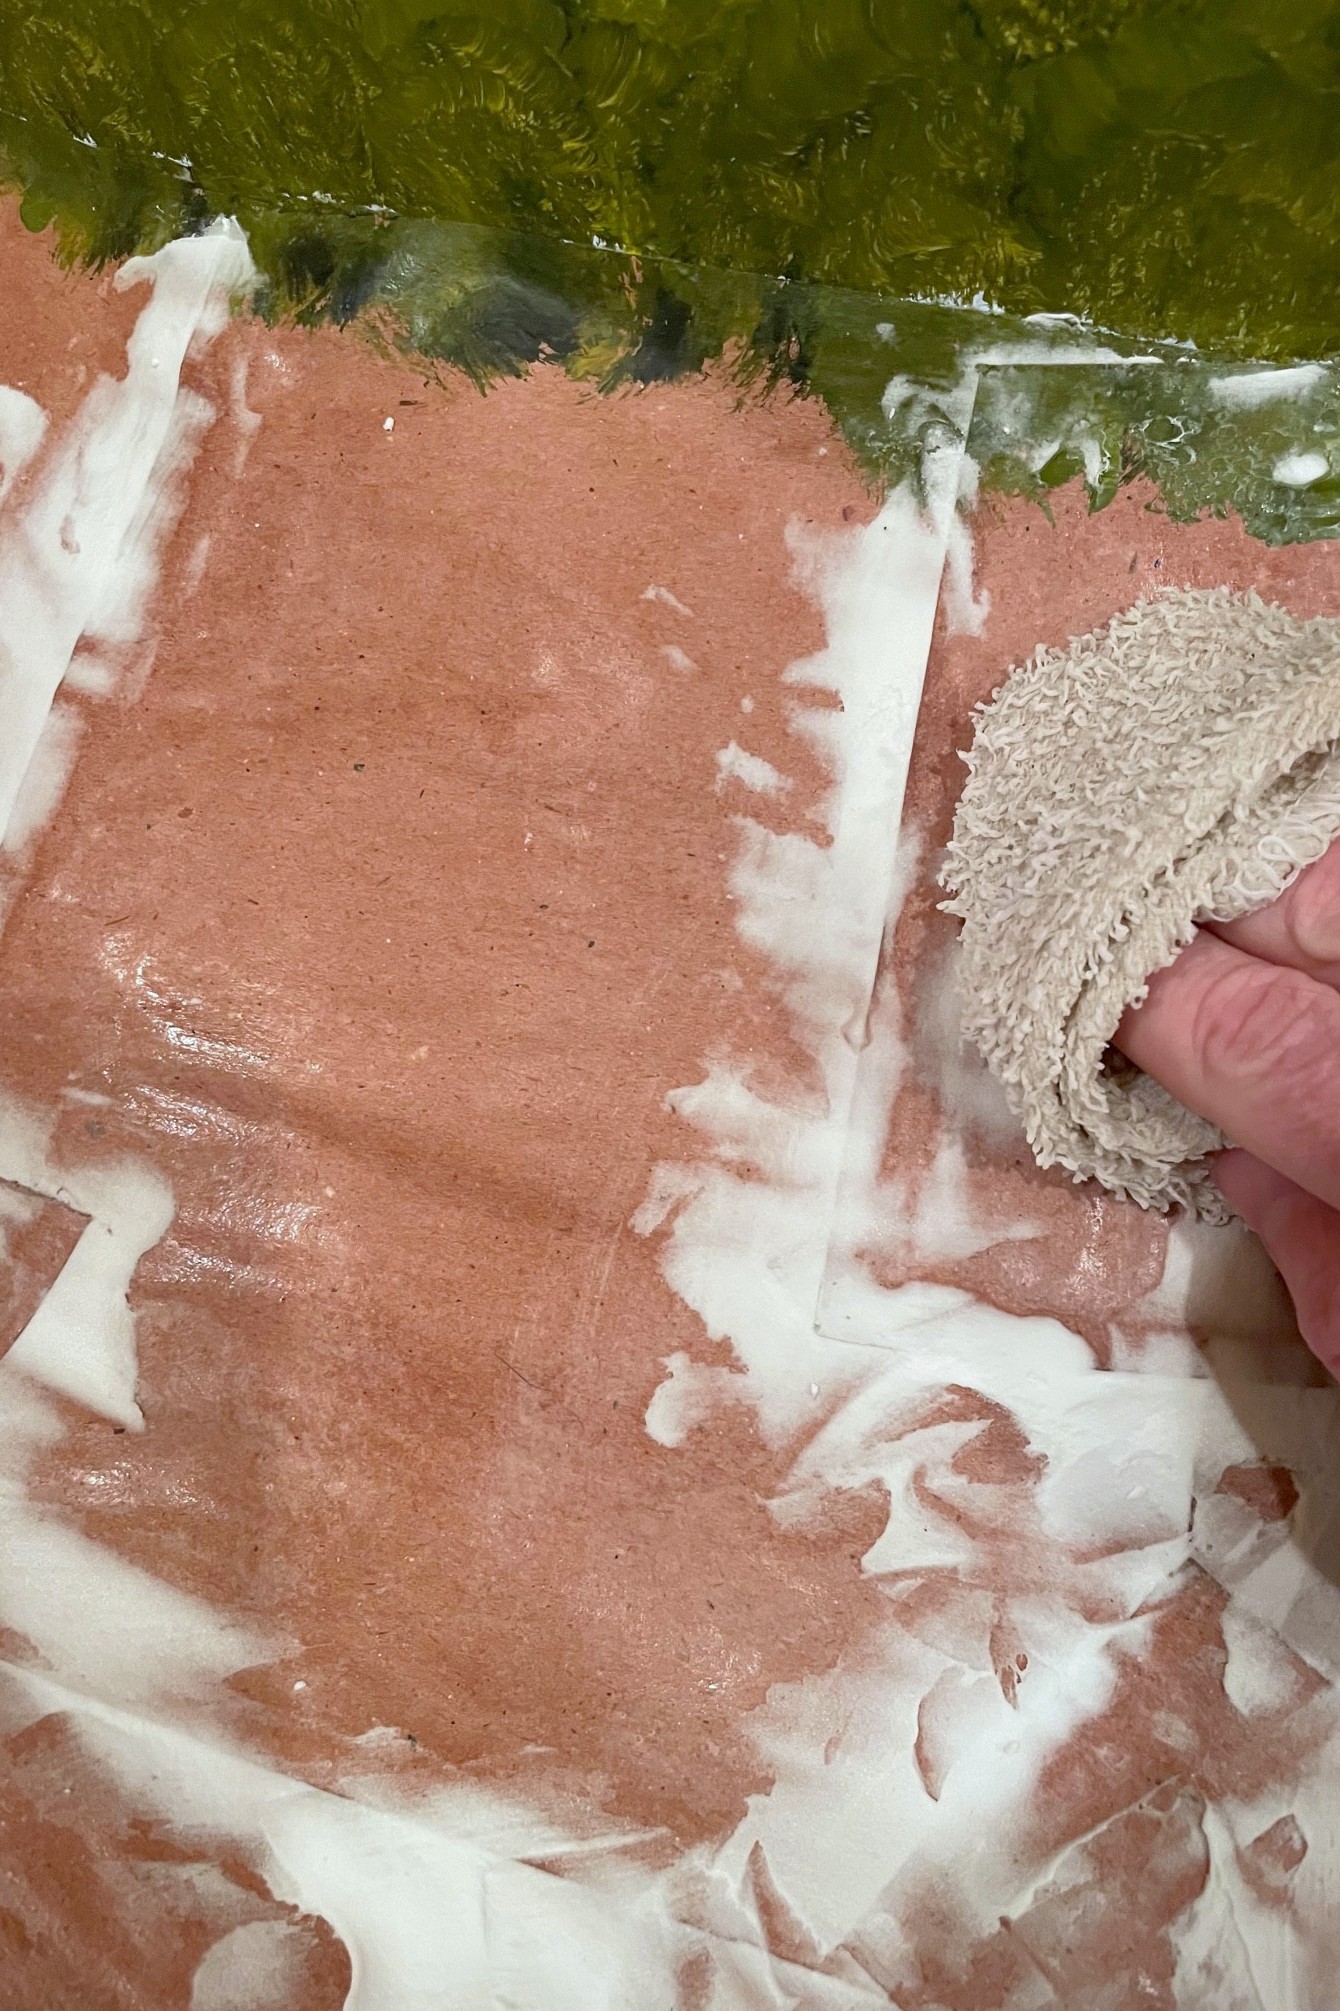
Step 9. Once the spackling compound has dried for several hours, use a wet washcloth to smooth it down.
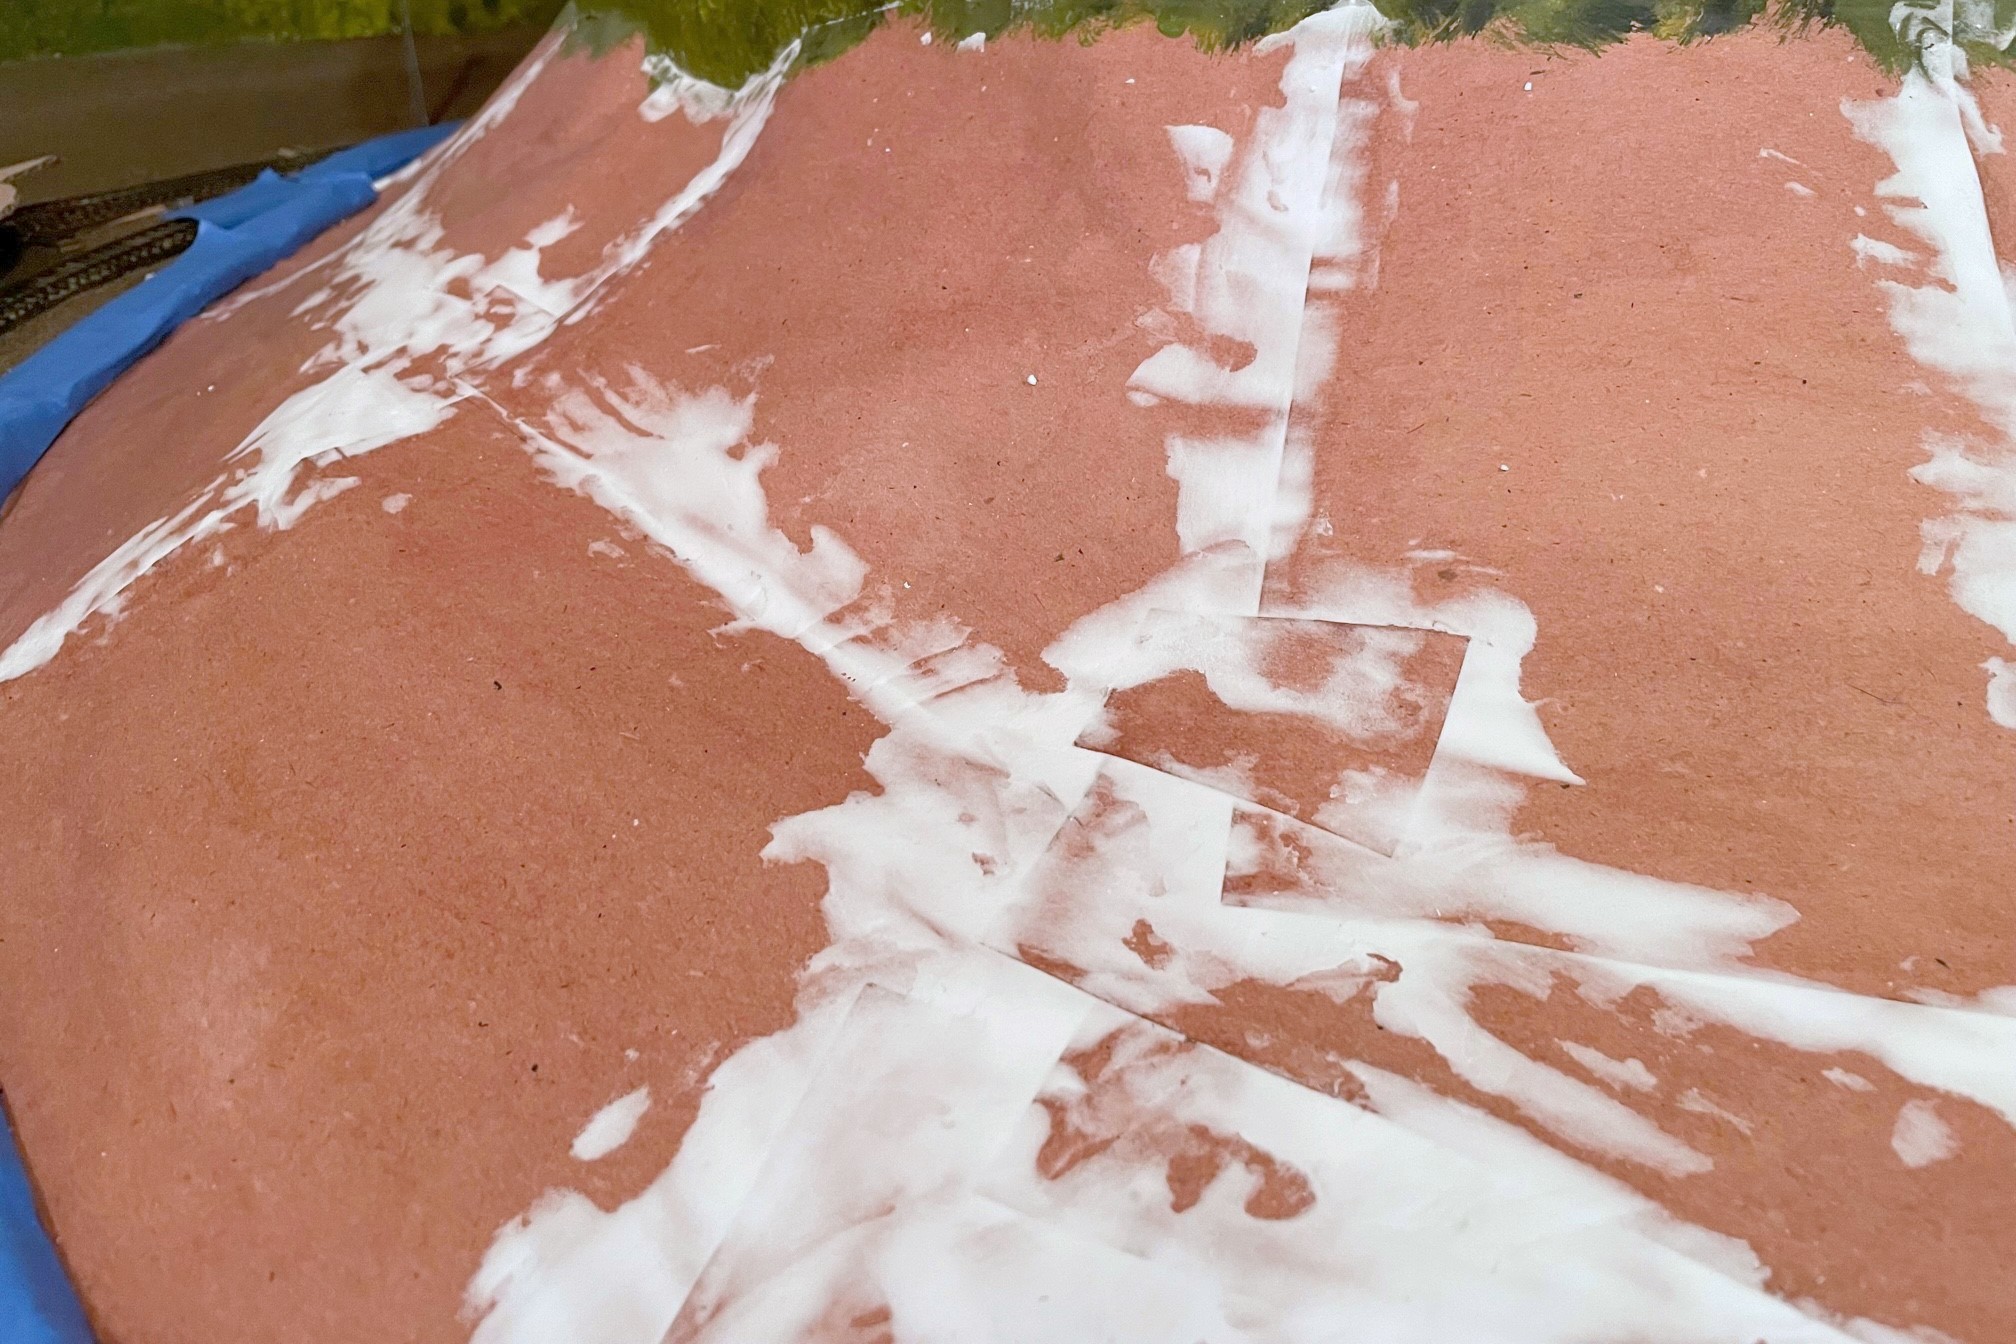
Step 10. Repeat the spackling compound for any stubborn edges until you’re satisfied the entire surface is relatively smooth and free of lines.
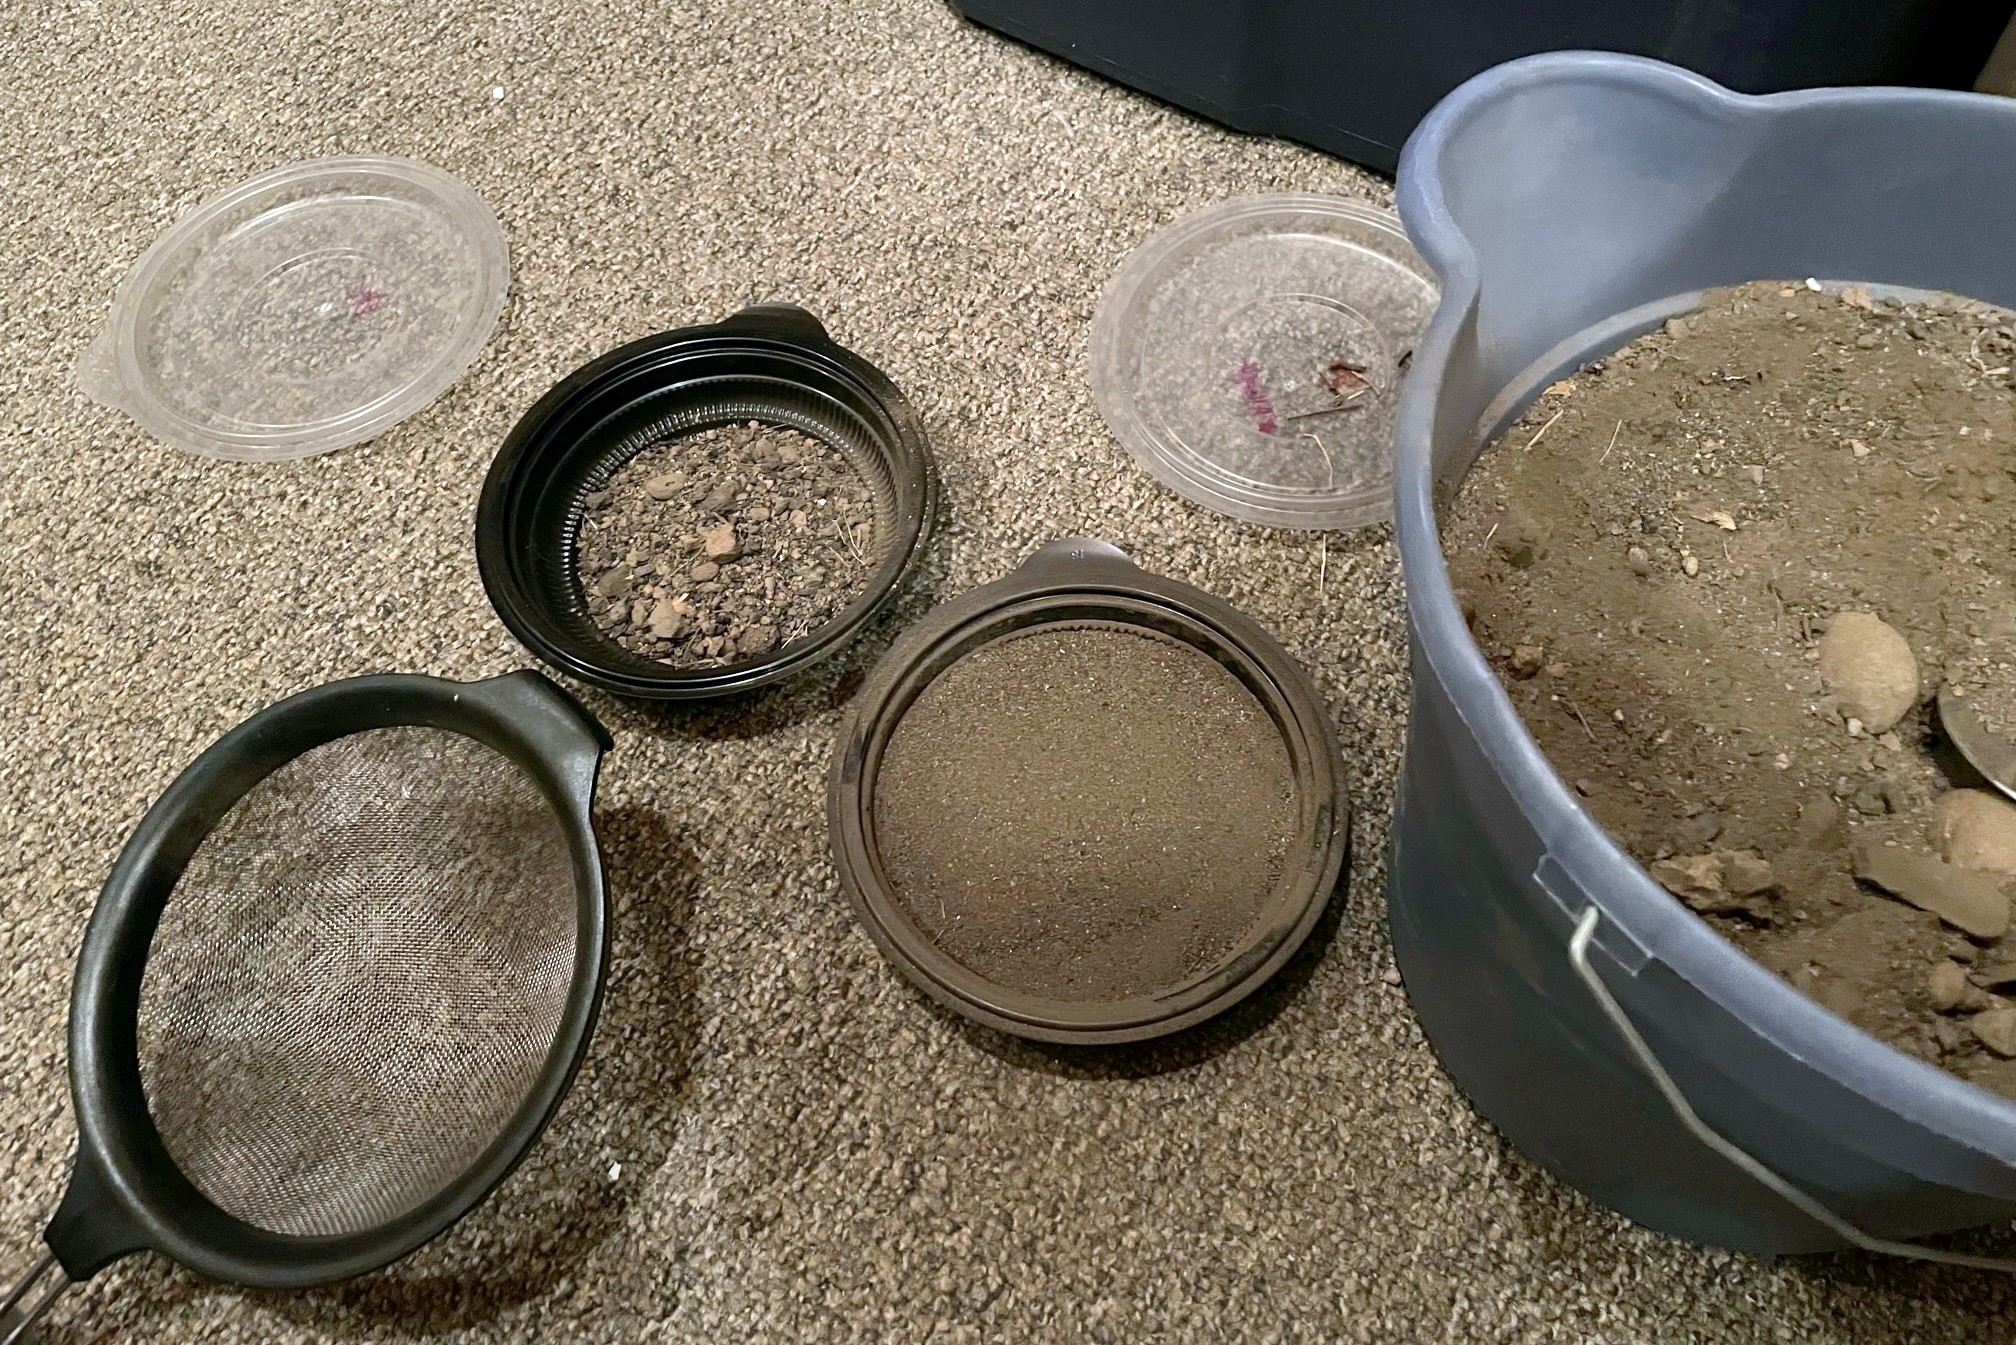
Step 11. Prepare the dirt by sifting it with a strainer and retaining the fine dirt. The dirt will serve as a scenery base over the red rosin paper.

Step 12. Thickly paint a small section of the glue-covered red-rosin paper with a base latex paint color that matches the dirt (I took a sample of dirt to the hardware store to pick the closest color). While the paint is still wet, use a spoon to sprinkle on a layer of dirt.
Step 13. Work in sections until everything is covered and let it dry overnight.
Step 14. Using a spray bottle, mix some “wet glue” from about 8 parts water, 1 part white glue, and a couple drops of dishwashing soap. Wet the dirt to secure it (the paint helps but is not quite sufficient).

Step 15. Vacuum up any loose dirt, and if necessary, use some glue and dirt to patch up any bald spots.
Step 16. The scenery is now ready for ballast, grass, trees, or anything else you want to add. Even without these things, the base scenery really makes the layout seem more realistic.
Some lessons I’ve learned:
- It’s easy to make good progress if you work assembly line style and in large sections
- If you’re not happy with the contours of the cardboard mesh, it’s really easy to just cut the cardboard and glue new pieces into the mesh as needed
- Take time to figure out road placement and build it into your scenery mesh
- You can make the mountains as steep as necessary–I find a slope of about 20-45 degrees looks best for foreground, but the hills can be 60 degrees or steeper against the backdrop to add height
- If any areas seem flimsy, you can add wood or cardboard risers from the benchwork to shore things up
- Spend some time with the cardboard web to visualize and tweak the scene before adding the paper as it’s much easier to make changes at this stage
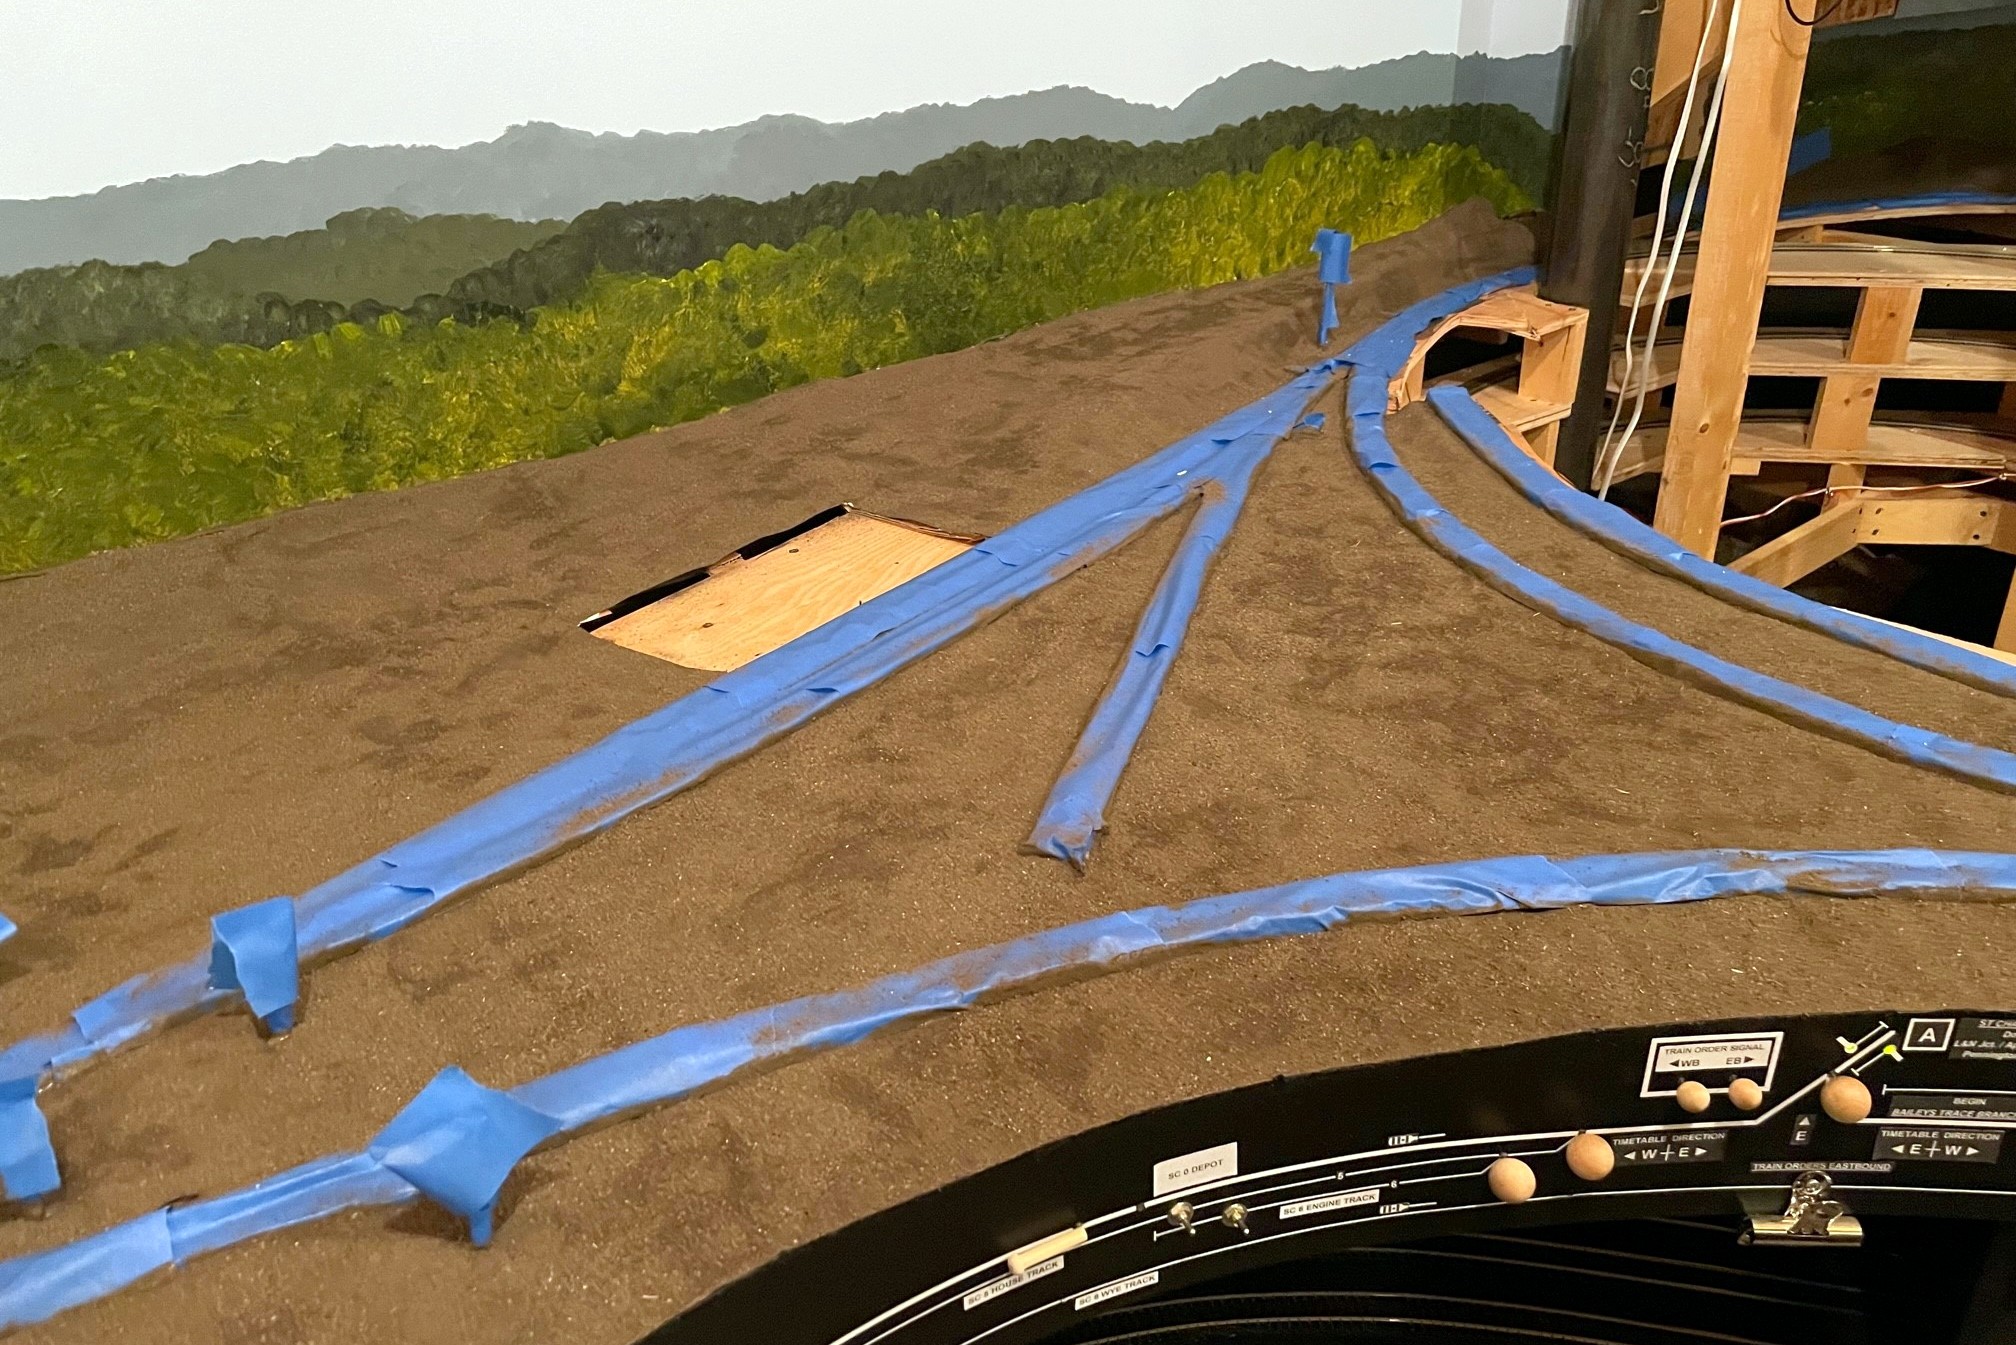
- Mask all track and permanent fixtures (e.g., signals) well before adding the white glue layer, and leave the masking on until you’re done spraying glue
- It’s easy to cut holes into the scenery base to place structures
Oh, Dan, did you HAVE to ruin the effect by putting those Southern Ry F-units on the rails? What you modeled looks a whole lot more like C&O/B&O terrain between, say, Charleston and Huntington, WV! In fact, there’s a photo in “C&O Power”, I think, that has an isolated peak, similar to what’s visible on your scenery, not too far from Charleston (“Carbon Hill” is the name of the site, IINM). But in all sincerity, that’s a great job and orders of magnitude easier/more user friendly that “Plaster-R-Us” or other hardshell scenery. Thanks for this article!
Haha! I think the tuxedos on the Fs really class things up, personally. It’s the grungy gray and yellow RS3s that show up every once and a while I’m suspect of.