


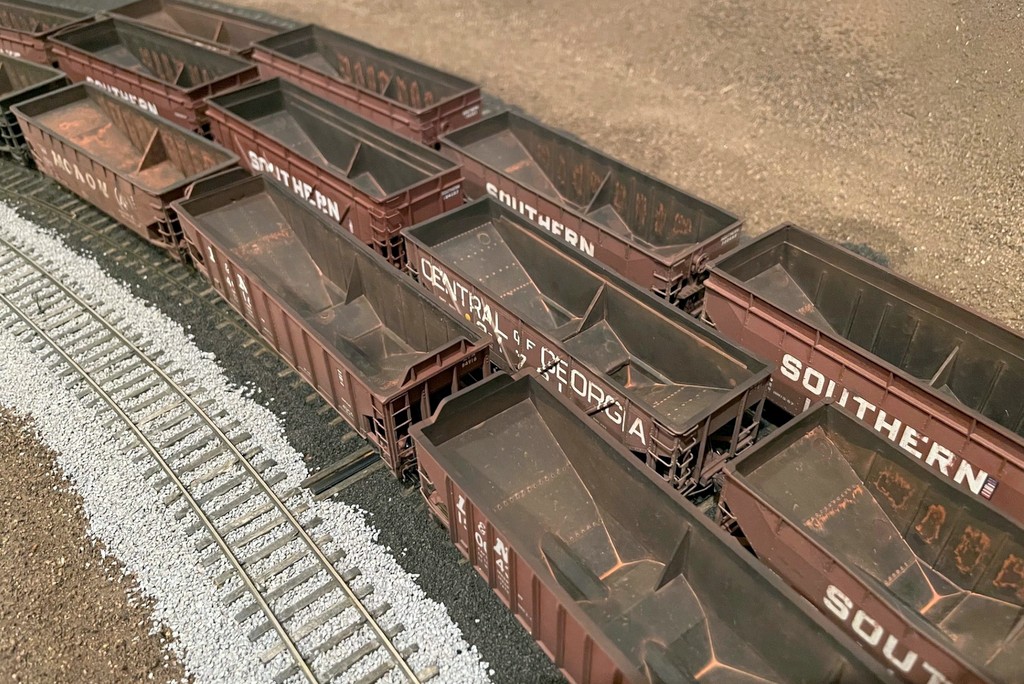
This Central of Georgia hopper from an Atlas model shows off the denting, exterior dry brushing, and interior weathering techniques
It should come as no surprise that someone who runs a site called “Appalachian Railroad Modeling” loves modeling coal hoppers! While unit trains dominate the rails today, a few decades ago it was common to see coal hoppers of all different vintages running together, and the condition of cars ran from “nearly new” to “how is this thing still on the rails!” Last year I wrote a shorter article on weathering a specific hopper using some of the same techniques, but in this article, I’ll go through each technique step-by-step because modeling variety in your hopper fleet requires the combination of many weathering techniques. Not all hoppers get every technique, but most hoppers get most techniques, especially those that simulate an old coal hopper still in service after a decade or three.
First, a word on rust. One of the most challenging things about weathering coal hoppers is getting the interiors to look right. The way rust forms on a coal hopper’s insides is a little counter-intuitive–if you see a lot of bright orange rust, it likely indicates a newer steel car. Coal hoppers come from the assembly line fully painted, inside and out (unless it’s a Cor-Ten car, but that’s a different story). It doesn’t take long for the roughness of coal loading and the scratching and sliding of coal unloading to start stripping the paint. When a newish car is unloaded, it usually leaves a shiny sheet of steel exposed slightly down from where the top of the coal load was. This sheen will stay for a day or so before a coating of bright rust appears, especially in wet or humid environments. Many of the rusting techniques you’ll see from others are fantastic for modeling either the shiny or brightly rusted look! Over time, the steel starts to really rust, and surfaces that are continually exposed take on a dark reddish brown color. Additionally, years of coal dust tend to coat the non-rusted areas. Between these two elements, the end result is that the interiors of black coal hopper interiors tend to take on a dark rusty look, and red or brown coal hopper interiors tend to take on a blacker look. When compared side-by-side, the interiors of old black and red coal hoppers tend to gravitate toward a common color somewhere in between. Even on newly repainted hoppers, they often don’t repaint the interiors–you might see some overspray, but they still have the same rusty black look inside. Additionally, many older hoppers tend to display a “high water mark” a foot or two down from the top where the load usually sits, and the area underneath takes on a slightly rustier color with perhaps spots of new rust showing through. This is the look I’m going for most of the time with my hoppers.
Model hopper interiors showing a variety of rusty looks based on the techniques in this article
As previously mentioned, not all hoppers get every weathering technique to preserve the variety of looks you’d see in prototype hoppers in the pre-unit-train era. Here are the basic steps, though, in order of how I usually do them including the following: rusty wheels, dents and dings, flat lacquer, exterior dry brushing, re-stenciling masks, airbrushing, exterior washes, cleaning wheels, interior washes, interior dry brushing, and lettering streaking.
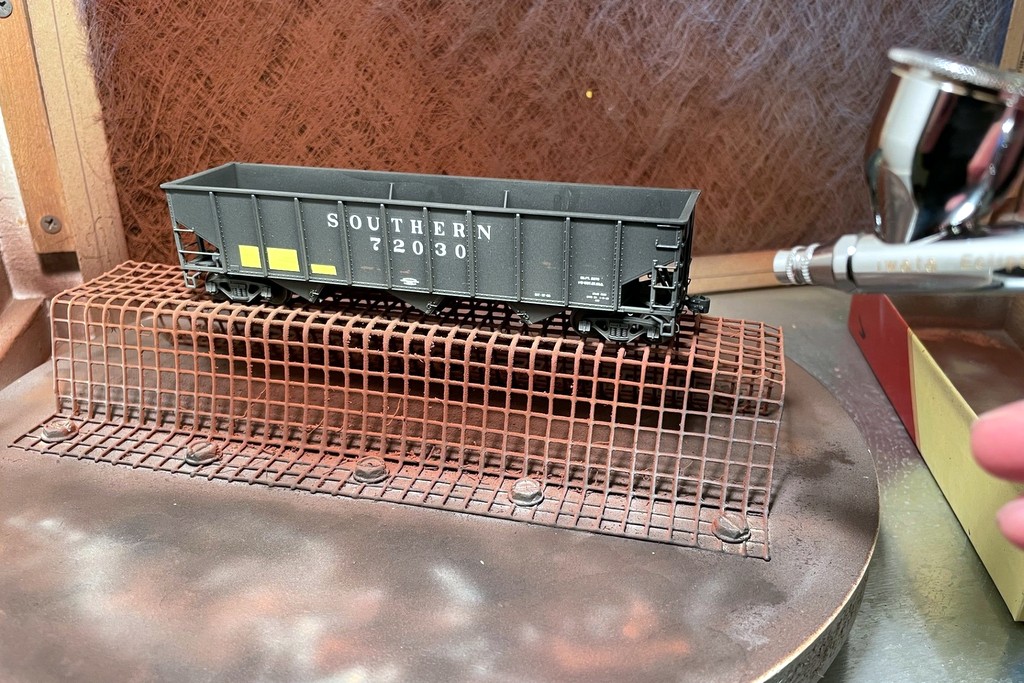
1. Rusty Wheels. The first weathering my coal hoppers get is rusty wheels. I use only metal wheels, so I’ll first paint the back of the wheels and axles flat black. Once dry, I’ll paint the fronts of the wheels with Vallejo Dark Rust. I just use a brush for both of these steps. I generally leave the wheels in the trucks, hold the brush against the wheel, and spin the wheel against the brush with a free finger. Every once and while, I’ll do a single wheel face in bright rust to simulate a new wheel that hasn’t fully rusted yet.
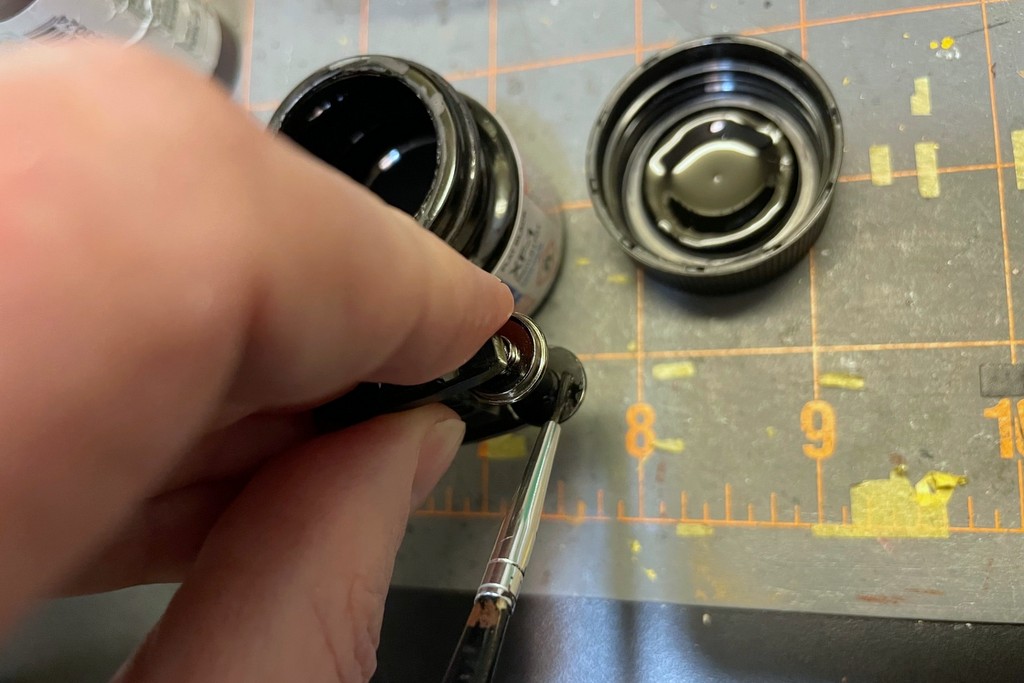
1A Paint the axles and wheel backs flat black
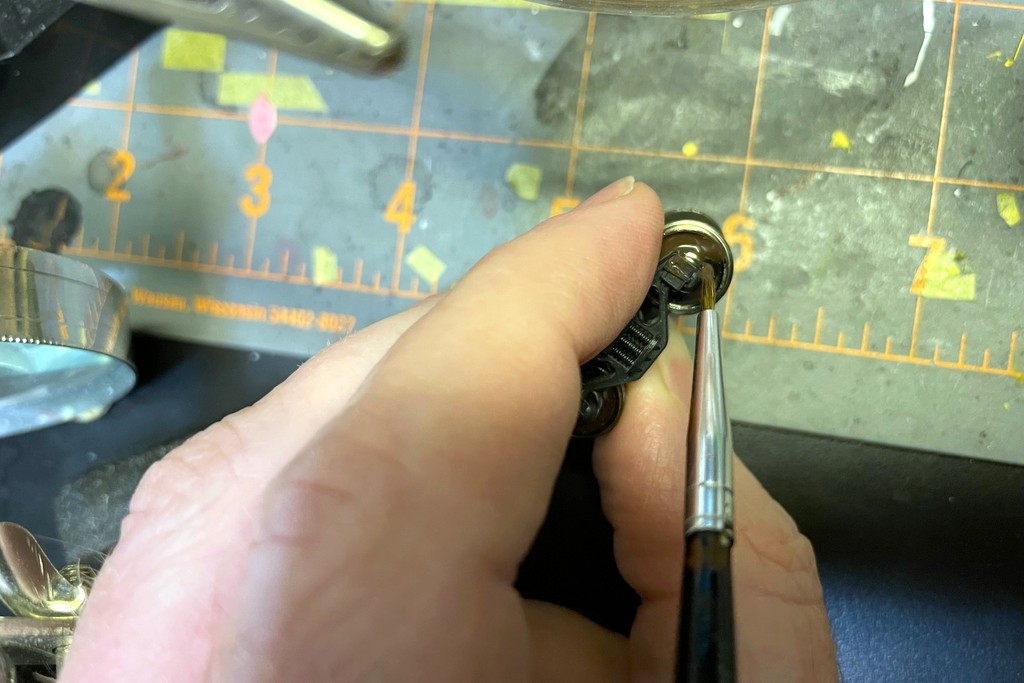
1B Paint the wheel front faces dark rust
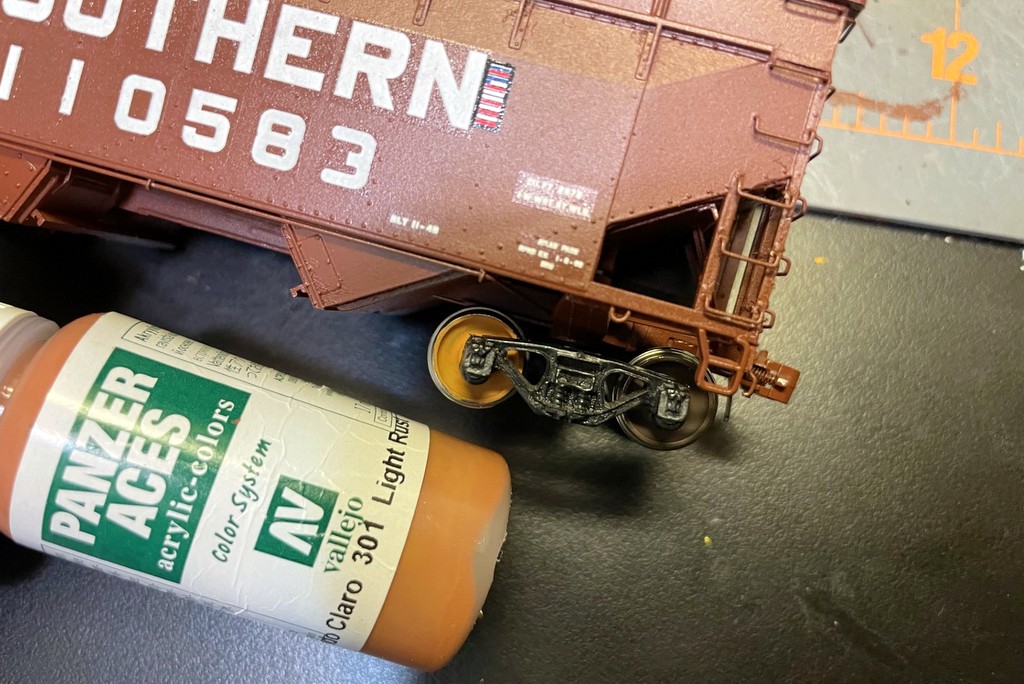
1C Paint an occasional wheel light rust to simulate a newly replaced wheel
2. Dents and Dings. Coal hoppers live a rough life, and few escape unscathed. I use two main techniques to model these dents and dings. For dents, my weathering tool-of-choice is a 100W lightbulb–this is getting hard to find, but the basic idea is a heat source capable of softening plastic without melting it. I mainly use this to simulate dents and bowing in the top chord. The dents usually occur between the ribs, and they seem more prevalent on offset hoppers than on rib-sided hoppers for some reason. I let the bulb heat up, then press the portion of the model I want to dent or bow directly against the hot bulb for about 10-15 seconds or until I can see the plastic starting to warp a little. Then I quickly remove the car from the heat and press the bow or dent in with the round metal handle of an X-Acto knife. For more pronounced creases, I’ll use the backside of an X-Acto blade. Not every car gets dents, and most that do only get 1-4 dents on the top chord in random spots. The key is variety for the fleet! This is best done before painting, but it can be done on a factory-painted car as well, though it might need some touch-up afterward. This technique sometimes “fattens” the top chord leaving a little balloon of melted plastic on the sides–this is easily corrected with an X-Acto blade and some fine sandpaper.
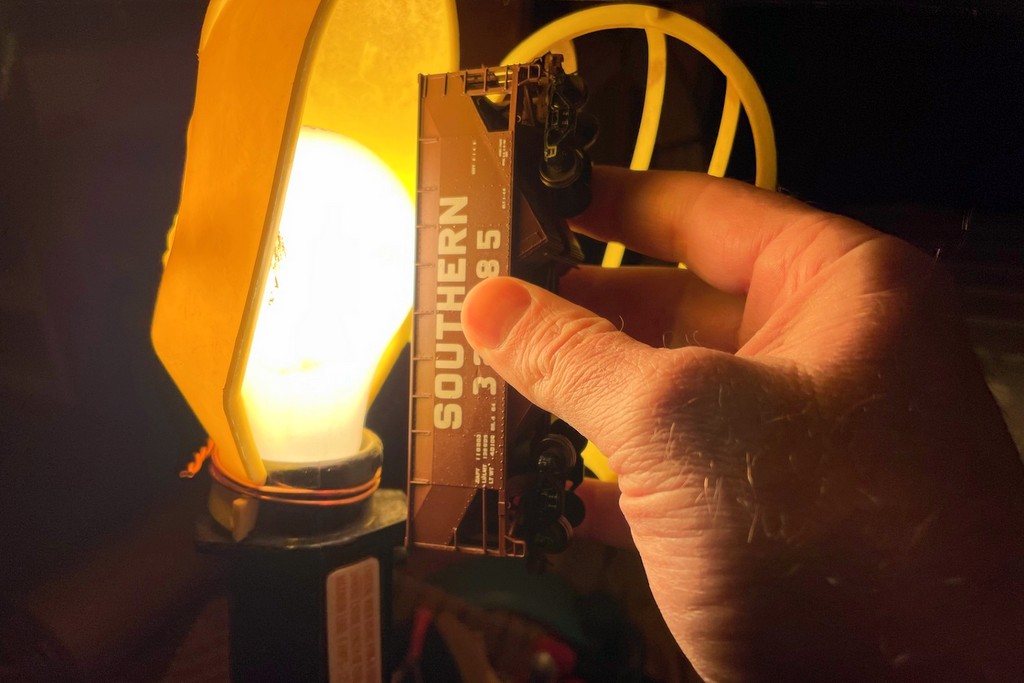
2A Holding plastic against a 100W incandescent lightbulb softens the plastic
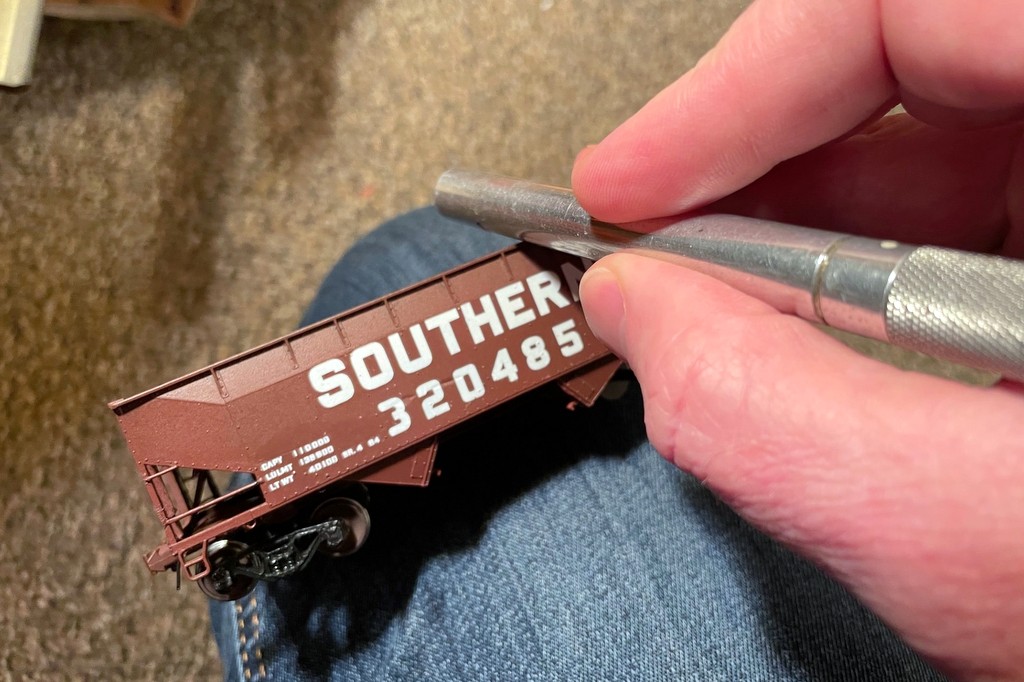
2B While the plastic is soft, use the metal handle of an X-Acto blade to push a dent into the top chord
Hoppers also tend to suffer “wounds” to their open corner posts and ladders. For these cars, replace any plastic bracing rods with brass wire and use the lightbulb technique to gently soften the plastic and push a corner post inward, simultaneously bending the wire downward at some point a scale foot or two from the corner post. This is a trickier and riskier technique, so practice on a model you’re not afraid to lose first.
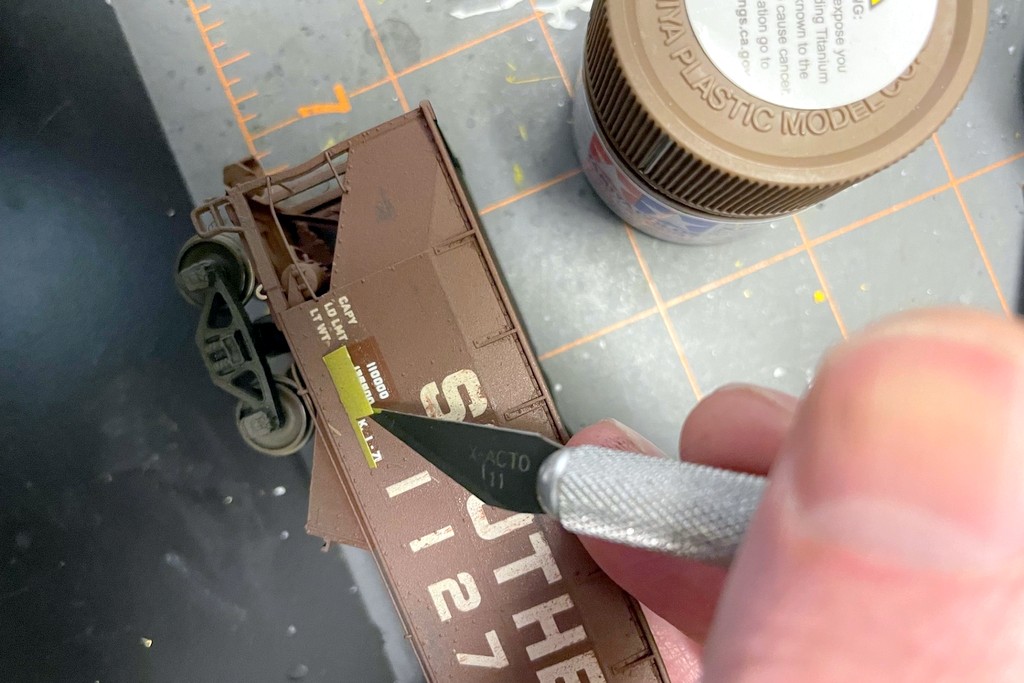
Hopper sides also collect a lot of scrapes. These scrapes tend to be horizontal (parallel with the direction of movement), and they often affect the ribs as well as the sides. I simulate these basically by carving the plastic. I use an X-Acto chisel blade for this. First, I use one corner of a blade to scratch a line across part of the side. This line can be long, short, across the ribs, or on adjacent panels skipping the rib (my favorite and pretty common on offset hoppers). Next I’ll carefully widen the scratch by making shallow chisel cuts into both sides of the original scratch. To simulate dented metal, it needs to look smooth, and it should taper to a slightly rounded point at the ends. I use a little fine sandpaper to smooth things out, making sure there’s a rounded edge and not a clean ridge at the edges of the dent.
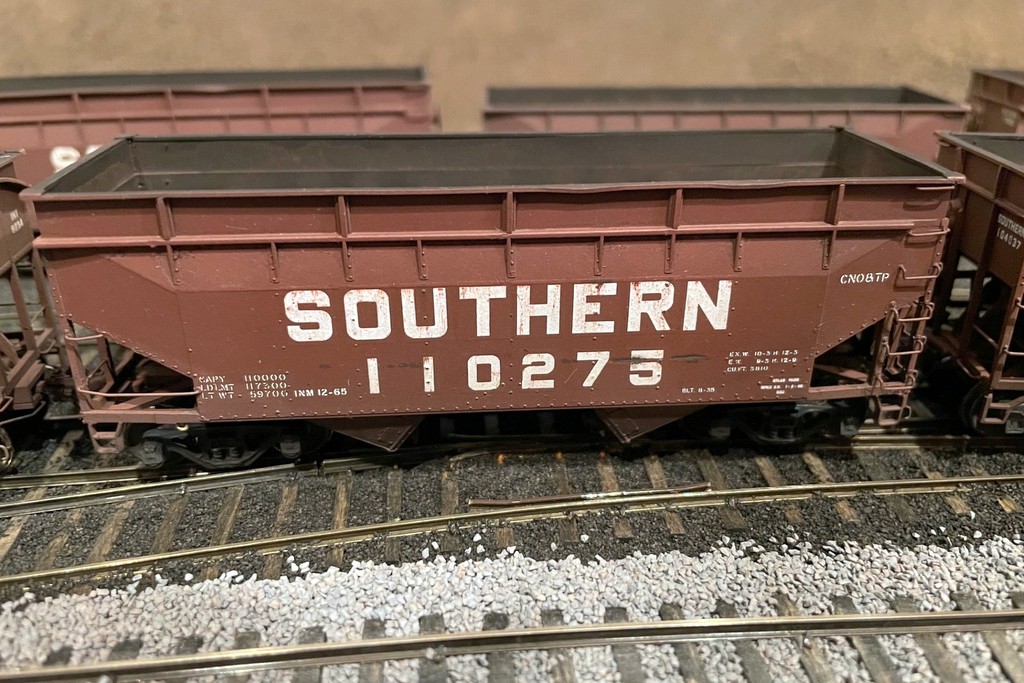
2C This car shows the result of some dents and scrapes carved into the sides with an X-Acto chisel blade as well as a couple of top-chord dents
3. Flat Lacquer. Before I start weathering with paint, I like to coat my hoppers with a couple thin coats of clear flat/matte lacquer finish. I find the Rustoleum products from the local hardware store do a good job, just test it on one non-favorite car first to make sure it doesn’t eat the paint or decals you’ve applied. I focus on the sides but also try to get inside the hopper as this paint will get a lot of weathering and handling later on in the process. I sometimes skip the lacquer with factory painted cars, but I find it’s important for custom paint/decals to give everything an even finish so the rest of the weathering effects go on evenly. I let this coat dry for at least a couple hours before handling a hopper.
3A Sealing with clear flat lacquer before weathering
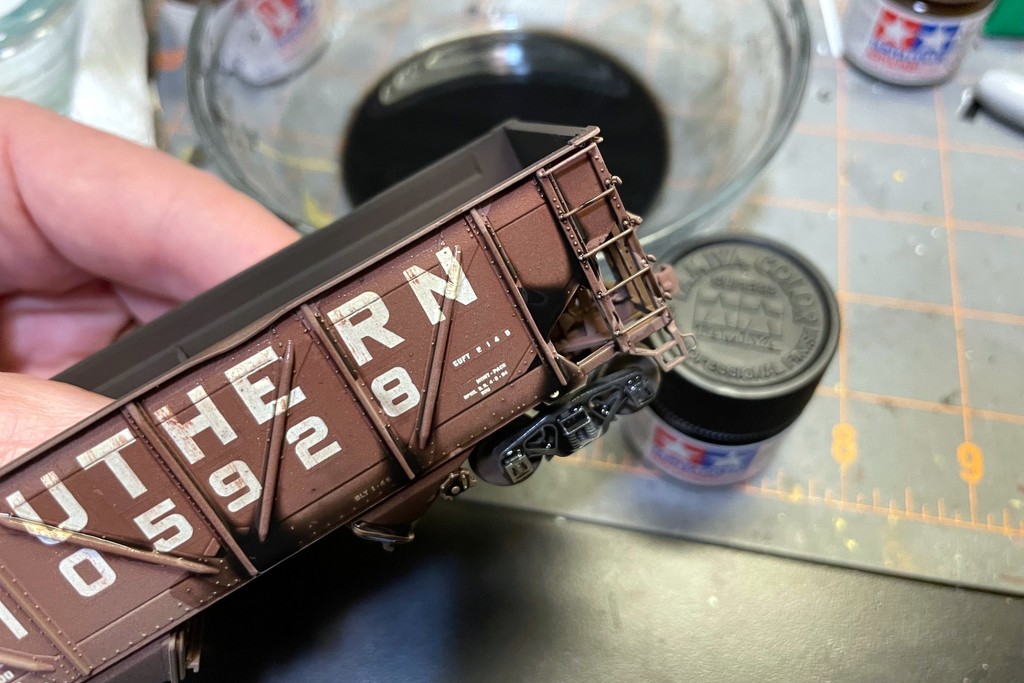
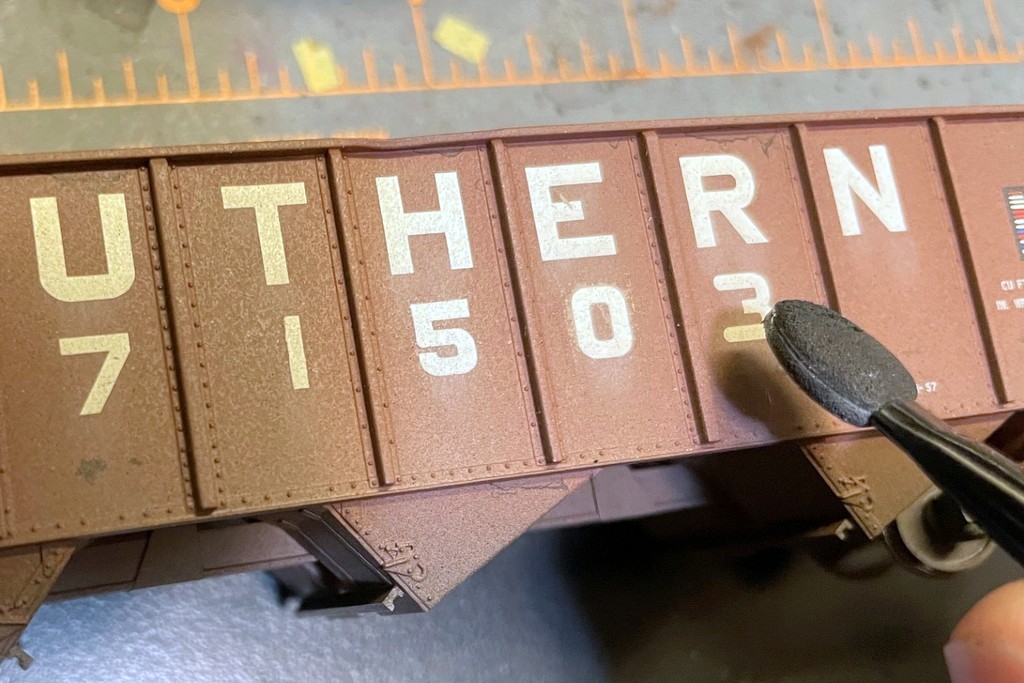
4. Exterior Dry Brushing. I use dry brushing for two purposes: to add a little rust and to give lettering a weathered look. I start with the lettering and dry brush with a color that matches the color of the car. Paint is pretty resilient, so I normally reserve this for cars that I’m simulating to be at least 10 years old from the last repainting. I use a typical drybrush technique where I put paint on the brush, remove most of it by “painting” the brush onto a piece of scrap paper or cardboard first, and then gently running the brush over the areas I want to weather. Two tricks here: 1) start light and work in layers to avoid overdoing it, and 2) work in vertical and horizontal strokes only–vertical and horizontal are how nature and movement work on railcars. This technique is particularly good for railroad logos and slogans. Don’t go too heavy on the reporting marks or numbers as these tend to get repainted if they were no longer visible.
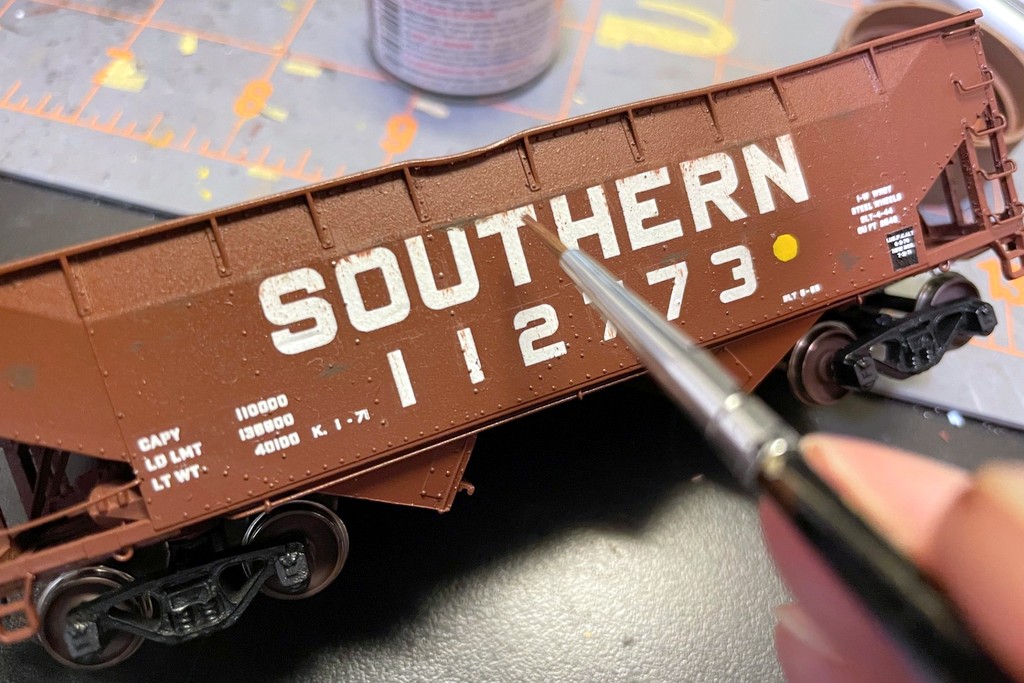
4A Using the same color as the car body, dry brush some fading and rust spots onto the lettering
Next I add rust to some of the cars that have “older” paint. For red or brown cars, I simply use a dark rust color (Vallejo Dark Rust) and old paintbrush. I brush off a good portion of the paint onto an old piece of paper or cardboard, but I leave enough that the result will be a distinct shape and not just streaks. I’ve found the keys to realism are to use a photograph for reference, use only horizontal and vertical strokes (sometimes combining the two into one rust mark), and to randomize the application across a car. “Randomize” does NOT mean “spread out”–evenly spread out or symmetrical rust marks look unrealistic. Rather, there should be one here, one there, a cluster here, a short line there, a wide swath of no marks elsewhere.
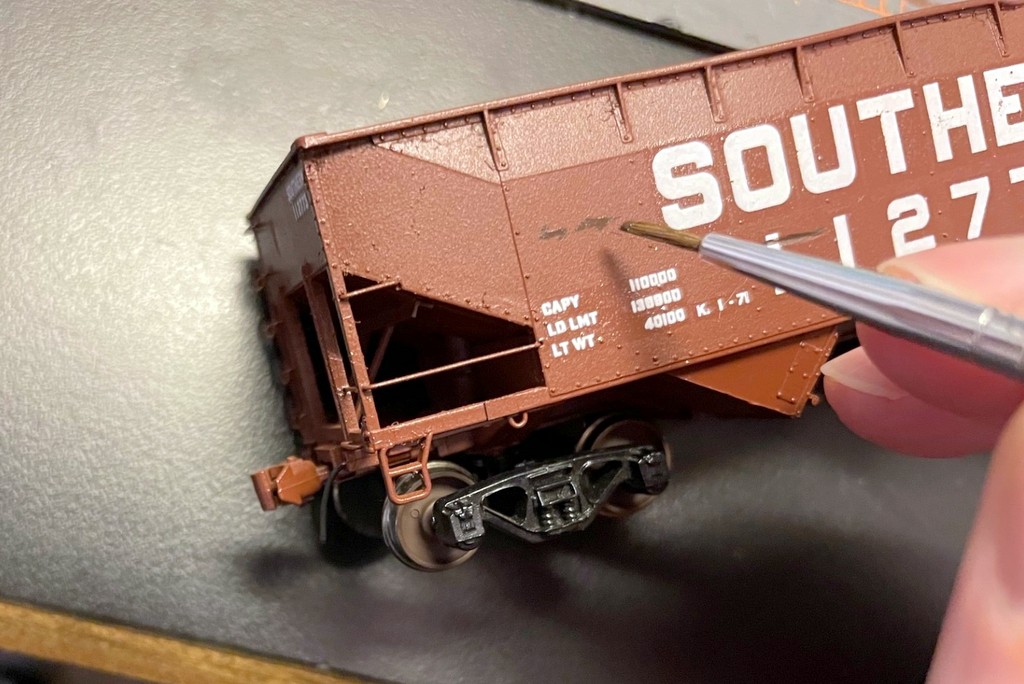
4B Brush some dark rust spots on randomly in horizontal and vertical patterns
For black cars, I like to start with a brighter rust color like Vallejo Orange Rust. For this, I’ll do more of a traditional light dry brushing, getting some of the edges (like the taper line on an offset hopper) and creating a couple small rust spots on the sides. Next, I’ll go back with a darker rust and drybrush on top of the light rust so the light only appears at the edges while the center looks like more mature rust.
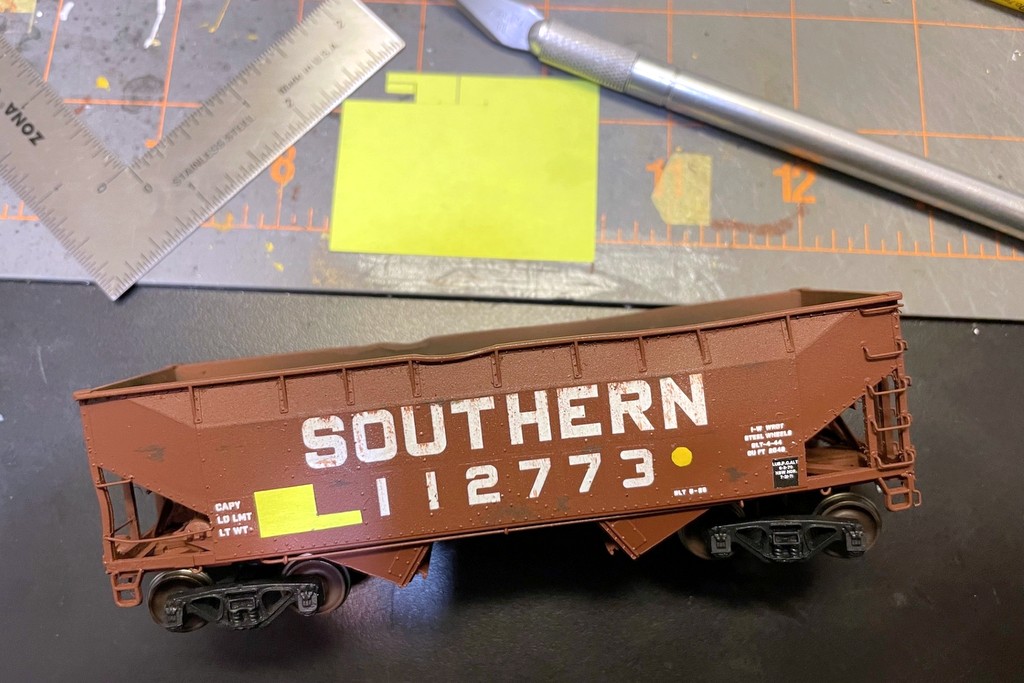
5. Re-stenciling Masks. Coal is shipped by weight, so an accurate weight of the car is important. This means you’ll often see a rectangle of fresh paint with freshly re-stenciled capacity and weight numbers and shop date markings, but not on every car. This paint patch can be half a panel or just big enough to cover the lettering. It can include the CAPY, LD LMT, and LT WT lettering, or these can be left and just the numbers repainted. Sometimes there are two rectangles of fresh paint on either side of a rib, sometimes the patch covers the rib too. The patch is usually the same basic color as the body, but not always–black patching on a red car seems pretty common for some roads. There are two ways to get this look. First, you can actually paint and decal on top of your weathering. What I usually do instead is to use a straightedge to cut rectangles of masking tape the size of the patches I want and place them over the lettering. This way you can get the weathering effect without actually having to paint anything on a factory painted car–just know that if the factory paint has a shop date with “NEW,” it should be re-lettered or modified (some of my cars have a shop of “NE” or “EW” :-). If I’m masking over decals, I’ll use the sticky part of a piece of a sticky note instead to minimize the risk of pulling off the lettering with the tape.
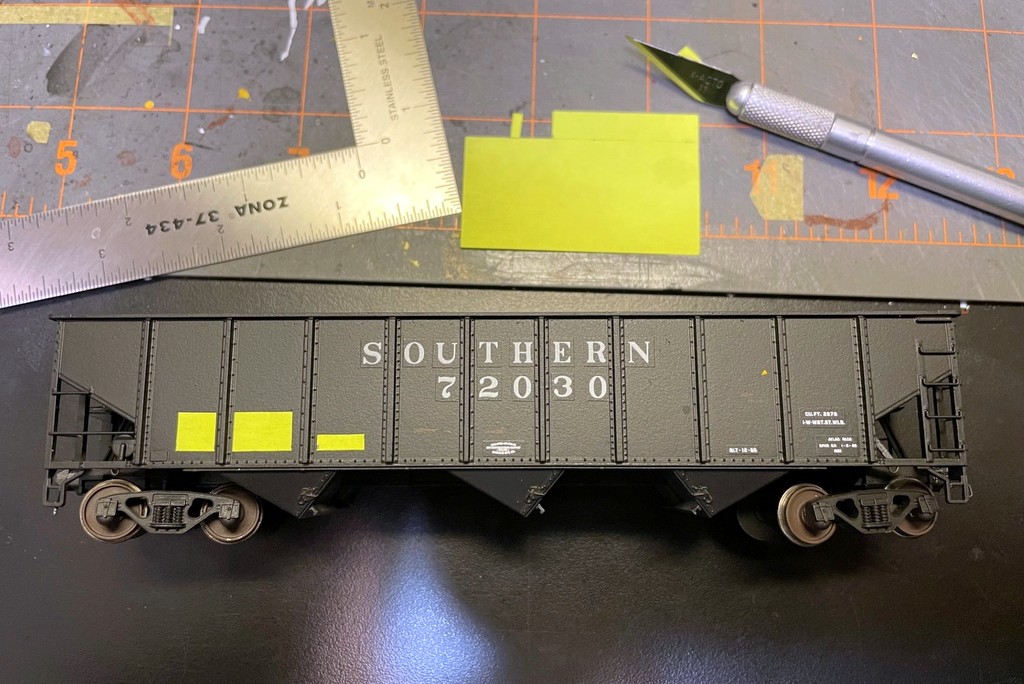
5A Using the sticky part of a sticky note, cut some rectangles to cover up capacity stencils and shop dates
5B The mask can be a variety of sizes and shapes–use photos as a guide
5C After airbrushing, remove the mask to reveal what looks to be a freshly painted data stencil
6. Airbrushing. No matter how new or old the car is supposed to be, every coal hopper on my layout gets at least a little airbrushing. I generally only use two colors for airbrush weathering: dark tan and flat black. I start with the dark tan. If it’s supposed to represent older paint, I’ll first use the tan to spray a light and even coat over all the surfaces to simulate fading and years of dirt. It’s easy to overdo this, so I work in thin layers. For all cars, I’ll hit the trucks and undersides generally pretty heavy with the tan. I don’t aim to weather the wheels, but I’m fine if overspray gets on them and leaves them with a mottled look of dirt and rust. I like to bring the tan slightly up on the car sides, especially near the trucks and on the hopper bays. I don’t usually spray much tan into the interior.
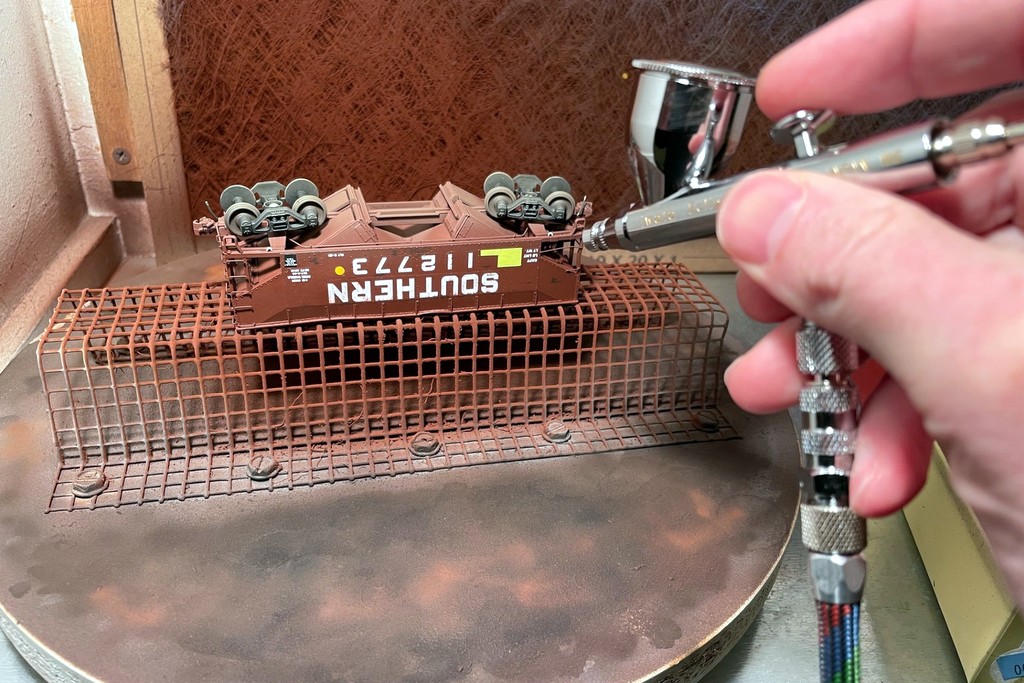
6A start with the undersides and a coat of dark tan on the underbody and trucks
6B airbrush dark tan on the sides to mimic fading and a layer of dust and grime
Next comes the flat black. I go back over the undersides and trucks with a little flat black to turn the tan a little more grimy looking but still showing through. I do NOT generally hit the sides of the car with black, or if I do, I keep it extremely light. I use most of the black for the interior. For most red or brown cars, I’ll work in layers and leave the inside of the car a dark rusty black color that doesn’t quite cover the original paint. I’ll also leave the area near the top of the interior lighter for the first scale foot or two to simulate overspray from a repaint and to start getting the “high water mark” look from the repeating coal loads. I try to get at least a little layer of black on the top chord as well because horizontal surfaces get pretty dirty from the elements, and coal dust is pretty sticky. If you look at prototype coal hoppers, you DON’T see distinct coal dust marks on the sides very often, so I’m careful to spray the far top chord from ACROSS the hopper and not the near top chord where I might get the hopper sides.
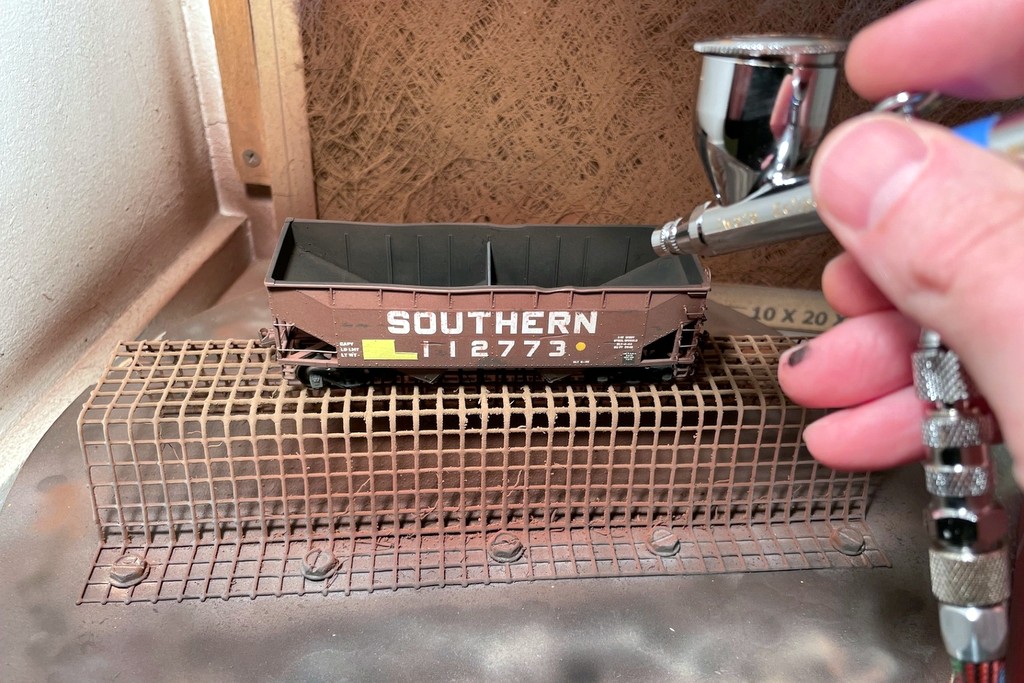
6C airbrush flat black into the hopper interior and a little on the trucks and underframe
7. Exterior Washes. Washes are a great way to give a car a nice layer of “I’ve been sitting in the rain and elements for years” look. I generally only use a black wash, though I’ve been known to do some dark tan wash on occasion, especially to bring out details in a black car. For my washes, I use a big brush and mix a couple brush-fulls of paint into some water with a drop of soap. I don’t measure my mixes, but I’d guess its something like 10: or 20:1 water:paint. If in doubt, start with more water and increase the strength of the paint if it’s not achieving the effect you want. I work one side at a time and “paint” the wash into every nook and cranny. If it looks too thick, immediately wipe it off with a damp paper towel and add more water to your mix. I let the wash sit for a minute or two, then I use a small piece of damp paper towel to wipe the wash DOWN and off the car. Perfectly vertical strokes with the paper towel are the key to getting a realistic look. Make sure to check the rest of car for any unwanted pools of wash that will leave a dark black mark in unwanted places if you leave it. Most of my cars get at least one light wash. Some get 2-3 layers of wash for a dirtier look. I typically put black wash on my trucks as well, and I give the interior a good black wash as well while I’m at it.
7A Use a wide brush to add a coat of flat black wash to the sides–let it sit a minute or two
7B Use a paper towel to gently wipe vertically down the sides to remove excess wash and create a streaked effect
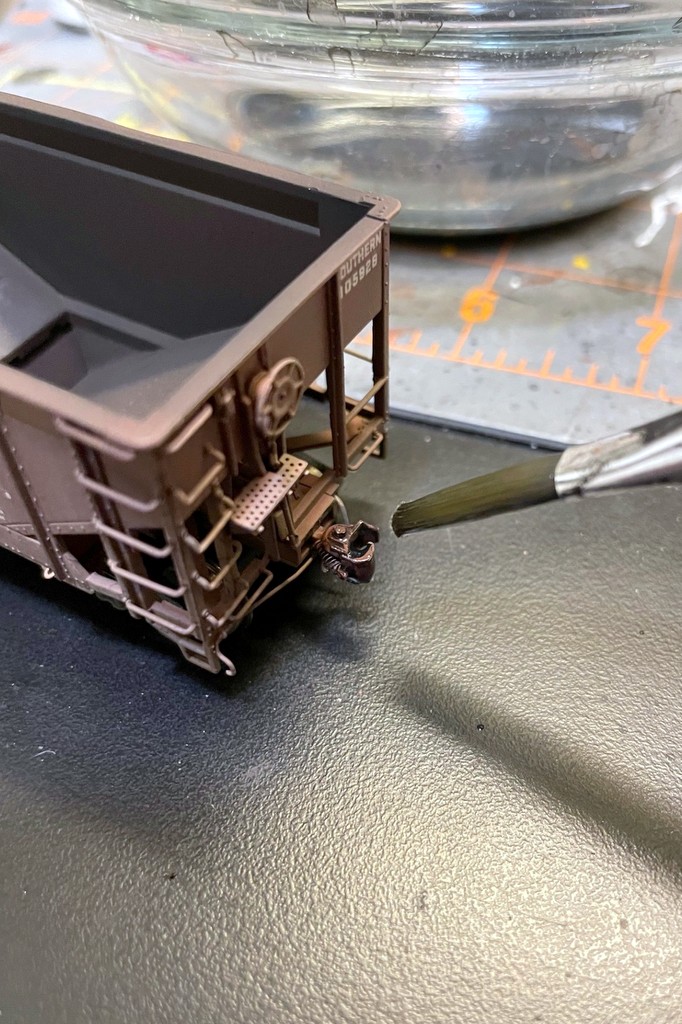
7C using a thicker black wash, coat any red or brown couplers to darken them–do the same with rust wash on black couplers
8. Cleaning Wheels. I do my airbrush weathering with the trucks and wheels attached, so at this point, the wheels are pretty coated with thin layers of paint. You could save this step for last, but who wants to have a layout-ready car just waiting for wheel cleaning to join the layout? This is as good a place as any for this step. I clean the treads by first removing the trucks then using the end of a bamboo skewer to scrape any paint off the treads. The bamboo works well because it’s hard enough to scrape off paint but not so hard it will scratch the wheels. Once the end of the skewer has a nice layer of black and tan grime, I clip off the end with some wire cutters and use the freshly cut end–one skewer will clean several dozen wheels this way. When all four wheels on a truck have been scraped clean, I turn the wheel treads against a paper towel to remove an loose paint, then I reattach the trucks.
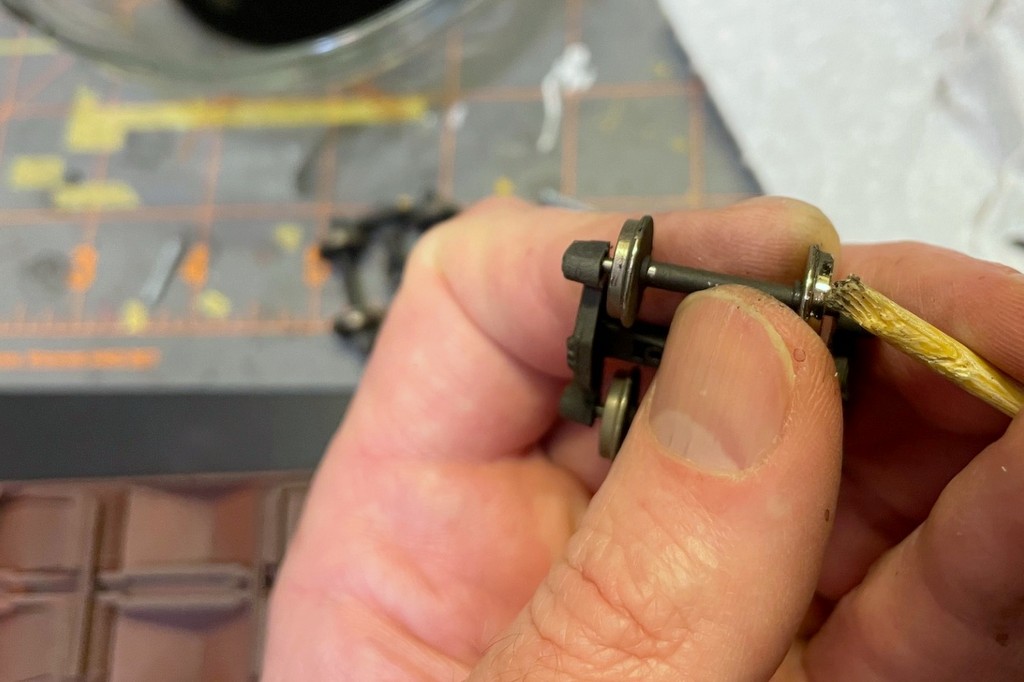
8A Clean any excess paint off the wheel treads using a bamboo skewer
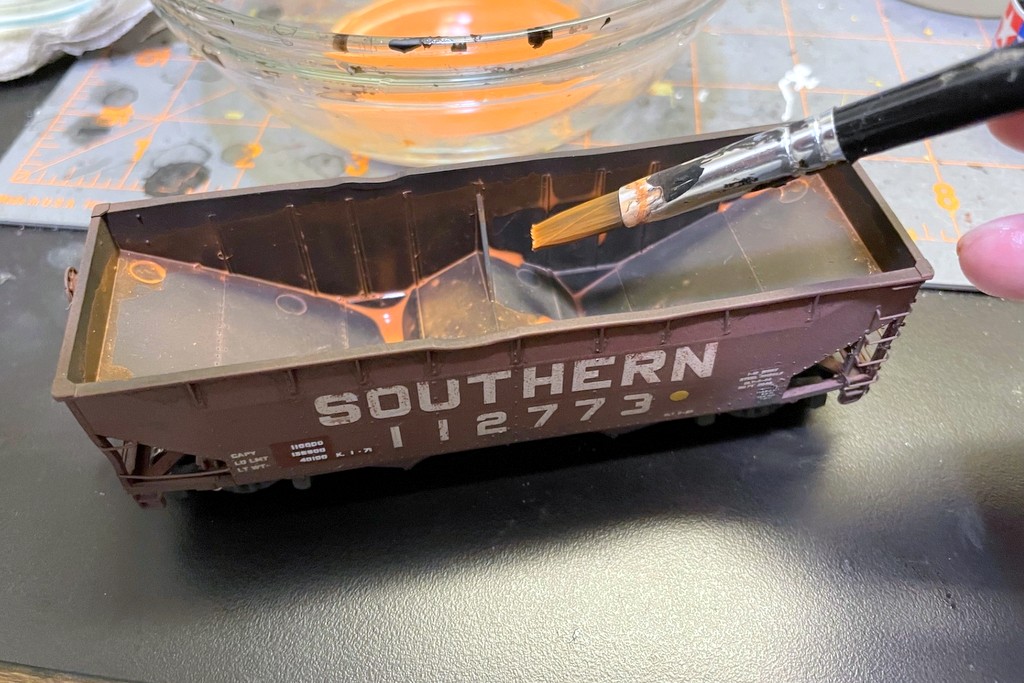
9. Interior Washes. This is where the “old dark rust” look described earlier comes to be. I make a wash from Vallejo Orange Rust, water, and a drop of soap. Unlike the exterior, for this I don’t want to hit everything, just the area below the “high water mark.” I use a large brush to roughly paint the high water mark onto the upper sides of the interior on all sides. The high water mark usually slopes down near the ends, and the ends have a rounded peak. Once this line is in place, I liberally paint the wash into the rest of the interior below the line. After letting it sit upright for a few minutes (upright so any wash drains vertically), I’ll use a paper towel to dab up any excess wash from the hopper bays, but I usually don’t wipe the sides of the car to preserve the high water line. I vary the number of wash coats I use (1-3 washes), but I repeat the same steps for each wash, and if the rust color isn’t showing through, I’ll add more paint to the wash. I vary the technique a little by not mixing the wash super well and dabbing some thicker paint as I apply the wash. This tends to leave a few streaks and spots of brighter rust in places which I like. When dry, there should be a dark rusty brown interior, a noticeable high water mark of rust, a few spots or streaks of brighter rust, and lines of bright rust around the corners and in the bottom of the bays, exactly where rain would cause new rust or run-off rust to gather.

9A using a thin wash of light rust, paint a “high water mark” where the coal load would normally sit
9B Fill in the rust wash on the rest of the hopper interior below the high-water mark
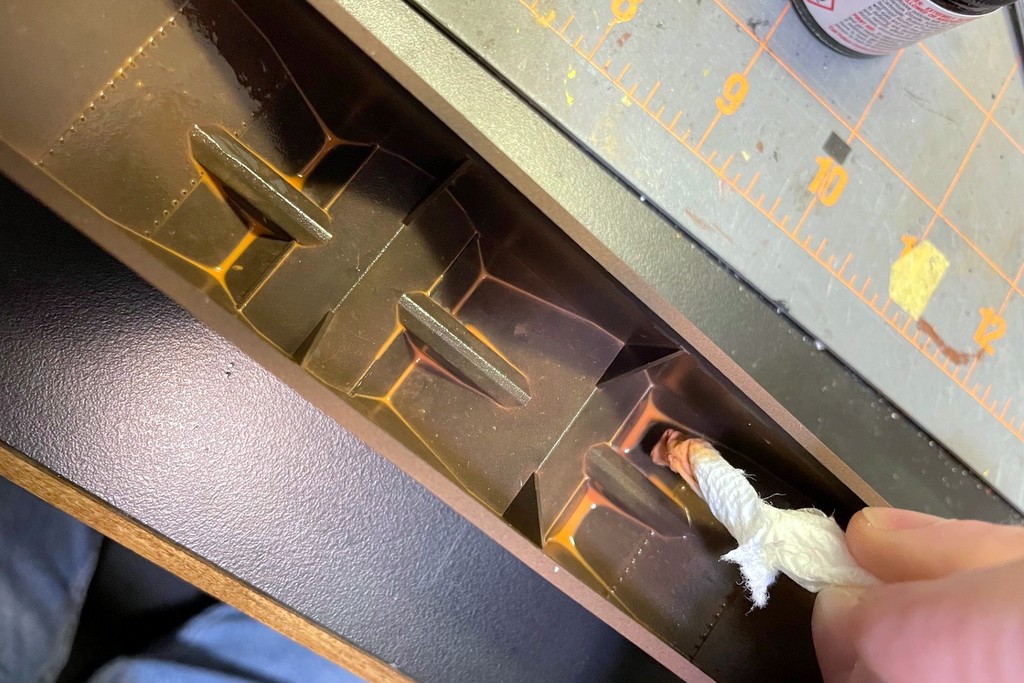
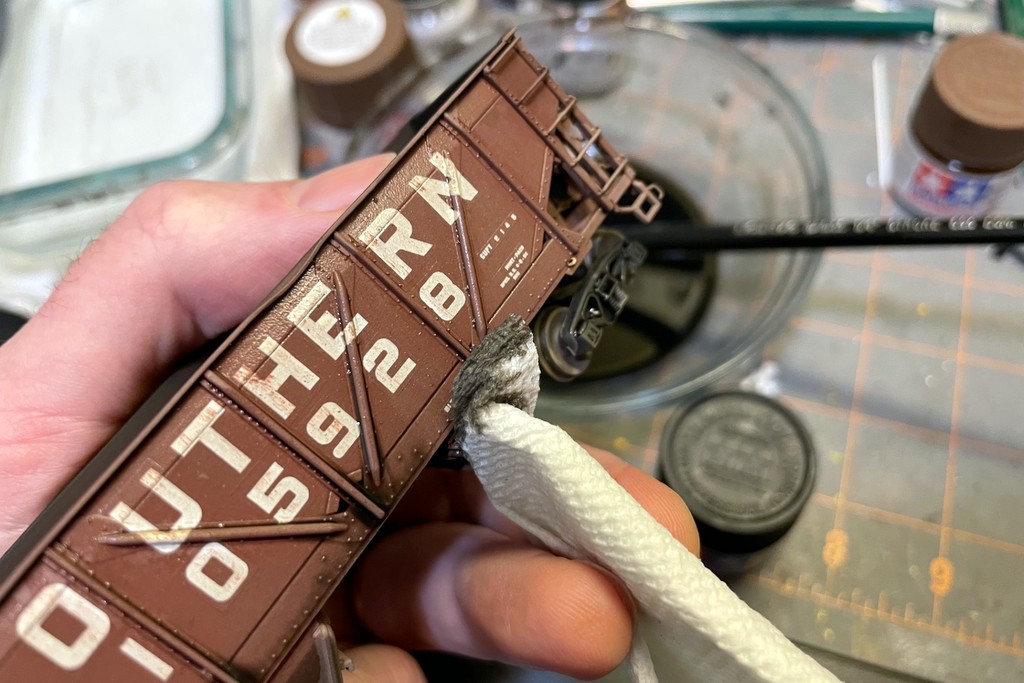
9C Using the twisted end of a dry paper towel, gently soak up any excess wash–repeat the rust wash as many times as necessary to get the right color
While I’ve got the interior rust wash out, I’ll pick a hopper or two out of the lineup to get “extra rusty.” I like to do this especially for offset hoppers between the interior ribs. I’ll dump most of the water from the wash leaving any rusty “sludge” at the bottom… basically a “thick wash” of rust. With this thick wash, I’ll half-dab, half-dry brush some in the areas between ribs, then I’ll dab some watered down rust along the seams of the slope sheets and use a paper towel to streak everything downward to look like extra fresh rust streaking from seams and rivets. This thick rust wash is also perfect for couplers–I just dab some on the coupler everywhere and dab off the excess with a paper towel after letting it sit a minute. Once the wash dries, I work the coupler knuckles and move them back and forth to break any dried paint that might interfere with coupler operation.
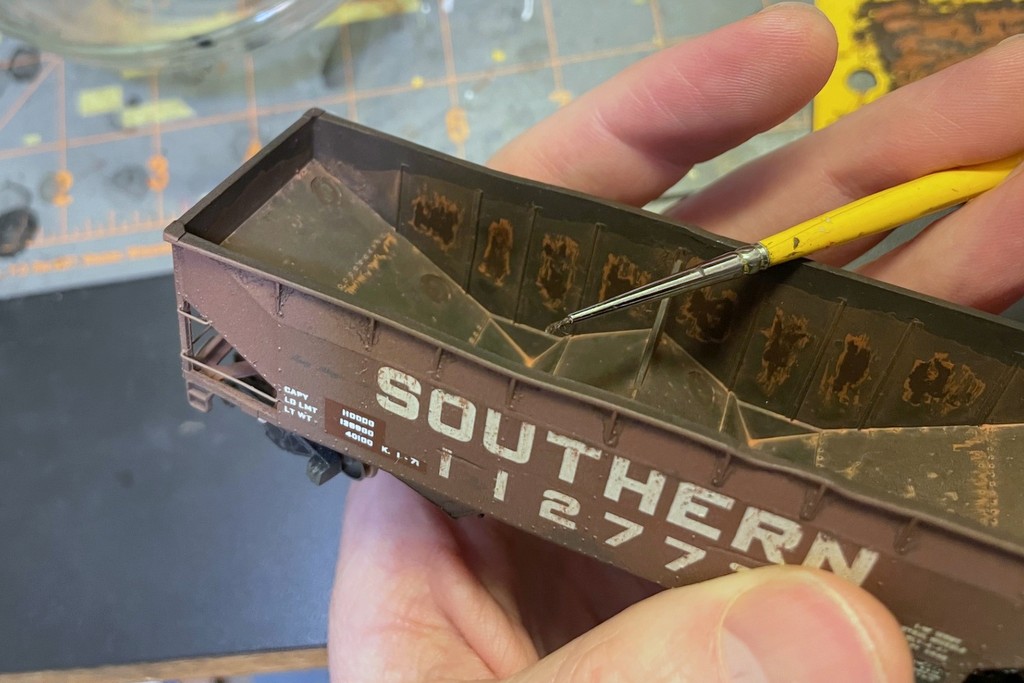
10. Interior Dry Brushing. Once the rust wash has dried, I’ll finish the “extra rusty” cars by dry brushing some more light rust spots along panel edges, edges of interior bracing, and some spots on the sides, especially for offset hoppers. Then I dry brush dark rust on top of the spots of lighter rust dabbed onto the sides in the previous step. This simulates the part of the panels where the paint has been gone a while and perhaps even the first layer of rust has been scraped enough to be replaced by a second for cars nearing the end of their lifespan. I’ll do the same on the slope sheets and braces, placing dark rust areas in the middle of light rust areas. Dark rust is also a good color to hide some of the bright rust ovals that form in the plastic mold marks on some model hoppers.

10A Using an old brush, dry brush some rust on panel edges and exposed edges of interior braces
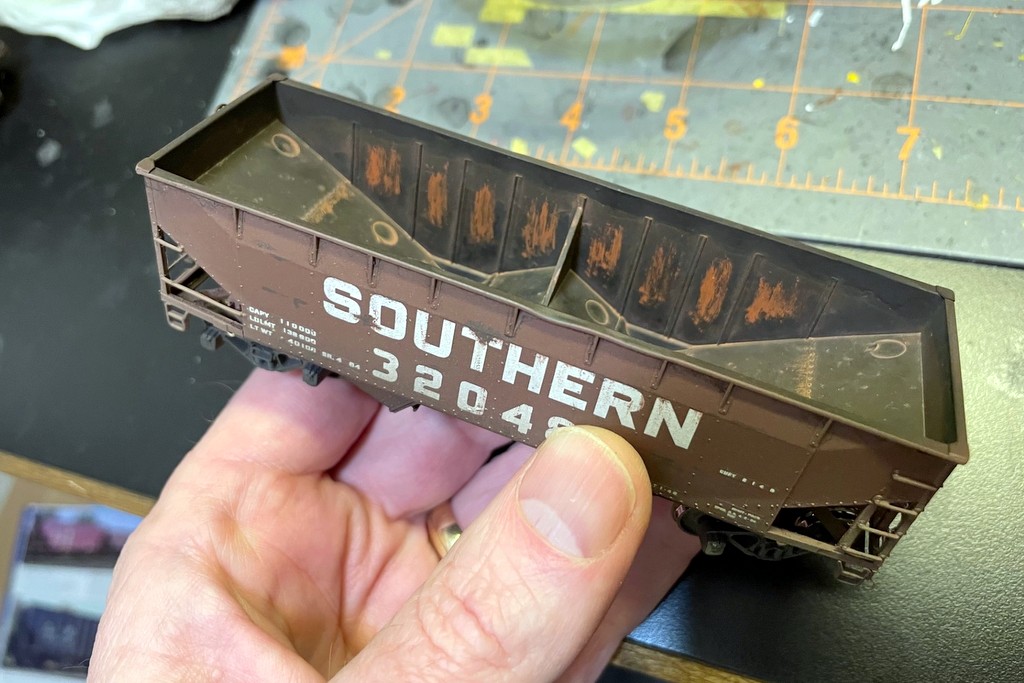
10B On some cars, dry brush areas of light rust on the sides
10C Dry brush dark rust on top of heavy areas of light rust
11. Lettering Streaking. My final step is to add some streaking and perhaps a few areas of light and dark using Tamiya “Weathering Master” kits. Some older hopper white lettering (certainly not all, check photos) shows signs of streaking. To simulate this on some cars, I use the “snow” color (white) and the Tamiya sponge applicator and streak gently down from the lettering. Where this effect is present, the streaking is generally pretty uniform on all the lettering. These kits are also great for adding additional areas of dirt and grime if you need more after airbrushing and washes, but I tend to use them as touch up rather than primary since they’re tough to work into corners, and they don’t stand up to handling as well as other techniques.
11A Using photos as a guide, use the Tamiya Weather Masters brush and “snow” to create subtle streaks below lettering
With that, the hopper is ready for the layout!
Final Tips.
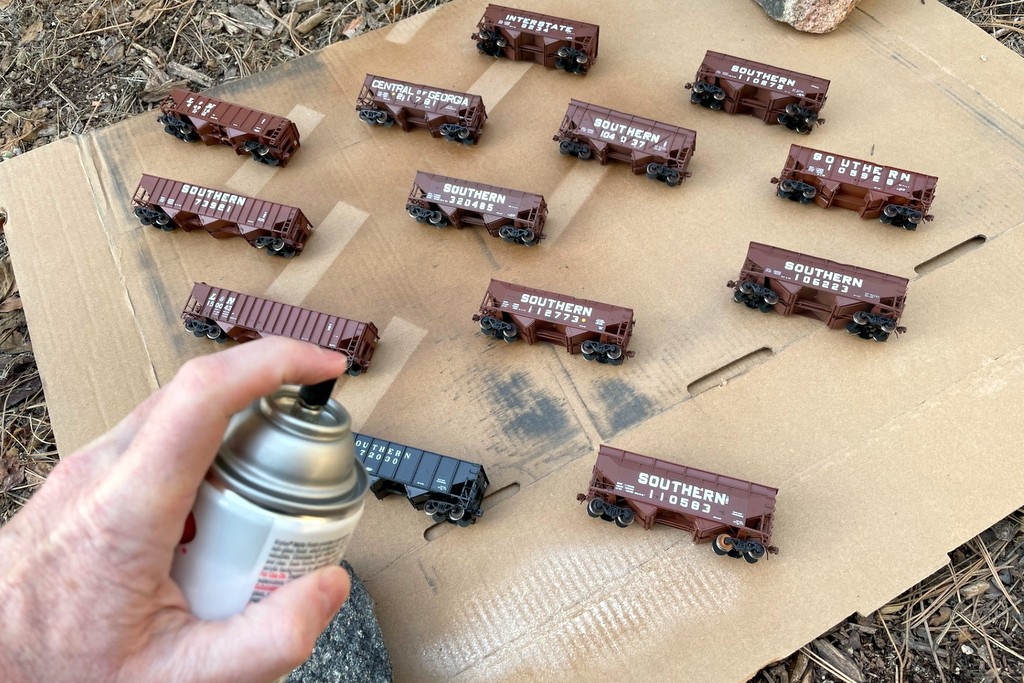
- To save time, I often build my hoppers in groups of 6-15 cars and weather them assembly line style
- Pictures are extraordinarily helpful! Even if you’re not modeling an exact car, having a photo of a car about the age and condition of what you want helps tremendously in seeing how much rust and grime to add.
- Study photos of hopper interiors. It’s surprisingly uncommon to find a photo of the top of an empty coal hopper, so any time I run across one, I save it to a “hopper weathering” file on my computer. Studying these photos is how I’ve come up with my interior weathering techniques.
- Work in several layers. It’s a lot easier to add more than to remove weathering.
- One good thing about the interiors is it’s easy to redo an interior by going back in with some black and brown airbrushing that don’t require repainting of the whole car–this makes it easier to try techniques until you like what you’ve got, and to apply any new techniques you learn to some hoppers that have been on the layout a while.
Old Weathered Hopper Gallery
L&N 50T PS3 from an old Train Miniatures model shows more subdued weathering and a nice top chord dent–note the dark rust line across the panels and ribs of the lower right body
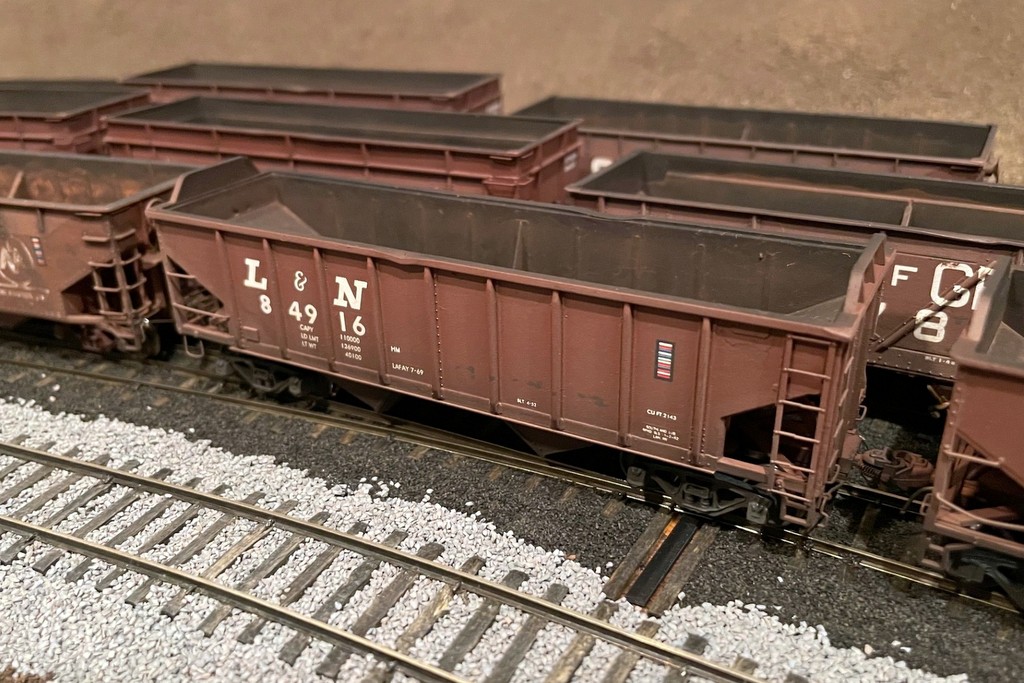
This 70T Atlas Trainman model has subtle exterior fading but shows its “high water mark” rust interior well
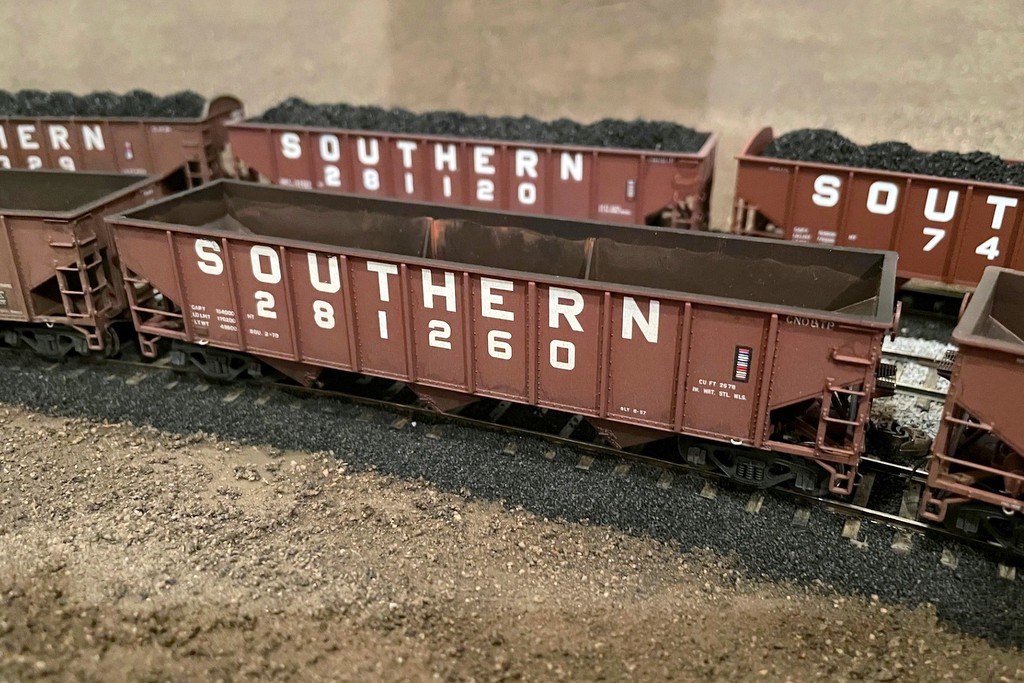
Southern PS3 clone kitbashed from an Atlas model with just a little rust streaking on the outside and a nice dark brown rust coat inside
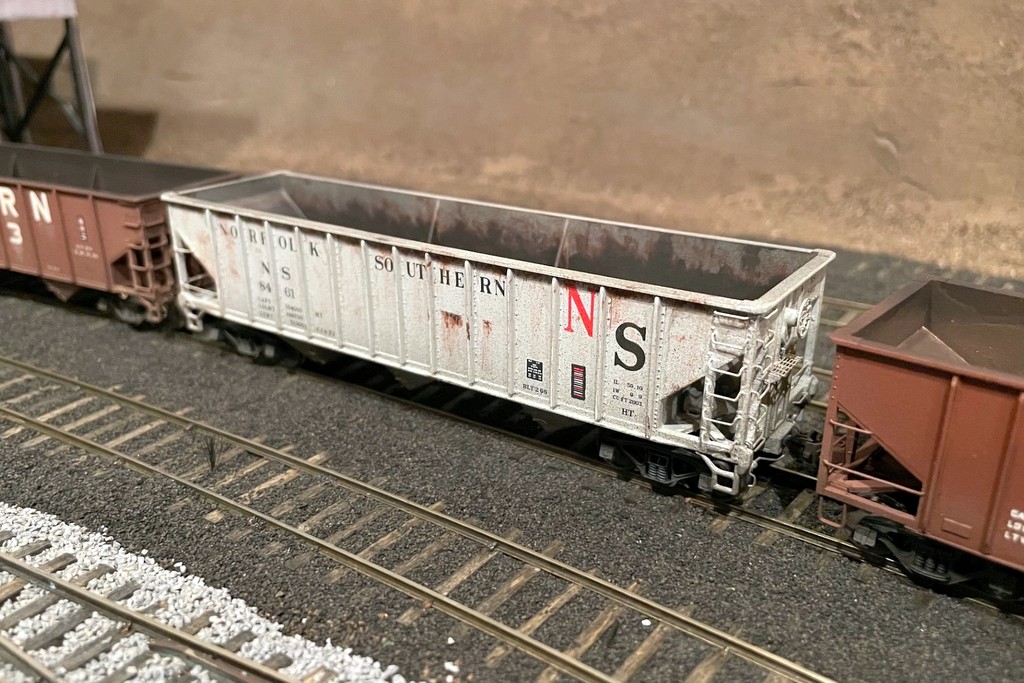
This old NS hopper from a Bowser kit got lots of rust dry brushing inside and out–the interior was then dirtied with some flat black airbrushing
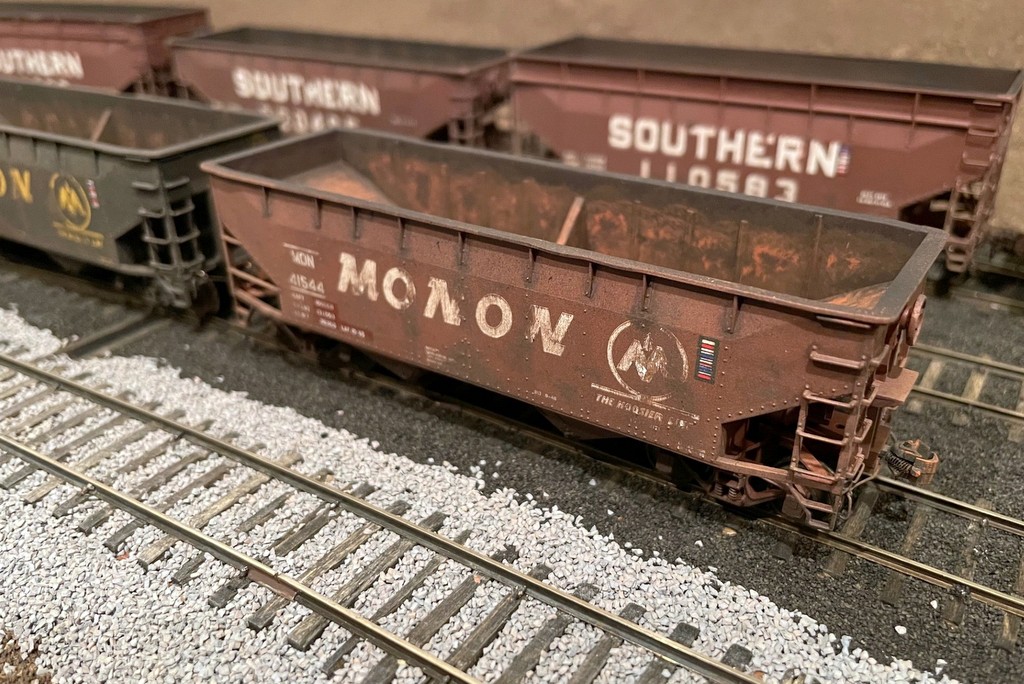
This Monon 50T hopper from an Atlas model shows a real “rust bucket” interior and exterior from washes and dry brushing
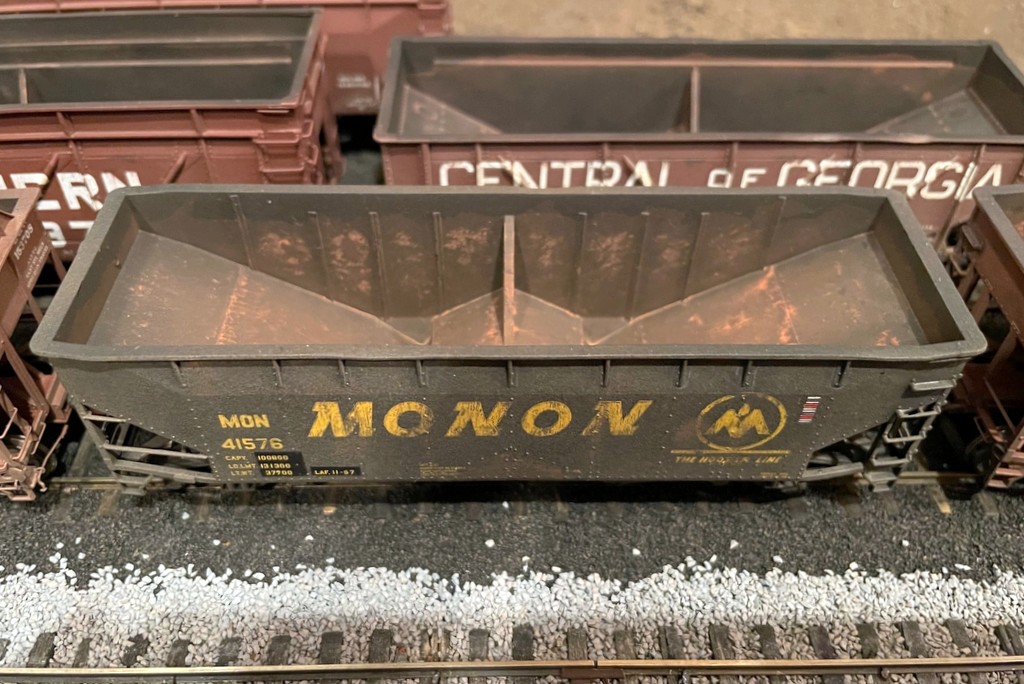
This Monon car from an Atlas model shows stencil masking, dry-brush fading on the lettering, and lots of wash and dry brush interior rust
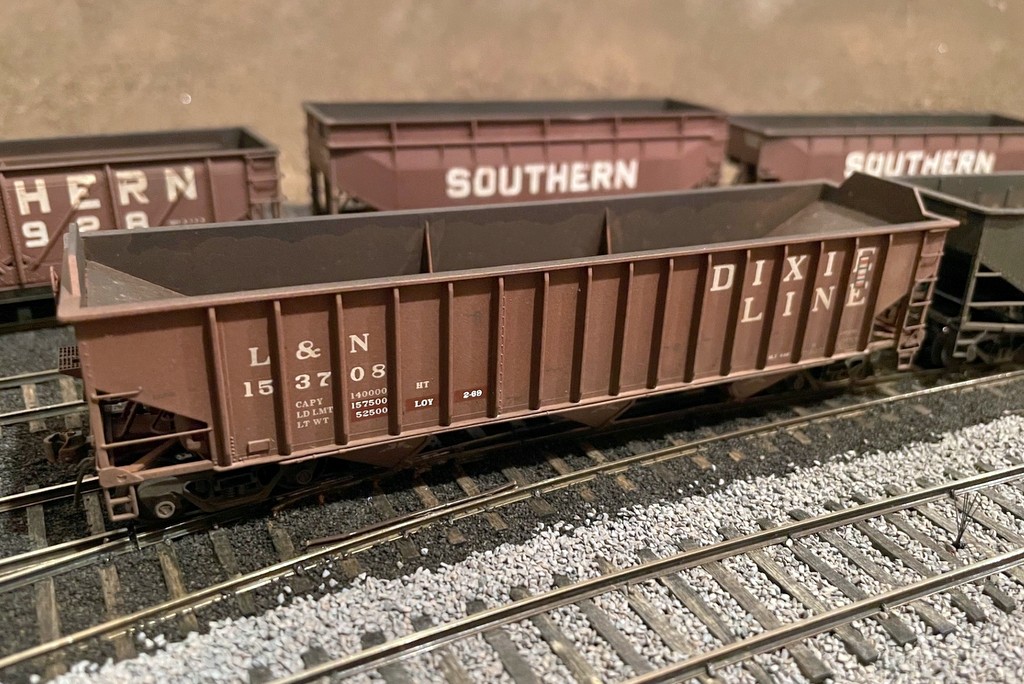
An L&N 70T PS3 from a Tangent model showing stencil masking, airbrush fading, and subtle interior rust
Great ideas and techniques here. Your exactly right about how hard it is to find pictures of the interior of an empty coal hopper.
I would think your techniques here would work equally as well on gondolas also!
I think so, but most gondolas would need a lot of extra time on the 100W lightbulb!
Just information, there are pictures of interior construction that are found on imagebase.lib.vt.edu of N&W H series hoppers. Plus, A & B ends and broadside views of both open and covered cars, quite a few actually.
Thanks for passing this tip along!
Thinking about Clay Hatcher’s ideas about gons, there are at least a couple of ways to, ah, age them. Most of the ones I’ve seen recently are either empty or in scrap-haul service and have various forms of damage to the sides. One type of damage is the “ripple” along the sides, where there’s a symmetric (same on both sides) wave from one end to the other. It’s easier to see than describe and I’ll try to find a suitable photo. The other is the sag in the middle, and some gons seem to have a serious bulge downward about the middle. Again, I’ll see what photos I have and try to find one. The bottom line is that there doesn’t seem to be any wrong way to damage a gondola!