


- Size: 11′ x 14′
- Scale: HO
- Minimum Radius: 24″
- Minimum Aisle Width: 24″
- Designed by Dan Bourque
 The challenge: design a prototype-based HO scale layout with mainline operations, branch line operations, helper operations, a yard, an engine facility, four loaders and a power plant. . . and fit it into an 11′ x 12′ bedroom with a closet. Sound impossible? Not if you want to model the Western Maryland’s Stony Fork Branch! The Stony Fork Branch was a twisting, 17-mile branch that connected the Mount Storm Power Plant with the WM mainline at Bayard, West Virginia in 1963. In that distance, the line had to climb nearly 1,000 feet from the mainline using a series of tight curves that nearly doubled over on themselves in several places. Along the way were a handful of loaders. These loaders, the power plant and a few loaders nearby on the mainline, were served by a half dozen first-generation diesels that were based at the small yard in Bayard and served as the mine run power, power plant power and helper power.
The Layout
If you haven’t figured it out yet, this area just begs to be modeled! While there’s plenty of railroad here to fill a much larger space, this track plan is intentionally designed to fit all the key elements of the line into a very modest space. Of course, this means compromises including a small minimum radius, some compressed scenes and a tight aisle. It’s designed as a “split level” plan with three scenes which represent the line and loaders as they appeared circa 1970.
The lower and intermediate levels represent the mainline and yard at Bayard and the branch from Bayard to North Branch. While grades on the line were around 2 percent in this section, I’ve increased them to three percent to give more impression of grade for shorter trains and to climb enough to avoid needing a helix. The scene at North Branch isn’t far off from the prototype where a large loader occupied the valley in the middle of a tight horseshoe curve along the walls of the hillside. I’ve also included the short branch to Sincell by extending a track under North Branch from Bayard. In actuality, this branch was about 1 mile from Bayard, but I included it to get some of the prototype’s operations off the branch. The transition through the backdrop is (somewhat awkwardly) covered with a wooden pedestrian bridge.
The upper level represents the end of the line from Gatzmer to Mount Storm. The power plant tracks are simplified and terminate at the rotary dumper (in the corner behind the door). A large lake occupied the area where the backdrop is with the stacks and power plant out of the scene (in the hallway, if you will), but you could include a photo of the power plant as the backdrop to further reinforce what’s going on in the scene.
The staging level is essentially a teardrop under Bayard with a two-track helix under North Branch. This arrangement allows for continuous running of trains and modest mainline operations to complement the branch. There is sufficient length to get 25-30 car trains in staging, but there’s probably only enough width for about 4 tracks. The majority of the hidden track is along one long wall, so I’ve included a small space to make access possible in the event of an emergency (made more likely with helpers). There are also some very deep scenes, but most of the switches (all but one at Armstrong) are within 30″ of the aisle.

Construction would be a little tricky with some wide benchwork and limited ability to support it, but the access area allows most of the thickest benchwork to be cantilevered instead of mounted solely to the wall. Likewise, the small backdrop that divides Sincell from North Branch would allow for a support underneath the power plant. While most small layouts don’t really need a high-end DCC system, the helper operations on this layout would benefit from the ability to easily consist and de-consist “on the main,” and if more than one operator is present, wireless throttles would help keep tangles to a minimum in the tight aisle.
Operations
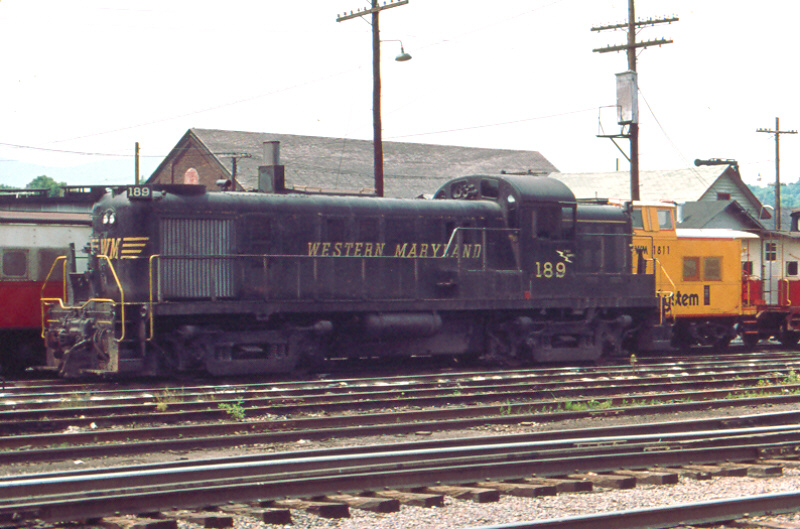
RS3 typical of WM mine run power in the early ’70s -Dan Bourque collection
Operations could easily support 2-3 operators, but practically speaking there’s only room in the aisle for 1-2. In 1970, there were a couple of crews stationed in Bayard operating 5-6 RS3s. On this layout, 4 are probably sufficient. These crews performed all the operations in the area including taking coal up to the power plant (a job requiring helpers), working the tipples on the branch, and working a handful of loaders along the mainline in both directions (mainly railroad south toward Thomas). The session would start with the loaders full of loaded hoppers, the power plan full of empties, and perhaps a few cuts of loads and empties in the yard. The first train could be a train of empty hoppers arriving from Knobmount–this train could either drop all of its loads, or it could drop a string and continue on to Thomas with the remainder. The mine run crew would pick up a pair of RS3s, sort the empties to grab the cars for the mainline, and work the loaders along the main, in this case Sincell. Because of the lack of a run-around, the empties would be shoved. On return to the yard, the crew would drop off the loads and grab some empties for the nearby loaders on the branch, Kemco and North Branch No 1, dropping empties and picking up loads to bring back to Bayard.
Most of the coal for the power plant originated from the Georges Creek area to the north (Knobmount end), so a train of loads would haul its cut of loads up the grade into Bayard Yard and trade them for the fresh loads from the loaders (distinguished by their humped appearance instead of the rounded appearance of the power plant coal which has been leveled by distance). Now its time for the Stony Fork Crews to earn their keep by coupling a set of RS3s to the front and a set to the rear. They might also pull up some empties for Douglas Coal behind the helpers. The longest hidden trackage is about 13 feet, so a train of 25 cars would keep at least one end of the train in view at all times; even so, running helpers with two people would be sporty but fun. Once at Mount Storm, the head end could cut off to allow the helpers to work the power plant with facing point moves, trading out loads for empties. With the empties assembled and the head end power now on the back end (and caboose way out in front), the crew would head down to Gatzmer to work Douglas Coal, shoving the empties to the end of the branch and running around the loads which would be cut in front of the empties from the power plant (the cab would often stay in front for the trip back to Bayard). Back in Bayard, the crew would again drop cars into the yard for pickup by trains of empties heading south toward Thomas and Elkins and trains of loads heading north to Knobmount.
The power plant could receive up to 100 cars a day, so this whole process could be repeated with a second train bound for the power plant before tying up. Other variations would include local utilization of the empties from the power plant to feed the local loaders. You could also add a couple of through trains on the mainline to bring some non-coal cars onto the layout. A couple of pulpwood cars along the branch would also not be out of character for the area. The power plant also had its own switcher, so you could run a power plant crew to shuffle cars around and remove loads at the plant. Finally, this line is still active today, so you could change the era to get a variety of power including F-units and Geeps in the mid to late ’70s. Of course, if you’re running solo, the continuous running via staging would allow you to set a train of empties or loads in motion on the mainline while you’re working the branch to add some context and additional interest.
Things I Like About this Plan:
- Tons of great things in a small space
- Helpers on a branch
- Small yard with a tiny engine facility
- Double deck without a helix
- Continuous running
Things I Don’t Like About this Plan:
- Tight radii
- Tight aisle
- Compressed scenes
- Some awkward transitions into the backdrop
Related Products: