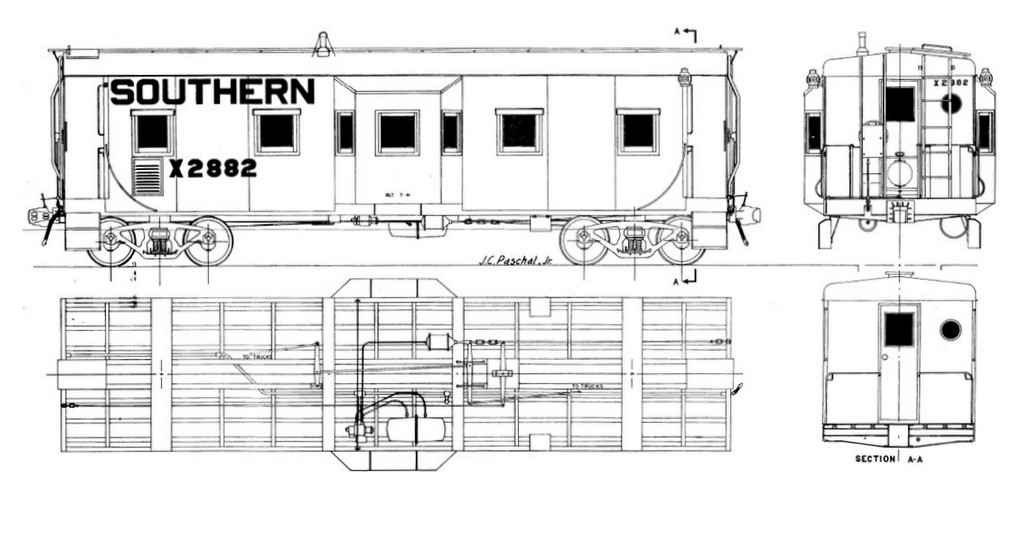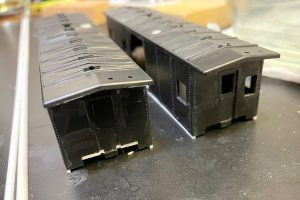
Two kitbashed Southern bay window cabs in ’60s “Brosnan Brown” meet on the author’s in-progress layout
Some railroads are blessed to have fairly accurate plastic caboose models, but unfortunately, the Southern Railway is not one of them. In HO scale, the choices are brass, a nice but complicated (and hard to find) resin kit, and a pretty substantial kitbash from a plastic kit. In this 4-part series, I’ll show you the steps to get a credible and fairly accurate model from an Athearn bay window kit. Warning, this project is not for the faint-of-heart! In fact, I think these are the most challenging models I’ve ever built (and I’ve scratchbuilt some cars and done major locomotive kitbashes). Even if you don’t go all-out, you can pick the steps that are most important to you, and while this project is geared toward a ’60s-era model, most of the steps still apply to building a later model caboose in the Southern’s more familiar red scheme.
The Prototype Cabooses
The vast majority of the Southern’s cabs in the transition and diesel eras were of a similar bay-window design. Many of these cabs, including our prototypes here, were built in the 1940s and originally wore red and gold paint with black roofs. All initially had four large windows on each side in addition to the bay window and one or two porthole windows in each end. The side windows had angular sunshades over them, very similar to the style of sunshades used on their locomotives. Roofs seemed to come in multiple styles including smooth and paneled versions. In the 1960s, most of these cabs received one or more modifications including blanking of some windows, removal of some sunshades, and some new roofs, it would appear. They also had their red and gold replaced with the 1960’s sans-serif block white lettering on a body of what became known as “Brosnan Brown.” It seems Mr. Brosnan was a bit of a penny pincher, and while red and brown paint were comparable in price, it seems the time spent changing out paint to go from freight cars to cabooses was considered too high a luxury! So brown they were… at least until Mr. Brosnan retired in 1967, and the shops quickly requested to switch back to red. The Southern initiated a major caboose rebuilding program around 1970, so it didn’t take long for most of these brown cabs to be repainted in the red and block white lettering scheme which graced Southern cabs until well after the NS merger.
There are many features which give a Southern caboose a unique look. The first is the bay window which has much more sloped sides and roof (close to 45 degrees) than most bay windows. Next is the steps–rather than having stairs up to a narrower platform, the platform on a Southern cab is as wide as the body, and the steps are a boxy underslung two-step arrangement. Third, the crash bar arrangement on the ends is substantial using vertical posts with round grab areas at the bottom, multiple horizontal bars, and multiple vertical stakes. Fourth, the brake wheels are connected to two unique multi-angled L-profile vertical posts I’ve never seen on any other railroad. Fourth, rather than markers on the sides, most of these cabs (at least in the ’60s) had a large circular marker mounted in the center of the end above the coupler–this marker was red on one side and yellow on the other and could be turned via a handle on top. Finally, they were long cars and sat low compared to other cabooses.
The Model Starting Point
I chose the Athearn bay window kit as my starting point. The overall dimensions are close–the body is the right height but about 6 scale inches too short, the platforms a few scale inches too long, and the wheelbase about 2 scale feet short. Still, it’s close enough that the model it yields likely won’t raise many eyebrows. I also love working with Athearn’s plastic–it’s a tad softer than some models, and I find it easy to cut, file, and putty for kitbashing. The old blue-box kits are no longer in production, but you can still find them secondhand in hobby shops or on eBay. I was able to get a couple of unbuilt, undecorated kits which were great, but even a painted and built kit would be suitable provided it hasn’t been mangled or too heavily glued. The Athearn kit is based on a Southern Pacific prototype, though, so there are many details that need to be changed out to get a credible Southern model–that’s the crux of the project.
I decided to do two cabs at once. I picked two prototype photos of cabs in the mid-’60s. The first, X2931, had a round, smooth roof, four windows on each side (not including the bay), and no sunshades on the four windows. The second, X3175, was built a little later and had a unique paneled roof, two windows blanked on each side, and sunshades on the outer windows intact. This would give me two distinct looking but very representative cabooses from this era. Most of the construction is the same, but I’ll make it clear when one is a little different.
Initial Body Work
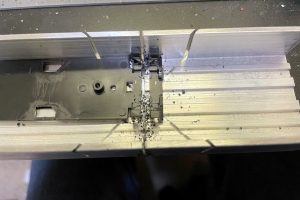
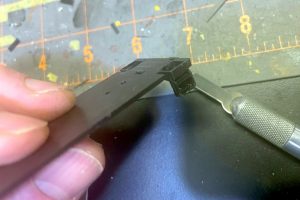
- Remove storage boxes. The first thing that stands out when looking at the Athearn model compared to a photo of a Southern cab is the two large storage lockers underneath the model. Removing these from the body shell is fairly easy by scoring it repeatedly along the bottom sill with an X-Acto blade. Removing the boxes from the floor is another matter and requires either a saw blade or repeated scoring along all sides until it comes off (easier said than done). There… already it’s looking a little more Southern!
- Remove bottom sill plates. The model has many angular plates molded on the bottom sill to cover the cross-members of the underbody. The Southern’s bottom sills were taller, so these plates need to be removed and the bottom smoothed out to make room for a styrene extension.
- Remove grabs and details from the body and ends. I used a combination of X-Acto chisel blade, triangular blade, and files to remove all the molded-on grabs and bars across the end windows. I cleaned things up with fine grit sandpaper trying to leave the rivets in place. I initially left the bolt detail for the round corner grabs, but this was unnecessary as the grabs were later installed in a different spot.
- Modify existing windows. A distinctive feature of the Southern cabs is the large square windows on the sides. The Athearn model’s existing windows are in pretty good spots already, and they match the Southern’s height and vertical placement on the body. I marked where I would enlarge them using a square ruler and pencil to eventually yield four square windows on each side. The outside windows get extended inward. The middle windows get extended outward toward the seam. I didn’t bother modifying the existing middle windows for cab X3175 that would get blank panels installed as these completely cover the windows. For the existing windows, I started by carefully removing the window panes using multiple shallow passes of an X-Acto No 11 blade. Then I extended the windows using a combination of shallow X-Acto passes, a flat file, and a square file.
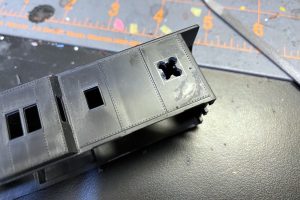
- Add new windows. Using the pencil guides I had drawn, I first drilled four small holes well inside the corners. Then I inserted an X-Acto blade and reamed out the holes being careful not to ream outside the lines. I cut between the holes to make one hole, then methodically worked the X-Acto blade around to widen the hole to the shape of the window, cleaning up with a flat file and square file.
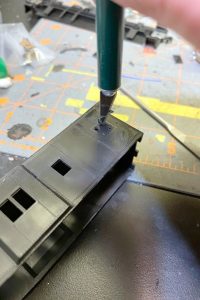
4. I marked the windows with a pencil and drilled small holes well inside the corners–I used an X-Acto to ream the holes closer to the pencil lines
- Remove the bay windows. I removed each bay window using careful and repeated cuts of a No 11 X-Acto blade along the outside of the bay window on all four edges. I cut as parallel to the sides as possible (i.e., into the bay window, not into the body) to leave as much of the body as possible for attaching the new bay window. I worked all sides evenly to avoid putting too much stress on the body plastic. Once the cuts were pretty deep, I cut through the bottom of the bay first as this is the thinnest and most delicate connection, and I didn’t want this piece of the body to break. Then I worked the knife through on all edges until the bay window came off–you can throw the bay window away at this point as it’s not used in the finished model.
- Add bottom sill extensions. At this point, I went ahead and added a long piece of .040 x .040″ styrene strip to the length of the bottom of each side of the car. I tried to get it as flush as possible with the existing bottom sill. I also added a piece of the same styrene strip to the bottom of the bay window opening to cover the gap since the Southern bay window is a little shorter. Once the glue dried, I used some modeler’s putty and fine grit sandpaper to cover the seam. I wish I’d spent more time on this as the joint is still visible on the finished models.
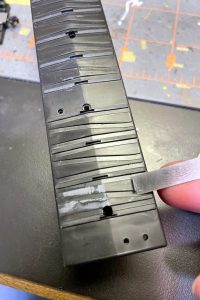
- Remove roof ribs. Of note, this step is only for a cab with its original roof. If you’re modeling a 1970s rebuilt cab, the existing Athearn roof is pretty close (it just has the extra flat section in the middle the prototype didn’t have). I modeled one cab with a round, smooth roof and one cab with a unique panel pattern of two uniform “bulges” per panel. I don’t know the name of this style of roof, but it was also used on Milwaukee Road horizontal rib boxcars. While I have one of these Milwaukee Road roofs, it’s too wide for the caboose, so I decided to just scratchbuild my own panels. For both these roofs, I started by carefully removing the vertical ribs between the panels but leaving the base. For the round roof cab, I left the molded-on triangular panel bulges, but for the paneled roof, I carefully shaved the triangles off with an X-Acto chisel blade. It’s tedious but not as difficult as it seems. A little modeler’s putty to cover a few divots and some sandpaper finished the removal work.
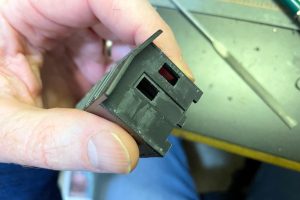
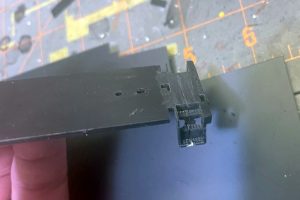
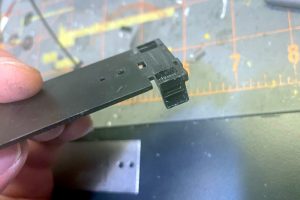
- Step cuts. Like the square windows, the Southern’s boxy steps are a unique spotting feature of these cabs and are worth the extra attention. Because my models will get a lot of running and handling on my layout, I decided to modify the existing steps rather than hang a set of delicate scratchbuilt steps on the corner. I started by cutting a triangular notch out of the back of the middle step. From a normal viewing angle, the goal is to make the side of the steps look like a single rectangular piece so you don’t see the second step–this preserves some of the strength of the step without it being easily visible. I also used an X-Acto chisel blade and file to remove the anti-skid pattern from the top of the existing platform (this will be covered with styrene later). The Athearn platform is too wide, so I used a medium-tooth hacksaw blade and miter box to cut each platform right down the middle of each step. Next I ran the cut edges along a fine flat file and fine sandpaper until the width matched that of drawings (just a little more material than the hacksaw blade removed by itself). I glued the platform back together using liquid modeling cement and let it dry overnight. Then I used some modeler’s putty to fill in any gaps on the bottom steps.
Steps
- Step builds. Now that the basic step frame was in place, I added a new back out of .020″ black styrene. This rectangle was cut to fit snugly between the step sides and against the back of the bottom step. It needs to extend to the same height as the platform. I used black styrene wherever possible to make the model more resilient to handling on the layout (a white scuff in the paint is a lot easier to spot than a black one). I secured this piece with liquid model cement. Next I cut a rectangle to go across the top of the step frame to represent the bottom sill extended the entire length of the caboose (also from .020″ styrene). I measured this piece by test fitting the body and cutting it so the bottom sits a little higher than the bottom of the side sill, and it’s even with the top of the platform. I glued these in place on each of the four corners. I cut new second steps from .020″ styrene to fit inside the step frames. I cut them to fit as snugly as possible and inserted them at a uniform level around the caboose using pictures as a guide for height. After the glue on these had dried, the final step was to cut a small triangular notch (about 45 degrees eyeballed) in each step side between the top of the second step and the bottom of the bottom sill extension piece just installed. With this, the steps are basically complete.
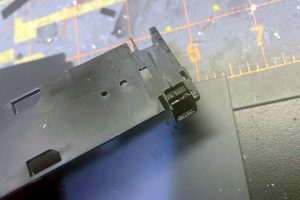
14. I inserted a rectangle of black styrene vertically in front of the bottom step back to form the new step back
That’s it for part 1! At this point the model already has some of the most characteristic features of a Southern cab, especially the steps. In Part 2, we’ll tackle the roofs and bay windows.


